The ugliest headphone amp on the planet?
Feb 5, 2006 at 10:40 PM Post #76 of 100
Quote:

Originally Posted by Oink1
So when's the 'finished product' going to be paraded in all it's glory then Mike?
smily_headphones1.gif


I've put her together and will take a few snaps when the sun shines, the artificial light and my camera don't get on with each other
mad.gif


EDIT: Got to let her dry fully for about two weeks then I use rubbing compound to cut a bit of the lacquer back followed with some polish to bring her up to a mirror like finish.
 
Feb 5, 2006 at 10:47 PM Post #77 of 100
PinkFloyd, life is funny (Thank God). Who would have thought this would become your favorite amp, specially when the overall $ spent was shall we say minimun.

The main thing is not only did you enjoy modifying it, but now you get to enjoy listening to it. I wonder if your post count per day will suffer?
very_evil_smiley.gif


Pd: To celebrate your accomplishment I am downing a Mackeson XXX. Cheers!
 
Feb 6, 2006 at 8:28 PM Post #78 of 100
Quote:

Originally Posted by Oink1
So when's the 'finished product' going to be paraded in all it's glory then Mike?
smily_headphones1.gif


Ok Paul, I've put her together but she's not finished yet as I have to cut the lacquer back a bit in 2 weeks and then polish her up like a mirror. Here are a few pics, they have not turned out too good as the weather has been awful (my camera needs sunshine to take a good pic) but they'll give you the general idea.

It's far from stunning looking (there's a limit to what you can do with a rectangular block of bare MDF) but the £4.42 spent on spray paint (grey primer and clear lacquer) was worth it as it has made the amp look a bit "shorter"

Before:

DSCF2303.jpg

Black vinyl wrap that had burn marks on it

During:

DSCF2337.jpg

Vinyl wrap "and" wood veneer stripped back to the bare MDF

After:

DSCF2640.jpg


DSCF2633.jpg


DSCF2618.jpg


DSCF2625.jpg


DSCF2631.jpg


Now to find a nice knob and some new feet
tongue.gif
 
Feb 6, 2006 at 8:37 PM Post #79 of 100
A few words from the designer of this amp, Tim De Paravicini:

[size=medium]Me:[/size] I recently bought a Hi-Fi news "headcase" HFN-009 headphone amplifier which I believe you designed?

[size=medium]Tim:[/size] Correct.

[size=medium]Me: [/size]I totally stripped the board and have replaced the carbon film resistors with metal film types and replaced the original capacitors with low ESR types, it sounds pretty damned good but I'm sure there's a bit more performance to be squeezed out of it and wonder if you, 20 years after designing it, have any little tips or tweaks up your sleeve which I could apply to the headcase? The volco positioned adjacent to the phono sockets is a very good idea and I wish more designers would implement this idea, it keeps the PSU separate from the amp proper and the connecting rod just adds a touch of peculiarity to the amp.

[size=medium]Tim:[/size] Not peculiar, Just very logical!

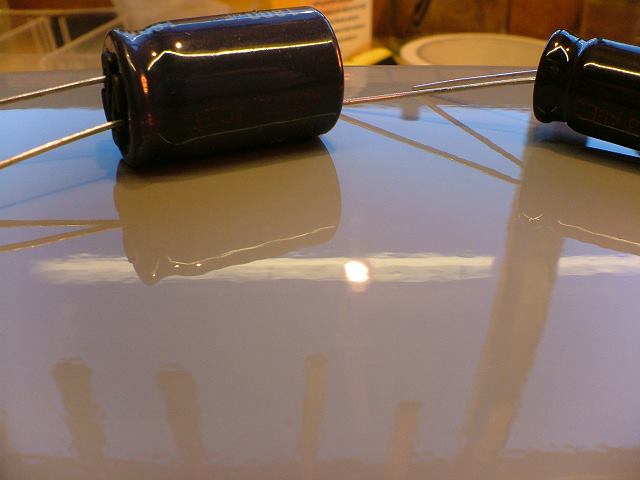
[size=medium]Me:[/size] Checked the DC offset at the output and it was pretty large (267mV & -78mV respectively) so I decided to fit 1000uF output caps in series with the output to null any offset present on the output. I also fitted an extra 4400uF capacitance to the PSU section which made a slight improvement especially to the dynamics and general "drive" of the amp.

[size=medium]Tim:[/size] As to offset, this is due to the opamp. Do not put output caps in, as this does effect the sound. 20 mV is more than good enough. See next comment.

[size=medium]Me:[/size] I'm not too sure if it's a good idea to remove the 120 ohm output resistors and replace them with zero ohm links, what do you think? I know 120 ohm was industry standard 20 years ago but many amp designers seems to think zero impedance is the best way to go, your comments appreciated.

[size=medium]Tim:[/size] The 120 Ohm is there for a good reason. This is so that virtually all dynamic headphones with impedances from 8 to 600 Ohm have similar volume levels and to prevent serious overdriving of low impedance types with serious hearing loss and damage to the drivers. Also the amplifier operating on about plus minus 10 volt (if memory serves me) does not have the current ability to drive full voltage into 8 Ohms of about 12 watts. The 120 Ohm limits the power to a few tens of milliwatts. Do you see my point?

[size=medium]Me:[/size] Could you possibly tell me what function the TL082 opamp undertakes and if there are any better modern chips I could use in its place? I have literally hundreds of assorted dual chips but won't roll them in just for the sake of it unless I'm doing the amp any justice.

[size=medium]Tim:[/size] The TL082 was cost effective, likewise the carbon film resistors. If the unit had been another £100, would you have purchased it? I doubt it. The OPA2134 would be best in current times. did not exist 20 years ago. This is history you know. Hindsight is wonderful. Once I have completed a design I move on to the next thing, In all my 40 plus years there are lots of product out there. Everybody thinks they know more than me but reinventing the wheel is tough. I don't have a copy of the circuit, sorry about that.

Sincerely yours, Tim de Paravicini.

What a nice man! I hope this information will be of use to any fellow Headcase owners out there.

Mike.
 
Feb 6, 2006 at 10:46 PM Post #81 of 100
Quote:

Originally Posted by TURBO
I think, the ugliest is my first cmoy

firstcmoy.JPG


Quote:

Originally Posted by PinkFloyd
I must have different taste to you as I think that amp looks fantastic!


I quite agree, and in any event it looks much more interesting than that black thingy in the background.
 
Feb 6, 2006 at 11:02 PM Post #82 of 100
Quote:

Originally Posted by EdipisReks
it definitely looks a lot better! i'd get a big black anodized aluminum volume knob, myself.


I think it should be huge and covered with bling!
 
Feb 7, 2006 at 11:43 AM Post #84 of 100
Quote:

Originally Posted by Oink1
Looking good Mike - the knob does need some work though i think
smily_headphones1.gif
It's a little 'out there'
biggrin.gif


Yeh it kind of "adds" to the length of the unit, I'll find something shorter yet fatter (larger diameter) to replace it. The volco positioned right next to the inputs with "con rod" to the knob is a great idea but in practice it's a bit "scrapy" as the con rod fouls the hole on the front of the case.... I could make the hole bigger but this would introduce "play" which I don't want so I'll probably grease the hole and let the con rod break in to the hole in its own good time
tongue.gif
 
Feb 7, 2006 at 1:02 PM Post #86 of 100
Quote:

Originally Posted by Voodoochile
It looks a bit like a casket, Mike.
I've seen uglier, but not much...
wink.gif


Yeh it's a bit like a coffin for a pet rodent but we can't have our cake "and" eat it can we? It sounds absolutely heavenly and that's the main thing. Pity about the stiff rod making contact with the hole any ideas to smooth this other than greasing the hole and allowing the rod to bed in?

Mike.
 
Feb 7, 2006 at 2:32 PM Post #87 of 100
Quote:

Originally Posted by PinkFloyd
Pity about the stiff rod making contact with the hole any ideas to smooth this other than greasing the hole and allowing the rod to bed in?


Must...get....mind...out of gutter....
very_evil_smiley.gif


I think the hole could be enlarged with some light sanding/filing without introducing any play into the assembly. That'd be the first thing I'd try rather than the potential mess that grease could be.

Nate
 
Feb 7, 2006 at 2:45 PM Post #88 of 100
Quote:

Originally Posted by n_maher
Must...get....mind...out of gutter....
very_evil_smiley.gif


Lol, you guys can make anything sound "dirty"

Quote:

Originally Posted by n_maher
I think the hole could be enlarged with some light sanding/filing without introducing any play into the assembly. That'd be the first thing I'd try rather than the potential mess that grease could be.

Nate


Yeh, I think I'll go up a drill size and enlarge it slighty, possibly also grease the part of the shaft that contacts the hole just to smooth out the action of the volco a touch.
 
Feb 20, 2006 at 9:52 PM Post #89 of 100
Let the paint set for 2 weeks and scrubbed her back with some rubbing compound and then some polish, quite a mirror like finish, will take some good pics of the finish in the daylight.... looks better now I think:

5.jpg


1.jpg


Sounds incredible too, best I have ever heard bar none this is a definite keeper. Fitted 5532 opamp, gorgeous!

4.jpg


3.jpg


2.jpg


If you see one of these on ebay guys.... GRAB IT. "Headcase HF009"

EDIT: This is the first headphone amp that has made me want to dance Honestly, it's just totally out of it
cool.gif
 
Apr 4, 2006 at 7:18 PM Post #90 of 100
Well, after long consideration, and despite Pink Floyd's kind offer, I decided it was time to improve my soldering skills and try some of the upgrades myself.

The story so far:

1. Install Alps 50kohm Blue Velvet volume control - needed 'cos the original crackled like sweet wrappers. I'd put a 100kohm pot in but reverted to a 50kohm to make the amp as close to the original design as possible. Sounds fine but seems to require substantially more rotation for a given volume.

2. Replace the 6 1,000 microfarad capacitors with Panasonics. This was a major improvement - gonewas the bloated and overblown bass and in its place a much more evenly balanced and detailed sound. Not only that, but the caps themselves are shorter and don't foul the extension shaft for the volume control.

3. Replace the original TL082 op amp with a socketed OPA2134. This is another major improvement and has given the amp a much "quicker" and more controlled sound.

Overall a massive improvement. I'm now happy to use this as my main headphone amp.

Alan
 

Users who are viewing this thread

Back
Top