The ugliest headphone amp on the planet?
Jan 20, 2006 at 4:50 PM Post #46 of 100
Quote:

Originally Posted by rickcr42
payback for my liking amber and yellow in your "Favorite LED Color" thread and taking a mini-beating


I must have missed that one... personally I like Green.
smily_headphones1.gif
 
Jan 21, 2006 at 2:55 AM Post #51 of 100
Amber ? Ahh Amber......I remember you well babe.That blond hair,red-gold tan,the way I could actually feel where the tan lines ended by touch alone in the dark...........

[shakes self to bring focus back]

always liked the amber rockers on Dynaco gear yet every time i tried to get the same effect with an amber LED was totally 100% not happy with the way it looked.Color was right but somehow it looked cheap and "forced" so scrapped as an option.Then one day I had a brain storm and instead of using the correct current limiting resistor for the LED according to its specs tried a pot of X10 the spec so I could dial in the brightness and while a serious improvement it was still somehow cheesy looking so I came to the stark reality that orange LEDs look like crap but neons on an orange bezel or rocker switch look cool and then accepted this as fate.
The upside of this woeful tale is (
very_evil_smiley.gif
) I began to experiment with the current limiting resistor values and found I like a soft glow far and above the starkness of a LED glowing brightly and since that time have used at least triple the normal resistor value for all LEDs .
WAY easier on the eyes in a dark room yet easily visible even in direct sunlght.A big time help when using a pure white LED which will bling a human at full lumens
tongue.gif
 
Jan 21, 2006 at 6:05 AM Post #52 of 100
Ya I will admit the MF X-Can V3 is very pretty in comparison. Honestly I am not a fan of the blue LED's. Too 'cold'. The one on my GL is too bright too. If you walk by and it hits you in the eye, watch out. Though it pales in comparison to Luxeon Star LED's. Though using a 3 watt LED as in indicator would be ridiculous.
 
Jan 21, 2006 at 6:25 AM Post #53 of 100
Pinky paint it Neon green (like a hot blue) with a pink neon glowing from the underside...everything from the 80's had neon and the neon hot colors!

something like this for the paint
p1014917.jpg


then do something like this for the "on" light but under the amp..
http://cgi.ebay.com/ebaymotors/6-ft-...QQcmdZViewItem


Dude its from the 80's and it should show it!
etysmile.gif
 
Jan 21, 2006 at 8:10 AM Post #55 of 100
Nice job getting all that gunk-ey looking stuff off. That MDF is pretty clean looking so getting a decent finish should be somewhat easy. Thing about painting MDF (or any wood for that matter) is that the paint soaks into the wood fiber and it "swells" up. Ive sanded MDF smooth, only to have it swell up and regain its ugly original texture once the paint is applied.

A 3-4 layers of sanding sealer should do the trick. Sand the sealer smooth between coats with 100 then 200 grit. Dont sand-through and expose the MDF though. If you get a sand-through, re-apply sanding sealer and repeat the procedure.

Rattle can automotive paints (Kragen, grand auto) can do an admirable job. Trick again is sanding lightly between color coats and applying light layers after. 2-3 light coats of color should suffice. A few layers of clearcoat should do the trick. Wet sand to 2000 grit, and buff with swirl automotive swirl remover. Further buff with turtle wax polish.

Surf the guitar re-ranch www site and the Stewart Macdonald site for all kinds of wood painting ideas and suplies. They are guitar www sites, but most of the basic principles apply.

Some of my favorite paint schemes.... (guitar related again of course
biggrin.gif
)

Steve Vai's Flame guitar (Crazy from the Heat video).
vai_flame_frt_close_a.jpg


Steve Vai's Green Meanie Charvel.
green1.JPG


After a year of touring and trashing it looked like this
gtr067.jpg


Petrucci picasso Ibanez:
jpmc.jpg


Of course the masters machine:
5150lrg.jpg


Garrett
 
Jan 21, 2006 at 6:22 PM Post #56 of 100
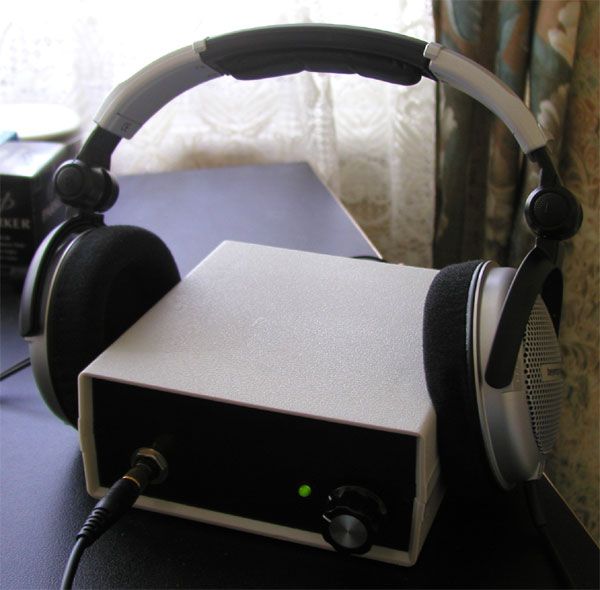
I've finished rejunevating the internals of the amp and I must confess this is one very nice sounding amp indeed. Designed by Tim de Paravicini (now with EAR Yoshino) back in 1987 this amp retailed for the princely sum of £129 ($228) and was sold exclusively through Hi-Fi News & Record Review.


My objective was to see what kind of sound £50 ($88) could buy you in this day and age if you shopped around. I did my shopping on ebay and the headcase cost me £42 which left me £8 for parts... here's the breakdown:

Headcase Amplifier: £42
6 x 1000uF NRSZ 105C capacitors: £1.50
1 x gold plated quad RCA socket: £1.10
2 x 2200uF Panasonic FC capacitors: £1.50
Metal film resistors: £2.00
Blue LED and bezel: £0.55

Total: £48.65

I haven't included stuff I already had like solder, heatshrink and soldering iron etc. so these items would have to be added to the cost if you didn't already own them.

So, under £50 for an amplifier but how does it compare to say an amplifier costing £250? The short answer is, extremely well. I defy anyone to walk into a shop and lay down £250 and come home with an amp that sounds "better" than this.... at just under £50 this shows that there are bargains to be had out there and you don't have to take out a second mortgage to buy one.

I could have just left the amp "as is" and it would have been £42 well spent but for a little extra I decided to fit new caps as the original ones were almost 20 years old and pretty much past their best... I also fitted an extra 4,400uF of capacitance to have a bit more juice on tap. The original carbon resistors could have remained intact but I decided to replace them with metal film varieties as they are less noisy... most of them I replaced with 1% types but some I replaced with 0.1% 15ppm types. I also socketed the TL082 opamp in order that I can roll in some different types but I'm not sure what the TL082 is doing in the circuit yet but as soon as I find out I'll try some other chips in its place.

So, all in all, I consider this £50 very well spent and for any of you who are on a tight budget then get looking on ebay, there are plenty of old amps for sale and with very little work you can buy yourself a real sonic gem for very little money and have great fun into the bargain!

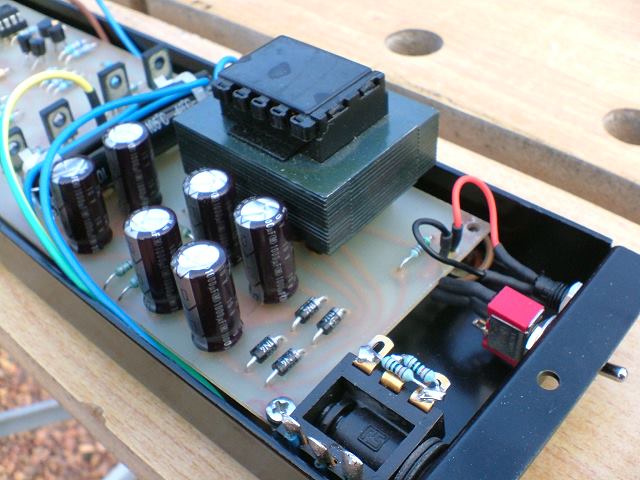
For all you anoraks out there here are some pictures of the guts. Please note that I decided against fitting the ALPS RK27 as the original pot measured up very well and had plenty of life left in it. I'll get to work on the enclosure, as and when, and am looking at spending a maximum of £10 on it (either iron on wood veneer and varnish or spray paint finish) which will take the total cost of this lovely sounding amp to just under £60 ($106) not bad at all!

The amp gets the last laugh in that it sounds absolutely gorgeous!!
smily_headphones1.gif


DSCF2346.jpg

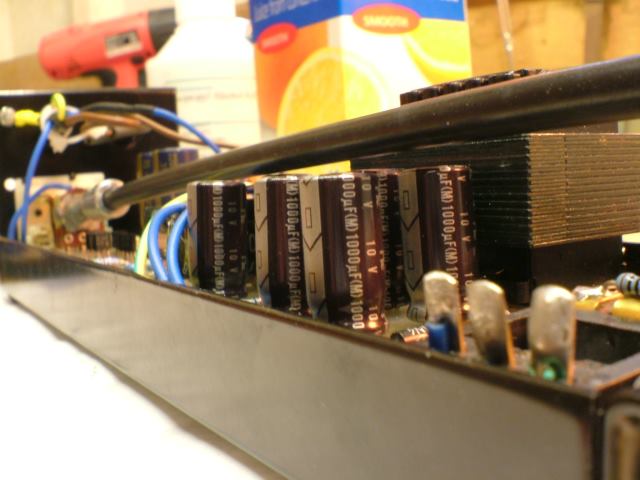
New NIC NRSZ series capacitors.

DSCF2349.jpg

NRSZ caps and CD71 non polar output caps.

DSCF2351.jpg

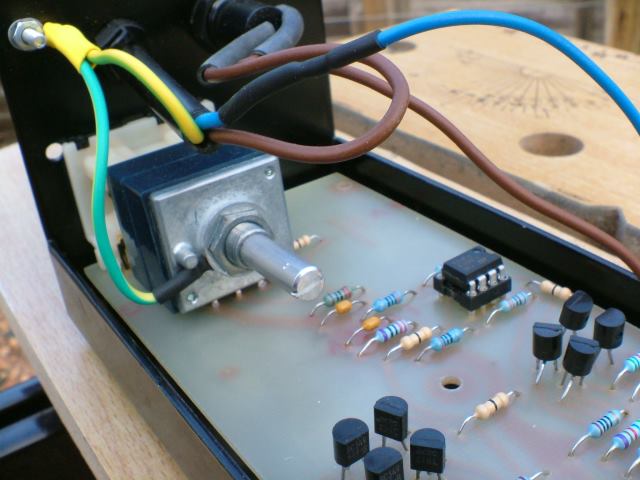
ALPS pot (now replaced with original)

DSCF2353.jpg

Overhead view 1

DSCF2355.jpg

Overhead view 2

DSCF2356.jpg


DSCF2360.jpg

TL082

DSCF2361.jpg


DSCF2379.jpg

Nickel plated quad socket replaced with gold plated quad socket

DSCF2382.jpg

Additional 4,400uF Panasonic FC fitted to the board.
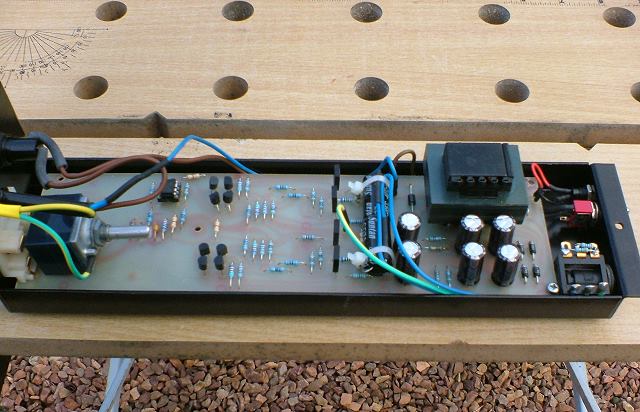
DSCF2386.jpg

Long view

DSCF2388.jpg


DSCF2393.jpg

Potentiometer extension shaft runs the entire length of the amp.
 
Jan 21, 2006 at 6:49 PM Post #57 of 100
Quote:

Originally Posted by kramer5150
Thing about painting MDF (or any wood for that matter) is that the paint soaks into the wood fiber and it "swells" up. Ive sanded MDF smooth, only to have it swell up and regain its ugly original texture once the paint is applied.


Hi Garret,

I've given the MDF enclosure about 7 coats of UPVA / Water mix to size the wood and it's now sanded and shiny ready to accept either veneer or coats of paint.
 
Jan 21, 2006 at 7:48 PM Post #58 of 100
I know you said the original pot had life left and measured well, but did it sound better or different with the ALPS? Did you decide to keep it out because of your cost/performance concern? With your upgrades this thing is starting to look high end. You should buy cheap electronics, fix them up, and sell them at a large profit. I bet you would have buyers lined up for some of your upgraded electronics. Very nice.
 
Jan 21, 2006 at 8:57 PM Post #59 of 100
Quote:

Originally Posted by TURBO
I think, the ugliest is my first cmoy

firstcmoy.JPG


I think it looks kind of cool actually with the choice of colors for the wires and the capacitor and how they look together.


As for the OP's amp, sure it looks ugly but it looks well designed with the power section very far away the audio section. It seems like all the care taken in making that amp was taken to make it sound good rather than look good.
 
Jan 21, 2006 at 9:41 PM Post #60 of 100
Quote:

Originally Posted by TURBO
I think, the ugliest is my first cmoy

firstcmoy.JPG


I must have different taste to you as I think that amp looks fantastic!

Quote:

Originally Posted by VR6ofpain
I know you said the original pot had life left and measured well, but did it sound better or different with the ALPS?


Sounded much the same to be totally honest, I decided to use the original pot and save my RK27 for the next amp I build.

Quote:

Originally Posted by VR6ofpain
Did you decide to keep it out because of your cost/performance concern?


No. The original pot was working fine, sounded fine and measured up very well so it would have been a waste just to chuck it in the bin... no point changing something just for the sake of changing it.
 

Users who are viewing this thread

Back
Top