tonglongjeff
New Head-Fier
- Joined
- Dec 9, 2015
- Posts
- 26
- Likes
- 147
We’ve all been there. We put in our earphones and either one side doesn’t work, or it cuts in and out while you’re moving.
Repairing earphones is a real pain. In most cases it’s better off to buy a new set. But sometimes you just get bored so...
Recently I picked up a pair of Sennheiser Momentum in ears for $2. For this price I thought it’d be fun to repair them. This isn’t for everyone but this tutorial is for anyone searching")
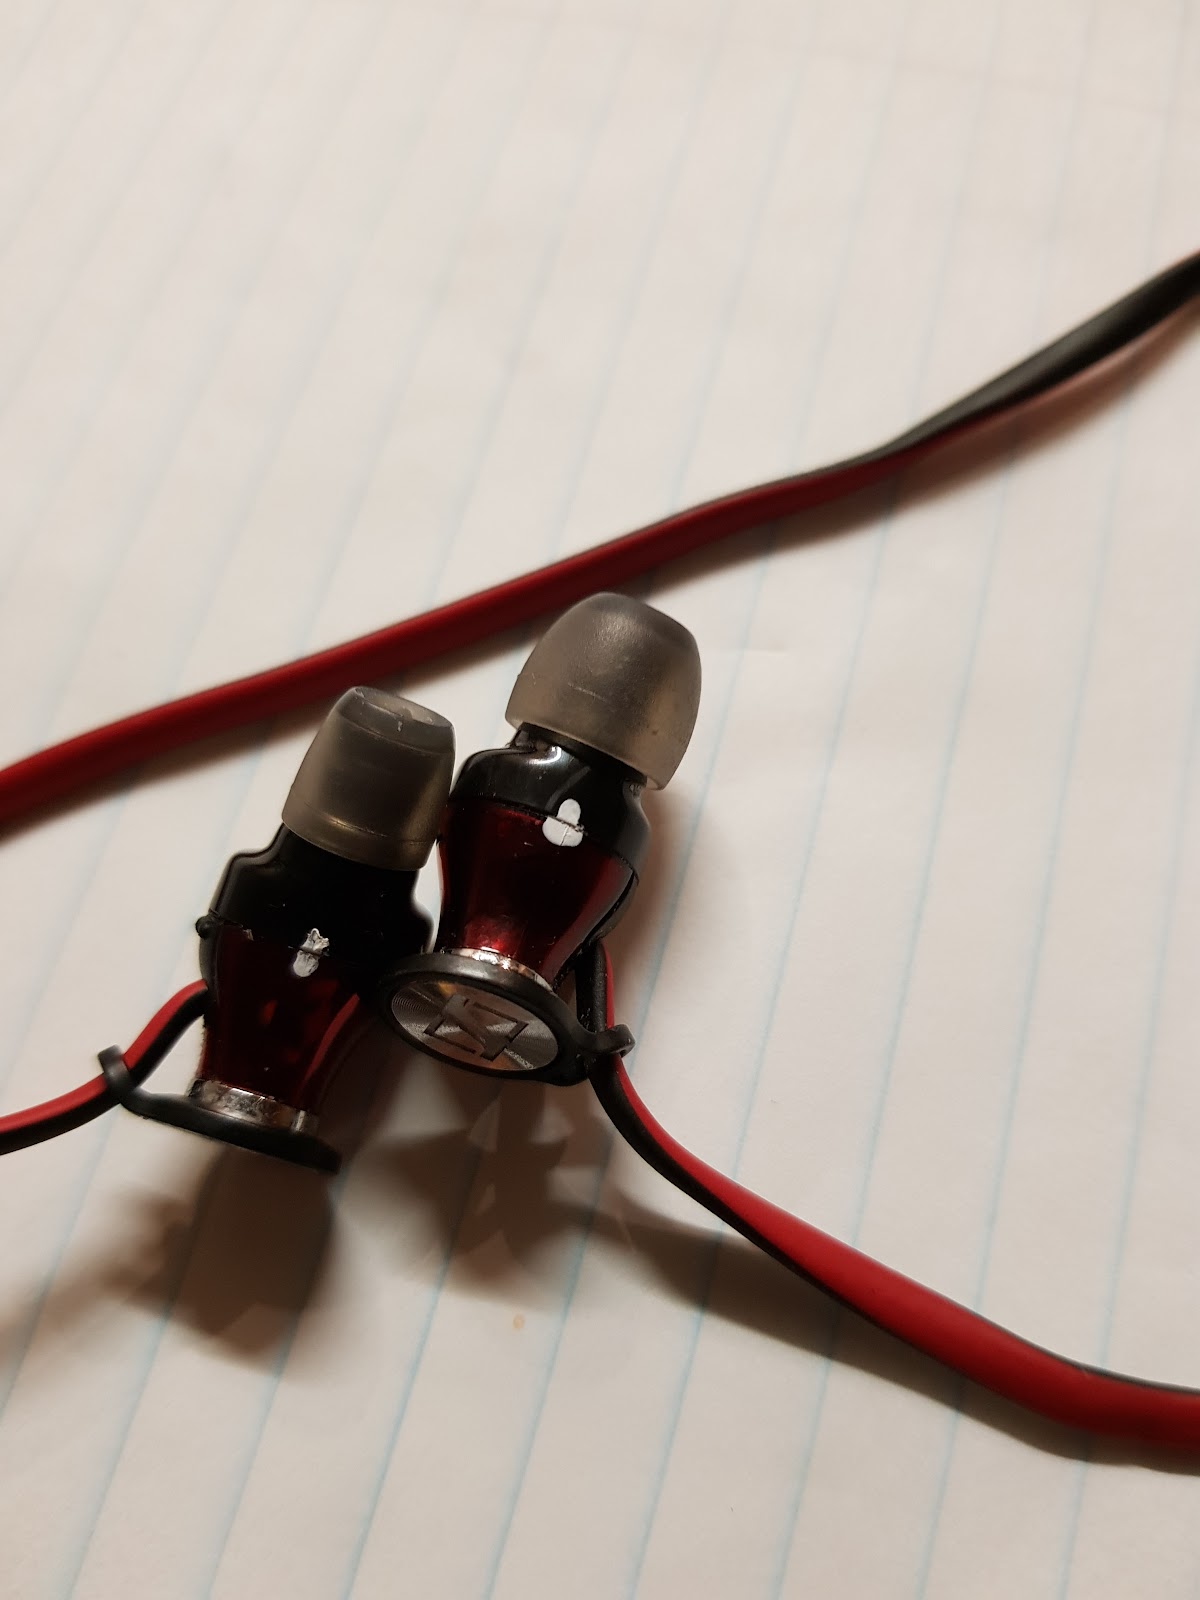
This is how it all started. The listing photo

As you can see, the cables have seen better days. The side with the mic didn’t work at all. The cable wasn’t saveable.
The first step is to get these apart. At first I wasn’t sure how to proceed since there are not images of this earphone apart.
I began with a stanley blade. I softly went around the line between the black and red. Once I went all around a few times. I pulled and they clipped apart. This is honestly the hard part. 90% of the time opening stuff breaks it.
Note that it’s a good idea to mark how it goes back together in case there are no notches. I just used some twink.

Once I got them apart I began cutting out the wire. Since it was useless in its current state. The previous owner had wrapped some leather around the plug and areas it was fraying badly.

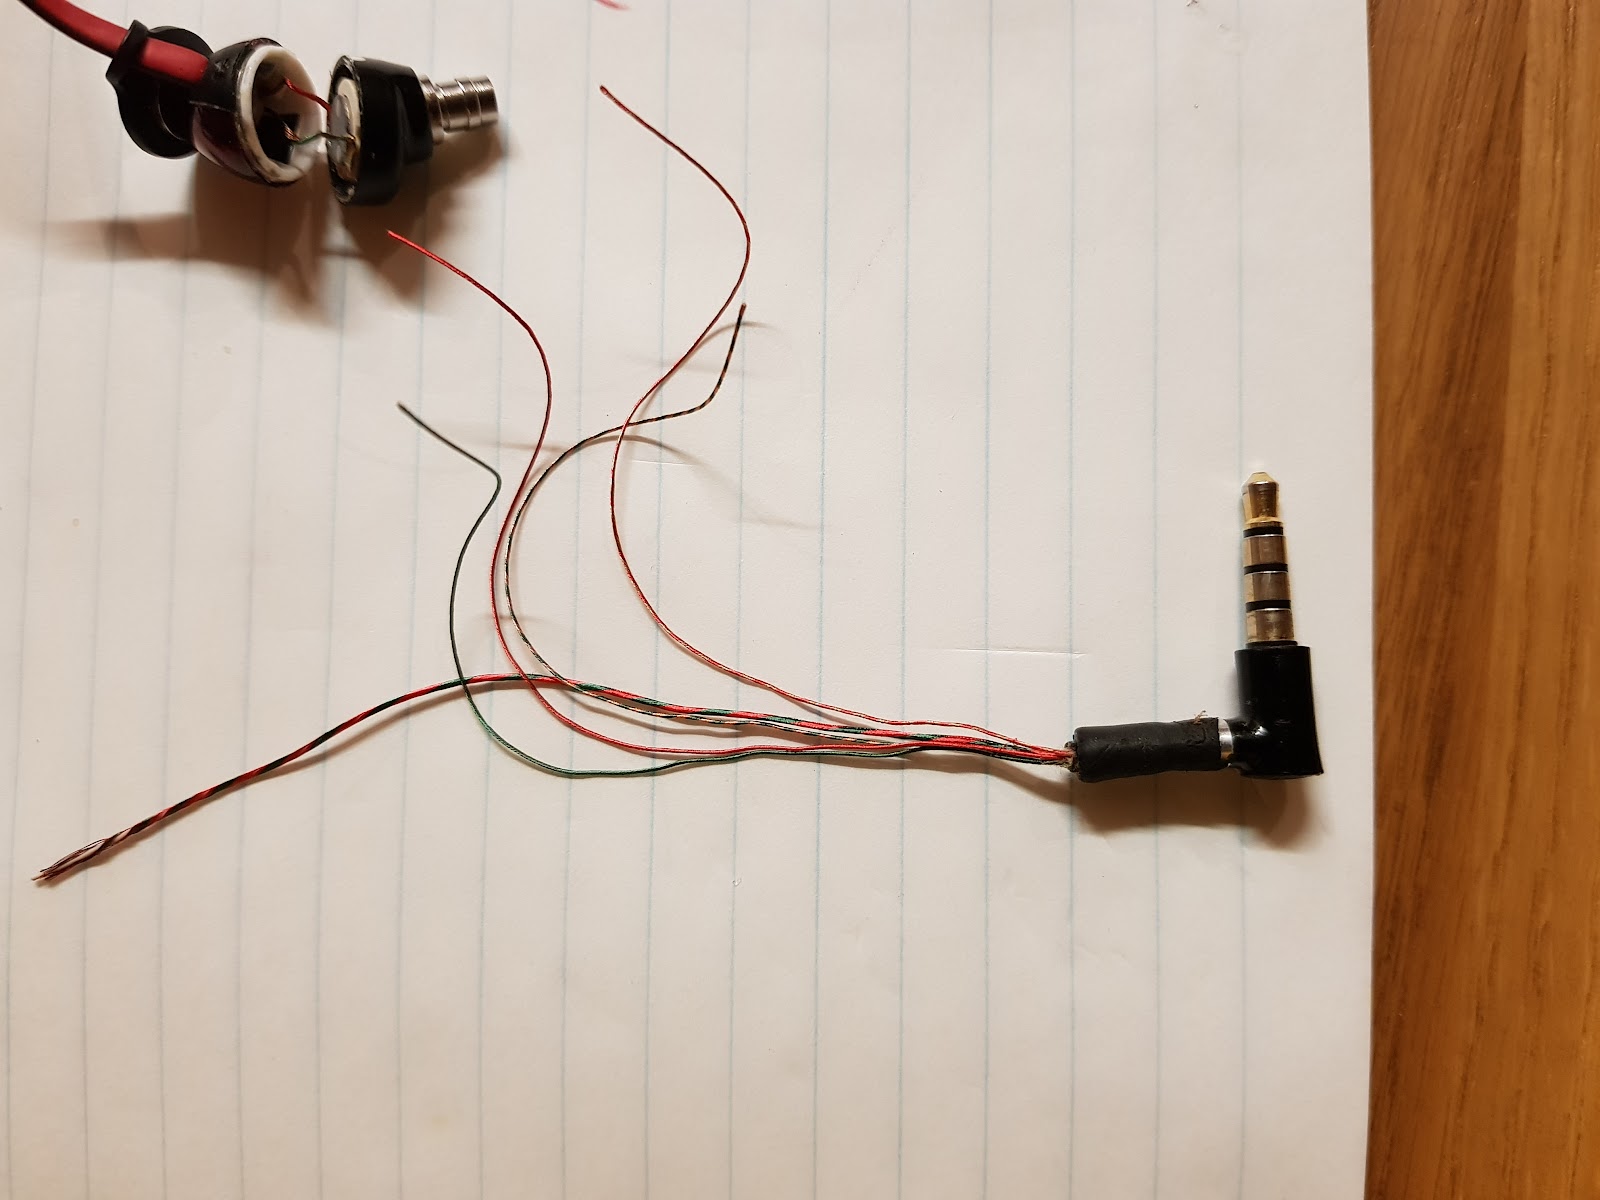
I kept a short run of wire after the plug so I could work out where the wires led. Then I used a multimeter along with an online pin out diagram for a 4 pin 3.5mm jack to make my own pin out.
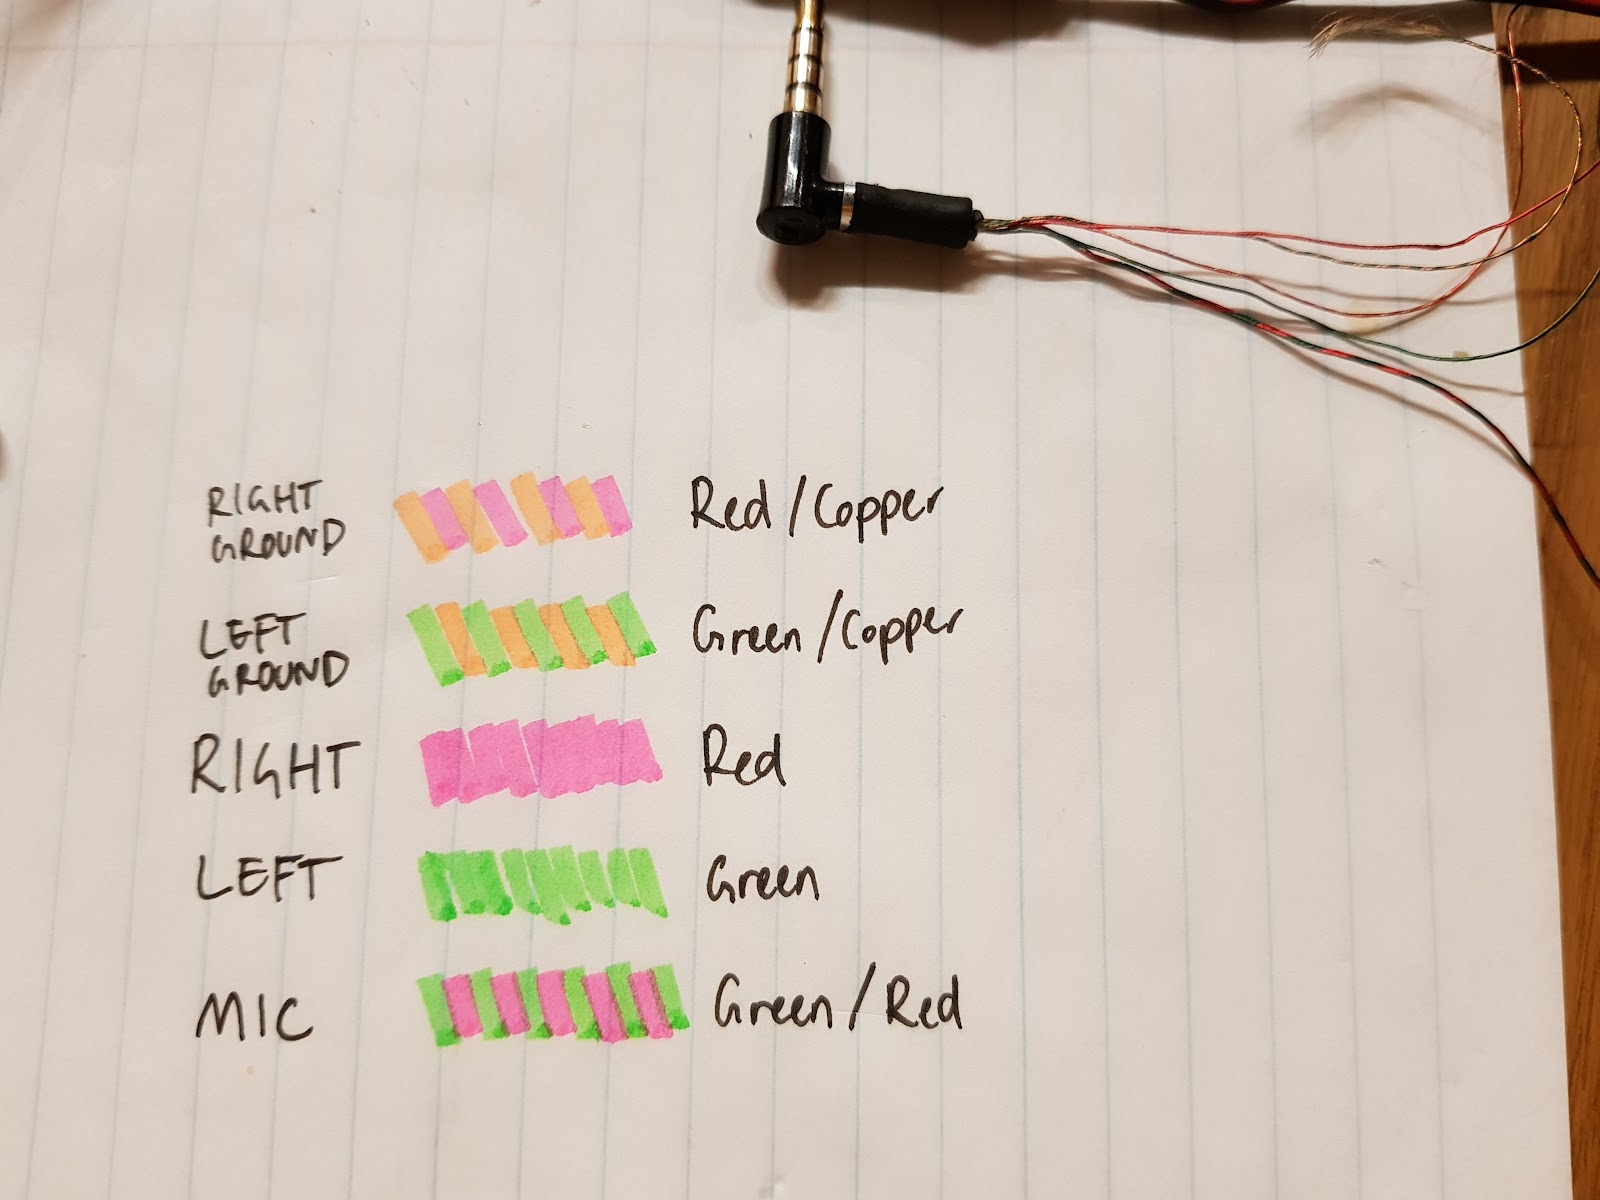
Ignore the left/ right ground. I got them round the wrong way.
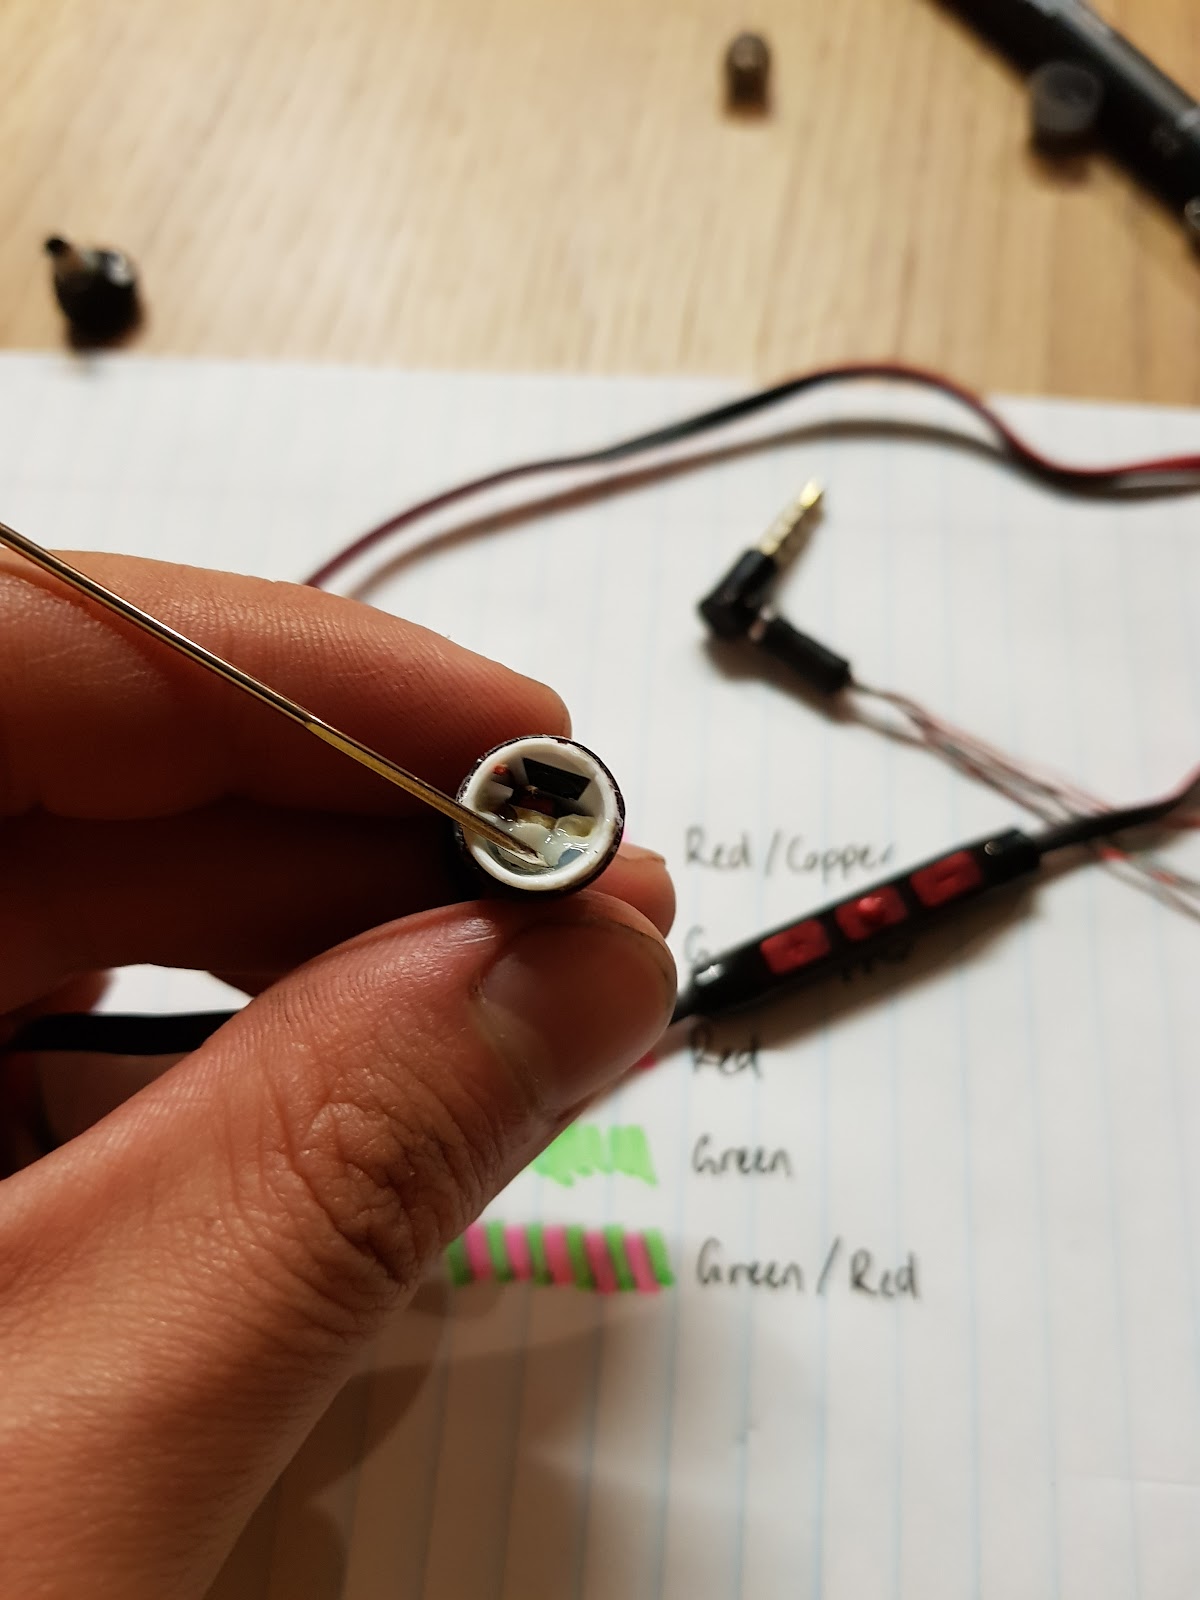
Now that we know where the wires lead. It’s time to clean all the old stuff out. The pair used some sort of silicone adhesive. I used a large needle to pick it out. Then some needle nosed pliers to pull the brass staple holding the cable flat.
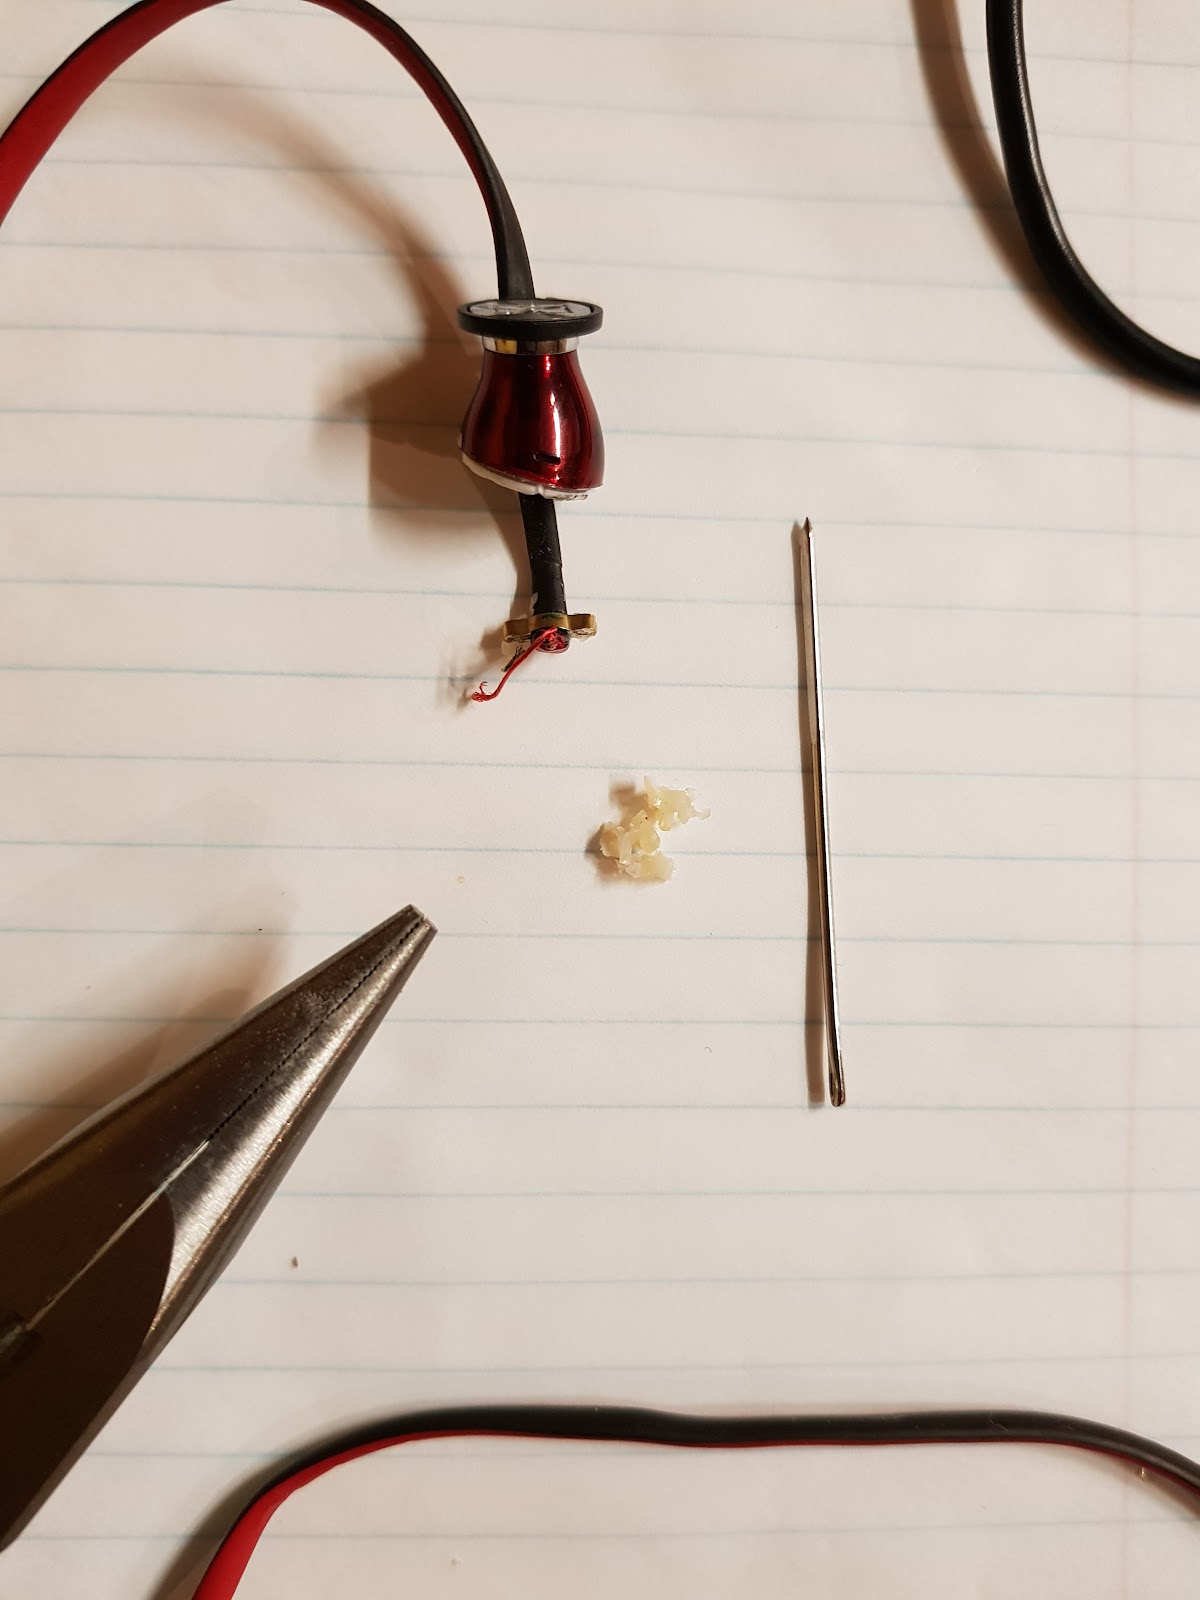
Once all the glue is out you can cut and pull the cables out. You should get empty shells like this.

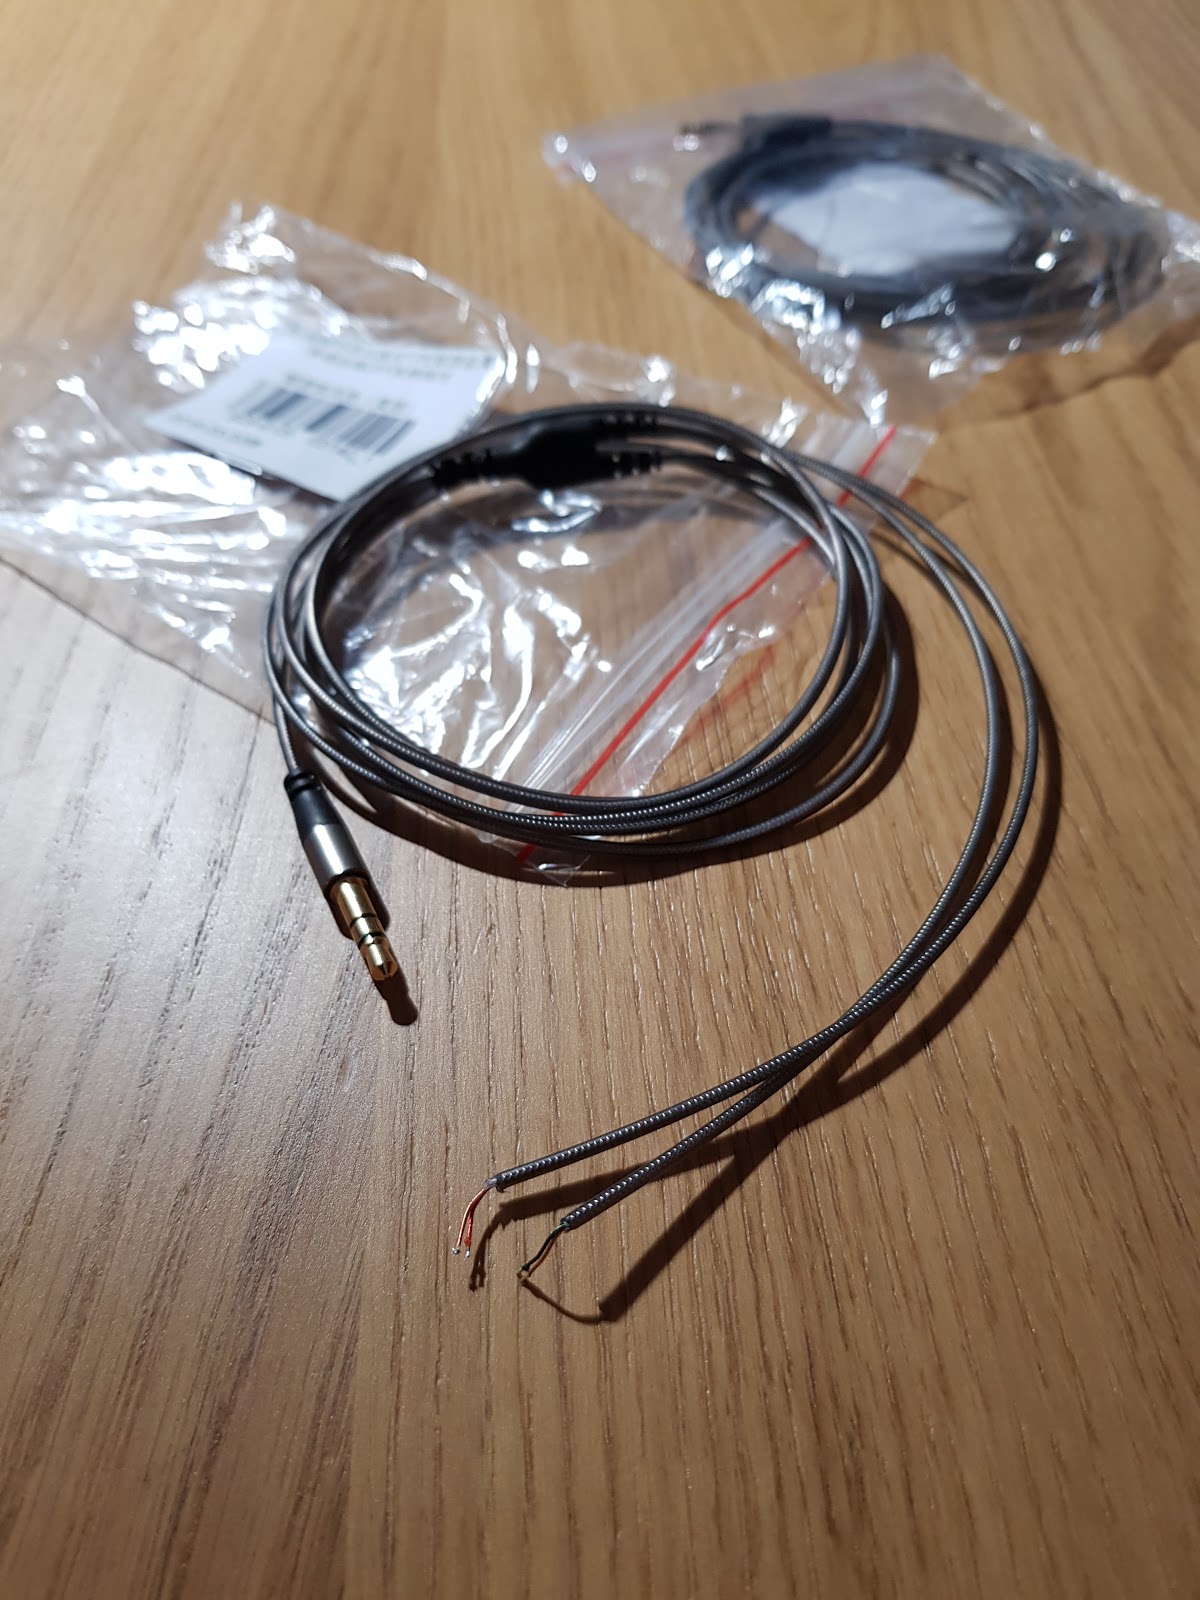
At this point I ordered a couple cables from Aliexpress. They were $3.36usd each free shipping. Super cheap. When I got them they were actually really good quality. The rubber felt really nice and strong.
Here is the link for anyone interested: https://www.aliexpress.com/item/Han...32825604088.html?spm=a2g0s.9042311.0.0.d4IaRH
I bought 2 sets as I have a pair of se530’s to fix later
I decided to knot the cables so they wouldn’t pull out. Make sure you do it right at the end so the cable can sit as low as possible.
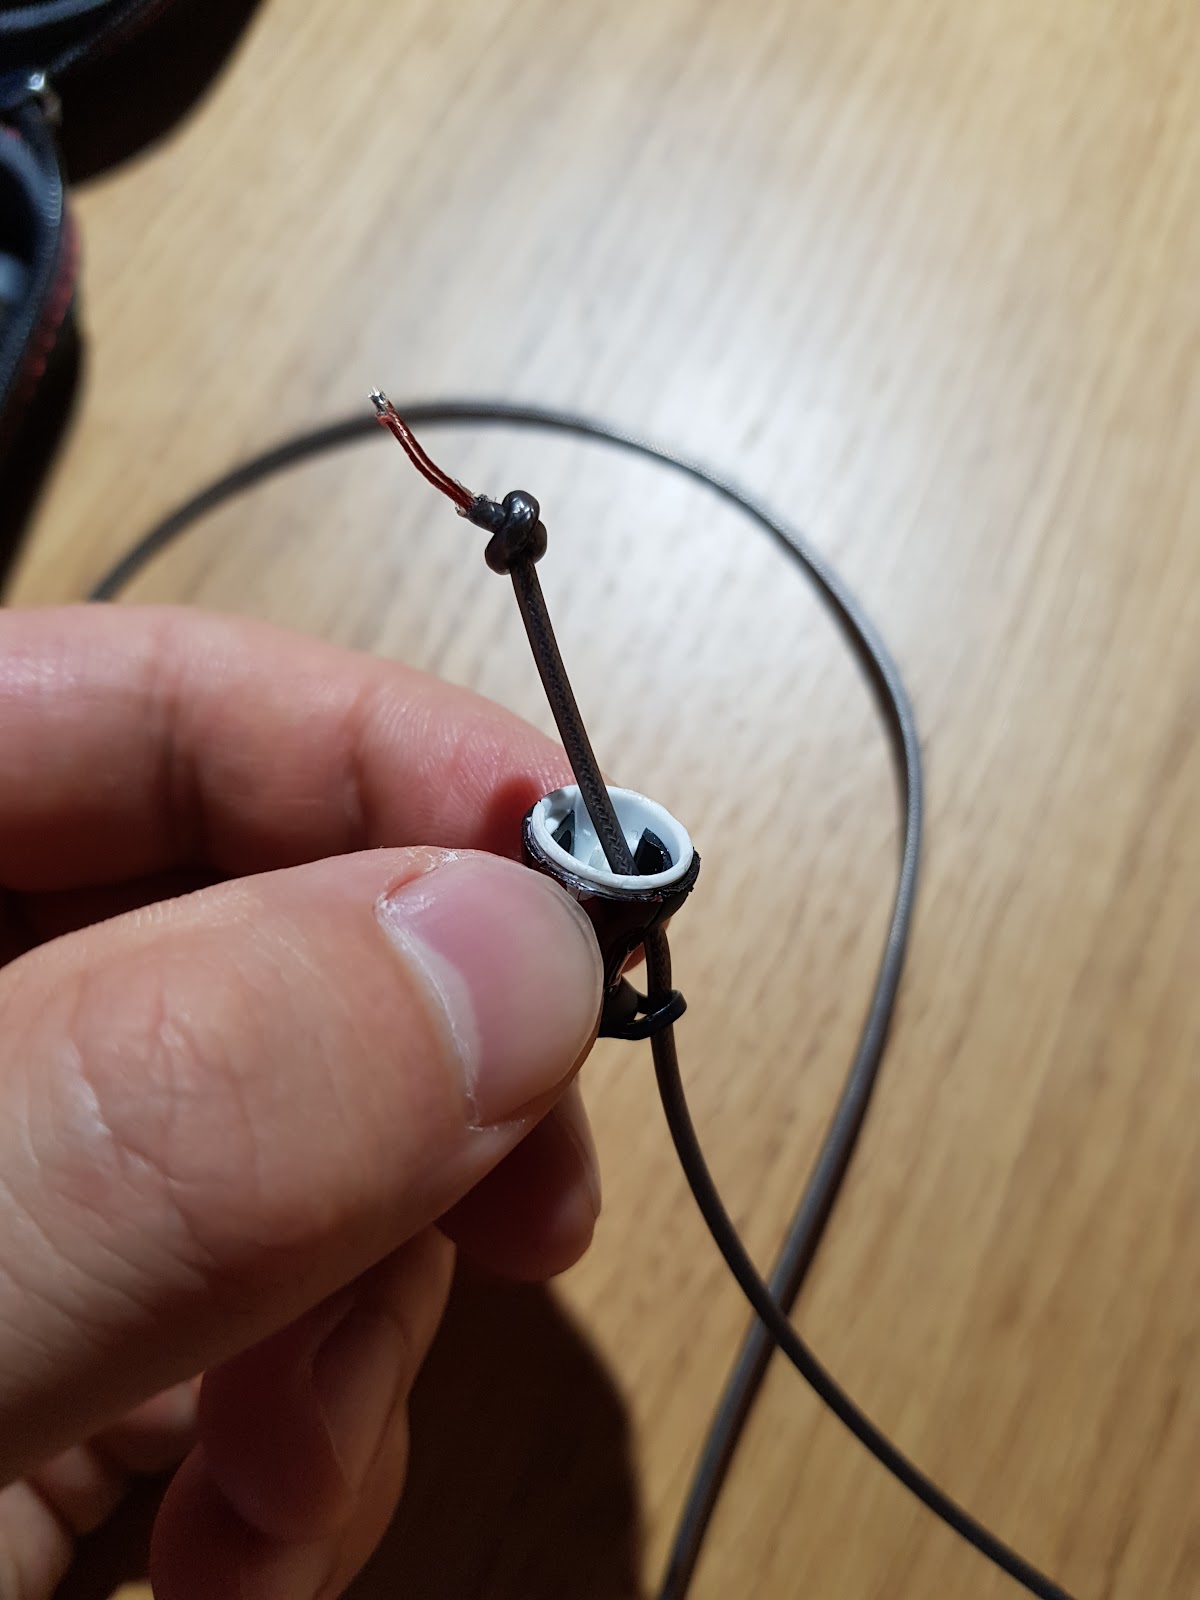
Since the hole at the bottom is on an angle. You can rotate the cable to get it to sit even lower. There isn’t much room inside so do whatever you can.
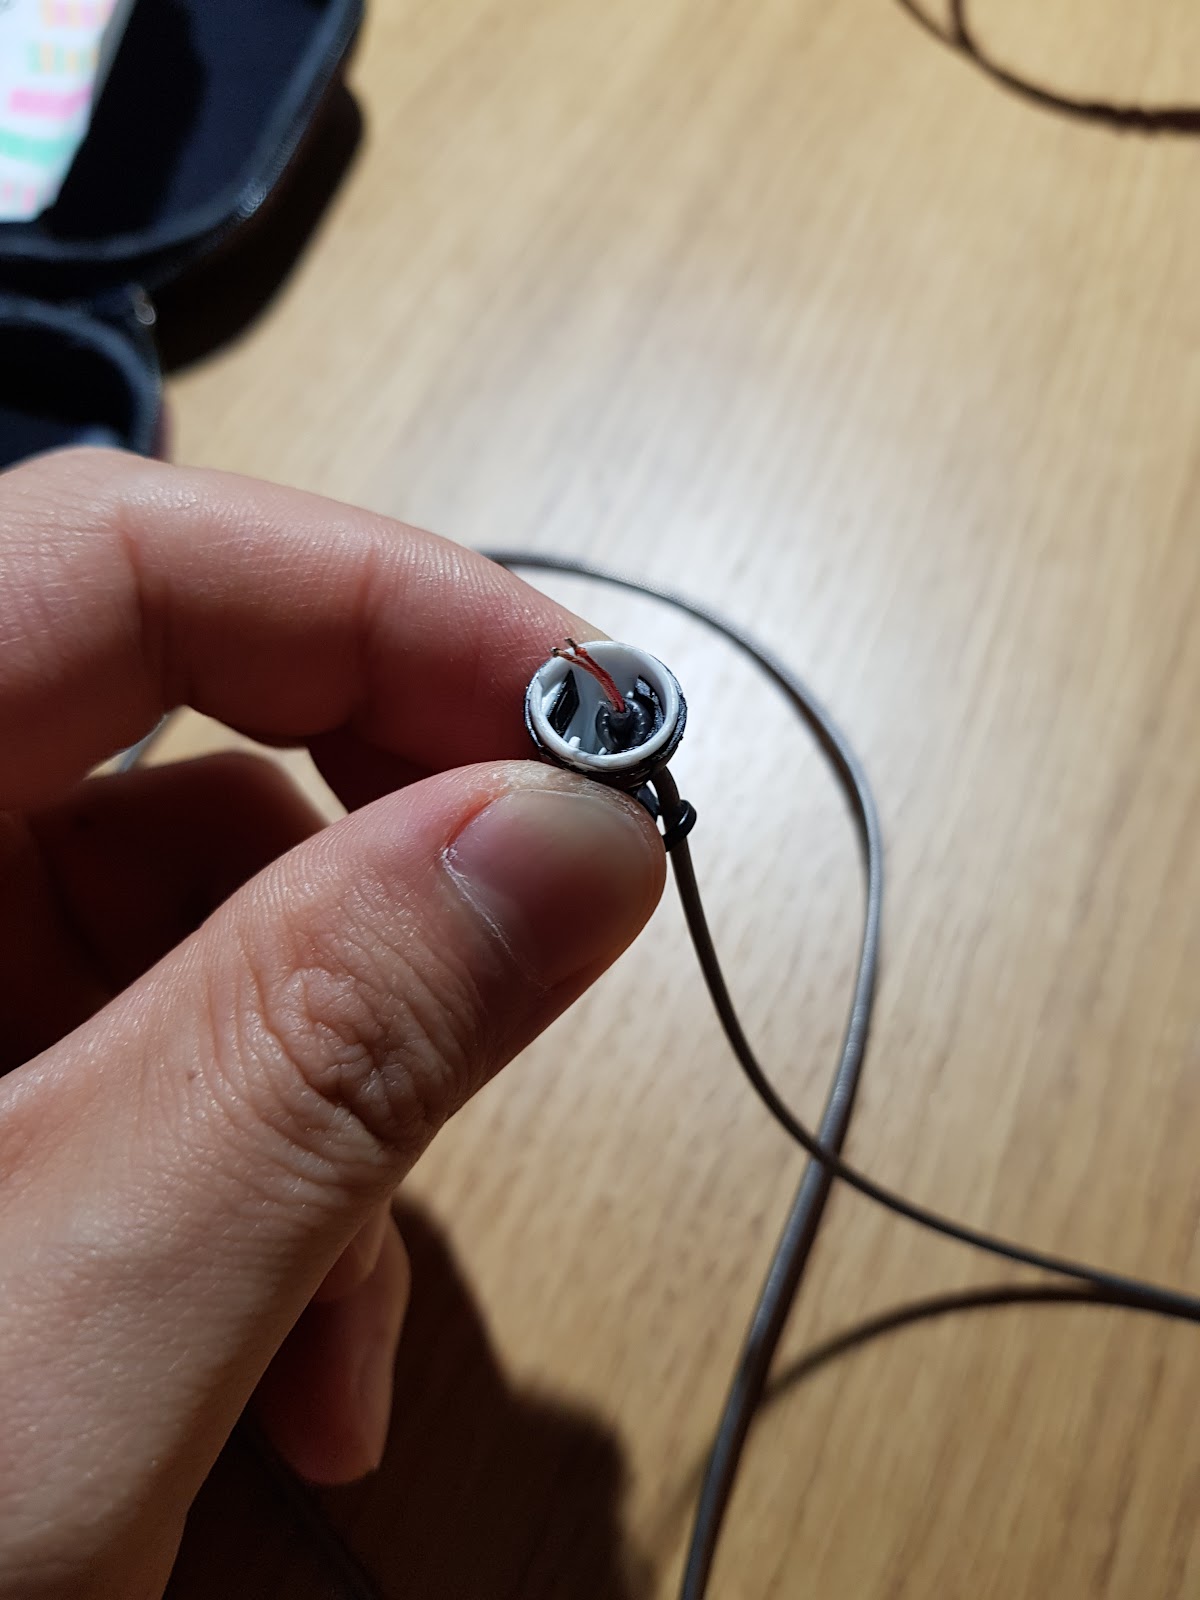
Next is to solder the new cable onto the drivers. I put a big dot on the right driver beforehand. This way I don’t assemble them wonky the wrong way round.
I find that using a bit of flux when soldering small wires really helps. Put some on the terminal behind the driver. Then dab the end of the cable in some. Get a small ball of solder on the tip of your iron. Then a quick touch should get them connected nice and shiny
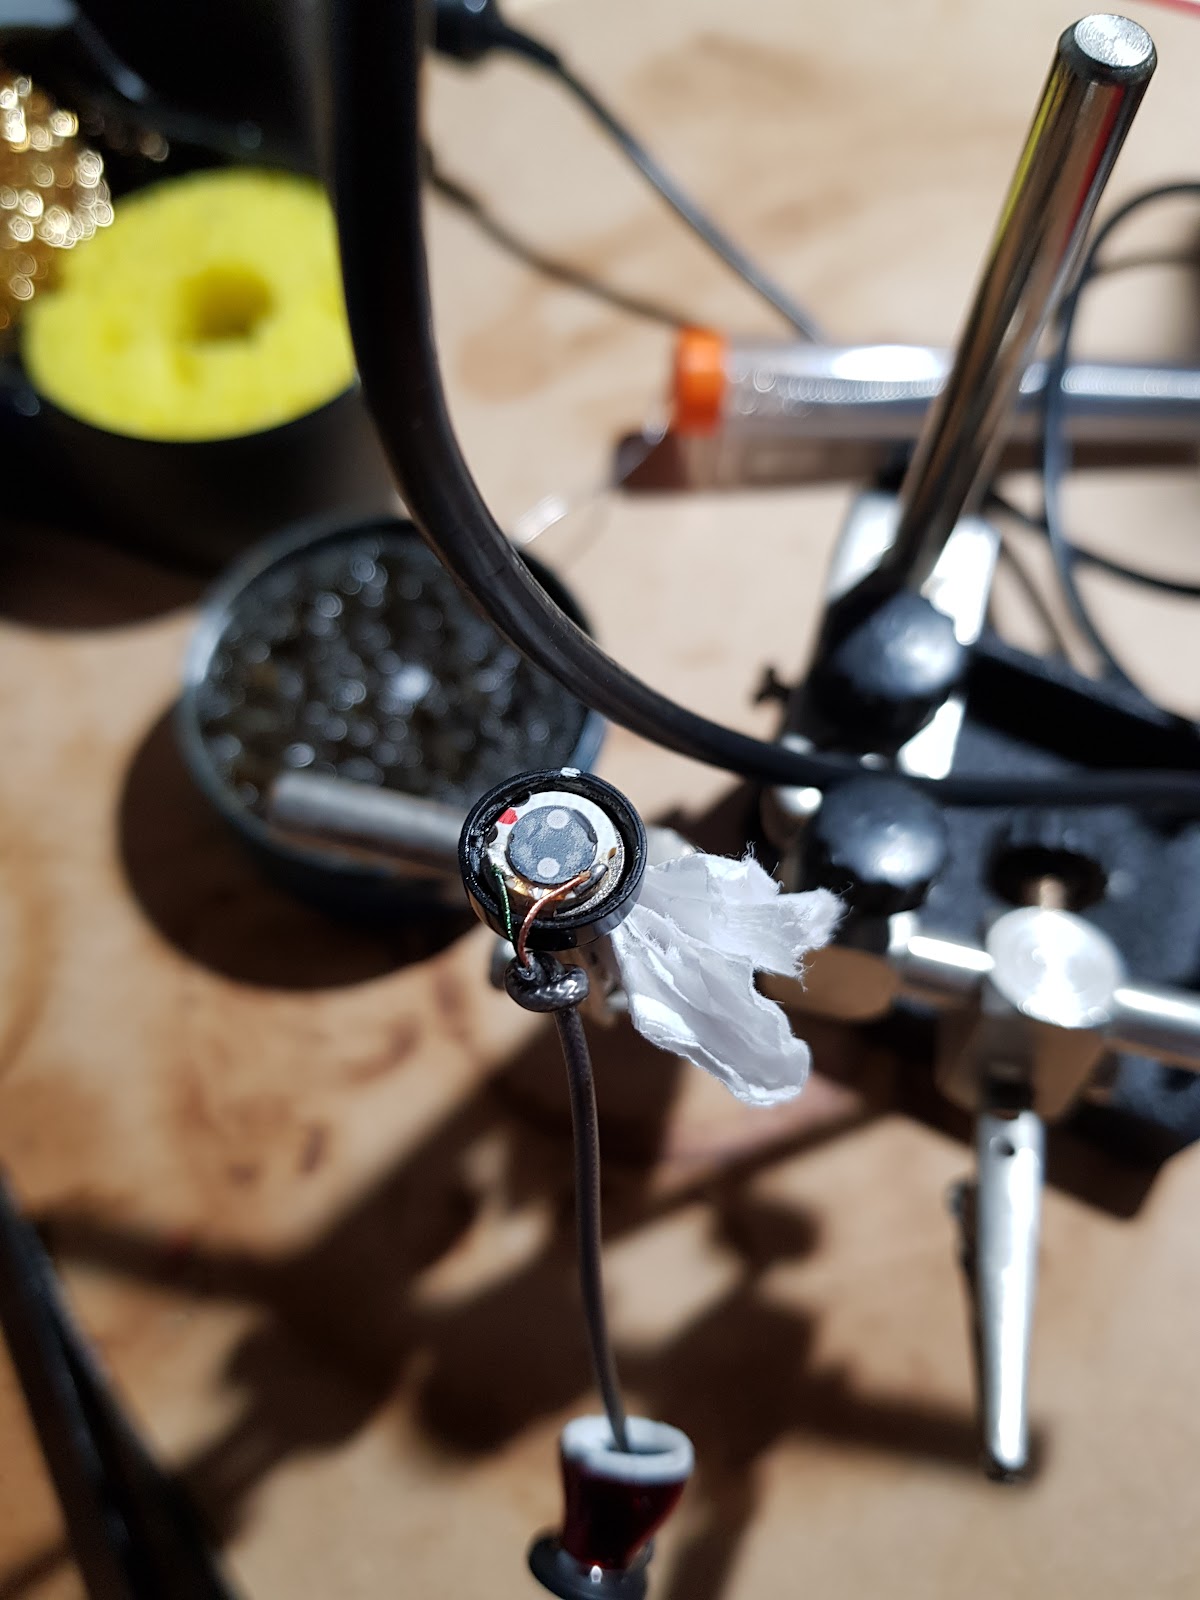
Once I was finished with both sides. I tested them to make sure sound was coming out of left and right. Always do this before assembling.
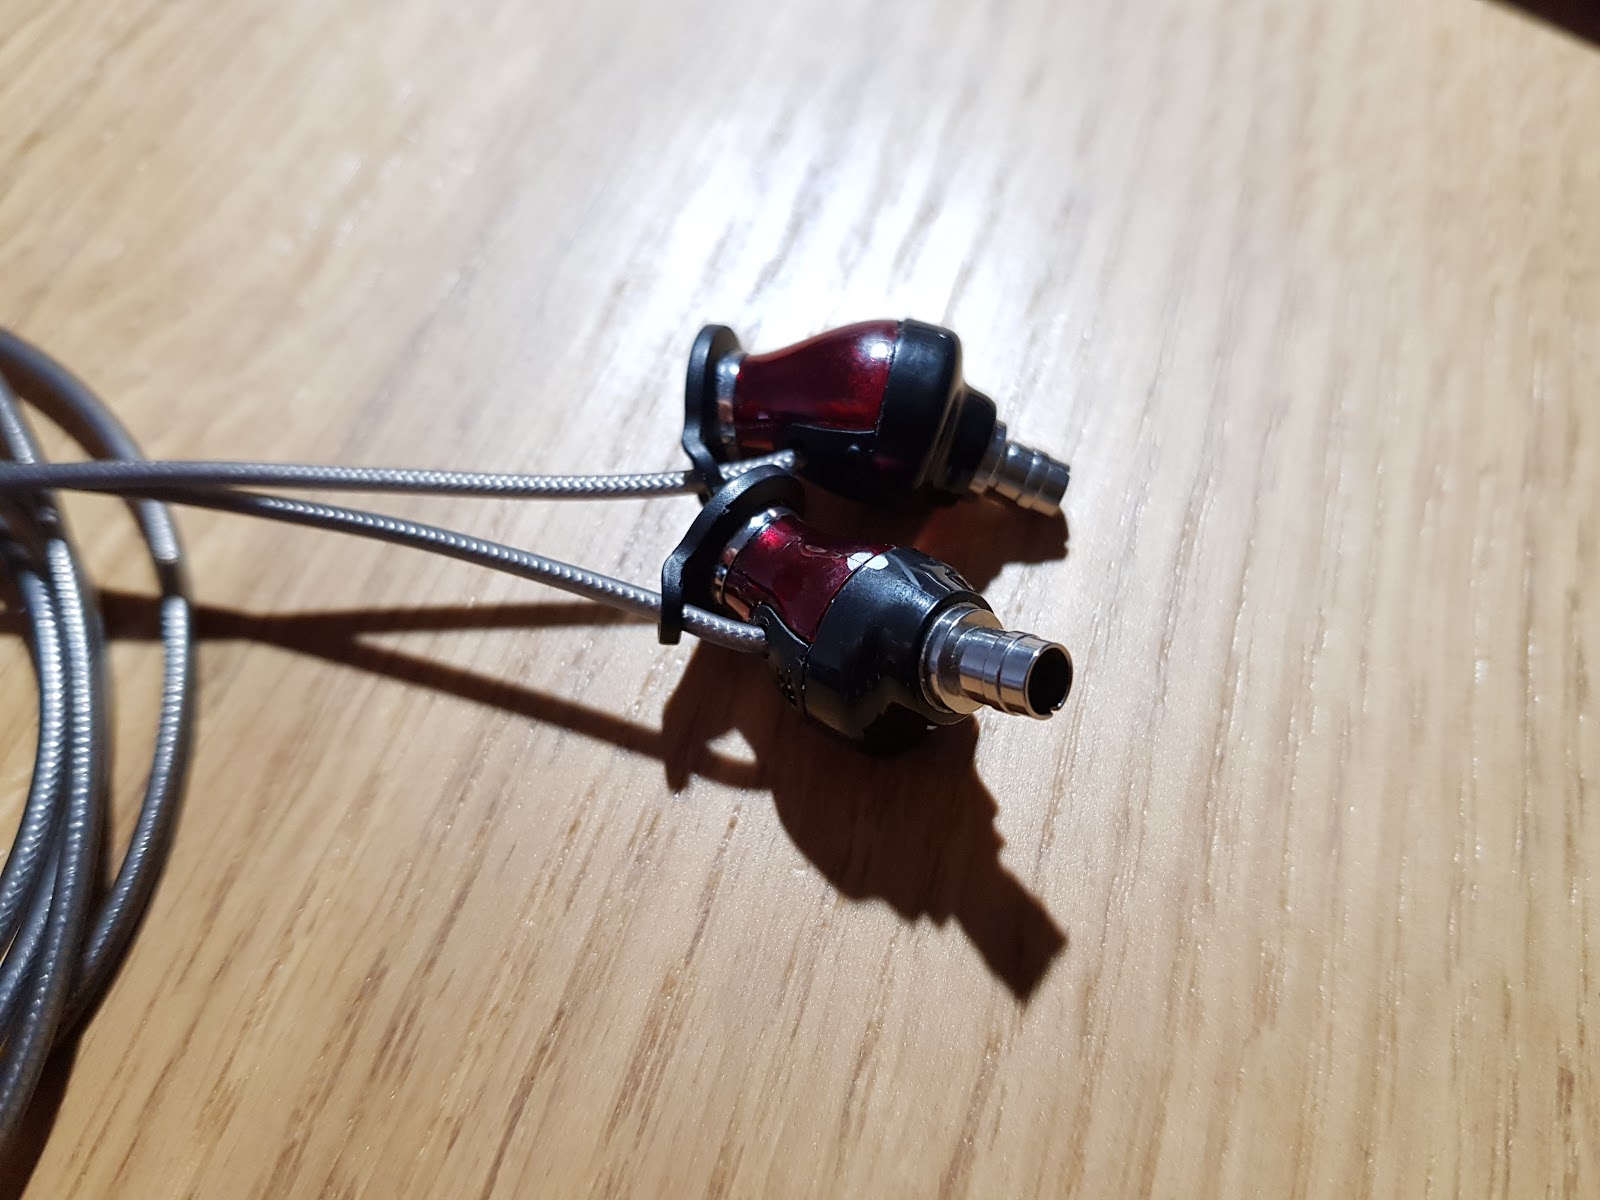
A bit of plastic glue later, a working set of Momentums for $6 total score.
After this I actually thought there was too much bass. I might wait to see if it grows on me but I like more neutral earphones
Repairing earphones is a real pain. In most cases it’s better off to buy a new set. But sometimes you just get bored so...
Recently I picked up a pair of Sennheiser Momentum in ears for $2. For this price I thought it’d be fun to repair them. This isn’t for everyone but this tutorial is for anyone searching
This is how it all started. The listing photo
As you can see, the cables have seen better days. The side with the mic didn’t work at all. The cable wasn’t saveable.
The first step is to get these apart. At first I wasn’t sure how to proceed since there are not images of this earphone apart.
I began with a stanley blade. I softly went around the line between the black and red. Once I went all around a few times. I pulled and they clipped apart. This is honestly the hard part. 90% of the time opening stuff breaks it.
Note that it’s a good idea to mark how it goes back together in case there are no notches. I just used some twink.
Once I got them apart I began cutting out the wire. Since it was useless in its current state. The previous owner had wrapped some leather around the plug and areas it was fraying badly.
I kept a short run of wire after the plug so I could work out where the wires led. Then I used a multimeter along with an online pin out diagram for a 4 pin 3.5mm jack to make my own pin out.
Ignore the left/ right ground. I got them round the wrong way.
Now that we know where the wires lead. It’s time to clean all the old stuff out. The pair used some sort of silicone adhesive. I used a large needle to pick it out. Then some needle nosed pliers to pull the brass staple holding the cable flat.
Once all the glue is out you can cut and pull the cables out. You should get empty shells like this.
At this point I ordered a couple cables from Aliexpress. They were $3.36usd each free shipping. Super cheap. When I got them they were actually really good quality. The rubber felt really nice and strong.
Here is the link for anyone interested: https://www.aliexpress.com/item/Han...32825604088.html?spm=a2g0s.9042311.0.0.d4IaRH
I bought 2 sets as I have a pair of se530’s to fix later
I decided to knot the cables so they wouldn’t pull out. Make sure you do it right at the end so the cable can sit as low as possible.
Since the hole at the bottom is on an angle. You can rotate the cable to get it to sit even lower. There isn’t much room inside so do whatever you can.
Next is to solder the new cable onto the drivers. I put a big dot on the right driver beforehand. This way I don’t assemble them wonky the wrong way round.
I find that using a bit of flux when soldering small wires really helps. Put some on the terminal behind the driver. Then dab the end of the cable in some. Get a small ball of solder on the tip of your iron. Then a quick touch should get them connected nice and shiny
Once I was finished with both sides. I tested them to make sure sound was coming out of left and right. Always do this before assembling.
A bit of plastic glue later, a working set of Momentums for $6 total
score.
After this I actually thought there was too much bass. I might wait to see if it grows on me but I like more neutral earphones
