Roll Call: Who's building, built, or thinking of building a beta22?
May 10, 2009 at 12:26 AM Post #811 of 3,218
Quote:

Originally Posted by amb /img/forum/go_quote.gif
alwayshungry, there is an incongruence between your two points. If the fuse blows within 2 seconds after power-up, how do you even get to do the biasing at all?


I read it as this...

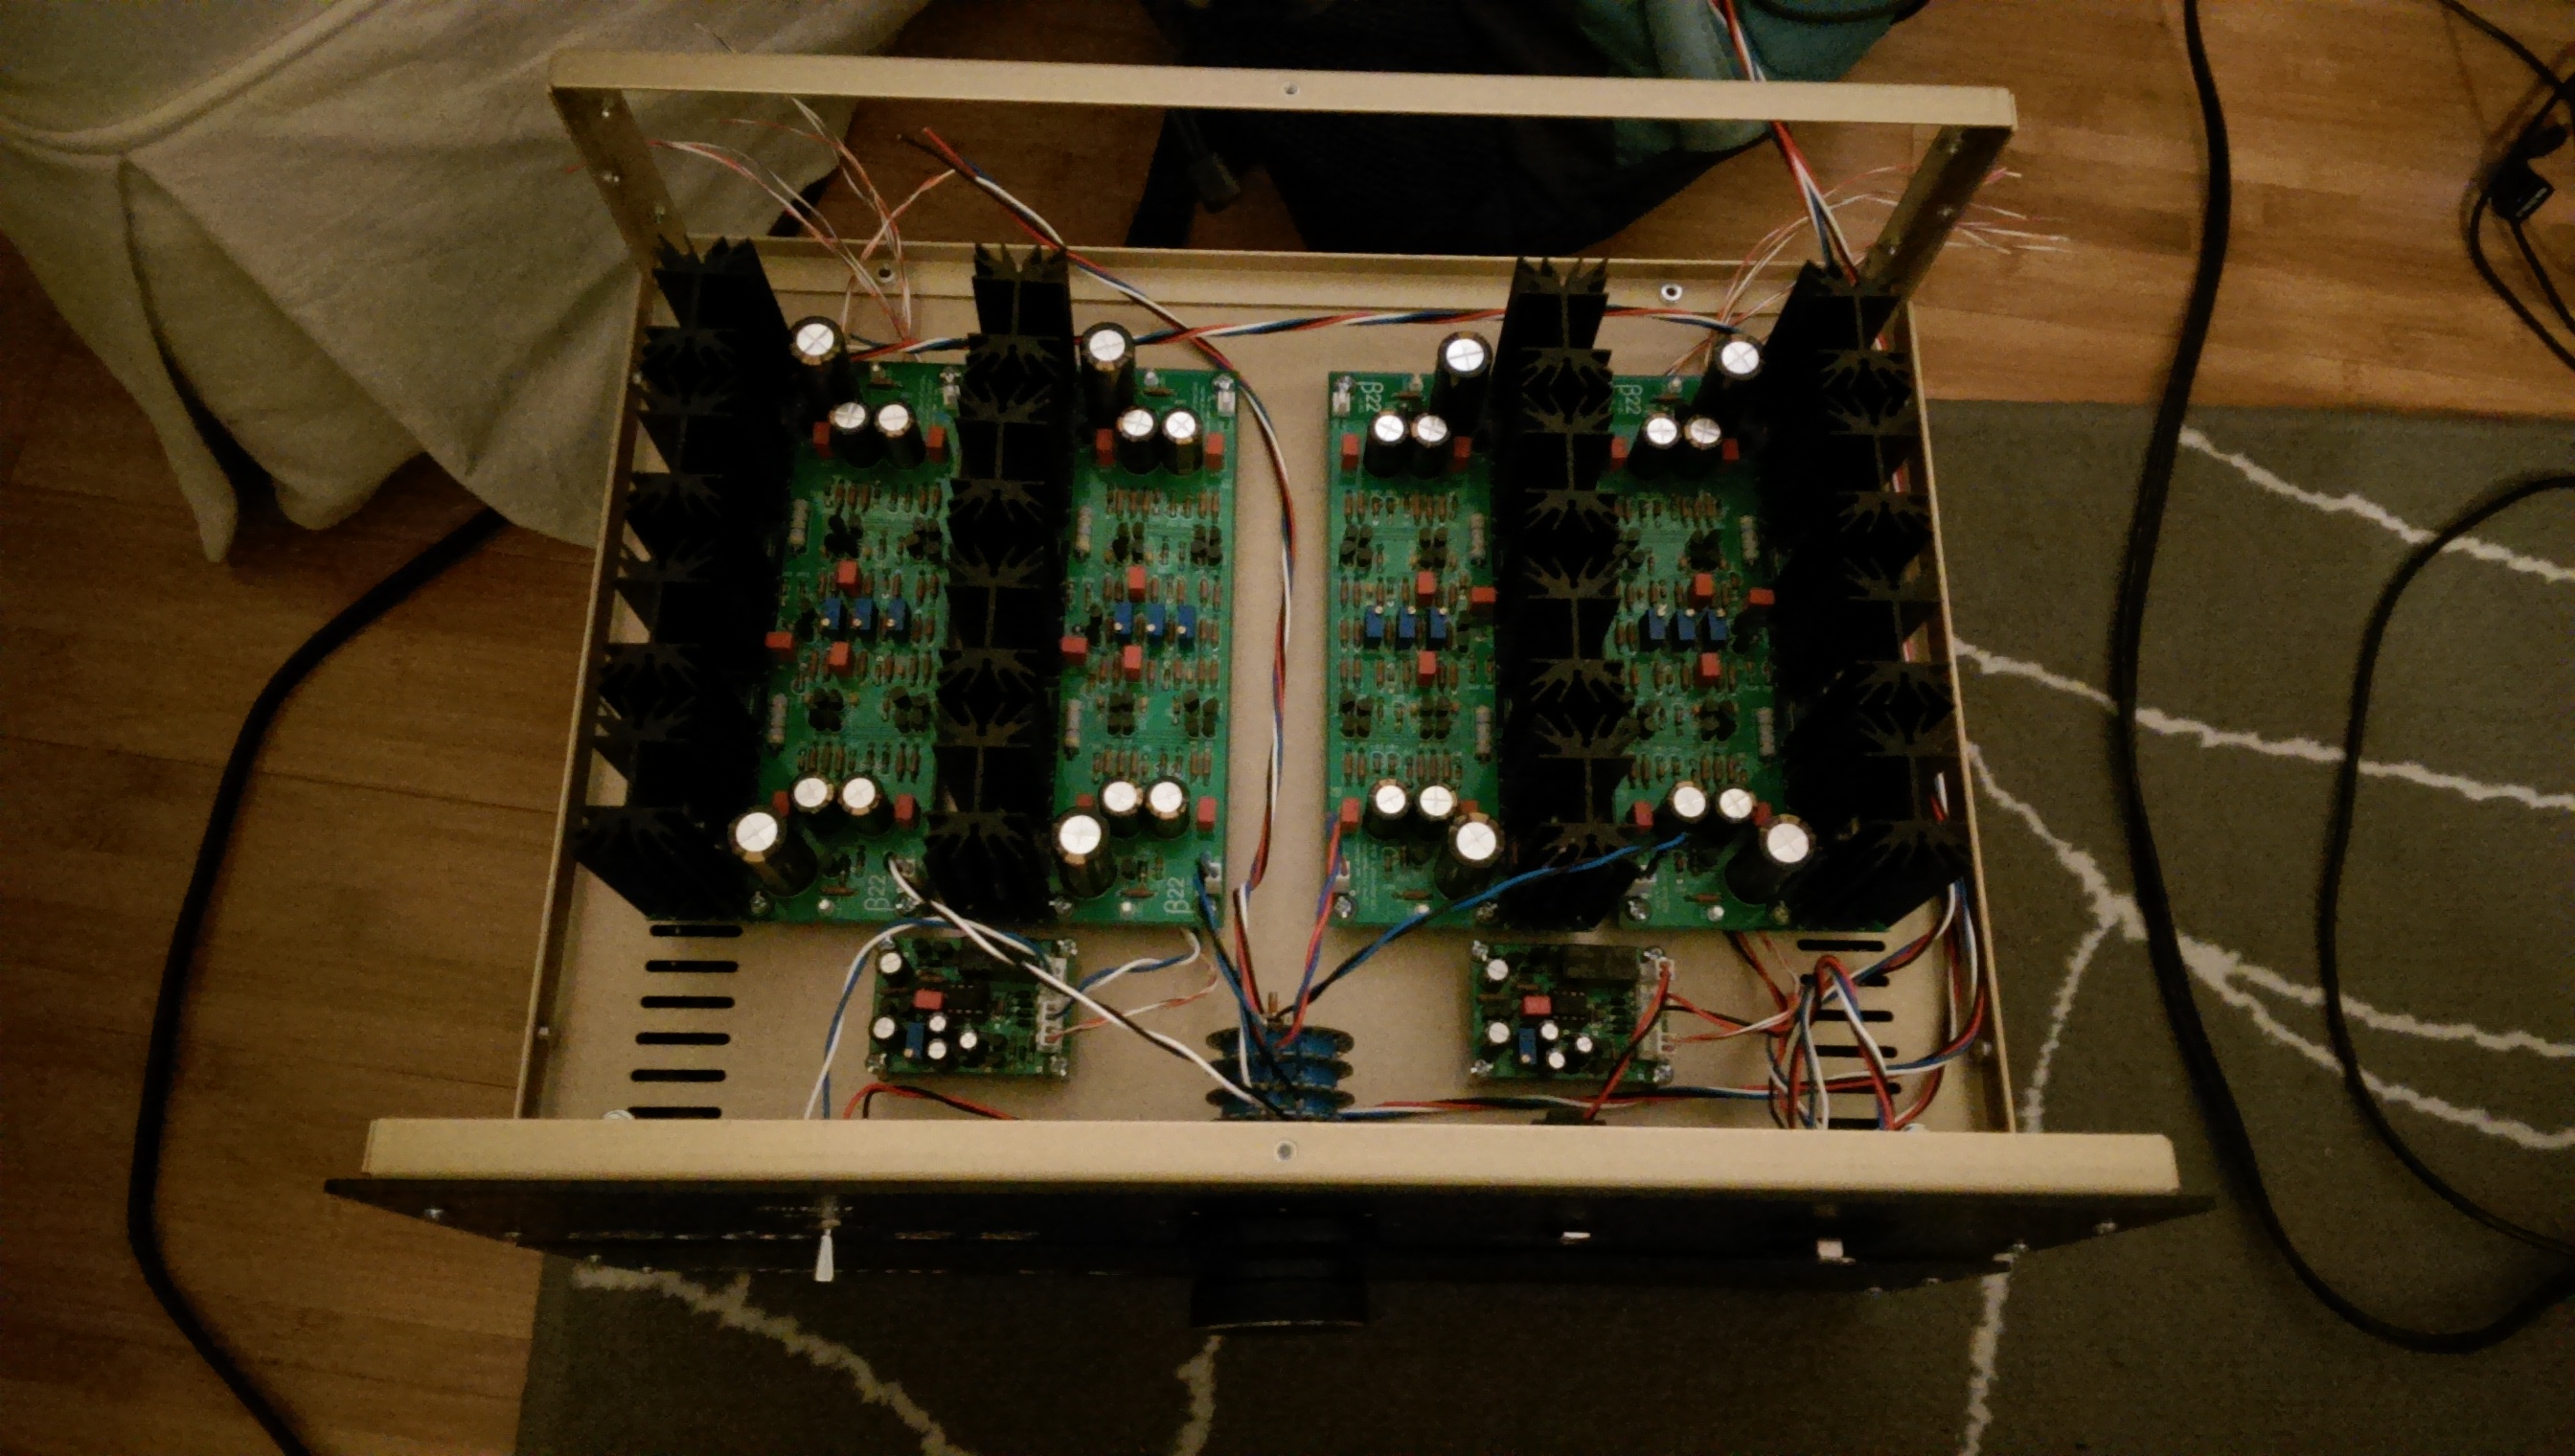
He has two boards biased and working. Point 1 an 2 are his two remaining boards.
 
May 10, 2009 at 12:41 AM Post #812 of 3,218
Yes, that's what I was asking. If powering up causes the fuse to blow within 2 seconds, then how does he even have time to check the voltage across R9, adjust it to 4.5V, and then proceed to measuring the voltage across R34 (which he reports as having no effect when turning VR2)?
 
May 10, 2009 at 1:07 AM Post #813 of 3,218
Quote:

Originally Posted by amb /img/forum/go_quote.gif
alwayshungry, there is an incongruence between your two points. If the fuse blows within 2 seconds after power-up, how do you even get to do the biasing at all?


Hi Ti,
I should have clarified but each of my points refers to a different b22 board.
 
May 10, 2009 at 3:54 AM Post #814 of 3,218
OK, for the board that causes the fuse to blow, check to make sure your VR2 is installed in the proper orientation and that it's pre-set to fully-counterclockwise position before initial power-up. Also, make sure you didn't mix up the MOSFETs (Q21/Q23= IRFZ24N, Q22/Q24 = IRF9Z34N). Check the MOSFETs for shorts.

For the board that doesn't respond to VR2 adjustments, after setting VR1 to get 4.5V across R9, did you also measure the voltage across R10, R11 and R12? Check the voltage across D11 and D12. They should be no more than a couple of volts. If you get more, than the corresponding Q25 or Q26 might be blown.
 
May 10, 2009 at 7:22 AM Post #815 of 3,218
Never mind, forgot to refresh
smily_headphones1.gif
 
May 10, 2009 at 4:53 PM Post #816 of 3,218
I just finished my Sigma22 a few days ago. Worked first time! Considering my only other amp was a cmoy a about five years ago I was more than a little shocked!
biggrin.gif


Now to order the rest of the components for the beta22 boards!
 
May 10, 2009 at 9:40 PM Post #817 of 3,218
Did you spec it out with a load on it?
 
May 12, 2009 at 4:39 AM Post #818 of 3,218
Quote:

Originally Posted by amb /img/forum/go_quote.gif
OK, for the board that causes the fuse to blow, check to make sure your VR2 is installed in the proper orientation and that it's pre-set to fully-counterclockwise position before initial power-up. Also, make sure you didn't mix up the MOSFETs (Q21/Q23= IRFZ24N, Q22/Q24 = IRF9Z34N). Check the MOSFETs for shorts.

For the board that doesn't respond to VR2 adjustments, after setting VR1 to get 4.5V across R9, did you also measure the voltage across R10, R11 and R12? Check the voltage across D11 and D12. They should be no more than a couple of volts. If you get more, than the corresponding Q25 or Q26 might be blown.


Hi amb
For the board with the blown fuse the MOSFETs are correctly installed but I found shorts between various pins (resistance measures between 0.8 and 130 ohms between different pins on each MOSFET). I checked the resistances of R28, R29, R30, R32, R33, R34 and R35 and they look correct. Do I just need to replace the MOSFETs?

For the board with VR2 adjustments, it is not responding to VR1 adjustments now
frown.gif
I getting the following readings:
R9 = 0.74V
R10 = 0.78V
R11 = 0V
R12 = 1.50V
D11 = 30.7V
D12 = 0.8V
When it did bias at VR1 before, I remember the voltages at R10, R11 and R12 being slightly higher (4.5-4.6V).

Thanks for your help John and Ti.
 
May 12, 2009 at 7:08 AM Post #819 of 3,218
Quote:

Originally Posted by alwayshungry /img/forum/go_quote.gif
Hi amb
For the board with the blown fuse the MOSFETs are correctly installed but I found shorts between various pins (resistance measures between 0.8 and 130 ohms between different pins on each MOSFET). I checked the resistances of R28, R29, R30, R32, R33, R34 and R35 and they look correct. Do I just need to replace the MOSFETs?


Yes, you should not get such low ohms between any MOSFET pins. Now, they blew out for a reason, so make sure you check the rest of the board carefully. I previously posted using the diode check function of the DMM to veryfy the small signal BJTs. You should do this on all the BC550C and BC560C transistors. This method will not work on JFETs, though. Also check for bad solder joints, particularly around R25-R27, VR2, Q17 and Q18.

Quote:

For the board with VR2 adjustments, it is not responding to VR1 adjustments now
frown.gif
I getting the following readings:
R9 = 0.74V
R10 = 0.78V
R11 = 0V
R12 = 1.50V
D11 = 30.7V
D12 = 0.8V
When it did bias at VR1 before, I remember the voltages at R10, R11 and R12 being slightly higher (4.5-4.6V).


Looks like your Q25 is blown.
 
May 18, 2009 at 3:33 AM Post #820 of 3,218
Just finished putting together the PSU for my Beta22 last night.
Fully assembled
IMGP1374.jpg

Initial testing of the Sigma's, using an Ardiuno and LCD to track all four rails at once.
IMGP1365.jpg


Yes its heavily based on Naamanf's build
smile.gif
 
May 18, 2009 at 4:31 AM Post #821 of 3,218
Quote:

Originally Posted by Gatsu /img/forum/go_quote.gif
Just finished putting together the PSU for my Beta22 last night.
Fully assembled
IMGP1374.jpg

Initial testing of the Sigma's, using an Ardiuno and LCD to track all four rails at once.
IMGP1365.jpg


Yes its heavily based on Naamanf's build
smile.gif


Whooo sounds nice, but those images are not viewing for me
frown.gif
 
May 18, 2009 at 5:01 AM Post #822 of 3,218
Hmm... lets try that again...

3541720198_9624ecb955_b.jpg


3541719534_ba8be14948_b.jpg
 
May 18, 2009 at 12:54 PM Post #823 of 3,218
Nice Gatsu, a real beast! Was this a Glass jar kit? You’ve got great tolerances with those specs. Congratulations looks absolutely awesome!
 
May 19, 2009 at 2:50 AM Post #825 of 3,218
Yup, thats the glass jar kit, makes things so much easier
smily_headphones1.gif
(Thanks Jeff!)

I have cut notches into the heatsink so I could have them mounted closer together. The vents in the bottom of the case now line up with the heatsink fins. I figure the way Perth summers get I need it to handle as much heat as it can :p
I'll grab a couple of close up shots when I get home tonight.

The board in the middle is the power controller. Its a picaxe microprocessor as well as a 5V PSU (for the amp controller as well). The picaxe senses the supply rails through 4 opto-couplers and if one drops out it flashes an error code on the power switch LED.
 

Users who are viewing this thread

Back
Top