Official Perfboards and P2P Thread.
Dec 14, 2007 at 12:33 PM Post #16 of 49
Quote:

Originally Posted by TzeYang /img/forum/go_quote.gif
I don’t know why but most of diyers who posted their pcb works don’t solder this way. They would always solder the components first and then trim the leads later. IIRC, Kin0kin solders this way too.


I indeed solder first and then cut. Because :

- I'm lazy. Long leads are easier to bend, it's faster to cut all the leads at once.

- I'm messy. I often have to desolder stuff because I made mistakes and it's easier to resolder the part somewhere else if it still has longer leads.

- I work a bit in a different way. Compared to your amp layout, I would have run the power supply lines and most of the ground lines on wires, going in straight lines from the PS to each channel. Longer leads are thus needed to solder the wires straight onto the leads of some parts. P2P in my view has the advantage of allowing you to work in 3D rather than flat on the board.

But I sure wish my stuff would look as neat as yours.
 
Dec 14, 2007 at 2:04 PM Post #17 of 49
I guess the only "real" DIY I've done is this:

36905622.jpg
 
Dec 15, 2007 at 8:12 AM Post #19 of 49
Quote:

It'll be awesome if we can use a software that actually does perfboard layout. I only use a piece of paper with little squares. , gets the job done but i'd like to have a softcopy of the layout in my pc instead of a piece of paper lol.


Apart from the freeware-software posted some posts above, there is a other software called "Lochmaster".
See here:
LochMaster

Unfortunatelly it's not freeware but I think it's worth the money.

As an example you can see here the rev. Millet Diamond Buffer (discrete Diamond Buffer - Overview) I layouted with this software for a stripeboard as a direct drop in BUF634 substitute. I like the software very mutch and I use it very often to fit the circuit on the smallest space stripeboard. You can very easily rearrange all parts etc.


Dec 15, 2007 at 11:40 AM Post #21 of 49
^^^^^ Oh boy, great work on perfboard!
From your packing density I am miles away!
frown.gif

Maybe I should try one time a pointed perfboard instead of my favorite stripeboard...
 
Dec 16, 2007 at 12:13 AM Post #22 of 49
SOHA_Final_Wiring_op_800x599.jpg

Seduction1.jpg

SeductionSignal.jpg

SeductionPS2.jpg

SeductionPS1.jpg


Top one is of my SOHA, one of the few that is p2p. You can tell where I relocated the PS on the right side.
The bottom 4 pics are of my Bottlehead Seduction.

Here's a link to more pics if anyone's interested:
PowerAmps
 
Dec 16, 2007 at 3:24 AM Post #24 of 49
"Trim the lead first" would be nice to the experienced hands when he/she want solder joints look smooth and clean. It also prevent those excessive leads touching each other making unnecessary interferance. But that does not mean doing different way is bad way. Its all good when you find the way you like and works. For those who can't make clean soldering joints, all you need is practice and more practice, then you will eventually got clean look. I personally do my soldering quite similiar to what TzeYang said, and I also use nail clipper for the same purpose.

I have to say some amps you guys made are quite impressive. Full P2P without purf board is something that requires good amount of knowledge and patience. I can but won't do that because of my laziness. For that reason, I like Blooze's work even if those soldering joints look little rough. Good job, man.
 
Dec 16, 2007 at 4:19 AM Post #25 of 49
Quote:

Originally Posted by Seaside /img/forum/go_quote.gif
"Trim the lead first" would be nice to the experienced hands when he/she want solder joints look smooth and clean. It also prevent those excessive leads touching each other making unnecessary interferance. But that does not mean doing different way is bad way. Its all good when you find the way you like and works. For those who can't make clean soldering joints, all you need is practice and more practice, then you will eventually got clean look. I personally do my soldering quite similiar to what TzeYang said, and I also use nail clipper for the same purpose.

I have to say some amps you guys made are quite impressive. Full P2P without purf board is something that requires good amount of knowledge and patience. I can but won't do that because of my laziness. For that reason, I like Blooze's work even if those soldering joints look little rough. Good job, man.


Thanks Seaside. I have to say the soldering to the groundplane really looks awful, but I just couldn't get the heat high enough to get the solder to flow worth a dang. A lot of the joints look somewhat rough (my first p2p and I used a little too much solder on some of the joints and left some of the leads a little long), but I made sure that all connections were a mechanical connection first. I could have fired that thing up without any solder at all at one point in the build. I highly recommend the Seduction if anyone is looking for a tube phono preamp.

As far as trimming leads after soldering, I was told once that if you can avoid
it, do, as the shock of trimming the leads after soldering can weaken the joint. I personally do the tape method mentioned before to hold components in when soldering to a board now.
 
Dec 16, 2007 at 4:48 AM Post #26 of 49
Quote:

Originally Posted by Seaside /img/forum/go_quote.gif
"Trim the lead first" would be nice to the experienced hands when he/she want solder joints look smooth and clean. It also prevent those excessive leads touching each other making unnecessary interferance.


Plus it depends what your objectives are in laying out the circuit. I use the excess leads to make the connections between components. I just use pliers to bend it and tack down the corners with solder. This works really well when you have a good idea of what your layout actually needs to be. Reworking it can be annoying.

Having seen Blooze's SOHA, I think tomorrow I'll take the board out of mine to photograph it. So far I've preferred that it stay hidden - I didn't start out with a logical layout, and changed my mind about where things were going several times. Grounding ended up being . . . . pretty interesting.
 
Dec 16, 2007 at 1:11 PM Post #27 of 49
Quote:

Originally Posted by ericj /img/forum/go_quote.gif
Having seen Blooze's SOHA, I think tomorrow I'll take the board out of mine to photograph it. So far I've preferred that it stay hidden - I didn't start out with a logical layout, and changed my mind about where things were going several times. Grounding ended up being . . . . pretty interesting.


Mine looks like a rats nest, doesn't it
biggrin.gif
But I get very little to no hum with it. I've seen some tube amps that looked like you just shoved a wad of wires into them and they sounded fantastic. Once I got the ground wires placed just right everything was A-OK.
 
Dec 17, 2007 at 3:42 AM Post #28 of 49
I am very disappointed that I never took pictures of my diamond buffers, they were my finest work before I took to etching. I have an "interesting" looking E12 but that is buried inside another amp. All my perfboard amps have gone to other homes.

So, seeing as Blooze doesn't object to "rats nest" P2P , here is some of my pigeon sh..t
biggrin.gif


PDRM1146.jpg


PDRM1144.jpg


And the end product

stacker2sm.jpg


..dB
 
Dec 17, 2007 at 4:05 AM Post #29 of 49
i think my only problem with hardcore P2Pers is that i cant comprehend where they find soooo much time and patience to complete the project. (Respect!) That is so intensely hardcore lol.
 
Aug 17, 2008 at 7:11 PM Post #30 of 49
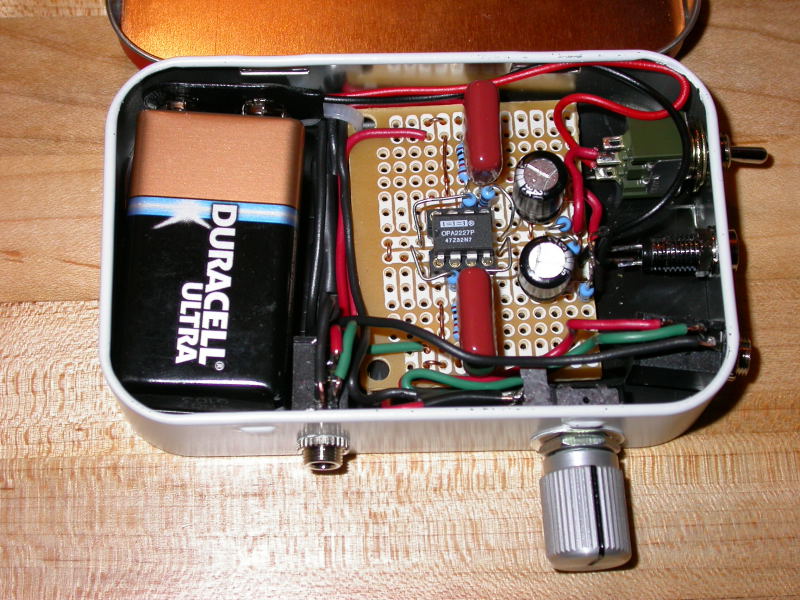
Here is the topside of my Tori amp, I used Sijosae's resistor/ dip configuration. I will post the underside later (will have to take amp appart first. But it rather neat, no where close to OP though

2771143233_cfb18731c6.jpg
 

Users who are viewing this thread

Back
Top