

Punnisher
Headphoneus Supremus
- Joined
- Dec 4, 2007
- Posts
- 2,655
- Likes
- 41
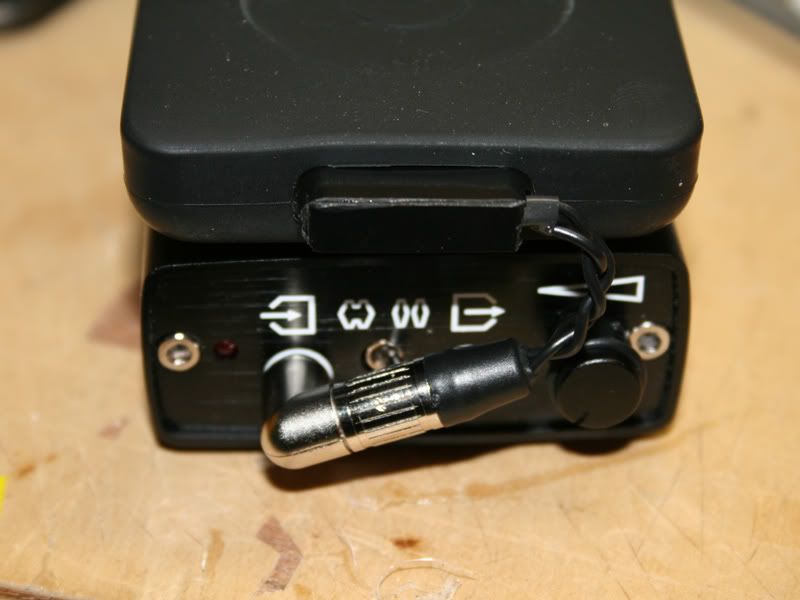
I was tired of all the gargantuan LOD cables that stick out a mile so I made something that won't get caught as easily. You can stick in your coat pocket without fear of damaging your ipod. Plus it's more discrete as to not attract attention.

Parts Needed:
Soldering Iron with a smaller than average tip. Cone tips work just fine.
Small flat tipped screwdriver.
Precision wire cutters.
Needle Nose Pliers.
Multimeter.
Hot Glue Gun.
iPod/Zen slim connector from Qables.
Right angle Neutrik mini-plug.
24AWG wire. Different sizes may be used but Don't go thicker than 22AWG.
Some 1/8" heatshrink.
Heat gun.
Lets pre-cut some wire, I used 3-1/8" pieces and it worked quite well for my 5.5g/Corda 2Move setup. You can try shortening or lengthening them depending on your setup.
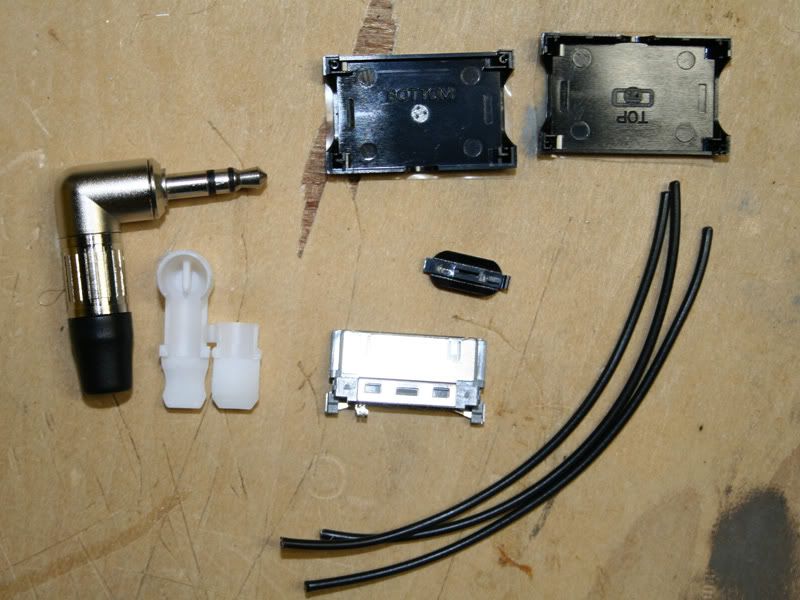
After your wire is cut, lay out all the pieces you'll need. Anything not pictured is not needed.
Two plastic halves, one clip button, ipod connector, three wires, and mini connector.
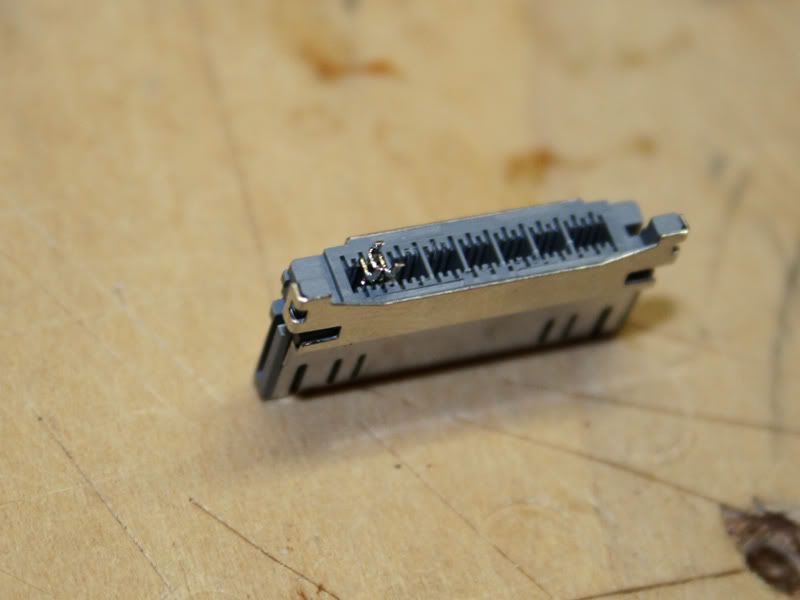
First start by removing all pins from the connector EXCEPT 2,3, and 4. These pins are Ground, Right, and Left respectively. You can find info on the iPod pinout here: Apple iPod dock interface pinout and signals @ pinouts.ru
Cut the pins short by about half. This will help make the LOD as slim as possible. Your connector should look something like this (you can see the shortened pins on photo #1 as well):
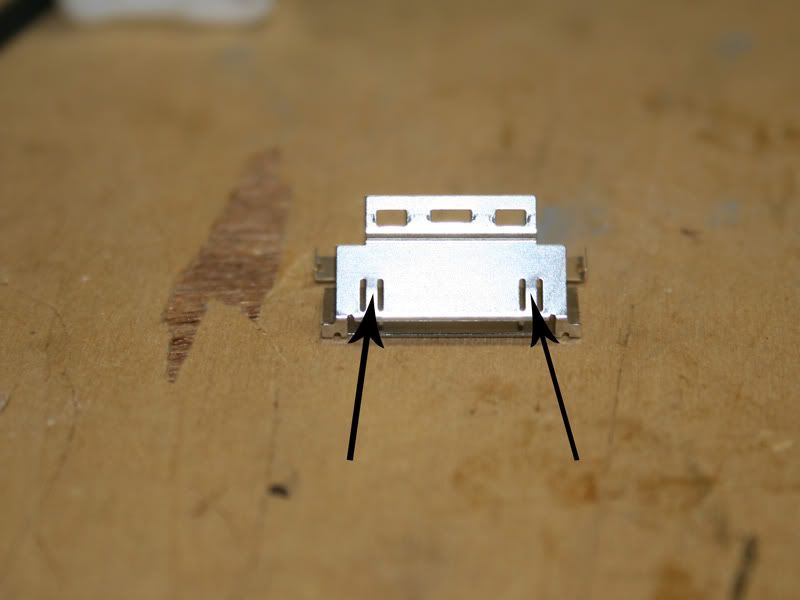
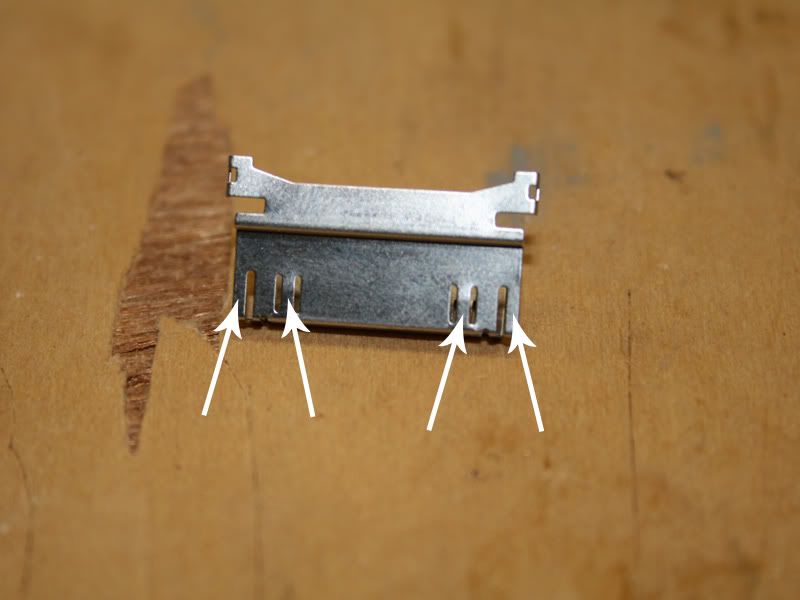
Now remove the metal casing from the ipod connector. To make a tight fit without clips, you'll need to expand the metal in six places. Simply take a small screwdriver and press down on them slightly. After you're done bend the metal casing back so it fits tightly around the plastic. This is a good time to check the fit in your ipod. If it's too tight, make some adjustments to the raised bumps.

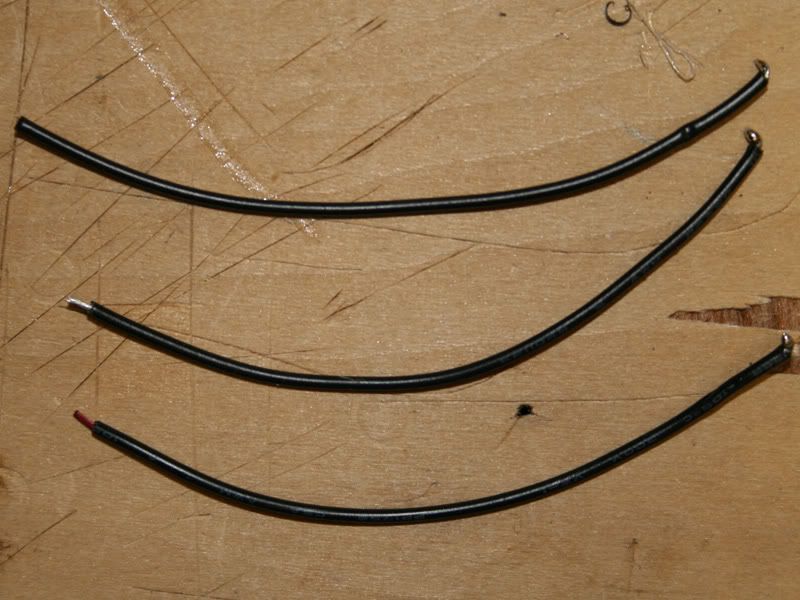
Next we prepare our three wires. You need to make sure you can tell them apart once we assemble the connector.
1. Strip each wire about 1/16" on one side only.
2. Bend this wire 90 degrees and tin it. Make sure you have a small blob of solder on it as well.
3. Take two of those wires and strip them 1/8" on the other side. I colored one red to symbolize Right Channel.
**Hint** When tinning these wires, do so quickly. If you leave heat on the solder for too long, you will dry up all the rosin in the solder. This will make soldering the wires to the pins very dificult.
So you have
Right: red
Left: silver
Ground: not stripped
You can use any method to label them but I did this since I didn't have any sticky labels or colored heatshrink. Here's what you should have now:
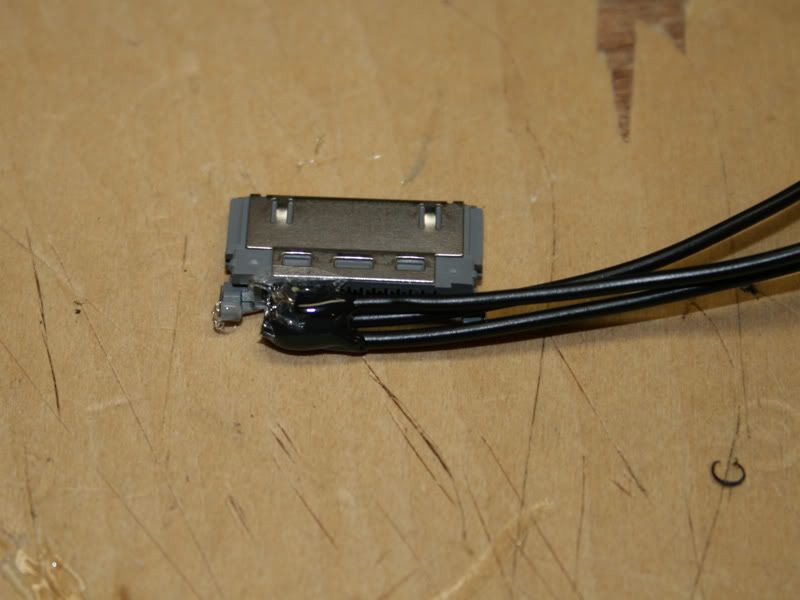
Next, solder your wires. Keep them as close to the connector as possible as to not add too much thickness to the plug. After you solder use a multimeter to make sure nothing has been shorted. Here's what you should end up with:
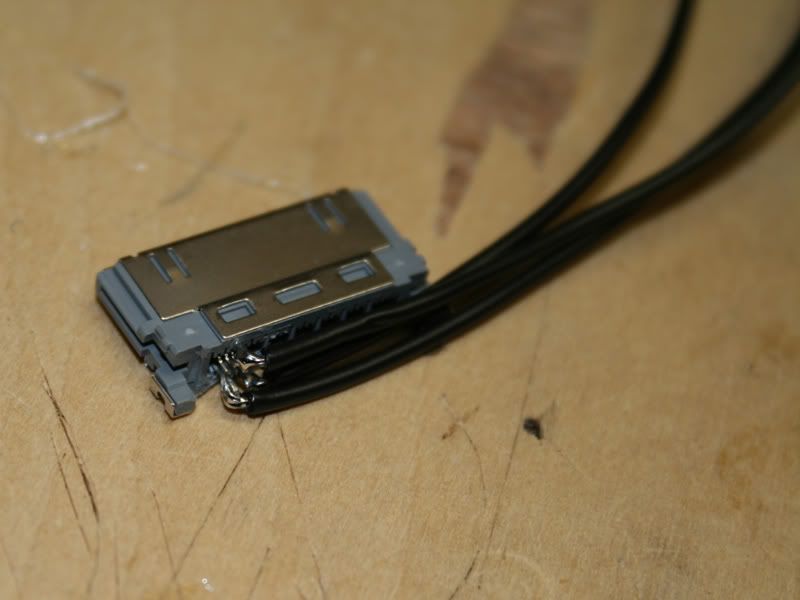
If you find no shorts in your soldering, use a bit of hot glue for strain relief:
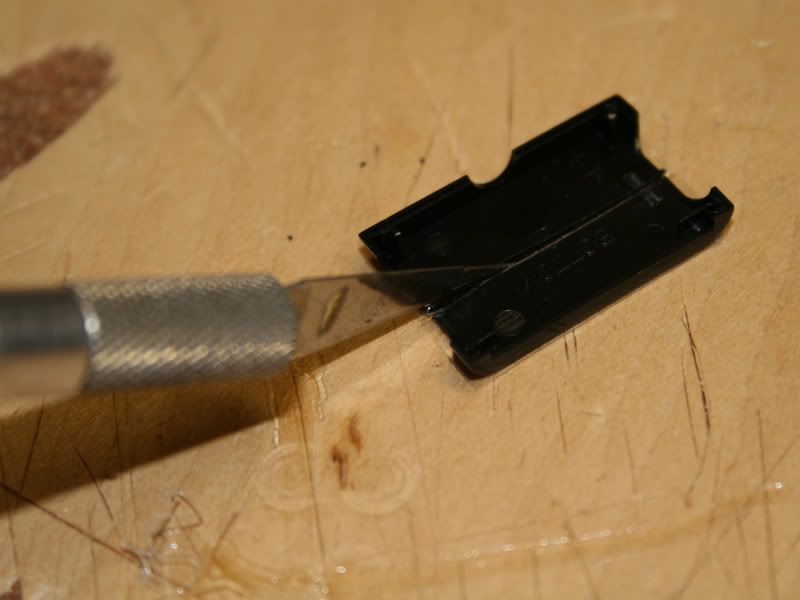
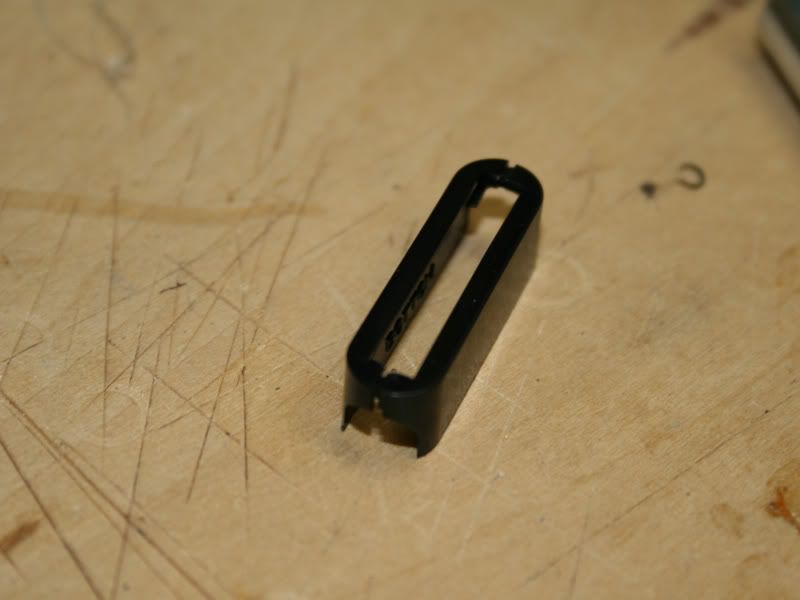
Next we prepare our black casing. Take each piece and cut it in half. There are two small lines on each connector, cutting them through the center of those lines seems to work well. You can use some large cutters or an xacto knife, whatever works. Sand any imprefections/burrs away with fine sandpaper.
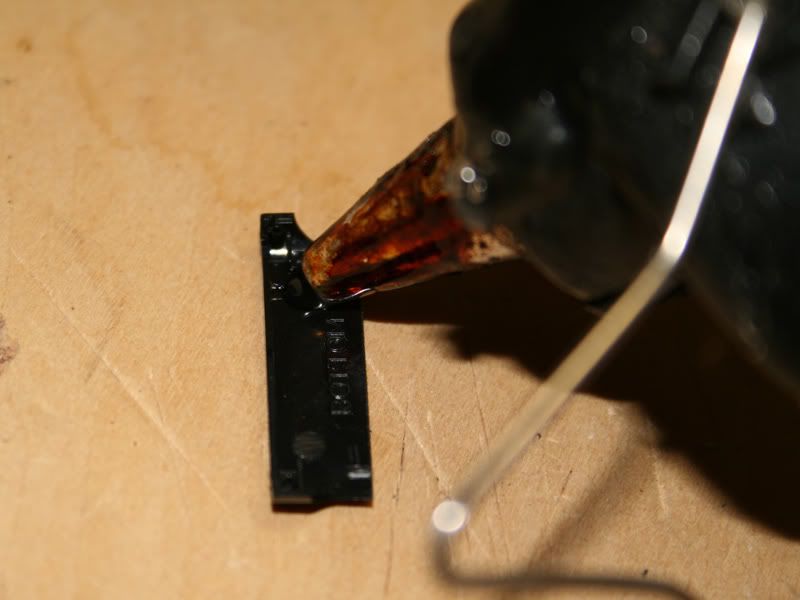
Next use a small amount of hot glue to attach the casing to the connector. Do the Bottom first, then the Top. The bottom has two notches to ensure a proper fit, but the top does not. When gluing the plastic on, be sure that the casings are parallel to the connector.
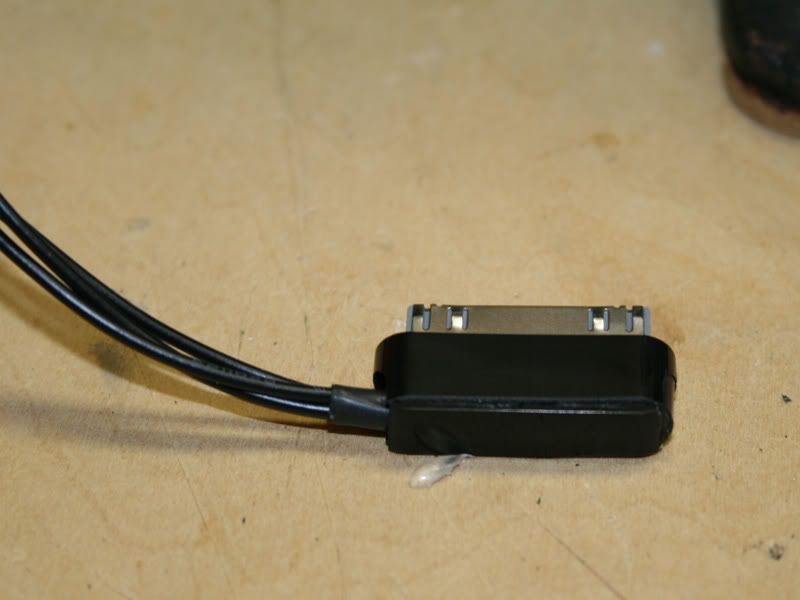
After the glue has cooled it should look something like this:
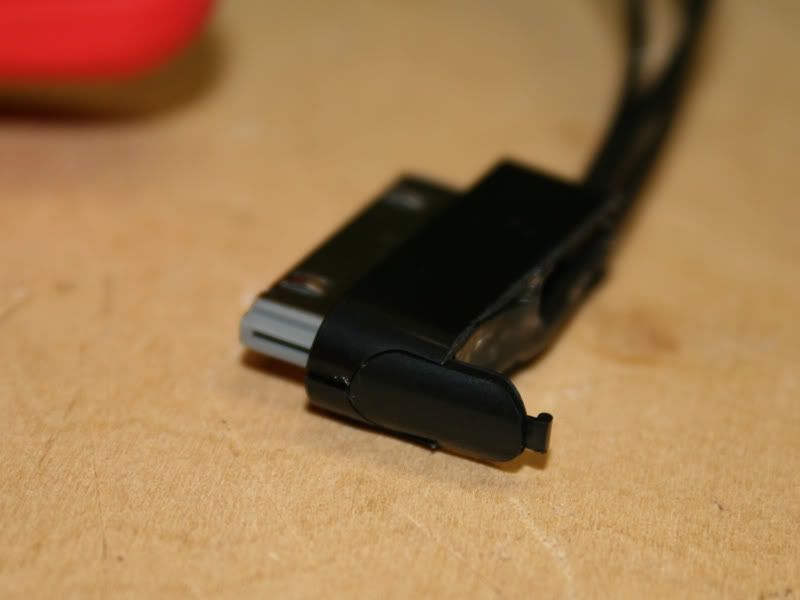
Now you can take that small plastic clip button and glue it into place on the left side of the connector. Place the whole thing in so it lines up perfectly with the two halves and fill in the void next to it with hot glue. After the glue cools, cut the plastic piece flush with the casing using your cutters or knife.
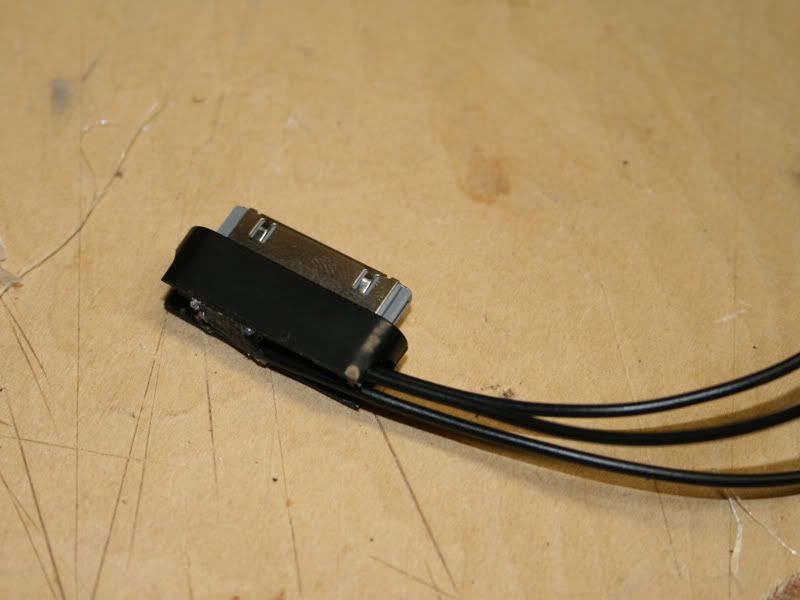
Next we take the leftover black plastic piece and cut it into a simple plastic strip to use for the back cover. Before you glue it though, put a small piece of heatshrink over the three wires for protection. Glue the back piece on and you should end up with this:
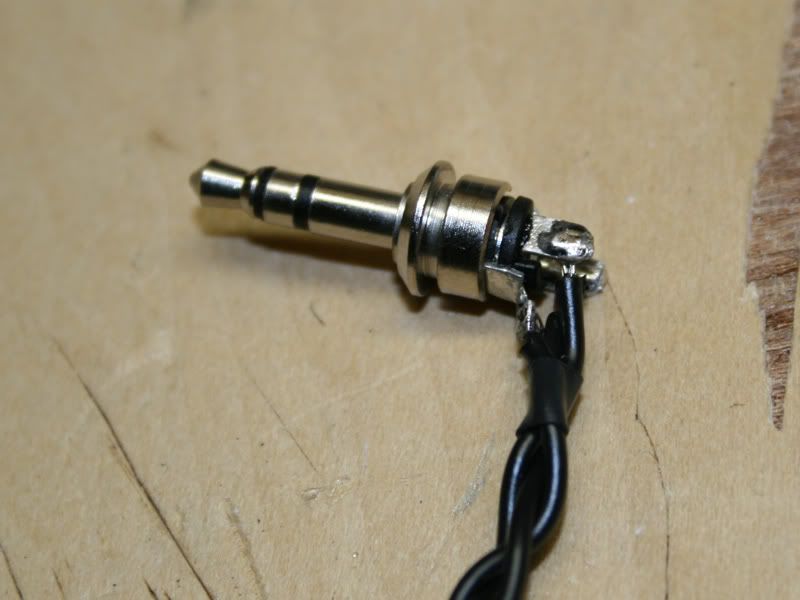
Now lightly braid the wires and solder them to your mini-plug. Use a bit of heatshrink to keep the wires braided while you solder.

Hopefully yours looks similar to this:
Now assemble your mini-plug and you're all set!
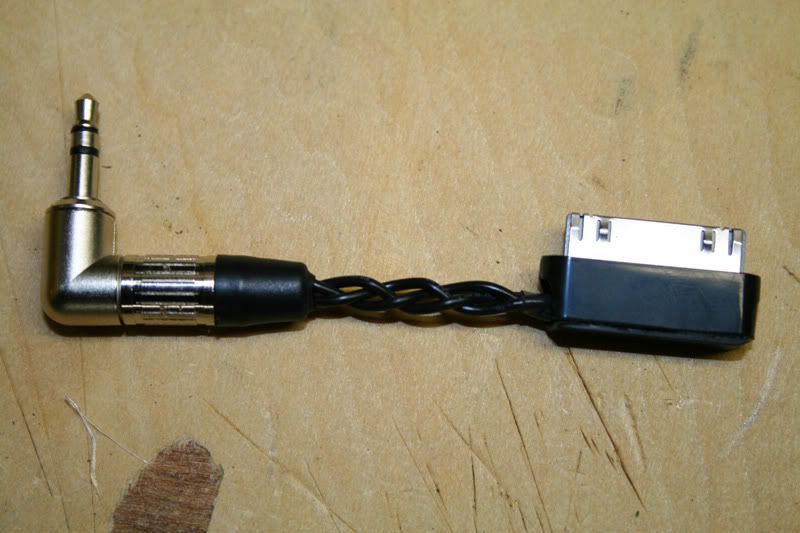
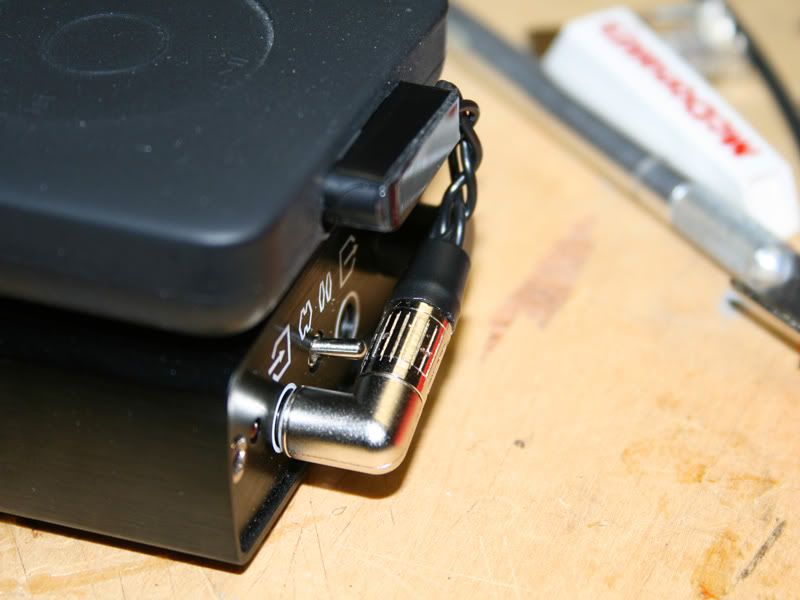
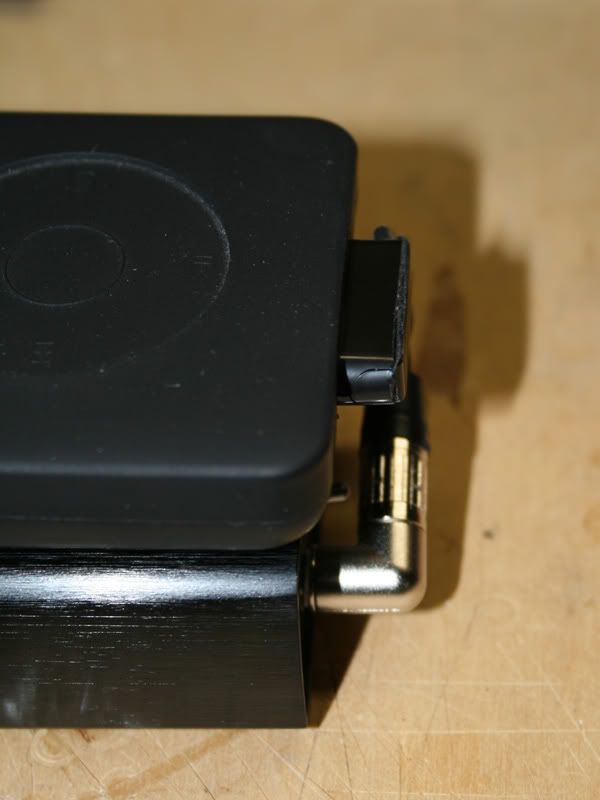
Enjoy the music!
Parts Needed:
Soldering Iron with a smaller than average tip. Cone tips work just fine.
Small flat tipped screwdriver.
Precision wire cutters.
Needle Nose Pliers.
Multimeter.
Hot Glue Gun.
iPod/Zen slim connector from Qables.
Right angle Neutrik mini-plug.
24AWG wire. Different sizes may be used but Don't go thicker than 22AWG.
Some 1/8" heatshrink.
Heat gun.
Lets pre-cut some wire, I used 3-1/8" pieces and it worked quite well for my 5.5g/Corda 2Move setup. You can try shortening or lengthening them depending on your setup.
After your wire is cut, lay out all the pieces you'll need. Anything not pictured is not needed.
Two plastic halves, one clip button, ipod connector, three wires, and mini connector.
First start by removing all pins from the connector EXCEPT 2,3, and 4. These pins are Ground, Right, and Left respectively. You can find info on the iPod pinout here: Apple iPod dock interface pinout and signals @ pinouts.ru
Cut the pins short by about half. This will help make the LOD as slim as possible. Your connector should look something like this (you can see the shortened pins on photo #1 as well):
Now remove the metal casing from the ipod connector. To make a tight fit without clips, you'll need to expand the metal in six places. Simply take a small screwdriver and press down on them slightly. After you're done bend the metal casing back so it fits tightly around the plastic. This is a good time to check the fit in your ipod. If it's too tight, make some adjustments to the raised bumps.
Next we prepare our three wires. You need to make sure you can tell them apart once we assemble the connector.
1. Strip each wire about 1/16" on one side only.
2. Bend this wire 90 degrees and tin it. Make sure you have a small blob of solder on it as well.
3. Take two of those wires and strip them 1/8" on the other side. I colored one red to symbolize Right Channel.
**Hint** When tinning these wires, do so quickly. If you leave heat on the solder for too long, you will dry up all the rosin in the solder. This will make soldering the wires to the pins very dificult.
So you have
Right: red
Left: silver
Ground: not stripped
You can use any method to label them but I did this since I didn't have any sticky labels or colored heatshrink. Here's what you should have now:
Next, solder your wires. Keep them as close to the connector as possible as to not add too much thickness to the plug. After you solder use a multimeter to make sure nothing has been shorted. Here's what you should end up with:
If you find no shorts in your soldering, use a bit of hot glue for strain relief:
Next we prepare our black casing. Take each piece and cut it in half. There are two small lines on each connector, cutting them through the center of those lines seems to work well. You can use some large cutters or an xacto knife, whatever works. Sand any imprefections/burrs away with fine sandpaper.
Next use a small amount of hot glue to attach the casing to the connector. Do the Bottom first, then the Top. The bottom has two notches to ensure a proper fit, but the top does not. When gluing the plastic on, be sure that the casings are parallel to the connector.
After the glue has cooled it should look something like this:
Now you can take that small plastic clip button and glue it into place on the left side of the connector. Place the whole thing in so it lines up perfectly with the two halves and fill in the void next to it with hot glue. After the glue cools, cut the plastic piece flush with the casing using your cutters or knife.
Next we take the leftover black plastic piece and cut it into a simple plastic strip to use for the back cover. Before you glue it though, put a small piece of heatshrink over the three wires for protection. Glue the back piece on and you should end up with this:
Now lightly braid the wires and solder them to your mini-plug. Use a bit of heatshrink to keep the wires braided while you solder.
Hopefully yours looks similar to this:
Now assemble your mini-plug and you're all set!
Enjoy the music!


