


jerg
Headphoneus Supremus
- Joined
- Aug 11, 2010
- Posts
- 6,143
- Likes
- 901
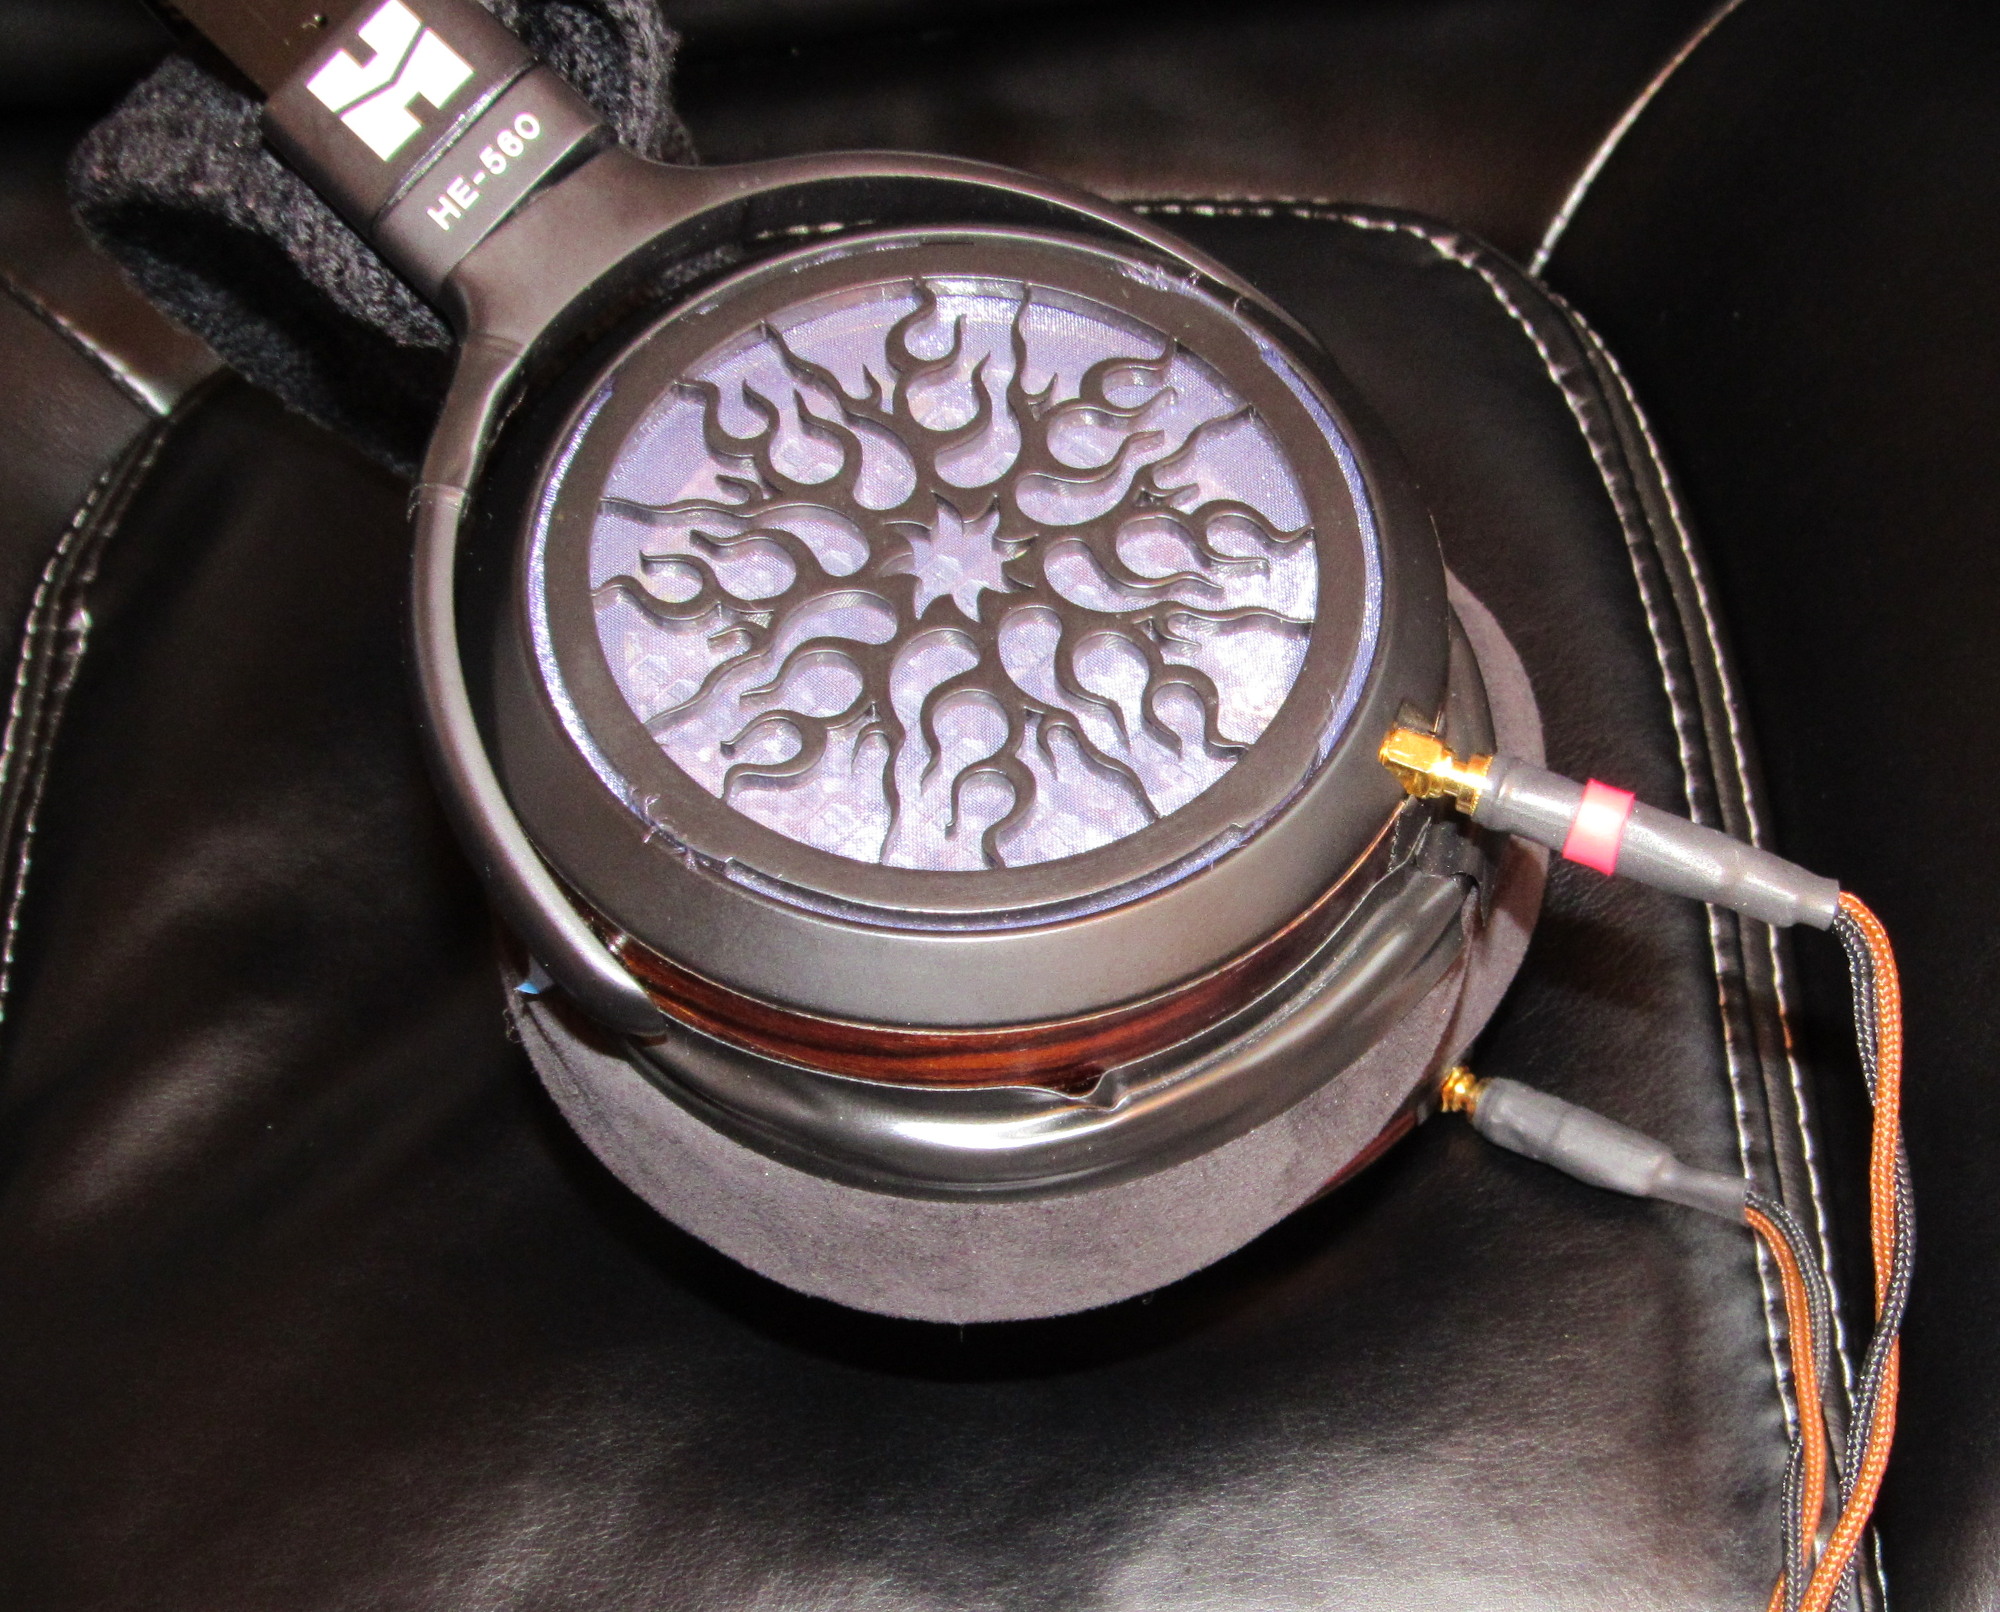
HE-560 Enhancement Mod
v1.5.0
2015-02-08: UPDATED TO V. 1.5.0, FROM 1.0.1; CHANGELOG POST

Preface
This is the result of a couple dozen hours of tweaks (Edit 2015-02-08 a couple more dozen hours now, with v. 1.5.0) after the last several months of HE-560 ownership. I’m finally satisfied with the state of the sound now so here is to sharing.
The goal is simple:
To reduce chamber reflections/resonance between the ears and the drivers, perfect the seal / coupling between the earpads and the drivers, with minimal change to the natural sound signature.
Old thoughts about Focus vs Focus-A pads for the purpose of this mod:
Before I go into detail about the actual modifications, I have to clarify with regards to earpad choice. I ended up deciding that Focus pads are better than Focus-As for the sake of this modification treatment, because I realized that Focus pads simply had the better "potential" tonal balance. It has a more meaty lower end, bass and a bit of low midrange, due to the physical differences (solid cylindrical ring of foam instead of a lip), which in turn tilts the overall tonal balance toward a less clinical and more musical tone, ever so slightly but noticeable. Now I made an educated guess that Focus pads' deficiency in terms of its upper mids brightness may simply be due to a lack of proper damping qualities relative to Focus-A's, and I think I'm right.
So ultimately it is a better-toned but worse-damped earpad vs (IMO) worse-toned but better-damped earpad, the former wins because the tonal balance is due to physical limitations, but damping can be altered. Unmodded, I do prefer Focus-As over Focus pads.
So ultimately it is a better-toned but worse-damped earpad vs (IMO) worse-toned but better-damped earpad, the former wins because the tonal balance is due to physical limitations, but damping can be altered. Unmodded, I do prefer Focus-As over Focus pads.
Edit (2015-02-08): With v 1.5.0, Focus-A's will take over in this revision of the mod, instead of heavily modified Focus pads. In the end I decided that for the sake of tonal balance, Focus-A's are indispensable.
Summary of mods
There is 3 core components to this mod compilation, one of which has 2 variations; plus 1 optional component:
1) Backwave Damping (Anax-esque direct reflection cancelling & driver-cup seal improvements)
2) Earpad Enhancement (Earpad de-filtering & mounting contact improvements)
3) * Bass & Seal Enhancement (bass improvements, via air-tight earpad-cup coupling/seal)
4) ** Hifiman Regrilling Mod
*Mod #3 SHOULD be done after mods #1 and #2 have been completed to satisfaction!
**Mod #4 will not be described much in this modification write-up, I will link to its own thread.
Tools & Materials
Creatology / off-brand foam sheet (1/16-inch or 0.16cm thick; Could be found in your local Michael’s arts & crafts store, probably somewhere online too; LINK or LINK )
Double-sided clear adhesive tape (non-foam types, can be found in dollar stores though name-brand tapes tend to have higher adhesive strength; I bought something similar to this: LINK )
RTV Silicone Adhesive Sealant / Glue (I bought these Permatex-branded ones: LINK; the key is that it needs to be "RTV", meaning it'll vulcanize / cure at room-temperature)
Con-Tact (R) Grip Excel shelf-liner (non-adhesive) (This specific variation out of 2~3 different grid pattern liners: LINK , I bought it in a Canadian Tire store)
Putty (what I used was kneadable eraser putty rubber LINK which has a bit more elasticity; could use popular variations like Blue Tac putty LINK but note I haven't tried Blue Tac)
Mini Philips screwdriver (if you don’t have one already, one from this kit will work: LINK )
Scissors (Any sharp-tipped ones will do; I like iris scissors for modding, i.e. a cheap one on Amazon: LINK )
Focus-A hybrid earpads (can be ordered from LINK), **NOT Focus hybrid earpads**
Heavy textbooks/boxes (for allowing
Optional: Aluminum baffle rings (only if your HE560s have the older plastic baffle rings when you take the earpads off; can be ordered from LINK)
*Note that in this guide, some photos may show the older plastic baffle rings, as those photos were taken before the aluminum baffle rings became widely available*

Ruler (for measuring)
Fine-liner pen, marker (for labeling / outlining)
SPARE Hard plastic card (e.g. old useless credit card; for earpad removal / installation; !!! don't use a card that you still need !!!!!)
Regrilling mod materials won’t be covered here. For that, refer to its own Guide Thread instead.
Modding Procedure
1) Backwave Damping
Estimated time to completion: 30 minutes ~ 1 hour
Explanation:
One interesting issue with full-sized planar headphones is that the driver face is a large surface area with zero damping, and could account for unwanted reverberation. Older Hifimans were especially problematic in this regard as they had many magnets on a grid running across the inner driver face, which were all flat metal surfaces terrible for acoustics. For that I developed the “Fuzzor mod”. But for HE-560?
Since HE-560 doesn't have inner-facing magnets, I can't do the fuzzer mod. Instead I turned to the material used in Anax’s HD800 mod, shelf-liner, as it is a perfect material to absorb/diffuse backwaves in the enclosed chamber.
Additionally it appears to have a very mild treble-attenuating quality which is quite welcome on HE-560. To my extensive listening, no detail or airiness is lost, which is a surprise, as most other materials I've tried directly on the driver did something bad for treble.
I also included a small driver/cup seal improvement step here, via some use of putty when the baffles are still detached.
Modding procedure:
The earpads are taken off the headphone via pushing out the 4 tabs under the earpads with a hard plastic card (e.g. a credit card). This exposes the driver, as well as its baffle with 6 screws holding everything together.
At this point, you will be able to see if the baffles in your HE560s are plastic, or aluminum. Older HE560s will have plastic baffles which I would strongly recommend replacing to the newer, aluminum baffles, for reasons pertaining to the Part III of this mod series. If your HE560s are newer and already have aluminum baffles as stock, then carry on.

 (as shown here are older, plastic baffles)
Using a mini Phillips screwdriver, unscrew all 6 screws holding the baffle/driver down, both cups. After those screws are all extracted, the baffle rings should come out easily. Take the baffle rings out without disturbing the drivers that are still nestled in the cups. Note that there is a small foam ring fitted under the baffle, don't lose them, they should be put back where they were when we screw the baffles back later in this section.


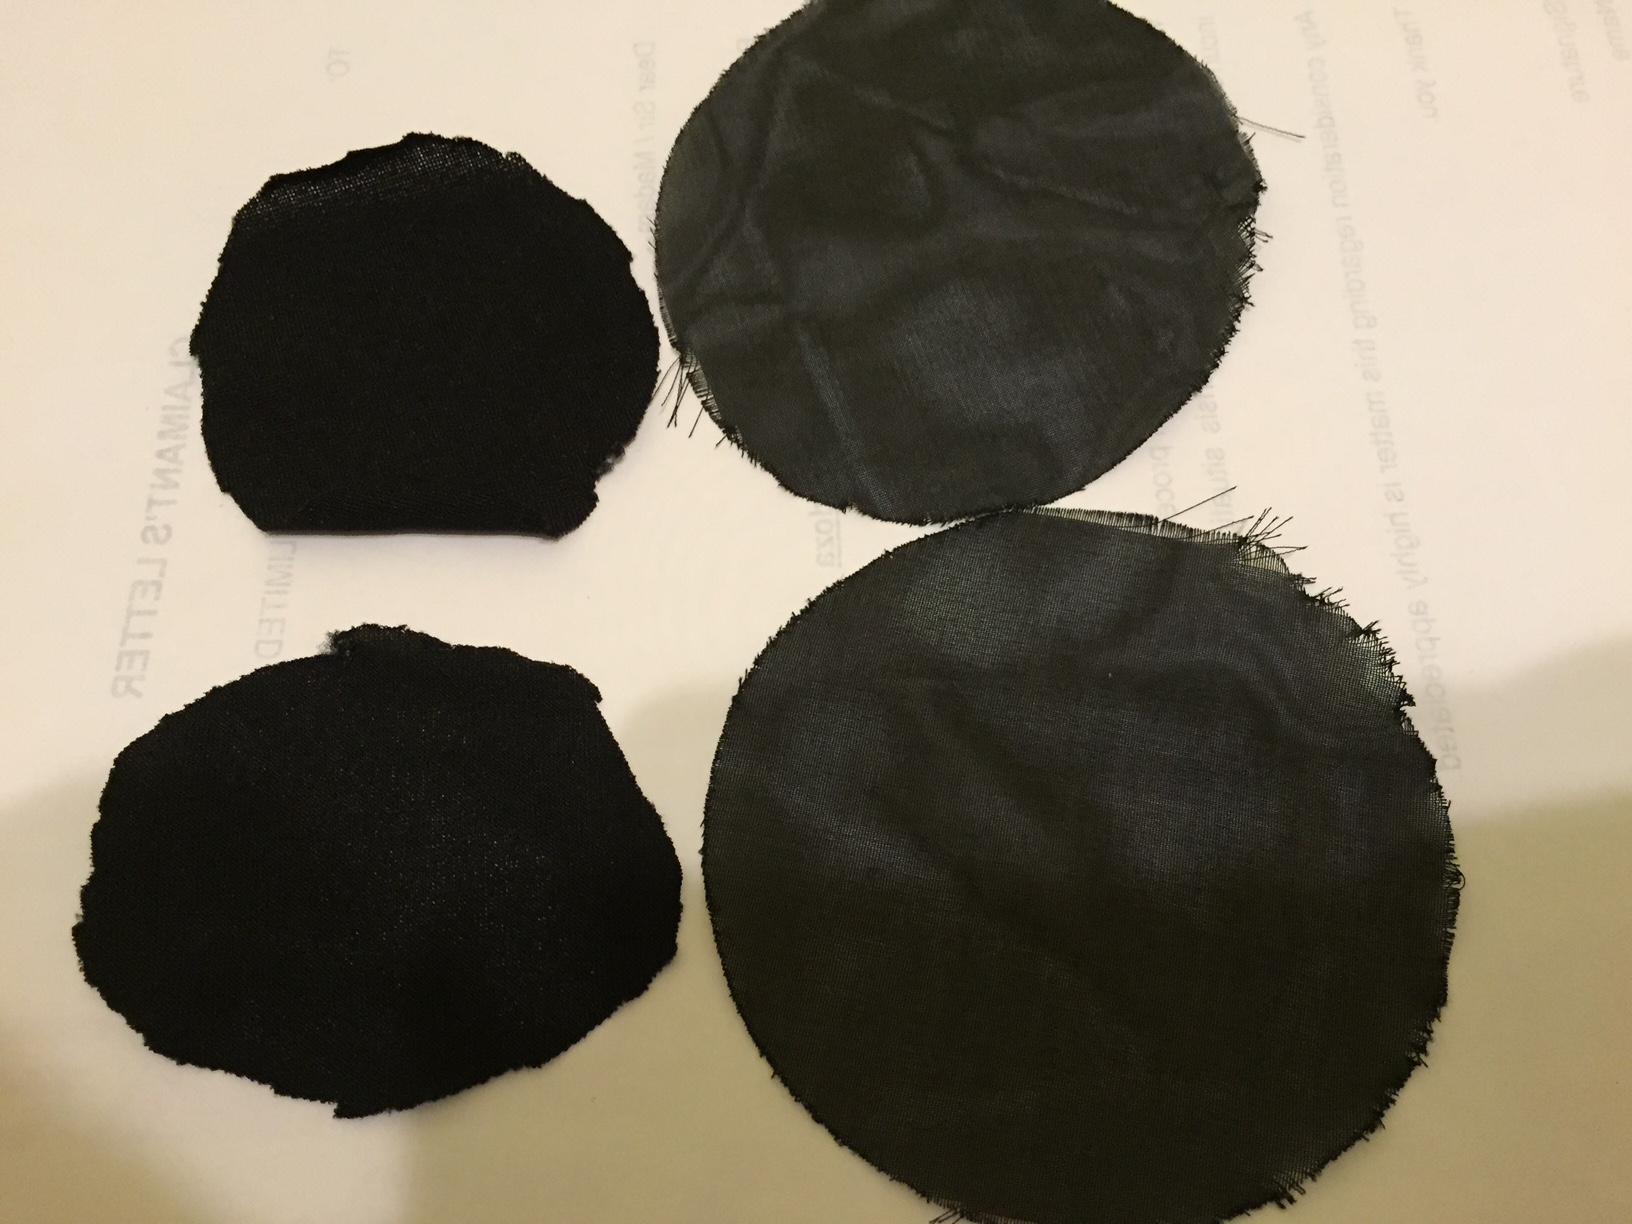
Using a baffle as a guide, cut out two circular discs from the shelf-liner material about the same size as the baffle. Now trim them by about 5mm all around so that we are sure they will fit well under the baffles.


Holes are cut out at the centres of the two shelf-liner discs, so that the centre area of the driver diaphragm is unobstructed; this had negligible impact on the chamber damping of the liner discs, but allows for treble to be just a bit tighter than with full liner disc coverage. Specific dimensions for the cutouts are shown below:

Before the shelf-liner discs are to be installed, first we will improve the seal between the drivers and the inside of the cups, by lining the outer circumferences of the drivers with putty; the putty will "set in" when we screw down the baffles later on. What I did was that I kneaded out long, thin segments of the kneadable eraser putty, as shown below. I then carefully wedged them at the contact circumference between the drivers and the inside of the cups, as shown by an annotated picture below (note that I added the foam ring and the shelf-liner disc there already, as I took the photo after I completed all the mods already; in your case, deposit just the putty for now).


The shelf-liner discs are now to be sandwiched between the drivers and the baffles/screws. Important: the liner material’s two sides are not identical, you’d want the side with slightly flatter foam bubbles to face down toward the driver, and the side with slightly more bumpy foam bubbles to face away from the drivers. Additionally, you want to orientate the shelf-liner discs so that the grids line up parallel with the driver tracing grids, and the small centre hole we cut out on the liner discs lines up with the centre area of the diagragm.

 (top is bumpier side, bottom is flatter side; minor difference but discernible in real life)

With those orientation details in mind, seat the liner discs down on top of the two drivers. Then carefully lay down the baffles, metal & foam both (be sure to line up the screw holes properly, as the baffles only have a single correct orientation) on top, and screw in the 6 screws per baffle.

 (Notice the little bit of putty extruding from the edges of the baffles; it shows just enough was added and it filled up the spaces nicely)
STEP ONE, COMPLETE.

The earpads are taken off the headphone via pushing out the 4 tabs under the earpads with a hard plastic card (e.g. a credit card). This exposes the driver, as well as its baffle with 6 screws holding everything together.
At this point, you will be able to see if the baffles in your HE560s are plastic, or aluminum. Older HE560s will have plastic baffles which I would strongly recommend replacing to the newer, aluminum baffles, for reasons pertaining to the Part III of this mod series. If your HE560s are newer and already have aluminum baffles as stock, then carry on.
Using a mini Phillips screwdriver, unscrew all 6 screws holding the baffle/driver down, both cups. After those screws are all extracted, the baffle rings should come out easily. Take the baffle rings out without disturbing the drivers that are still nestled in the cups. Note that there is a small foam ring fitted under the baffle, don't lose them, they should be put back where they were when we screw the baffles back later in this section.
Using a baffle as a guide, cut out two circular discs from the shelf-liner material about the same size as the baffle. Now trim them by about 5mm all around so that we are sure they will fit well under the baffles.
Holes are cut out at the centres of the two shelf-liner discs, so that the centre area of the driver diaphragm is unobstructed; this had negligible impact on the chamber damping of the liner discs, but allows for treble to be just a bit tighter than with full liner disc coverage. Specific dimensions for the cutouts are shown below:
Before the shelf-liner discs are to be installed, first we will improve the seal between the drivers and the inside of the cups, by lining the outer circumferences of the drivers with putty; the putty will "set in" when we screw down the baffles later on. What I did was that I kneaded out long, thin segments of the kneadable eraser putty, as shown below. I then carefully wedged them at the contact circumference between the drivers and the inside of the cups, as shown by an annotated picture below (note that I added the foam ring and the shelf-liner disc there already, as I took the photo after I completed all the mods already; in your case, deposit just the putty for now).
The shelf-liner discs are now to be sandwiched between the drivers and the baffles/screws. Important: the liner material’s two sides are not identical, you’d want the side with slightly flatter foam bubbles to face down toward the driver, and the side with slightly more bumpy foam bubbles to face away from the drivers. Additionally, you want to orientate the shelf-liner discs so that the grids line up parallel with the driver tracing grids, and the small centre hole we cut out on the liner discs lines up with the centre area of the diagragm.
With those orientation details in mind, seat the liner discs down on top of the two drivers. Then carefully lay down the baffles, metal & foam both (be sure to line up the screw holes properly, as the baffles only have a single correct orientation) on top, and screw in the 6 screws per baffle.
STEP ONE, COMPLETE.

--------------------------------------------------------------------------------------------------------------------------------

2) Earpad Enhancement
Estimated time to completion: 1 hour ~ 2 hours
Explanation:
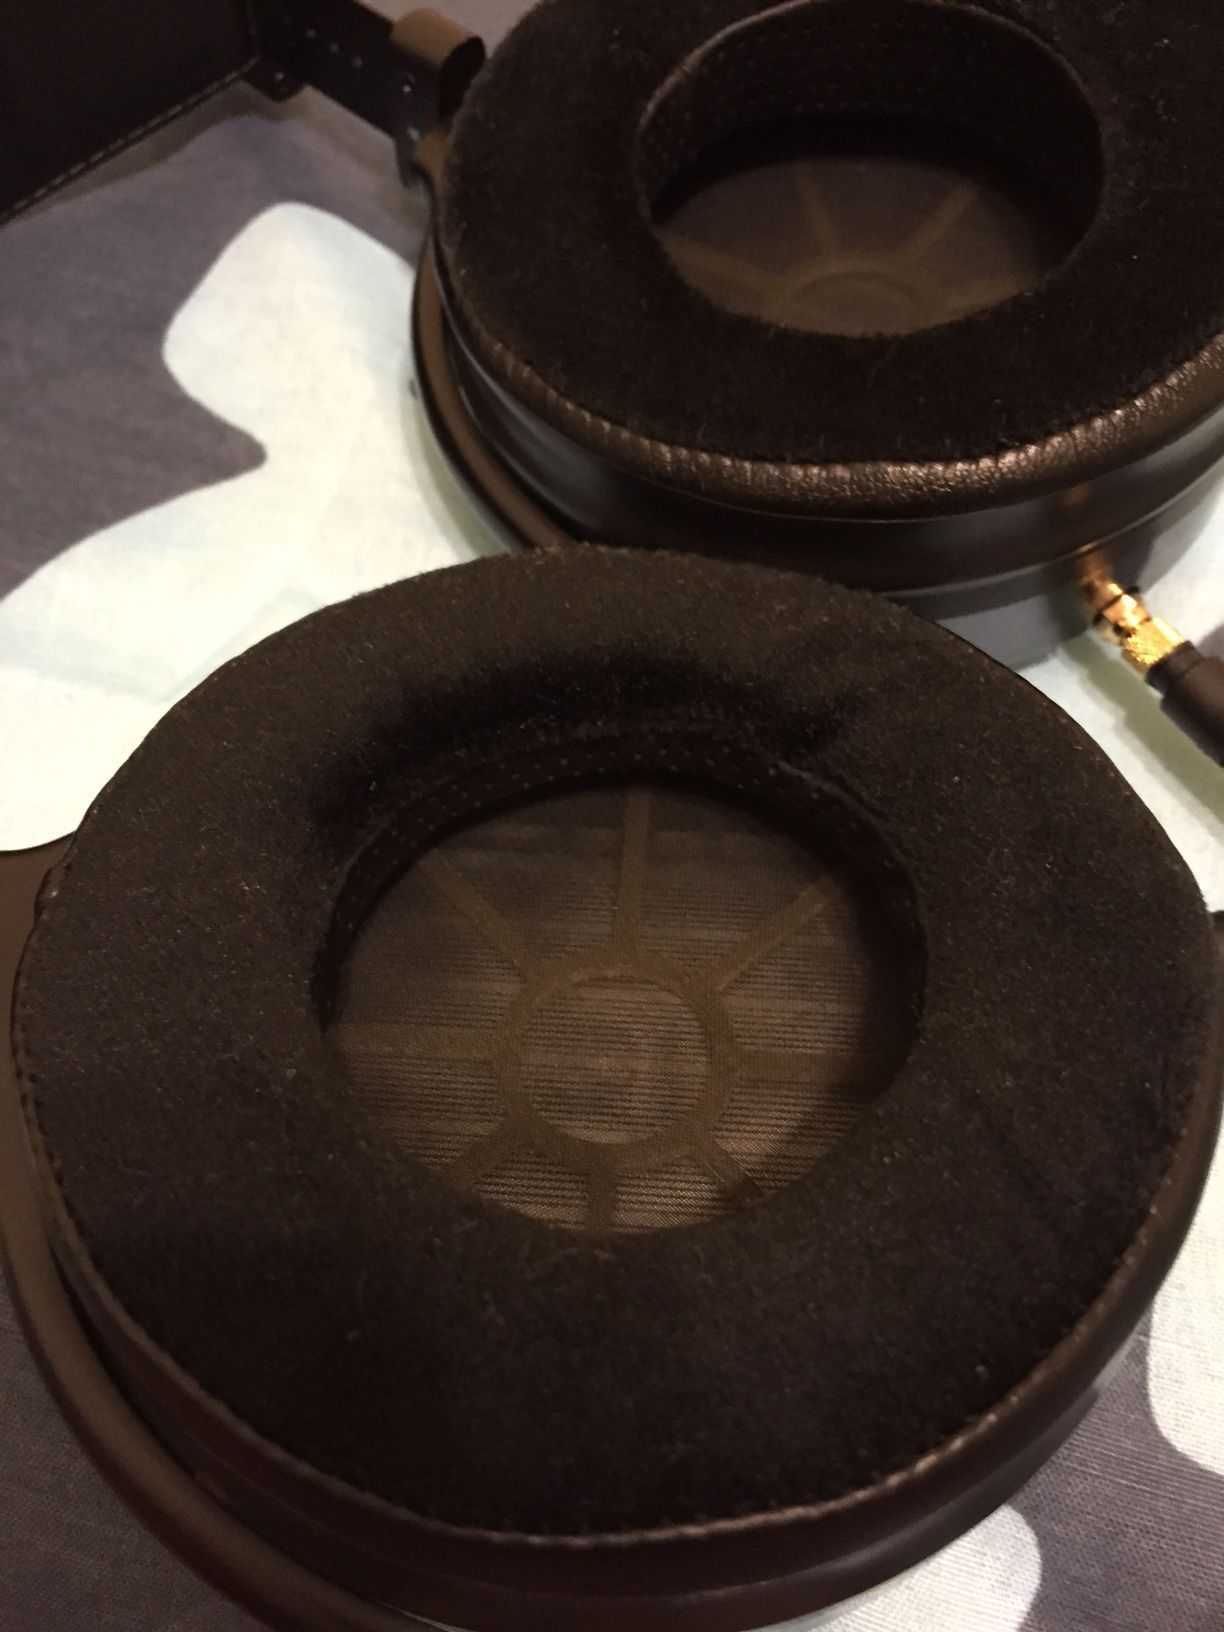
The Focus-A earpads are first "de-filtered", meaning the dust filter is completely trimmed off. This is for two reasons: one that it allows better access to the earpads so the hole-cutting is easier, and two that the earpads don't actually need the earpad dust filter as the driver already has a dust filter integrated into its inner face. Sonic-wise removing the dust filter doesn't do anything significant, besides making the upper extremes of treble ever so slightly clearer.
Then the earpads are angled slightly more, by cutting out two half-circle crescents of foam and inserting them into the back-half of the earpads, and then to adhere four cutouts of foam into the four open slots in the mounting ring; the angling allows for slightly deeper soundstaging and to make 100% sure the ears don't touch the shelf liner papules, while the foam cutouts allow for the earpads to have better physical coupling to the cup baffles.
Modding procedure:
Assuming you learned how to remove the earpads from the cups from the prior mod, the earpads are now detached and by themselves.
First things first: removal of the dust filter fabric. This is done easily by using the iris scissors: flip the earpads over in the hand so the mounting ring faces up, then using one hand to pull back the elastic dust screen back, the other hand controls the iris scissor and makes tight cuts near the corners where you’ve pulled back the dust screen fabric. This is done carefully all around, through the holes in the plastic at and between the mounting ring tabs, then the bits of fabric between the cuts are also trimmed with care. After some elbow grease you should be able to trim out the dust screens from both Focus hybrid earpads.


The next part of the earpad modification here is to insert a crescent shaped foam piece into the thicker halves of each earpad to give them slightly more angling, then to adhere specifically cut-out foam pieces into the large holes in the mounting ring using double-sided tape.
*NOTE THAT SOME PHOTOS BELOW ARE FOCUS HYBRID EARPADS AS THEY WERE OLDER PHOTOS OF THE MOD; IGNORE THAT, CLOSE YOUR EYES AND RE-IMAGINE THEM AS FOCUS-A EARPADS!
To create the crescent shaped foam piece, use an earpad as a guide to draw out a precise circle the radius of the earpad on the creatology foam, then trim that circle out into a disc using scissors. From there on, cut that disc exactly into two halves. Then mark out a spacing of approx. 1 cm from the outer circumference of these two half-discs, and trim them into 1 cm-wide crescents using these guides. Try fitting these crescent foam pieces into the thicker half of the earpads between the mounting ring and the undersides of the pads; if the crescent is slightly too large / too wide, trim as per needed.


The foam cut-out pieces that fill the holes in the mounting ring will be shaped exactly like those holes, so what I did was trace the hole onto a piece of cardboard, and using that as a template to cut out the 8 identical foam pieces. Then I individually adhered each piece onto a segment of double-sided tape, and trimmed the tape to the shape of the piece, peeled the tape protective liner off, and adhered the foam piece into the mounting ring hole. Two of the 4 foam pieces will be directly adhered onto the crescent foam insert piece, which is good as it locks the crescent piece in place. The end result should be that the four foam pieces are flush with the base surface of the mounting ring, and they will provide more thorough coupling between the baffle and the earpad assembly.

(can use any hard material to make the template)


 (just cut a piece of double-sided tape out (with its liner intact), stick the foam piece on, and trim the excess tape)


STEP TWO, COMPLETE.
First things first: removal of the dust filter fabric. This is done easily by using the iris scissors: flip the earpads over in the hand so the mounting ring faces up, then using one hand to pull back the elastic dust screen back, the other hand controls the iris scissor and makes tight cuts near the corners where you’ve pulled back the dust screen fabric. This is done carefully all around, through the holes in the plastic at and between the mounting ring tabs, then the bits of fabric between the cuts are also trimmed with care. After some elbow grease you should be able to trim out the dust screens from both Focus hybrid earpads.
The next part of the earpad modification here is to insert a crescent shaped foam piece into the thicker halves of each earpad to give them slightly more angling, then to adhere specifically cut-out foam pieces into the large holes in the mounting ring using double-sided tape.
*NOTE THAT SOME PHOTOS BELOW ARE FOCUS HYBRID EARPADS AS THEY WERE OLDER PHOTOS OF THE MOD; IGNORE THAT, CLOSE YOUR EYES AND RE-IMAGINE THEM AS FOCUS-A EARPADS!
To create the crescent shaped foam piece, use an earpad as a guide to draw out a precise circle the radius of the earpad on the creatology foam, then trim that circle out into a disc using scissors. From there on, cut that disc exactly into two halves. Then mark out a spacing of approx. 1 cm from the outer circumference of these two half-discs, and trim them into 1 cm-wide crescents using these guides. Try fitting these crescent foam pieces into the thicker half of the earpads between the mounting ring and the undersides of the pads; if the crescent is slightly too large / too wide, trim as per needed.
The foam cut-out pieces that fill the holes in the mounting ring will be shaped exactly like those holes, so what I did was trace the hole onto a piece of cardboard, and using that as a template to cut out the 8 identical foam pieces. Then I individually adhered each piece onto a segment of double-sided tape, and trimmed the tape to the shape of the piece, peeled the tape protective liner off, and adhered the foam piece into the mounting ring hole. Two of the 4 foam pieces will be directly adhered onto the crescent foam insert piece, which is good as it locks the crescent piece in place. The end result should be that the four foam pieces are flush with the base surface of the mounting ring, and they will provide more thorough coupling between the baffle and the earpad assembly.
(can use any hard material to make the template)
STEP TWO, COMPLETE.
--------------------------------------------------------------------------------------------------------------------------------
3) Bass & Seal Enhancement
Estimated time to completion: 30 minutes
Explanation:
This is to round off the whole core enhancement mod and put the final piece into the puzzle of improving the acoustic chamber between the ears and the drivers.
To really perfect the earpad-driver coupling for the sake of perfecting HE560's bass response, we use a room-temperature-curing silicone glue to securely bond the earpads to the baffles/cups, in a nearly air-tight fashion. Silicone adhesive glue is the only choice here, as it is by far the best glue for 1) permanent bonding if you leave it be, and 2) if needed, easy and clean removal just by detaching the two surfaces then peeling the silicone away.
A key thing here is that the newer, aluminum baffles are flat out better (no pun intended) for serving as flat services for the glue to bind the earpads in a nice seal to the cups. If you take off your earpads and find the baffle ring (the ring with the 6 screws) below to be plastic, then I'd heavily recommend getting a pair of the aluminum version, linked in the materials section.
If done properly, the glue should cure in a way so that there will be a near-perfect seal between the ears, the earpads, and the cups when the headphones are worn. This is the key to utter bass/sub-bass clarity and tautness I found, some tough song segments (an obvious one being the sub-bassy part of the first track of The Dark Knight OST, with the industrial drums in the background) are rendered with such clarity and authority it was mindblowing. This improved bass/sub-bass clarity carries into every other song I've listened to too. Sub-bass is about as extended as HE560 drivers are capable of I think, that is to say, bottomless in practice. In any track that demands “grand” bass, now HE560s can deliver that sheer scale, whereas before they only go half-way.
Modding procedure:
Before you do anything here, a quick interruption reminding you to practice reinstalling the earpads after they’ve been detached from the cups.
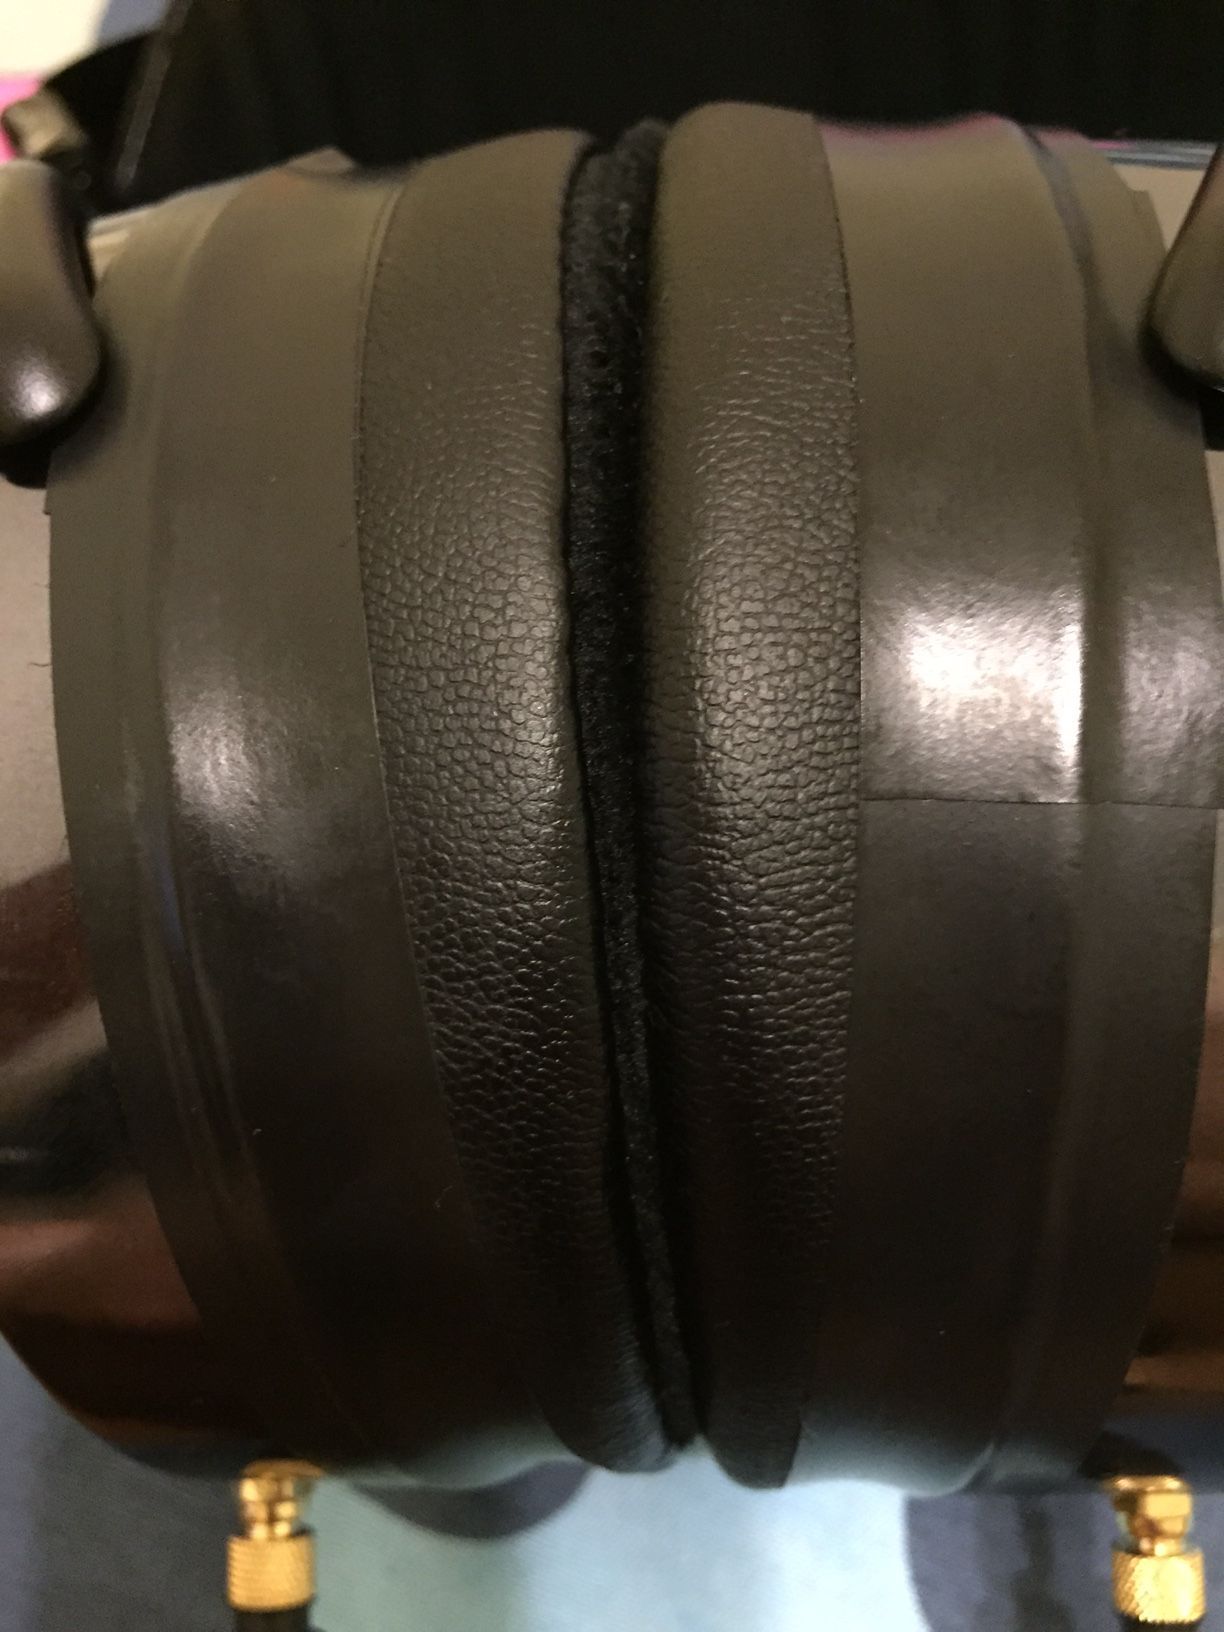
Be aware that there are indentations in the baffle where the tabs at the base of the earpads should precisely slot into. The earpads are always installed in a specific orientation so that the thick part faces toward the back of your head, and the thin part faces forward, with the SEAM running across the outer surface of the earpad facing down toward the ground, near where the cable connectors are. Line up 1 of the tabs to 1 of the baffle indentations, slot it in easily, then slot in an adjacent tab into its respective baffle indentation. That’s two out of 4 tabs in already. For the two tabs still jutting out, use the credit card and gently but firmly push the tabs in until they “snap” and lock in under the baffle. Voila!

(note the indentation on the aluminum baffle, that is where tabs of the earpads should fit directly into, locks the earpads in place for the correct fit)

(with bottom tab of earpad slotted into baffle in the correct orientation, the seam should line up like this with the connector section)
It is now near the end of the mod series, and time to put it all together with the air-tight sealing step using the silicone glue.
First, open up the silicone glue, and get familiar with its rate of glue extrusion - you don't want any surprise squirts of glue when you get down to the actual modding!
Then, confirm that you have done all the previous steps to satisfaction, here's an easy checklist:
- inserted putty in between the drivers and the inside of the cups
- inserted the properly cut-out shelf-liner discs; 4.8cm full radius, 1.0cm centre hole radius, on top of the drivers
- baffle (aluminum ring, as well as foam ring fitted under it) is in, and screws are tight and flush
- Focus-A earpads had their dust filter fabric removed
- Focus-A earpads now have extra slanting from inserting half-circle foam crescents along the back-facing halves of the two pads; make sure they are mirrored symmetrical
- Focus-A earpads now have small foam cutouts filling the four open areas of their bottom mounting plastic rings
If all of the above are checked, it's time to glue down.
Carefully but deliberately, start depositing the silicone glue onto the baffle, approximately 6 mm away from the outer edges of the cups, in a consistent ~2mm-thick strip, as shown in the annotated photo below:

* VERY IMPORTANT: MAKE SURE THAT THERE IS NO GAP OR OVERLY THIN AREAS OF SILICONE GLUE DEPOSITION, AS THEY COULD CAUSE THE FINAL CURED SEAL TO BE INCOMPLETE *
Also, be sure to deposit a bit more of the glue than usual at each of the screws, as they are indented so need more glue volume to stay flush with the rest of the baffles when you cure the glue.
The end result should look like so:

Since RTV silicone adhesive glue like the one I bought, will partially cure in about 20 mins (and fully cure in 24hr), you want to work at a steady pace, but no need to rush and risk messing up.
With 1 cup fully prepped with silicone glue, attach the earpad; BE EXTRA SURE THE EARPAD ORIENTATION HERE IS CORRECT, REFER BACK TO THE START OF PART III IF NEEDED BE!


Thoroughly squeeze the earpad down all around the cups, so that the glue can start its binding process.

If there is a bit of glue extruding somewhere after this, just quickly wipe it off with some paper towel.
Now quickly go on to the other cup, and do the exact same (depositing the glue on the baffle, installing the earpad making sure orientation is correct, and squeezing down all around to reinforce the glue bonding).
With both earpads now on, it is time to set up an overnight glue-curing assembly, so that the silicone glue will cure nicely and form a perfect seal for each earpad.
What I found worked is just heavy textbooks and boxes to bear down on the earpads, BUT because the seal is much improved now, you would risk the diaphragms bursting if you just push down textbooks on top of the earpads.
WHAT TO DO INSTEAD: squeeze down the earpad with your hand as much as you can while leaving the earpad opening open, then with the earpad still depressed down under your fingers, slip the textbook or box over, so that it doesn't generate a positive pressure inside the earpads.
MSPaint pictorial explanation:

Here it how it looked in real life:

Check the next day, should be good to go!

STEP THREE, COMPLETE.
Be aware that there are indentations in the baffle where the tabs at the base of the earpads should precisely slot into. The earpads are always installed in a specific orientation so that the thick part faces toward the back of your head, and the thin part faces forward, with the SEAM running across the outer surface of the earpad facing down toward the ground, near where the cable connectors are. Line up 1 of the tabs to 1 of the baffle indentations, slot it in easily, then slot in an adjacent tab into its respective baffle indentation. That’s two out of 4 tabs in already. For the two tabs still jutting out, use the credit card and gently but firmly push the tabs in until they “snap” and lock in under the baffle. Voila!
(note the indentation on the aluminum baffle, that is where tabs of the earpads should fit directly into, locks the earpads in place for the correct fit)
(with bottom tab of earpad slotted into baffle in the correct orientation, the seam should line up like this with the connector section)
It is now near the end of the mod series, and time to put it all together with the air-tight sealing step using the silicone glue.
First, open up the silicone glue, and get familiar with its rate of glue extrusion - you don't want any surprise squirts of glue when you get down to the actual modding!
Then, confirm that you have done all the previous steps to satisfaction, here's an easy checklist:
- inserted putty in between the drivers and the inside of the cups
- inserted the properly cut-out shelf-liner discs; 4.8cm full radius, 1.0cm centre hole radius, on top of the drivers
- baffle (aluminum ring, as well as foam ring fitted under it) is in, and screws are tight and flush
- Focus-A earpads had their dust filter fabric removed
- Focus-A earpads now have extra slanting from inserting half-circle foam crescents along the back-facing halves of the two pads; make sure they are mirrored symmetrical
- Focus-A earpads now have small foam cutouts filling the four open areas of their bottom mounting plastic rings
If all of the above are checked, it's time to glue down.
Carefully but deliberately, start depositing the silicone glue onto the baffle, approximately 6 mm away from the outer edges of the cups, in a consistent ~2mm-thick strip, as shown in the annotated photo below:
* VERY IMPORTANT: MAKE SURE THAT THERE IS NO GAP OR OVERLY THIN AREAS OF SILICONE GLUE DEPOSITION, AS THEY COULD CAUSE THE FINAL CURED SEAL TO BE INCOMPLETE *
Also, be sure to deposit a bit more of the glue than usual at each of the screws, as they are indented so need more glue volume to stay flush with the rest of the baffles when you cure the glue.
The end result should look like so:
Since RTV silicone adhesive glue like the one I bought, will partially cure in about 20 mins (and fully cure in 24hr), you want to work at a steady pace, but no need to rush and risk messing up.
With 1 cup fully prepped with silicone glue, attach the earpad; BE EXTRA SURE THE EARPAD ORIENTATION HERE IS CORRECT, REFER BACK TO THE START OF PART III IF NEEDED BE!
Thoroughly squeeze the earpad down all around the cups, so that the glue can start its binding process.
If there is a bit of glue extruding somewhere after this, just quickly wipe it off with some paper towel.
Now quickly go on to the other cup, and do the exact same (depositing the glue on the baffle, installing the earpad making sure orientation is correct, and squeezing down all around to reinforce the glue bonding).
With both earpads now on, it is time to set up an overnight glue-curing assembly, so that the silicone glue will cure nicely and form a perfect seal for each earpad.
What I found worked is just heavy textbooks and boxes to bear down on the earpads, BUT because the seal is much improved now, you would risk the diaphragms bursting if you just push down textbooks on top of the earpads.
WHAT TO DO INSTEAD: squeeze down the earpad with your hand as much as you can while leaving the earpad opening open, then with the earpad still depressed down under your fingers, slip the textbook or box over, so that it doesn't generate a positive pressure inside the earpads.
MSPaint pictorial explanation:
Here it how it looked in real life:
Check the next day, should be good to go!
STEP THREE, COMPLETE.

And that is all three steps of the core HE560 Enhancement Mod finished. Congratulations!
--------------------------------------------------------------------------------------------------------------------------------
4) Regrilling mod
Goal:
To minimize the reflection of outward-propagation soundwaves from the drivers back to the ears. Should improve midrange and treble clarity slightly, and reduce upper midrange energy slightly.
Explanation:
The regrilling mod, you probably know about it already. I wouldn't do it on your cans if I end up modding them, but I really like how they reduce HE-560's upper mids energy slightly and push out a bit more airiness. It synergizes well with pretty much any other effective mod on HE-560s.
Modding procedure:
Check my Hifiman Regrilling mod thread Here.
Concluding Remarks
The biggest improvements, I think, are bass, overall tone, and overall clarity.
Bass in general turns into a tour de force; the punch, sheer tautness, skull-numbing rumble and bottom-less extension, perfect in quantity still, meaning bass kicks in big and powerful when the music calls for it. In my personal opinion, it’s one of the most impressive, wholesome bass experiences I’ve experienced yet in headphones; a far cry from stock HE-560s with either earpad variation.
The overall tone gets altered to a degree; it is still neutral as a whole, but now strikes a great balance between still being musical and having a convincing/realistic tonal balance. But of course, tonal balance is heavily subjective, so the signature I like might be what you hate, take it with a grain of salt I guess.
The clarity is pushed up a few notches due to the major acoustic chamber damping overhaul in this mod. I find instrument separation utterly effortless now, it’s quite eerie. The only other headphones where I’ve experienced this “sound emerging out of thin air” effect are ‘stats and LFF’s Code-X, and here is my HE-560 doing something like that too. Nuance and background detail extraction is substantially more effortless due to the damping-based clarity enhancement and better seal.
I would stress that the regrilling mod synergizes really well with this core HE-560 mod; there is very slight residual congestion/slowness with stock grills. Couple the regrilling mod with the total enhancement mod if you can.
No doubt HE-400i owners will be wondering whether this HE560 total enhancement mod will apply equally as well to 400i; to be honest I do not know. If you feel adventurous and have a lot of time, I don’t think it hurts to try it. Let me know how it turns out in this thread! If after a while there is unanimous impression that this simply does / doesn’t work with 400i, I will make a strong note of that in the beginning of this post.
In terms of maintenance, the earpads can be detached still of course, just have to firmly but carefully yank them so that you disengage the adhesive bond due to the silicone glue along the baffles, then using the credit card to pop the tabs out again. The silicone glue should be removable just by peeling it. All other modifications are easily replaced or removable. In the event that the earpad flanges are partly torn off the mounting ring due to to long-term adhesion to the baffles, some arts&crafts glue (not super-glue!) can be used to glue the pads back into stock condition.
Have fun modding!
PAST VERSIONS
v1.0.1
HE-560 Enhancement Mod
v1.0.1
Preface
This is the result of a couple dozen hours of tweaks after the last several months of HE-560 ownership. I’m finally satisfied with the state of the sound now so here is to sharing.
The goal is simple:
To reduce chamber reflections/resonance between the ears and the drivers, perfect the seal / coupling between the earpads and the drivers, but also passively shaping the (most) ideal tonal balance.
Old thoughts about Focus vs Focus-A pads for the purpose of this mod:
Before I go into detail about the actual modifications, I have to clarify with regards to earpad choice. I ended up deciding that Focus pads are better than Focus-As for the sake of this modification treatment, because I realized that Focus pads simply had the better "potential" tonal balance. It has a more meaty lower end, bass and a bit of low midrange, due to the physical differences (solid cylindrical ring of foam instead of a lip), which in turn tilts the overall tonal balance toward a less clinical and more musical tone, ever so slightly but noticeable. Now I made an educated guess that Focus pads' deficiency in terms of its upper mids brightness may simply be due to a lack of proper damping qualities relative to Focus-A's, and I think I'm right.
So ultimately it is a better-toned but worse-damped earpad vs (IMO) worse-toned but better-damped earpad, the former wins because the tonal balance is due to physical limitations, but damping can be altered. Unmodded, I do prefer Focus-As over Focus pads.
So ultimately it is a better-toned but worse-damped earpad vs (IMO) worse-toned but better-damped earpad, the former wins because the tonal balance is due to physical limitations, but damping can be altered. Unmodded, I do prefer Focus-As over Focus pads.
Edit (2014-11-17): Added the Focus-A earpad variant of HE560 Enhancement Mod. After extensive testing I concluded that there is a spot for Focus-A earpads in the final mod structure, depending on users' tastes and preferences.
Summary of mods
There is 3 core components to this mod compilation, one of which has 2 variations; plus 1 optional component:
1) Backwave Damping (Anax-esque direct reflection cancelling)
2) Earpad Enhancement (Extensive enhancement to earpad damping factor + de-filtering)
- Focus-A earpad alternative
3) * Bass & Seal Enhancement (bass improvements, via air-tight earpad-cup coupling/seal)
4) ** Hifiman Regrilling Mod
*Mod #3 SHOULD be done after mods #1 and #2 have been completed to satisfaction!
**Mod #4 will not be described much in this modification write-up, I will link to its own thread.
Tools & Materials
Iris scissors (straight blade, 4-1/2’’ length; a cheap one on Amazon: LINK )

Creatology / off-brand foam sheet (1/16-inch or 0.16cm thick; Could be found in your local Michael’s arts & crafts store, probably somewhere online too; LINK or LINK )

Double-sided clear adhesive tape (non-foam types, can be found in dollar stores though name-brand tapes tend to have higher adhesive strength; I bought something similar to this: LINK )

Con-Tact (R) Grip Excel shelf-liner (non-adhesive) (This specific variation out of 2~3 different grid pattern liners: LINK , I bought it in a Canadian Tire store)

Mini Philips screwdriver (if you don’t have one already, one from this kit will work: LINK )

Focus hybrid earpads (can be ordered from LINK )

ALTERNATIVELY: Focus-A hybrid earpads (can be ordered from LINK)

Ruler (for measuring)
Fine-liner pen, marker (for labeling / outlining)
Hard plastic card (e.g. credit card; for earpad removal / installation)
Regrilling mod materials won’t be covered here. For that, refer to its own Guide Thread instead.
Creatology / off-brand foam sheet (1/16-inch or 0.16cm thick; Could be found in your local Michael’s arts & crafts store, probably somewhere online too; LINK or LINK )
Double-sided clear adhesive tape (non-foam types, can be found in dollar stores though name-brand tapes tend to have higher adhesive strength; I bought something similar to this: LINK )
Con-Tact (R) Grip Excel shelf-liner (non-adhesive) (This specific variation out of 2~3 different grid pattern liners: LINK , I bought it in a Canadian Tire store)
Mini Philips screwdriver (if you don’t have one already, one from this kit will work: LINK )
Focus hybrid earpads (can be ordered from LINK )
ALTERNATIVELY: Focus-A hybrid earpads (can be ordered from LINK)
Ruler (for measuring)
Fine-liner pen, marker (for labeling / outlining)
Hard plastic card (e.g. credit card; for earpad removal / installation)
Regrilling mod materials won’t be covered here. For that, refer to its own Guide Thread instead.
Modding Procedure
1) Backwave Damping
Goal:
To minimize direct reverberations between the plane of the driver and of the face without significant interference with sound wave propagation; part of the puzzle for perfecting the acoustic environment of the drivers when worn. Should improve clarity in the midrange and treble by a small~moderate amount.
Estimated time to completion: 30 minutes ~ 1 hour
Explanation:
One interesting issue with full-sized planar headphones is that the driver face is a large surface area with zero damping, and could account for unwanted reverberation. Older Hifimans were especially problematic in this regard as they had many magnets on a grid running across the inner driver face, which were all flat metal surfaces terrible for acoustics. For that I developed the “Fuzzor mod”. But for HE-560?
Since HE-560 doesn't have inner-facing magnets, I can't do the fuzzer mod. Instead I turned to the material used in Anax’s HD800 mod, shelf-liner, as it is a perfect material to absorb/diffuse backwaves in the enclosed chamber.
Additionally it appears to have a very mild treble-attenuating quality which is quite welcome on HE-560. To my extensive listening, no detail or airiness is lost, which is a surprise, as most other materials I've tried directly on the driver did something bad for treble.
Modding procedure:
The earpads are taken off the headphone via pushing out the 4 tabs under the earpads with a hard plastic card (e.g. a credit card). This exposes the driver, as well as its baffle with 6 screws holding everything together.
Using a mini Phillips screwdriver, unscrew all 6 screws holding the baffle/driver down, both cups. After those screws are all extracted, the baffle rings should come out easily. Take the baffle rings out without disturbing the drivers that are still nestled in the cups. Note that there is a small foam ring fitted under the baffle, don't lose them, they should be put back where they were when we screw the baffles back later in this section.
Using a baffle as a guide, cut out two circular discs from the shelf-liner material about the same size as the baffle. Now trim them by about 5mm all around so that we are sure they will fit well under the baffles.

The shelf-liner discs are now to be sandwiched between the drivers and the baffles/screws. Important: the liner material’s two sides are not identical, you’d want the side with slightly flatter foam bubbles to face down toward the driver, and the side with slightly more bumpy foam bubbles to face away from the drivers. Additionally, you want to orientate the shelf-liner discs so that the grids line up parallel with the driver tracing grids.
(top is bumpier side, bottom is flatter side; minor difference but discernible in real life)

(line up the shelf liner grid, with the driver tracing grid!)
With those orientation details in mind, seat the liner discs down on top of the two drivers. Then carefully seat the baffles (be sure to line up the screw holes properly, as the baffles only have a single correct orientation) on top, and screw in the 6 screws per baffle.


STEP ONE, COMPLETE.
The earpads are taken off the headphone via pushing out the 4 tabs under the earpads with a hard plastic card (e.g. a credit card). This exposes the driver, as well as its baffle with 6 screws holding everything together.
Using a mini Phillips screwdriver, unscrew all 6 screws holding the baffle/driver down, both cups. After those screws are all extracted, the baffle rings should come out easily. Take the baffle rings out without disturbing the drivers that are still nestled in the cups. Note that there is a small foam ring fitted under the baffle, don't lose them, they should be put back where they were when we screw the baffles back later in this section.
Using a baffle as a guide, cut out two circular discs from the shelf-liner material about the same size as the baffle. Now trim them by about 5mm all around so that we are sure they will fit well under the baffles.
The shelf-liner discs are now to be sandwiched between the drivers and the baffles/screws. Important: the liner material’s two sides are not identical, you’d want the side with slightly flatter foam bubbles to face down toward the driver, and the side with slightly more bumpy foam bubbles to face away from the drivers. Additionally, you want to orientate the shelf-liner discs so that the grids line up parallel with the driver tracing grids.
(line up the shelf liner grid, with the driver tracing grid!)
With those orientation details in mind, seat the liner discs down on top of the two drivers. Then carefully seat the baffles (be sure to line up the screw holes properly, as the baffles only have a single correct orientation) on top, and screw in the 6 screws per baffle.
STEP ONE, COMPLETE.
--------------------------------------------------------------------------------------------------------------------------------
2) Earpad Enhancement
Goal:
To maximize intrinsic damping qualities of the Focus hybrid earpads and remove unnecessary material; part of the puzzle for perfecting the acoustic environment of the drivers when worn. Should improve clarity in the midrange and treble by a substantial amount, as well as adjusting the midrange tone to be more realistic.
Estimated time to completion: 1.5 hours ~ 3 hours
Explanation:
This reminds me of the old story of how I came to do the Jergpad mod. I found the velour earpads more technically capable and clean, but pleathers had my more favourable tonal balance, so I tried to “fix” the pleather earpads so they get close to velours’ clarity but still retain the tonal strength. A similar case here, though Focus and Focus-A pads are MUCH, MUCH closer in balance and clarity than between the two older Hifiman earpads.
Building on my elaboration on why I ended up choosing the Focus pads, to increase their damping factor is quite simple – significantly higher coverage of damping holes.
Conveniently HFM already punched the inner cylinder surfaces with (not very effective) pinholes, which are perfect for guiding the cutting of perfectly-spaced, nicely-shaped, much larger holes.
Additionally a circle of holes are cut at the bottom-facing surfaces of the pads so that all leather parts of the earpad internal exposed areas are considerably damped. All the hole-cutting is done easily with surgical iris scissors and some patience.
Prior to all this hole-cutting, the earpads were first "de-filtered", meaning the dust filter is completely trimmed off. This is for two reasons: one that it allows better access to the earpads so the hole-cutting is easier, and two that the earpads don't actually need the earpad dust filter as the driver already has a dust filter integrated into its inner face. Sonic-wise removing the dust filter doesn't do anything significant, besides making the upper extremes of treble ever so slightly clearer.
Modding procedure:
Assuming you learned how to remove the earpads from the cups from the prior mod, the earpads are now detached and by themselves.
First things first: removal of the dust filter fabric. This is done easily by using the iris scissors: flip the earpads over in the hand so the mounting ring faces up, then using one hand to pull back the elastic dust screen back, the other hand controls the iris scissor and makes tight cuts near the corners where you’ve pulled back the dust screen fabric. This is done carefully all around, through the holes in the plastic at and between the mounting ring tabs, then the bits of fabric between the cuts are also trimmed with care. After some elbow grease you should be able to trim out the dust screens from both Focus hybrid earpads.
Before we get to the bulk of hole-cutting, a ring of holes around the bottom-facing areas of the earpads are first cut out. Using a marker, mark out 16 evenly spaced holes like in the photo shown below: 4 lined up to the tabs, 4 lined up to the holes between the tabs, and another 8 spaced between these holes.
The iris scissors should make short work of cutting these holes, just lightly fold up the area where you want a hole cut, and do a “V” cut into the material using the iris scissors; then do another “V” cut opposite to the V to make a diamond incision; trim the flab of material off if it is still attached.


With the 16 bottom holes per earpad cut out, now we get to the meat of the hole-cutting: expanding the damping holes on the cylindrical surfaces of the earpads.
WARNING: this requires quite a bit of patience, focus, and persistence. And more patience.
Okay, now that you know what to expect, here we go. The gist of it is that we want to cut out diamonds and triangular holes, with the existing pin hole grid as a guide. I found the best and most evenly-distributing hole pattern, the diaphragm of that is shown in a photo below. I start at the very thickest part of the earpad, where there should be exactly FIVE rows of pinholes. This allows for a full diamond plus two half-diamonds to be cut out, as I show in a photo below. From there it is basically just a careful expansion of the exact same repeating pattern of diamonds / half-diamond holes expanded across the whole circumference of the earpads. Use the iris scissors gently as “tweezers” (this is why I love these scissors, they save the trouble of switching between scissors and tweezers in situations like this) to pick away every piece I cut off, so that they do not fall into the space between the pleather and the foam inside.

(the patterns are a bit different with the diagram than with what I actually cut; basically just start at the thickest part with the indicated pattern, and propagate the pattern throughout the inner surface of the pad, should be fairly intuitive)


STEP TWO, COMPLETE.
First things first: removal of the dust filter fabric. This is done easily by using the iris scissors: flip the earpads over in the hand so the mounting ring faces up, then using one hand to pull back the elastic dust screen back, the other hand controls the iris scissor and makes tight cuts near the corners where you’ve pulled back the dust screen fabric. This is done carefully all around, through the holes in the plastic at and between the mounting ring tabs, then the bits of fabric between the cuts are also trimmed with care. After some elbow grease you should be able to trim out the dust screens from both Focus hybrid earpads.
Before we get to the bulk of hole-cutting, a ring of holes around the bottom-facing areas of the earpads are first cut out. Using a marker, mark out 16 evenly spaced holes like in the photo shown below: 4 lined up to the tabs, 4 lined up to the holes between the tabs, and another 8 spaced between these holes.
The iris scissors should make short work of cutting these holes, just lightly fold up the area where you want a hole cut, and do a “V” cut into the material using the iris scissors; then do another “V” cut opposite to the V to make a diamond incision; trim the flab of material off if it is still attached.
With the 16 bottom holes per earpad cut out, now we get to the meat of the hole-cutting: expanding the damping holes on the cylindrical surfaces of the earpads.
WARNING: this requires quite a bit of patience, focus, and persistence. And more patience.
Okay, now that you know what to expect, here we go. The gist of it is that we want to cut out diamonds and triangular holes, with the existing pin hole grid as a guide. I found the best and most evenly-distributing hole pattern, the diaphragm of that is shown in a photo below. I start at the very thickest part of the earpad, where there should be exactly FIVE rows of pinholes. This allows for a full diamond plus two half-diamonds to be cut out, as I show in a photo below. From there it is basically just a careful expansion of the exact same repeating pattern of diamonds / half-diamond holes expanded across the whole circumference of the earpads. Use the iris scissors gently as “tweezers” (this is why I love these scissors, they save the trouble of switching between scissors and tweezers in situations like this) to pick away every piece I cut off, so that they do not fall into the space between the pleather and the foam inside.
(the patterns are a bit different with the diagram than with what I actually cut; basically just start at the thickest part with the indicated pattern, and propagate the pattern throughout the inner surface of the pad, should be fairly intuitive)
STEP TWO, COMPLETE.
(NEW!) Alternative:
A perfectly viable alternative here is to use Focus-A hybrid earpads instead of Focus earpads. The key difference in modding procedure is that, for Focus-A earpads, you only need to trim out the dust filter fabric, and can skip all the subsequent work in cutting holes in the earpad inner lining, as Focus-A earpads are already adequately damped by design.
Key differences between these two variants:
Fully-modded Focus pads allow for:
- More meaty bass
- More engaging and forward midrange
- Treble more detail-heavy and resolving
Focus-A pads allow for:
- Lighter, more focused bass
- More effortless and even-sounding mids
- Treble more laid-back and open
So in short, two slightly different flavours of the same brand, pick your favourite.
--------------------------------------------------------------------------------------------------------------------------------
3) Bass & Seal Enhancement
Goal:
To maximize the driver-earpad coupling for optimal bass conduction, and introduce a near air-tight seal between the earpads, cups, and face for optimal sub-bass propagation; part of the puzzle for perfecting the acoustic environment of the drivers when worn. Should improve bass tactility and solidity substantially, improve sub-bass extension substantially, and improve overall bass / lower midrange clarity substantially. Also may introduce a minor warm “tilt” to the overall tonal balance of the sound signature.
Estimated time to completion: 1 hour ~ 2.5 hours
Explanation:
This is to round off the whole core enhancement mod and put the final piece into the puzzle of improving the acoustic chamber between the ears and the drivers. First the earpads are angled slightly more, by cutting out two half-circle crescents of foam and inserting them into the back-half of the earpads, and then to adhere four cutouts of foam into the four open slots in the mounting ring; the angling allows for slightly deeper soundstaging and to make 100% sure the ears don't touch the shelf liner papules, while the foam cutouts allow for the earpads to have better physical coupling to the cup baffles.
To really perfect the earpad-driver coupling for the sake of perfecting HE560's bass response, extensive application of double-sided adhesive tape is used along the baffles of the cups, much like how Audeze does their earpad installation. The foam cutouts used to fill the holes in the mounting ring further enhance this earpad-cup coupling. If done right, there should be a near-perfect seal between the ears, the earpads, and the cups when the headphones are worn. This is the key to utter bass/sub-bass clarity and tautness I found, some tough song segments (an obvious one being the sub-bassy part of the first track of The Dark Knight OST, with the industrial drums in the background) are rendered with such clarity and authority it was mindblowing. This improved bass/sub-bass clarity carries into every other song I've listened to too. Sub-bass is about as extended as HE560 drivers are capable of I think, that is to say, bottomless in practice. In any track that demands “grand” bass, now HE560s can deliver that sheer scale, whereas before they only go half-way.
Modding procedure:
Before you do anything here, a quick interruption reminding you to practice reinstalling the earpads after they’ve been detached from the cups.
Be aware that there are indentations in the baffle where the tabs at the base of the earpads should precisely slot into. The earpads are always installed in a specific orientation so that the thick part faces toward the back of your head, and the thin part faces forward, with the SEAM running across the outer surface of the earpad facing down toward the ground, near where the cable connectors are. Line up 1 of the tabs to 1 of the baffle indentations, slot it in easily, then slot in an adjacent tab into its respective baffle indentation. That’s two out of 4 tabs in already. For the two tabs still jutting out, use the credit card and gently but firmly push the tabs in until they “snap” and lock in under the baffle. Voila!

(note the two tiny pegs on the baffle, that is where two of the four tabs of the earpads should fit directly into, locks the earpads in place for the correct fit)
(with bottom tab of earpad slotted into baffle in the correct orientation, the seam should line up like this with the connector section)
The first part of Step 3 further concerns modding on the earpads; so be sure you have already successfully completed all of Step 2) ‘earpad de-filtering/hole-cutting’.
You have? Okay. The key here is to insert a crescent shaped foam piece into the thicker halves of each earpad to give them slightly more angling, then to adhere specifically cut-out foam pieces into the large holes in the mounting ring using double-sided tape.
To create the crescent shaped foam piece, use an earpad as a guide to draw out a precise circle the radius of the earpad on the creatology foam, then trim that circle out into a disc using scissors. From there on, cut that disc exactly into two halves. Then mark out a spacing of approx. 1 cm from the outer circumference of these two half-discs, and trim them into 1 cm-wide crescents using these guides. Try fitting these crescent foam pieces into the thicker half of the earpads between the mounting ring and the undersides of the pads; if the crescent is slightly too large / too wide, trim as per needed.
The foam cut-out pieces that fill the holes in the mounting ring will be shaped exactly like those holes, so what I did was trace the hole onto a piece of cardboard, and using that as a template to cut out the 8 identical foam pieces. Then I individually adhered each piece onto a segment of double-sided tape, and trimmed the tape to the shape of the piece, peeled the tape protective liner off, and adhered the foam piece into the mounting ring hole. Two of the 4 foam pieces will be directly adhered onto the crescent foam insert piece, which is good as it locks the crescent piece in place. The end result should be that the four foam pieces are flush with the base surface of the mounting ring, and they will provide more thorough coupling between the baffle and the earpad assembly.
(can use any hard material to make the template)
(just cut a piece of double-sided tape out (with its liner intact), stick the foam piece on, and trim the excess tape)
Lastly, it is time to put it all together with the air-tight sealing step. Taking the double-sided tape, I lay them onto the baffles carefully, and use the fine-liner pen to outline where I need to trim the tape. Then I carefully rip the tape off and trim accordingly. The trimmed tape is then re-adhered onto the baffle; here I leave the liner in place temporarily so that it’s not so sticky as I work on tape coverage over the rest of the baffle. The same is done around the whole baffle, requiring a total of 8 pieces of carefully trimmed tape pieces. Examine the complete tape coverage carefully, be sure there is a complete 360-degree tape coverage without spaces between tape pieces. Pressure and massage the tape liners so that the double-sided adhesive tape underneath binds without air bubbles.
WARNING: this part may become frustrating if the tape really likes to stick to its own kind, so just be very careful when trimming and piecing together the tape pieces on the baffle surface.


With the full coverage of double-sided tape across the baffles, the fully-modded earpads will now be re-installed onto the cups, and the double-sided tape on the baffles will be allowed to fully bond the earpads to the cups, creating an air-tight seal around the earpad-cup interface, as well as perfect contact between the two components.
Remember my short tutorial on how to reinstall the earpads with credit card? Here the same is done, except you must be at least ten times more careful and vigilant!
WARNING: this part can be by far the most frustrating step in the whole mod, as a small mishap in lining up the earpads or the credit card improperly will result in a lot of things sticking together where you don’t want to. Proceed through it with utmost care.
Remove all the double-sided tape protective liners to reveal the raw adhesive tape underneath. Slot in the first of 4 tabs into its correct baffle indentation, BE SURE to push it in as much as possible before the tape near that tab/indentation starts adhering in its full strength. Slot the second tab in too. For the last 2 tabs, keep the credit card up against the base of the earpads, and away as much as you can from touching the baffle/adhesive tape, as you try to push the tab into the indentation of the baffle. You can do it!

You did it! Cheers! At this point, you can just thoroughly squeeze the earpads down all around the cups, so that the double-sided tape bonds the earpad to the baffle in its entirety.
STEP THREE, COMPLETE.
Be aware that there are indentations in the baffle where the tabs at the base of the earpads should precisely slot into. The earpads are always installed in a specific orientation so that the thick part faces toward the back of your head, and the thin part faces forward, with the SEAM running across the outer surface of the earpad facing down toward the ground, near where the cable connectors are. Line up 1 of the tabs to 1 of the baffle indentations, slot it in easily, then slot in an adjacent tab into its respective baffle indentation. That’s two out of 4 tabs in already. For the two tabs still jutting out, use the credit card and gently but firmly push the tabs in until they “snap” and lock in under the baffle. Voila!
(note the two tiny pegs on the baffle, that is where two of the four tabs of the earpads should fit directly into, locks the earpads in place for the correct fit)
(with bottom tab of earpad slotted into baffle in the correct orientation, the seam should line up like this with the connector section)
The first part of Step 3 further concerns modding on the earpads; so be sure you have already successfully completed all of Step 2) ‘earpad de-filtering/hole-cutting’.
You have? Okay. The key here is to insert a crescent shaped foam piece into the thicker halves of each earpad to give them slightly more angling, then to adhere specifically cut-out foam pieces into the large holes in the mounting ring using double-sided tape.
To create the crescent shaped foam piece, use an earpad as a guide to draw out a precise circle the radius of the earpad on the creatology foam, then trim that circle out into a disc using scissors. From there on, cut that disc exactly into two halves. Then mark out a spacing of approx. 1 cm from the outer circumference of these two half-discs, and trim them into 1 cm-wide crescents using these guides. Try fitting these crescent foam pieces into the thicker half of the earpads between the mounting ring and the undersides of the pads; if the crescent is slightly too large / too wide, trim as per needed.
The foam cut-out pieces that fill the holes in the mounting ring will be shaped exactly like those holes, so what I did was trace the hole onto a piece of cardboard, and using that as a template to cut out the 8 identical foam pieces. Then I individually adhered each piece onto a segment of double-sided tape, and trimmed the tape to the shape of the piece, peeled the tape protective liner off, and adhered the foam piece into the mounting ring hole. Two of the 4 foam pieces will be directly adhered onto the crescent foam insert piece, which is good as it locks the crescent piece in place. The end result should be that the four foam pieces are flush with the base surface of the mounting ring, and they will provide more thorough coupling between the baffle and the earpad assembly.
(can use any hard material to make the template)
Lastly, it is time to put it all together with the air-tight sealing step. Taking the double-sided tape, I lay them onto the baffles carefully, and use the fine-liner pen to outline where I need to trim the tape. Then I carefully rip the tape off and trim accordingly. The trimmed tape is then re-adhered onto the baffle; here I leave the liner in place temporarily so that it’s not so sticky as I work on tape coverage over the rest of the baffle. The same is done around the whole baffle, requiring a total of 8 pieces of carefully trimmed tape pieces. Examine the complete tape coverage carefully, be sure there is a complete 360-degree tape coverage without spaces between tape pieces. Pressure and massage the tape liners so that the double-sided adhesive tape underneath binds without air bubbles.
WARNING: this part may become frustrating if the tape really likes to stick to its own kind, so just be very careful when trimming and piecing together the tape pieces on the baffle surface.
With the full coverage of double-sided tape across the baffles, the fully-modded earpads will now be re-installed onto the cups, and the double-sided tape on the baffles will be allowed to fully bond the earpads to the cups, creating an air-tight seal around the earpad-cup interface, as well as perfect contact between the two components.
Remember my short tutorial on how to reinstall the earpads with credit card? Here the same is done, except you must be at least ten times more careful and vigilant!
WARNING: this part can be by far the most frustrating step in the whole mod, as a small mishap in lining up the earpads or the credit card improperly will result in a lot of things sticking together where you don’t want to. Proceed through it with utmost care.
Remove all the double-sided tape protective liners to reveal the raw adhesive tape underneath. Slot in the first of 4 tabs into its correct baffle indentation, BE SURE to push it in as much as possible before the tape near that tab/indentation starts adhering in its full strength. Slot the second tab in too. For the last 2 tabs, keep the credit card up against the base of the earpads, and away as much as you can from touching the baffle/adhesive tape, as you try to push the tab into the indentation of the baffle. You can do it!
You did it! Cheers! At this point, you can just thoroughly squeeze the earpads down all around the cups, so that the double-sided tape bonds the earpad to the baffle in its entirety.
STEP THREE, COMPLETE.
And that is all three steps of the core HE560 Enhancement Mod finished. Congratulations!
--------------------------------------------------------------------------------------------------------------------------------
4) Regrilling mod
Goal:
To minimize the reflection of outward-propagation soundwaves from the drivers back to the ears. Should improve midrange and treble clarity slightly, and reduce upper midrange energy slightly.
Explanation:
The regrilling mod, you probably know about it already. I wouldn't do it on your cans if I end up modding them, but I really like how they reduce HE-560's upper mids energy slightly and push out a bit more airiness. It synergizes well with pretty much any other effective mod on HE-560s.
Modding procedure:
Check my Hifiman Regrilling mod thread Here.
Concluding Remarks
The biggest improvements, I think, are bass, overall tone, and overall clarity.
Bass in general turns into a tour de force; the punch, sheer tautness, skull-numbing rumble and bottom-less extension, perfect in quantity still, meaning bass kicks in big and powerful when the music calls for it. In my personal opinion, it’s one of the most impressive, wholesome bass experiences I’ve experienced yet in headphones; a far cry from stock HE-560s with either earpad variation.
The overall tone gets altered to a degree; it is still neutral as a whole, but now strikes a great balance between still being musical and having a convincing/realistic tonal balance. The thickness now lies right between Focus pads (which I find slightly rounded) and Focus-A pads (slightly thin). I found myself being able to keep the volume lower, yet achieving better PRaT and “boogey” factor than before. The timbre with instruments was impressive before, now it’s exquisite due to this tonal improvement, as well as the clarity improvement. But of course, tonal balance is heavily subjective, so the signature I like might be what you hate, take it with a grain of salt I guess.
The clarity is pushed up a few notches due to the major acoustic chamber damping overhaul in this mod. I find instrument separation utterly effortless now, it’s quite eerie. The only other headphones where I’ve experienced this “sound emerging out of thin air” effect are ‘stats and LFF’s Code-X, and here is my HE-560 doing something like that too. Nuance and background detail extraction is substantially more effortless due to the damping-based clarity enhancement and better seal.
I would stress that the regrilling mod synergizes really well with this core HE-560 mod; there is very slight residual congestion/slowness with stock grills. Couple the regrilling mod with the total enhancement mod if you can.
No doubt HE-400i owners will be wondering whether this HE560 total enhancement mod will apply equally as well to 400i; to be honest I do not know. If you feel adventurous and have a lot of time, I don’t think it hurts to try it. Let me know how it turns out in this thread! If after a while there is unanimous impression that this simply does / doesn’t work with 400i, I will make a strong note of that in the beginning of this post.
In terms of maintenance, the earpads can be detached still of course, just have to firmly but carefully yank them so that you disengage the adhesive bond due to the double-sided tape along the baffles, then using the credit card to pop the tabs out again. The double-sided tape should be removable with some rubbing alcohol and vigorous wiping. All other modifications are easily replaced or removable. In the event that the earpad flanges are partly torn off the mounting ring due to to long-term adhesion to the baffles, some arts&crafts glue (not super-glue!) can be used to glue the pads back into stock condition.
Have fun modding!

")


