Bottlehead Amplifier Discussion / Comparison Thread: Crack, SEX & Mainline
Apr 18, 2014 at 6:43 PM Post #571 of 2,108
  Ah, you are putting me on the spot 
wink_face.gif
. I think the balanced cable I made for the HD600/650 was made from continuous cast copper with a Teflon insulator. The stock HD600 cable is whimpy enough that just about any other cable makes an improvement. We sold the Cardas single ended HD600 cable for a while. It was slighty modded with a right angle TRS plug and it was quite a bit better than the stock cable.
 
At Can Jam a couple years ago I got to hear the then brand new Cardas balanced cable for the HD800. I thought it was a nice if not huge step up from the quite good stock HD800 cable. Recently I built a balanced cable of my own - maybe from Mogami mic cable? Can't recall. Anyway, the difference between it and the stock cable was again not very big. 

I was just curious that's all ,my apologies . I bought some 20 GAUGE silver plated solid copper/Teflon insulated NOS hook up wire for Crack and was wondering if this is good choice in case I want to build my own headphone cables 
Thanks 
 
Apr 18, 2014 at 8:01 PM Post #572 of 2,108
  I was just curious that's all ,my apologies . I bought some 20 GAUGE silver plated solid copper/Teflon insulated NOS hook up wire for Crack and was wondering if this is good choice in case I want to build my own headphone cables 
Thanks 

 
I know it's not answering your question, but is that solid core wire? Most of the Bottlehead wiring is solid core. If I had to use stranded wire as hookup wire for the S.E.X I probably would've shot myself a few times.
 
On second thought that's probably an over-exaggeration. Nothing compares to soldering those bloody rectifiers.
 
Apr 19, 2014 at 12:31 AM Post #573 of 2,108
   
I know it's not answering your question, but is that solid core wire? Most of the Bottlehead wiring is solid core. If I had to use stranded wire as hookup wire for the S.E.X I probably would've shot myself a few times.
 
On second thought that's probably an over-exaggeration. Nothing compares to soldering those bloody rectifiers.

 
LOL that's so true - those rectifiers are a nightmare!!
 
Apr 19, 2014 at 12:14 PM Post #574 of 2,108
My Bottlehead inspired headphone stand and a second life for an old tube, the base looks like its solid copper and the tube weighs in at 5.5kg. The top section is wrapped in copper foil when I find a offcut of solid copper tube I can polish up it will get swapped over.


Apr 23, 2014 at 7:21 AM Post #576 of 2,108
  I was just curious that's all ,my apologies . I bought some 20 GAUGE silver plated solid copper/Teflon insulated NOS hook up wire for Crack and was wondering if this is good choice in case I want to build my own headphone cables 
Thanks 

 
I'm not sure solid core is the best for a headphone cable since it's rigid and quite fragile if bent.
 
Apr 25, 2014 at 9:15 PM Post #577 of 2,108
Update Time!
 
I installed a new attenuator the other night in my Bottlehead S.E.X. and have now had a chance to listen to the setup for a little while. There's no doubt that it's a significant improvement. As others have reported, the key differences from the stock potentiometer are better transparency and detail. I feel like the textures of recordings and things like breathiness in vocals, etc. are now more accurately and clearly rendered through the S.E.X.
 
My attenuator of choice was a Chinese stepped attenuator assembled using high quality Dale resistors. The attenuator arrived from the eBay seller with some minor damage due to being crushed. The wire ring around the bottom of the attenuator was bent and snapped between 2 of the resistors, but was relatively easy to fix with some gentle bending and then some solder. Hopefully it will hold up in the long term, but I at least I'll know exactly where to look first if there are ever any issues. The seller kindly provided a partial refund to cover the inconvenience.
 
The new attenuator is a little bit stiffer to turn than I like, but I can deal with that in return for the more open sound it's providing.
 
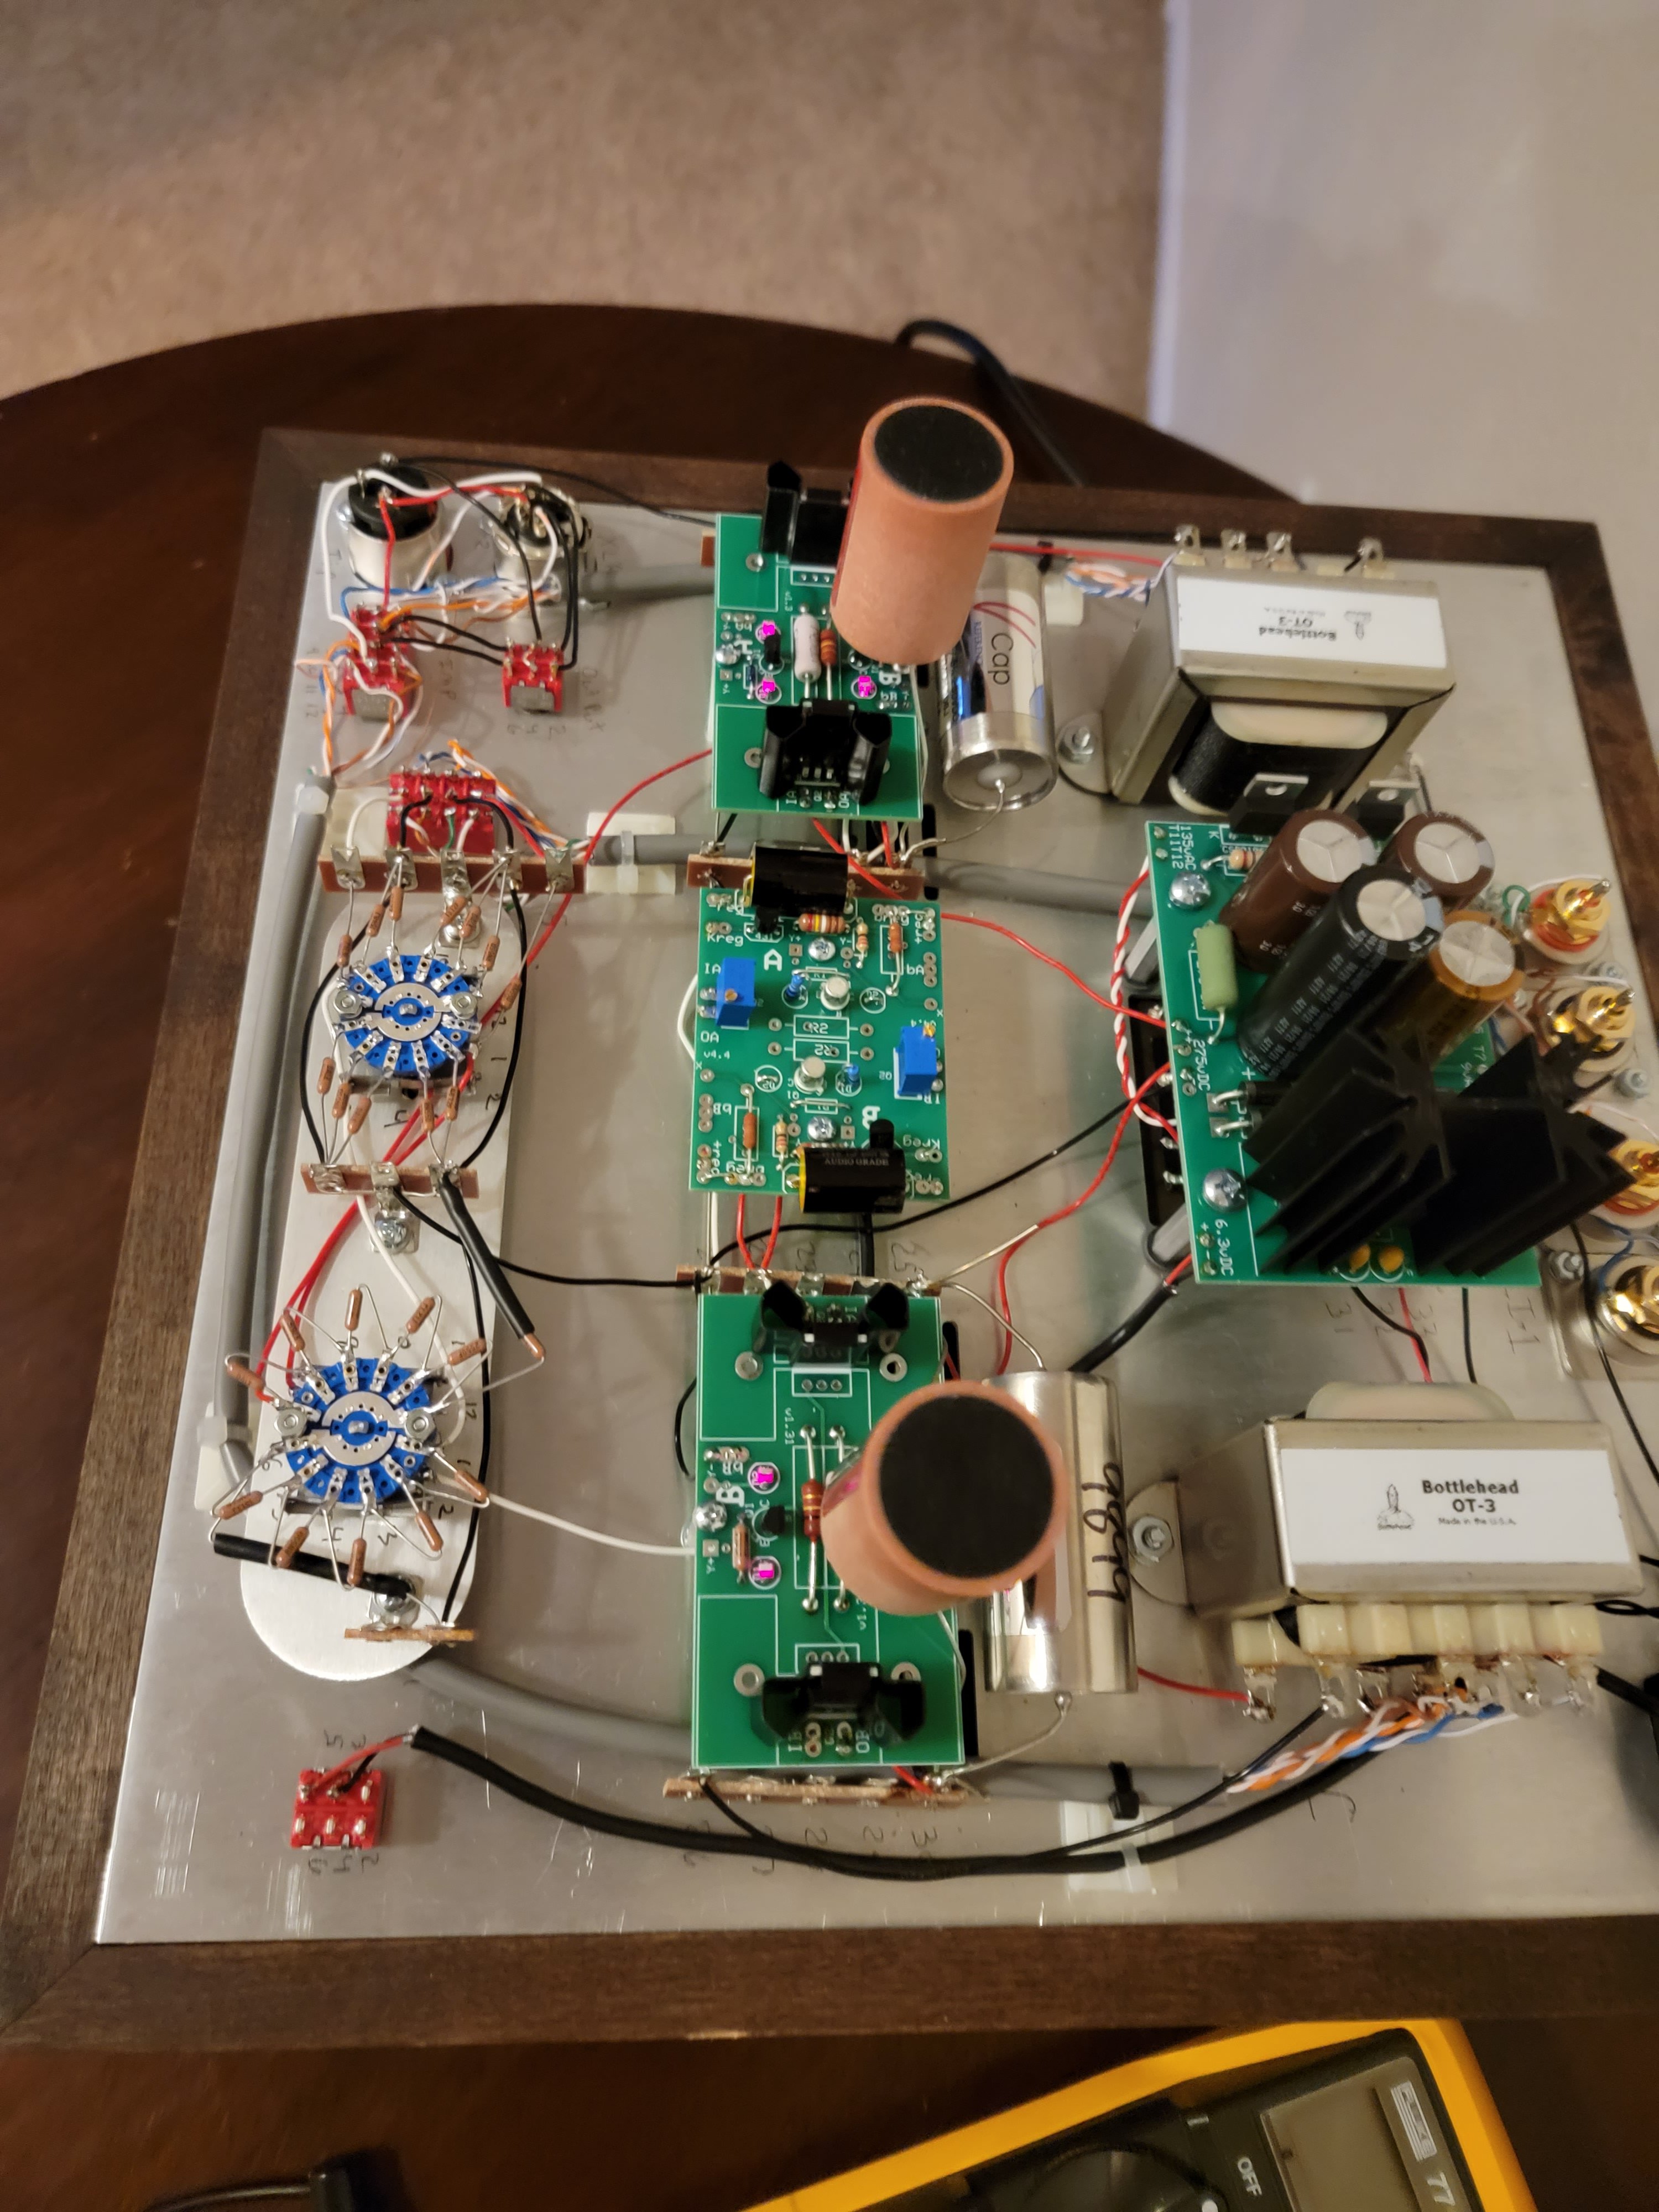
Here are some pics. The first one shows the attenuator design and you can see the wire ring that broke in transit (at the top of the attenuator in this image)


In order to install the attenuator properly I had to grind out a little bit of extra length and width in the chassis slot for the locking tab on the attenuator.


The stock volume knob now sits a little high so I might go looking for a vintage looking knob with a slightly recessed underside. If anyone knows good places to source vintage-looking knobs, please let me know.


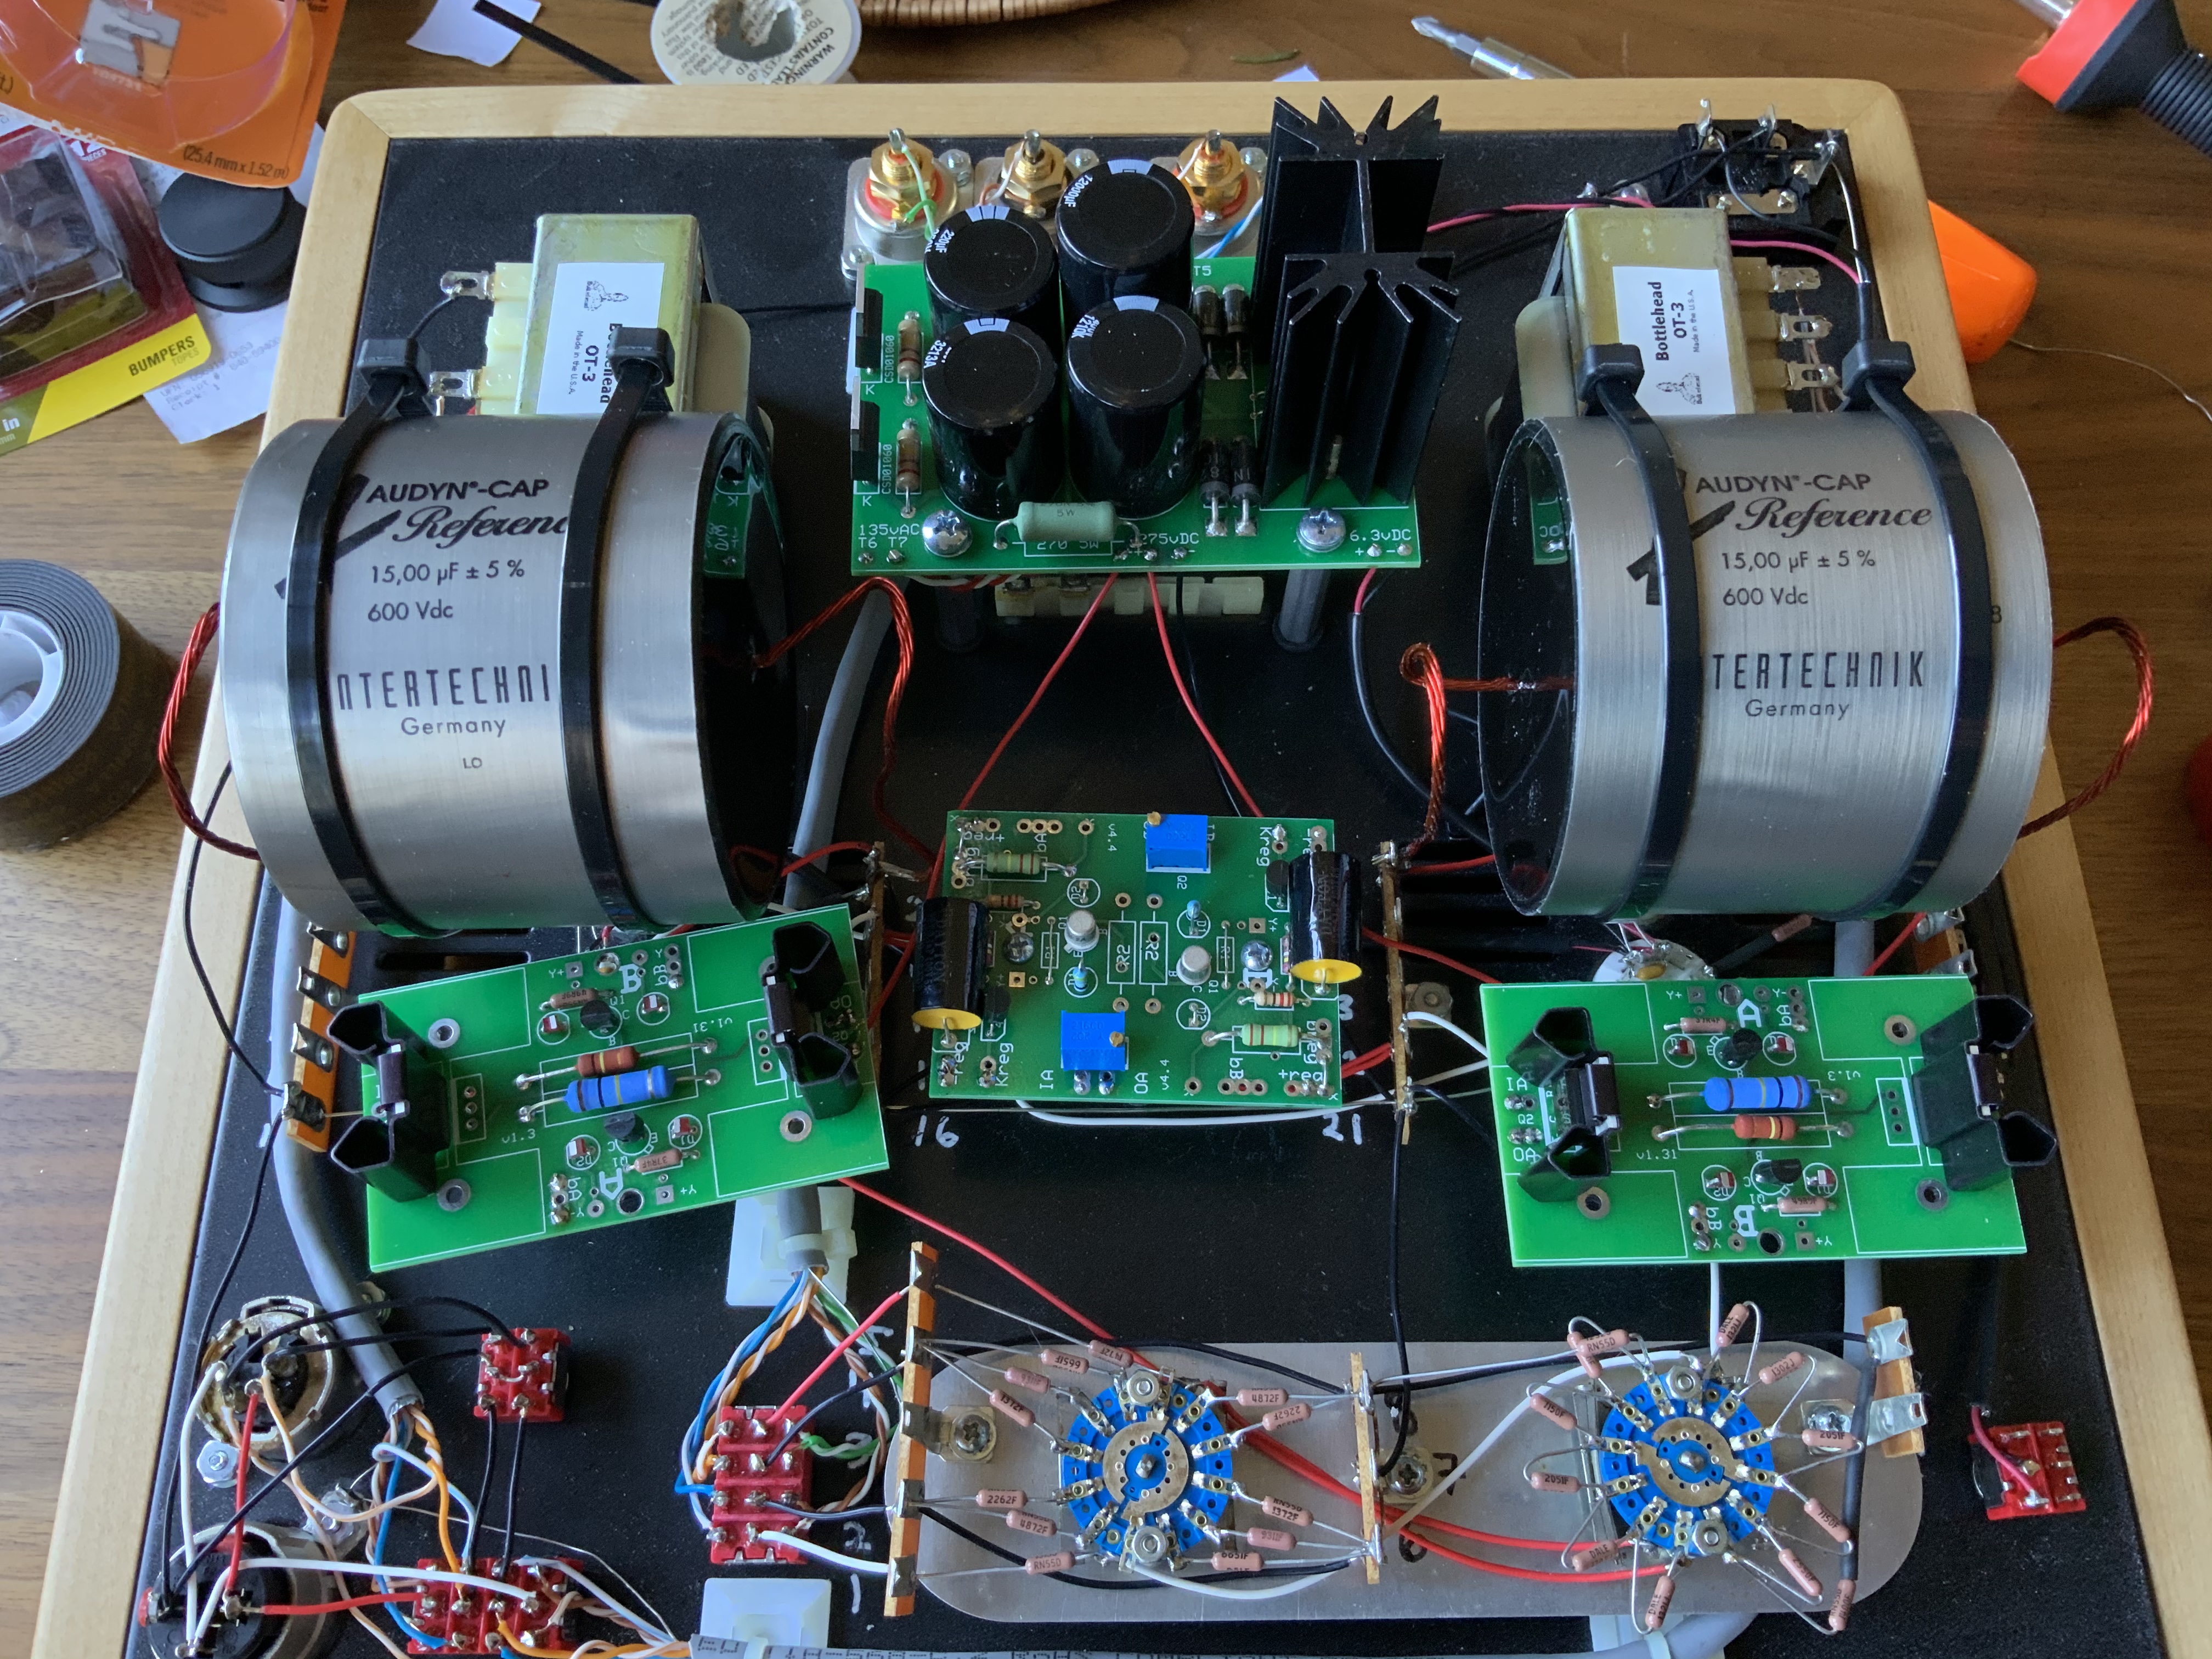
The fly-leads on the attenuator made connection really easy because I wasn't limited by the length of the existing cables. There are now a couple of loops of extra cable hanging down from the chassis, but they don't extend much further than the height of the C4S board so it's not at risk of being snagged on anything and it's not visible.


In addition to heat-shrinking the connections between the existing wiring and the attenuator fly leads, I also wrapped each bundle (left and right channels) in electrical tape to protect the drain wire connections from the stock wiring configuration.


I can highly recommend this modification. My assembled attenuator was just $50 from eBay and is easily the best improvement I've found for a Bottlehead kit other than Bottlehead's own upgrades (Speedball / C4S). Of course, this upgrade would not work (nor be required) for the Mainline, just the Crack, S.E.X., or Quickie.
 
Apr 25, 2014 at 11:27 PM Post #580 of 2,108
As you make upgrades to the Crack and SEX it would be interesting to hear how they compare to the Mainline.

Thanks for your continuing service to the community.

 
Good point, Nathan!
 
Currently, I would say that the original comparisons I made still ring true with the S.E.X. just being slightly more revealing now.
 
I'm literally about to walk into my living room now to plan (and possibly complete) the installation of some Mundorf output caps. I'll be sure to do some A/B comparisons with the Mainline once that's done...
 
Apr 26, 2014 at 1:00 AM Post #582 of 2,108
Ummm... OK, this just got interesting!
 
First, let me explain what I've just done with a few pics...
 
I've now removed the output caps which are these 1.5uF ones (one per side):


Thankfully, the existing connections are fairly easy to access to remove the original capacitors. These images show the right side (when looking at the bottom of the chassis). The left side is slightly more challenging, but still very doable:


The Mundorf capacitors I used have very stiff, bare metal leads so I have sheathed each of the leads with heat-shrink prior to installation and left the leads at full length to hold the caps at a good distance from other components. It's getting a bit crowded, but nothing that's concerning.


Here's what the finished product looks like:


Now, the sound... I wish I'd installed these caps ages ago!!
 
Instantly the sound is richer in the mid-range and subtle details are more present and tangible. I want to give the system a chance to settle in before I make any wild, sweeping generalisations, but early impressions are that this is an incredibly worthwhile investment of time and money. A quick test with the beyer T1s showed that the Mainline still maintains an edge and superiority over the S.E.X. - the treble and staging / imaging in particular is where the Mainline still has a clear advantage, but the new caps have brought the S.E.X.'s sound to a new level and it is now incredible when paired with the HE-500s.
 
Prior to upgrading the attenuator and caps, I had started to prefer my Matrix Quattro as an amp for the HE-500s, but the Quattro is once again on the shelf now that the S.E.X. has hit this new level.
 
I'll return with more detailed comparisons of the hot-rodded S.E.X. vs the stock Mainline in the coming days.
 
Apr 26, 2014 at 3:51 AM Post #585 of 2,108
  The new attenuator is a little bit stiffer to turn than I like, but I can deal with that in return for the more open sound it's providing.


This is one area where the more expensive DACT attenuators with their Swiss Elma switches are at an advantage.  They have a lighter torque setting giving an easier, smoother action. It may not bother you, unless you're one for always making fine adjustments.


Users who are viewing this thread

Back
Top