You are using an out of date browser. It may not display this or other websites correctly.
You should upgrade or use an alternative browser.
You should upgrade or use an alternative browser.
Reviews by jeromeoflaherty
Filters
Show only:
Loading…
jeromeoflaherty
100+ Head-Fier

Pros: Excellent gaming focused tuning with accurate imaging, decent bass and treble.
Midrange forward tuning
2 Cables one analog and one digital
Boom-mic and microphone on analog cable for in-game communication
Midrange forward tuning
2 Cables one analog and one digital
Boom-mic and microphone on analog cable for in-game communication
Cons: Usb-c cable is very long and tangles very easily (especially with boom-mic attached)
Unnatural Midrange tonality
Boom-mic might cause seal or fit issues (at least it did for me)
Unnatural Midrange tonality
Boom-mic might cause seal or fit issues (at least it did for me)
A versatile Gaming focused IEM with lots of tricks
The EPZ G20 is a versatile in-ear monitor that successfully bridges the gap between gaming audio and audiophile listening. Designed primarily as a gaming IEM, it offers a detailed sound signature focused on accurate imaging—a crucial feature for competitive gaming where positional audio cues can make all the difference. However, for me what makes this a special IEM ifs capabilities of the 2nd cable provided a DSP enabled usb-c cable.
So I having been listening to the G20 for a few weeks, for me, what truly elevates the G20 to a higher level of versatility is usb-c cable both for gaming (as it’s easy to load gaming-specific PEQ profiles on it) but also for normal audio as the excellent channel matching and decent ‘stock’ sound profile can be easily tailored using the PEQ to personal tastes.
So, this review, like many of my recent reviews, is more focusing on the PEQ capabilities of these devices. The G20 is an excellent example, where a cable that is compatible with the Walkplay PEQ application and my new “DevicePEQ” tool can easily be pushed to new levels.
I would like to thank EPZ for providing the G20 for this review and assist in testing the new ‘Device PEQ’ feature that I am developing.
If you are interested in finding more information about this product, you can find it at AliExpress
With the current tariff changes it will be hard to know the exact costs, but it is about €50 to deliver to Europe.
So, while I am impressed with the EPZ G20, there are a few things that I will highlight in this review that might be useful information before you buy one. However, before I get into those details, let’s see what you get in the box.Unboxing and Build Quality
The EPZ G20 comes in a nice box with a typical Waifu girl on the cover, with some ‘hints’ at its gaming-focused design while audiophile appeal:
Removing the sleeve reveals the inside box:

Opening this box reveals the manual:

The manual also hides a waifu card:

Inside, you’ll find the G20 IEMs nestled securely in their packaging:

Underneath the G20 is a separate ‘storage box’ where the EQ cable is stored:

So, ultimately removing everything you can see, you do get a lot of value with the G20:

The contents include:
- EPZ G20 IEMs
- Standard 3.5mm analog cable
- USB-C cable with both inline microphone and a separate boom-mic
- USB Adapter
- Multiple sizes of ear tips
- Documentation
The shells are well-constructed with a nice weight that feels significant without being too heavy.

The design of the shell is functional rather than flashy, there is fine at this price point but nothing too special.

Standard Analog Cable

The standard 3.5mm analog cable provides a direct connection to traditional audio sources. This cable delivers the G20’s default sound signature, which is already well-tuned with a focus on accurate imaging and detail retrieval, this was mainly the cable I used for my initial listening tests.
The microphone worked well on this cable, allowing me to take a few work calls while using this cable.
Ultimately, I did switch to the usb-c cable, and by default both cables provide the same sound signature, but of course with the usb-c cable you can change the sound signature.
USB-C Cable with Microphone
The USB-C cable is where the G20 shows its versatility, and while technically I loved this cable, I did have a few subjective issues with it.This cable features:

- Digital connection for cleaner audio signal
- Built-in microphone for gaming communication

This boom-mic functionality is a unique feature for an IEM, clearly targeting the gaming market. While the microphone performs well for voice chat during gaming sessions and calls, I found that the weight of the microphone module could occasionally cause fit issues during active movement, slightly dislodging the IEM and breaking the ear seal. This was primarily noticeable when walking around, making it less ideal for mobile use with the microphone cable.
But I did start using it with a foam eartip (as in the picture below) which did help keep it secure. You can also remove the boom-mic attachment.

Unfortunately, there are a few other little things that annoyed me with this cable. Firstly, the other microphone on this cable seemed to be disabled even when I detached the ‘boom-mic’ from the cable. The cable is also too long for normal use at 1.8m, while I understand that gaming IEM cables need to longer than typical IEM cables, I thought it was worth pointing this out. Finally, partially due to its length and especially if you have the boom-mic attached, this cable tangles very easily.
But these are all minor quibbles rather than anything major.
Fit and Comfort
The EPZ G20 offers good comfort for an IEM in this price range, with a design that sits well in the ear. The shells have a nice weight that provides a sense of quality without causing fatigue during extended listening sessions. With the standard cable, the fit is secure and comfortable for long periods.
The shell is slightly “opinionated” in that it has a slight ’lip’ so hopefully you can get a good feel for the shape with these comparisons with some other shells.
Note: it is not as large as the Truthear Zero Red but slightly larger than the other IEM’s have in this shell comparison.

| 
|
The included ear tips are fine and help the G50 achieve a good seal, but it can benefit a little bit from some tip rolling, especially if you don’t want to use EQ but want to tweak the treble a little. I did enjoy it with the Foam eartips I had in the pictures earlier.
Sound Impressions
The EPZ G20 delivers a well-balanced sound signature that works excellently for both gaming and music listening and is delivered by both cables.Bass
The bass response is controlled and accurate rather than overly emphasized. There’s enough low-end presence to give games and music proper weight and impact, but it never overwhelms the midrange. The bass extends well and provides good texture, allowing you to feel the rumble of explosions in games while maintaining clarity.For music, the bass is tight and detailed, offering good punch for genres like rock and electronic music without bleeding into the mids. The controlled nature of the bass helps maintain clarity in busy gaming soundscapes where more bass-heavy IEMs will overload the midrange clarity.
Midrange
The midrange presentation is slightly forward, with excellent clarity that helps dialogue in games and vocals in music stand out. This tuning choice makes sense for a gaming IEM, as it ensures important audio cues and team communications remain clear and intelligible.Instrument separation in the midrange is impressive, allowing for easy distinction between different sound sources. This quality translates well to music listening, where complex arrangements remain coherent and detailed. Later on when i did the measurement I spotted the reason for the excellent imaging as care was taken to make sure both the left and right have excellent channel matching, especially at this price point.
Treble
The treble is well-extended with good detail and air, providing the sparkle needed to accurately render high-frequency audio cues in games. There’s enough energy in the upper frequencies to highlight details like footsteps and weapon reloads without becoming fatiguing during long gaming sessions.For music, the treble presentation adds a nice sense of space and detail to recordings, though it might be slightly bright for those sensitive to high frequencies. The good news is that with the USB-C cable and Walkplay Application, you can easily adjust the treble response to your preference using parametric EQ.
Soundstage & Imaging
Where the G20 truly excels is in its imaging capabilities - a critical feature for gaming IEMs. The spatial presentation is precise, allowing for accurate positioning of sound sources in three-dimensional space. This quality makes it easy to locate enemies in competitive games based on audio cues alone.The soundstage is reasonably wide for an IEM, providing good separation between different elements in the audio mix. While it doesn’t match the expansiveness of open headphones, it offers an immersive experience that works well for both gaming and music.
PEQ Capabilities
One of the G20’s most valuable features is its compatibility with the Walkplay Application when using the USB-C cable. This functionality allows users to apply parametric EQ to fine-tune the sound signature to their preferences.For example, here is the G20 within the Walkplay webapp which can be accessed here:

Walkplay also provides an Android only mobile Application which has similar capabilities.
The PEQ capability transforms the G20 from a good gaming IEM into a versatile audio tool that can be customized for different genres of music or gaming scenarios. Because I really like PEQ versatility, I decided to develop a new tool which supports most usb-c IEM cables and dongles that support including many other EPZ devices (like the recently reviewed TP13) and including most Moondrop and FiiO usb-c devices.
Device PEQ
So device PEQ has been designed to work directly within typical squig website based online web measurement databases. You can see it in the bottom left of this image:
With the G20 connected you can simply autoEQ your PEQ filter preferences to the target you want, either another IEM or a target like JM-1 in this case. Then you can push the changes, and that is it no entering any numbers or exporting and import files, it has been designed to keep it simple.
When you connect the G30 to your computer and load, for example, “Pragmatic Audio” IEM database: here then switch to the ‘Equalizer’ tab, you can click the “Connect” button, and this popup will allow you to select the G20 (called in this case a very generic name ‘USB Audio’):

The EPZ G20 supports up to 8 PEQ filters more than many of its competitors like the Tanchjim One or Bunny DSP (that only support 5) and more than the FiiO / Jade Audio JA11 which also only supports 5 filters.
Note: You might expect PEQ to allow you to change the G20 to sound exactly like a different IEM, it isn’t quiet as simple as that, while you can get the tonality very close, the treble area especially will more than likely, still be significantly different due to, both the inaccuracies of measurements in that area and also the significant differences in peoples ear canals causing the treble ‘peaks’ and ‘dips’ to almost always be different in everyone’s ears, so don’t expect to make the G20 sound like the “Subtonic Storm” but you can for example us PEQ to make the G20 sound like “JM-1” or get the tonality close to your current favourite IEM.
Specifications and Measurements
| Category | Specification |
| Brand | EPZ |
| Model | G20 |
| Color | Blue/Pink/Gray |
| Driver | 10mm Silicone+PU Composite |
| Impedance | 320Ω |
| Sensitivity | 100dB (± 3dB) |
| Frequency | 20Hz-20KHZ |
| Plug Type | Type-C/ 3.5mm |
| Connector Type | 0.78mm 2-Pin |
| Cable Type | OFC Cable / OFC Silver-Plated Cable |
| Cable Length | 1.8m / 1.2m |
Measurements
The measurements were taken using my 711 clone coupler, and you can find the full measurement data here.Frequency Response
The frequency response graph clearly shows the slightly enhanced mid-forward tuning of the G20:
In the graph I have highlighted a controlled bass response (1), slightly prominent midrange especially in the vocal ‘presense’ region (2), and the well nice treble extension that provides detail without being too siliance (3).
Comparing the default DSP tuning with the analog table shows that the default DSP cable tuning is indeed neutral which makes applying EQ for specific games and for some audiophile tuning very easy.

Overall, I would describe the G20 from both cables as having ‘mid-forward yet comfortable tuning’ a great start to then further enhance with some EQ.
Comparisons
When compared to some of my other favourite midrange IEM (KiwiEar Orchestra Lite and FiiO FD15) and also with the Truthear Zero Blue 2 (with Foam eartips), the G20’s unique tuning becomes even more visible:
I highlighted 5 areas from the graph above:
- Bass, So the G50 is not quiet Harman level but it has more bass than those typical ‘midrange’ focused IEM like the Orchestra Lite or the FiiO FD15
- The Truthear Zero Blue 2 is the only one of these IEM with that typical mid-bass Harman ’tuck’
- That slightly elevated midrange “presence” tuning is evident here - just a little more than the other IEMs
- Though it has less presence in this region that the more Harman 2019 tuned Truthear Zero Blue 2
- Finally, the G20 treble is nicely balanced, so not as emphasized as the Truthear Zero Blue
Distortion
The G20 shows impressively low distortion from both cables across the frequency spectrum:
When viewed as a percentage, the distortion remains well controlled:

Finally, I measured the distortion with the stock cable and the usb cable (sometimes usb DSP cables can have more distortion), but these were very similar:

These measurements confirm the clean, detailed sound presentation experienced during subjective listening.
Rating Explanation
The EPZ G20 earns a 4-star Pragmatic Rating due to its excellent combination of gaming-focused features and audiophile sound quality, with only minor issues with the usb-c cable preventing a perfect score.Here’s the breakdown:
- Build Quality:
 (Solid construction with good materials)
 - Comfort: (Comfortable for long sessions, slight issues with microphone cable weight)
- Sound: (Excellent imaging and detail, good balance across frequencies)
- Features: (Dual cable system and PEQ capabilities offer exceptional versatility)
- Value: (Good value considering the dual functionality for gaming and music)
The G20 is ideal for:
- Gamers who want accurate positional audio without sacrificing music quality
- Audiophiles looking for a versatile IEM with PEQ capabilities
- Users who need both gaming communication features and high-quality audio in one package
Conclusion
The EPZ G20 successfully delivers on its promise as a gaming IEM while offering sound quality that extends well beyond gaming applications. Its accurate imaging and detailed sound signature make it excellent for competitive gaming, while its overall tonal balance and PEQ capabilities through the Walkplay Application make it equally suitable for music enjoyment.The dual-cable system provides excellent versatility, though the microphone attachment on the USB-C cable can cause minor fit issues during active movement. Despite this small drawback, the G20 represents a strong value proposition for those looking for a dual-purpose IEM that excels in both gaming and music scenarios.
For gamers who care about audio quality or audiophiles who enjoy gaming, the EPZ G20 offers a compelling package that bridges these two worlds effectively, earning it a strong recommendation at its price point.
Last edited:

jeromeoflaherty
100+ Head-Fier

Pros: Very reasonably priced
Nice build quality
Decent output power for the price
8 Band PEQ capabilities with the Walkplay App / Web
Nice build quality
Decent output power for the price
8 Band PEQ capabilities with the Walkplay App / Web
Cons: A bit bigger than some competitors (like the Apple USB-C Dongle or the FIIO JA11)
Not the most powerful
Not the most powerful
Compact USB-C Dongle with Powerful PEQ Capabilities
The EPZ TP13 is a small but mighty USB-C dongle that punches well above its weight / price and has the best build quality I have seen on this type of dongle. This unassuming little device serves as a portable DAC (Digital-to-Analog Converter) with a standout feature: the ability to apply parametric EQ filters both through the Walkplay application and with my new “Device PEQ” capability.
At roughly $15 (available on AliExpress), it represents an excellent value proposition for anyone looking to improve their audio experience on the go without breaking the bank.
I would like to thank EPZ for providing the TP13 for this review and assist in testing the new ‘Device PEQ’ feature that I have been developing.
If you are interested in finding more information about this product, you can find it at AliExpress
What makes the TP13 particularly interesting is how it competes directly with similar offerings like the FIIO JA11, offering comparable features and power output at a competitive price point. The combination of solid build quality, good audio performance, and PEQ functionality makes this tiny dongle a compelling option for budget-conscious audiophiles and casual listeners alike.But before I get into its PEQ capabilities, let’s have a quick look at what you get out of the box:
Unboxing and Build Quality
The EPZ TP13 comes in a compact, no-frills package that reflects its budget-friendly positioning:
The back of the box lists some of the specifications:

Opening the box reveals the dongle nestled securely inside:

The package includes:
- EPZ TP13 USB-C dongle
- 3.5mm adapter
- Documentation

The metal housing gives it a premium feel and provides durability for daily use. The cable appears to be well-reinforced at stress points, suggesting it should hold up well to regular use. The USB-C connector fits snugly into devices without feeling loose or wobbly.

The included 3.5mm adapter allows for compatibility with a wide range of headphones and IEMs, adding to the versatility of this little device. The adapter connection is secure and doesn’t introduce any noticeable degradation in audio quality.
Features and Specifications
The EPZ TP13 packs impressive technical specifications into its compact form factor:| Specification | Detail |
| Model | TP13 |
| DAC Chip | CS1300AU |
| Decoding Bit Rate | 94kHz/24Bit |
| Output Power | 31.25mW |
With 31.25mW of output power, the TP13 provides sufficient volume for most consumer headphones and IEMs. While it won’t drive power-hungry planar magnetic headphones to their full potential, it offers more than enough juice for typical portable listening scenarios.
The implementation of the CS1300AU DAC chip provides good audio quality for the price point, with clean conversion and minimal noise. The 94kHz/24Bit decoding capability ensures compatibility with high-resolution audio files, though most users will likely be streaming standard resolution content most of the time.
Feel free to skip this next section if you are just interested in how good it sounds with PEQ.
PEQ configuration
This feature allows users to:- Apply custom EQ profiles to compensate for headphone characteristics
- Create genre-specific sound signatures for different listening scenarios
- Switch between multiple profiles for different headphones or preferences
Walkplay Android APK and Web Application
The Walkplay ecosystem offers two main ways to interact with and customize the TP13’s sound signature: the mobile application and the web interface. Both provide intuitive access to powerful parametric EQ tools.This is the Main Android interface when you connect your device and when editing the PEQ filters, though you do have to register before you can edit the filters:

| 
| 
|
The Walkplay Android app also provides lots of other capabilities, including updating the firmware:

| 
|
For those who prefer a larger screen for more precise adjustments, the Walkplay website offers an expanded interface with additional visualization options.

| 
|
This makes it easier to see the exact frequency response curve you’re creating and fine-tune specific frequency bands with greater precision. The website complements the mobile app, allowing users to switch between platforms while maintaining their custom profiles.
DevicePEQ Extension Integration
As most Walkplay compatible devices the TP13 is also compatibility with the devicePEQ extension on Pragmatic Audio, which integrates with measurement databases to provide easy “pushing” of EQ profiles to devices. This functionality is currently available on Pragmatic Audio and will be coming soon to other squig.link websites, expanding the ecosystem even further.The devicePEQ extension allows users to:
- Access a database of pre-measured headphone and IEM frequency responses
- Apply compensation curves based on established targets
- Create and share custom EQ profiles with the community
- Export settings directly to the TP13 via the Walkplay ecosystem

This integration bridges the gap between subjective listening preferences and objective measurements, giving users the tools to make informed decisions about how they want their audio to sound.

The implementation is user-friendly while offering enough depth for those who want to dive into detailed sound customization. The ability to apply PEQ filters directly through the dongle means that the equalization works system-wide, regardless of the audio source being used.
This functionality elevates the TP13 from being just another budget dongle to a versatile audio tool that can significantly improve your listening experience across different headphones and IEMs.
Sound Impressions
The EPZ TP13 delivers a clean, neutral sound signature that serves as a good foundation for the PEQ capabilities.Bass
The bass response is controlled and accurate, without artificial boosting that often plagues budget audio devices. Low frequencies are reproduced with good definition, though the ultimate depth and impact will depend largely on the headphones or IEMs being used. The TP13 doesn’t add coloration to the low end, instead providing a transparent window to the recording.Midrange
Vocals and instruments in the midrange come through with good clarity and natural timbre. There’s no noticeable recession or emphasis in this crucial frequency range, allowing for an engaging listening experience across various genres. The midrange presentation is slightly forward, making vocals easy to follow without becoming shouty or aggressive.Treble
The high-frequency reproduction is detailed without becoming harsh or fatiguing. There’s enough sparkle to bring out the shimmer in cymbals and the air around instruments, but the TP13 avoids the common pitfall of budget DACs that often over-emphasize treble to create an artificial sense of detail. The result is a pleasant listening experience that remains comfortable during extended sessions.Soundstage & Imaging
For a budget dongle DAC, the TP13 presents a reasonably spacious soundstage with good separation between instruments. While it won’t match the expansive presentation of higher-end desktop equipment, it provides an immersive listening experience that extends beyond the confines of your head. Imaging is precise, allowing for accurate placement of sounds within the stereo field.Comparisons
EPZ TP13 vs. FIIO JA11
The FIIO JA11 is a natural comparison point, as both devices target the budget-friendly USB-C dongle market. In terms of build quality, the TP13 actually exceeds the JA11 with a more premium feel and better cable reinforcement at stress points. Both devices offer similar power output specifications. Here is a comparison photo with the JA11 and the Apple usb-c dongle, which doesn’t offer any PEQ capabilities:
Where the TP13 truly distinguishes itself is in its PEQ capabilities. While the JA11 offers a solid out-of-the-box sound signature with 5 PEQ filters, the TP13’s also supports up to 8 filters, and crucially, these filters are applied in real-time without you having to disconnect the device.
This feature alone makes the TP13 the more future-proof option, as it can be adapted to work optimally with any IEM or easy to drive headphone you might acquire in the future.
Rating
The EPZ TP13 earns a 5-star Pragmatic Rating due to its exceptional value proposition, solid build quality, and standout PEQ functionality that exceeds expectations at this price point.Here’s the breakdown:
- Build Quality: (Solid metal construction with excellent attention to detail)
- Sound Quality: (Clean, neutral presentation with good detail retrieval)
- Features: (PEQ capabilities through both Walkplay and devicePEQ are outstanding at this price)
- Value: (Exceptional value at $15, outperforming more expensive alternatives)
- Budget-conscious audiophiles looking to improve portable audio quality
- Users who want to apply PEQ to compensate for headphone characteristics
- Anyone seeking a compact, versatile audio solution for mobile devices
- Those who appreciate the ability to fine-tune their listening experience
Conclusion
The EPZ TP13 represents exceptional value in the budget dongle DAC market. Its combination of solid build quality, good sound performance, and powerful PEQ capabilities through both the Walkplay application and devicePEQ extension makes it a standout option at its $15 price point. While it won’t replace high-end desktop audio equipment, it offers a significant upgrade over built-in smartphone or laptop audio.What truly sets the TP13 apart is how it democratizes features like parametric EQ that were once the domain of much more expensive equipment. This little dongle empowers users to customize their audio experience regardless of budget constraints, making it a compelling choice for anyone looking to improve their portable listening setup without significant investment.
The integration with both Walkplay and devicePEQ provides unprecedented flexibility for tailoring the sound of whatever IEM or headphone you connect. This level of customization was previously available only in much more expensive equipment, making the TP13 a revolutionary product in terms of value and capabilities.
For the price of a few coffees, the EPZ TP13 delivers an audio upgrade that punches well above its weight class, earning it a strong recommendation for budget-conscious audio enthusiasts and anyone looking to get the most out of their existing headphones through the power of parametric equalization.
Attachments

Last edited:
jeromeoflaherty
100+ Head-Fier

Pros: Lightweight and very comfortable to wear
Well balanced
Midrange is slightly forward
Bass and treble are both nicely controlled
Good set of accessories for the price
Well balanced
Midrange is slightly forward
Bass and treble are both nicely controlled
Good set of accessories for the price
Cons: Maybe a little boring for some people
Comfortable Excellence with a controlled Bass and Treble
The SoncieMeory SW500H delivers a refreshing mid-forward tuning that places vocals front and center in your music. This hybrid IEM, featuring a single dynamic driver and four balanced armatures (1DD+4BA), creates a sound signature where vocals truly pop out of the mix, making it an excellent choice for vocal enthusiasts and perfect for pop or rock music.]
Priced at $72.99 ($78.99 with mic), the SW500H comes in 3 colours and offers a distinctive tuning option that stands out in a market often dominated by V-shaped or Harman-tuned IEMs. For those who prioritize vocal clarity and presence, this IEM provides a compelling listening experience with well-controlled bass and treble that support rather than overshadow the midrange.
I would like to thank Shenzhenaudio for providing the SoncieMeory SW500H for the purposes of this review.
If you are interested in finding more information about this product, you can check it out here.
Shenzhenaudio also provided the excellent SA500 dongle, which I’ve reviewed separately. They bundle both for $125.99 which offers excellent value, as the SA500 is easily worth $70 on its own.
Overall, I have been listening to the SW500H for a few weeks, and as someone who likes to mix sound signatures with different IEMs (as life would be boring if every IEM sounded like a Harman, V-shaped, or JM1), I really enjoyed the SW500H. The unusual ‘wooden’ nozzle is probably the most distinctive aspect of the design, and the sound signature, while not for everyone, is very enjoyable for particular genres of music.Read on to find out more but lets first get into the unboxing:
Unboxing and Accessories
The SoncieMeory SW500H comes in a clean, professional package:
The back of the box:

Opening the box reveals the IEMs nestled securely inside:

A closer look at the IEMs in their packaging:

The package actually includes lots of extras with replacement nozzle filters, a good range of eartips, and even a little usb-c adapter:

- SoncieMeory SW500H IEMs themselves
- Detachable cable with 2-pin connectors
- 2 sets of ear tips
- 6 replacement filters
- a brush and a pick tool for the filters,
- pouch
- USB-C DAC
- Some documentation

With secure 2-pin connectors:

| 
|
There are 2 sets of nice ear tip selection provides:

| 
|
USB adapter and nozzle filters, though my USB adapter did not work as a DAC:

Overall, the accessory package is good at this price point, offering everything needed for a quality listening experience right out of the box and enough replacement filters to keep you sorted for many years.
Design and Comfort
The SW500H features a very well-designed shell with a comfortable mid-sized form factor, the wooden nozzle is pretty unique, and while nobody will see it in your ear, it definitely stands out when you are swapping eartips:
The shell shape is ergonomically designed to fit comfortably in the ear. It is not ‘opinionated’ about your ear shape, which should mean it should work with the majority of people. Though this also means that it might not be as secure as other designs:

One of the standout aspects of the SW500H for me was its comfort. The mid-sized shell strikes an excellent balance - large enough to house the hybrid driver configuration while remaining comfortable for extended listening sessions. I am not sure if the ‘wood’ softens it in your ear, but I found it very comfortable and for me created a stable fit that doesn’t cause fatigue even after hours of use.
Some comparisons of the SW500H with other IEMs - hopefully the wooden nozzle makes the SW500H stand out compared to these others:

| 
|

| 
|
Sound Quality
The SoncieMeory SW500H offers a distinctive sound signature that prioritizes the midrange, particularly female vocal clarity, while maintaining a controlled bass and treble response.Bass
The bass response is well-controlled and precise, providing a solid foundation without overwhelming the midrange. While not bass-heavy so not for bass heads, the low-end extends well and offers good texture and detail. The dynamic driver delivers clean bass notes with minimal bloat, allowing for clear articulation of bass instruments.Midrange
The midrange is where the SW500H truly shines. Vocals are presented with exceptional clarity and presence, positioned slightly forward in the mix to create an intimate and engaging listening experience. Both male and female vocals benefit from this tuning, though for me the female tracks in my collection sounded exceptional with lots of subtle detail retrieval.While this forward midrange doesn’t feel shouty or aggressive, it creates a sense of immediacy and connection to vocal performances. Instruments that occupy the midrange, such as guitars and pianos, also benefit from this tuning, displaying good body and natural resonance.
For vocal enthusiasts, this midrange presentation will be the SW500H’s most appealing characteristic, offering a refreshing alternative to more recessed midrange tunings.
Treble
The treble is well-controlled with a notably recessed 6kHz region that effectively eliminates sibilance issues. This makes the SW500H a fatigue-free listening experience, even during extended sessions. While some might find the treble a bit too safe or lacking in sparkle, this tuning choice complements the vocal-forward presentation by ensuring that high frequencies never become harsh or distracting.Detail retrieval in the treble region is good, though not class-leading. The balanced armature drivers handling the high frequencies provide clean reproduction without artificial brightness.
Soundstage & Imaging
The soundstage is moderately sized with good height and width for an IEM in this price range. The vocal-forward tuning naturally creates a more intimate presentation, but there’s still enough space for instruments to breathe. Imaging is precise, allowing for accurate placement of elements within the soundstage.Separation between instruments is good, though complex passages can occasionally feel slightly congested due to the forward midrange presentation.
Measurements
The measurements were taken using my 711 clone coupler, and you can find the full measurement data here.Frequency Response
The frequency response graph clearly shows the mid-forward tuning of the SW500H:
In the graph I have highlighted the controlled bass response, prominent midrange (especially in the vocal ‘presense’ region), and the well nice treble extension that provides detail without being too siiliance.
Overall, the SW500H might be described as having ‘mid forward yet comfortable tuning’
Comparisons
When compared to other popular IEMs, the SW500H’s unique tuning becomes even more visible:
This comparison shows how the SW500H offers a tuning similar to the Truthear Gate but with more relaxed treble, creating a more comfortable listening experience for those sensitive to higher frequencies.
Another comparison with different IEMs:

This graph shows how the SW500H compares to 2 of my favourite ‘mid-forward’ IEM’s, the FiiO FD15 and Kiwi Ears Orchestra Lite. The SW500H has a even more vocal forward tuning, but then this is paired with a more relaxed 2–4kHz region providing a nice contrast to those other IEMs.
Distortion
The SW500H shows impressively low distortion levels across the frequency spectrum:
When viewed as a percentage, the distortion remains well controlled:

These measurements confirm the clean, detailed sound presentation experienced during subjective listening.
Rating
I’ve given the SoncieMeory SW500H a 4-star pragmatic rating for several reasons:- Sound Quality: The mid-forward tuning is executed well, creating an engaging listening experience for vocal enthusiasts
- Build Quality: Solid construction with good accessories for the price point
- Comfort: Excellent ergonomics with a stable, fatigue-free fit
The SW500H doesn’t quite reach 5 stars due to its somewhat specialized tuning that may not appeal to all listeners and treble that some might find too safe. However, for those who appreciate a vocal-forward presentation, it’s an excellent choice.
Conclusion
The SoncieMeory SW500H offers a refreshing alternative in the crowded IEM market with its mid-forward tuning that places vocals at the forefront of the listening experience. With well-controlled bass and treble that support rather than compete with the midrange, it creates a cohesive sound signature that vocal enthusiasts will particularly appreciate.The comfortable fit, good build quality, and accessory package add to the appeal, making this a solid option at its price point. The recessed 6kHz region effectively eliminates sibilance issues, creating a safe fatigue-free listening experience even during extended sessions.
Last edited:
W
williamms
Ty
jeromeoflaherty
100+ Head-Fier

Pros: 510mW balanced output power from a tiny package
Nice packaging with dual usb-c cables and an adapter
Nice premium looking design
Nice packaging with dual usb-c cables and an adapter
Nice premium looking design
Cons: Nothing at this price point
A powerful and compact USB DAC/Amp with excellent performance
The Soncie Meory SA500 is a compact USB DAC/Amp that delivers impressive power and performance in a tiny, lightweight package. Weighing just 16 grams, this diminutive device packs enough power to drive demanding headphones like the Hifiman Sundara while maintaining excellent sound quality and a clean, detailed presentation.
Priced at $72.99, the SA500 competes directly with popular portable DAC/Amps like the Fosi Audio DS2 and iBasso Macaron, offering similar performance characteristics but with some unique advantages. With both 3.5mm single-ended and 4.4mm balanced outputs, high-resolution audio support, and broad compatibility across operating systems, the SA500 represents excellent value for those seeking a portable audio upgrade.
I would like to thank Shenzhenaudio for providing the Soncie Meory SA500 for the purposes of this review.
If you are interested in finding more information about this product, you can find it athttps://shenzhenaudio.com/products/soncie-meory-sa500-portable-dac-amp
Shenzhenaudio also offers the SA500 bundled with the excellent SW500H IEM (which I’ve reviewed separately) for $125.99, representing outstanding value for a complete portable audio solution.Unboxing and Accessories
The Soncie Meory SA500 comes in a clean, professional package that reflects its positioning as a premium portable audio device:
The back of the box provides additional information about the product:

Opening the box reveals the DAC/Amp nestled securely inside:

Everything is nicely secured in a small portable box:

Opening this box reveals the complete package actually includes 2 separate usb-c cables:

- Soncie Meory SA500 DAC/Amp
- USB-C to USB-A adapter
- 2 short USB-C to USB-C cables
- User manual
- Warranty card

The accessory package is minimal but includes everything needed to get started with the device across various connection scenarios.
Design and Build Quality
The SA500 features an elegant, minimalist design with a premium metal housing that feels substantial despite its tiny size:
At just 16 grams, it’s remarkably lightweight yet doesn’t feel flimsy. The build quality is excellent, with a solid, seamless construction that inspires confidence in its durability.
The device features a USB-C input on one end:

And both 3.5mm single-ended and 4.4mm balanced outputs on the other:

The SA500 includes a simple LED indicator that shows the sampling rate of the audio being played, with different colors representing different rates. The device also features physical buttons for volume control and other functions:

Overall, the design is practical and functional, prioritizing performance and usability in a compact form factor.
Features and Performance
The Soncie Meory SA500 offers an impressive feature set for its size and price point:Connectivity
The device features USB-C input and dual outputs (3.5mm single-ended and 4.4mm balanced), providing flexibility for different headphone terminations. The balanced output delivers significantly more power, making it ideal for more demanding headphones.Compatibility
The SA500 works seamlessly across multiple platforms:- Windows
- macOS
- iOS
- Android
For some details, here is SA500 connected to my Macbook showing its impressive high-res credentials:

Audio Support
The SA500 supports high-resolution audio formats:- PCM up to 32bit/384kHz
- DSD64/128/256
Power Output
One of the most impressive aspects of the SA500 is its power output relative to its size:- Single-ended output: 128mW at 32Ω
- Balanced output: 510mW at 32Ω
Headphone Compatibility and “Practical” Measurements
Rather than compare DAC Amp SINAD charts, I thought for this review it might be more fun to see how well does this DAC Amp (and a few other portable DAC amps) perform when driving a real headphone to loud ‘90+ dbSPL’ volumes and then measure the output from that the headphone to see if it is still transparent.This is to remove most of that typical uncertainty that I read when people just read DAC or Amplifier measurements (i.e. ‘but how will it perform with my XXXX headphone’).
So over at AudioScienceReview Amir has been putting together an interesting graph of how hard it is to drive any headphone that he has measured. It is becoming a very extensive and interesting list covering most of the ’normal’ headphones (and many very expensive ‘high end’ headphones).
Here is the recent version of that chart:

For those interested, here is the source of this version of the list from his DCA Noise X review: DCA Noire X review
So I thought I should use a headphone from the bottom end of this chart as a good ’test’ of these DACs, so I picked the Hifiman Sundara. So here is that section of the list zoomed:

As you can hopefully that, I thought the Hifiman Sundara was a good ‘challenging’ part of this chart and a good match for the SA500.
So let’s see how the SA500 does? The following was the Sundara Frequency response, which was as transparent as the other amplifiers I measured the Sundara with:

And here is where I measured other dongles showing that these dongles are all transparent:

Yes, this was only 58% of the volume, so plenty of headroom for even more demanding headphones. For comparison the Apple USB-C dongle was at 98% to get to a similar SPL.
The Fosi Audio DS2 and the iBasso Macaron did result in a similar result, so ultimately all these dongles have surprising powerful output for their price points.
Sound Quality
The Soncie Meory SA500 delivers clean, detailed sound with excellent technical performance across the frequency spectrum.Bass
The bass response is tight and controlled, with good extension and minimal distortion. There’s no artificial boost here - the SA500 presents bass as it exists in the recording, with good texture and detail. The device maintains its composure even with bass-heavy tracks, showing no signs of compression or distortion at reasonable volume levels.Midrange
The midrange presentation is neutral and transparent, allowing vocals and instruments to shine through with natural timbre. There’s excellent clarity and detail retrieval in this crucial frequency range, making for an engaging listening experience across various genres.Treble
The treble is extended and detailed without becoming harsh or fatiguing. The SA500 strikes a good balance here, providing enough sparkle and air to create a sense of space and dimension without crossing into sibilance territory.Soundstage & Imaging
For a portable DAC/Amp, the SA500 creates a surprisingly spacious soundstage with good width and depth. Imaging is precise, allowing for accurate placement of instruments and vocals within the sonic landscape. The black background (low noise floor) contributes to this sense of space and separation between elements in complex recordings.Specifications and Internal Architecture
The internal architecture of the device reveals thoughtful design choices that contribute to its performance:
Key technical specifications include:
- Signal-to-noise ratio: ≥130dB (32Ω/A-weighted/single-ended)
- Output noise: <3.1uV (balanced/A-weighted)
- THD+N: 0.0002% (32Ω/single-ended/balanced)
- Dynamic range: 113dB
- Frequency response: 20Hz-20kHz
Comparisons
Here is the SA500 with a few other similar dongle DAC that I have reviewed recently, the Fosi Audio DS2 and the FiiO KA15:
| 
|

| 
|
Here are some more dongles I compared the SA500 with, including the FiiO Retro Nano and KA17 as well as the iBasso Macaron and the venerable Qudelix 5K:

| 
|
Specifications
Here’s a comprehensive list of the SA500’s specifications:- Rated single-ended output power: 128mW/32Ω
- Rated balanced output power: 510mW/32Ω
- Signal-to-noise ratio: ≥130dB (32Ω/A-weighted/single-ended)
- Output noise: <3.1uV (balanced/A-weighted)
- THD+N: 0.0002% (32Ω/single-ended/balanced)
- Dynamic range: 113dB
- Frequency response: 20Hz-20kHz
- Impedance range: 16Ω-300Ω
- DSD: 64/128/256
- PCM: 32bit/384kHz
- Weight: approximately 16g
- Input interface: USB2.0 Type-C
- Output interface: 3.5mm/4.4mm
- Compatibility: MacOS/Windows/iOS/Android
Rating Explanation
I’ve given the Soncie Meory SA500 a 5-star pragmatic rating for several reasons:- Sound Quality: The SA500 delivers clean, detailed sound with excellent technical performance across the frequency spectrum
- Power Output: Impressive power delivery for its size, especially through the balanced output
- Build Quality: Excellent construction with premium materials
- Value: At $72.99, it offers great performance for the price (even better when bundled)
Conclusion
The Soncie Meory SA500 is an impressive portable DAC/Amp that delivers excellent performance in a tiny, lightweight package. With enough power to drive demanding headphones, support for high-resolution audio formats, and broad compatibility across operating systems, it represents outstanding value at its $72.99 price point.The bundle option with the SW500H IEM at $125.99 deserves special mention, offering a complete portable audio solution at a very competitive price. For those looking to upgrade their portable audio experience without breaking the bank, the SA500 is easy to recommend.
Whether you’re a casual listener seeking better sound quality on the go or an audiophile looking for a compact, powerful DAC/Amp for travel, the Soncie Meory SA500 delivers performance that belies its diminutive size and modest price.
Last edited:
jeromeoflaherty
100+ Head-Fier

Pros: Excellent deep and mostly controlled bass response
Mostly balanced sound especially using with custom 'Oluv' presets in right scenario (outdoors, ground etc)
Excellent customization with companion application
Nice extras like Power bank support and Lights
IP67 waterproof
Distortion well controlled even when playing loud
Can be synced with 50 other UBoom X
Cons: Default profile is a little boomy ( I would pick one of Oluv's presets e.g. Studio)
Heavy ( I guess the weight gives stability to the)
Lack of high ref codecs (only SBC and AAC)
Lighting effect is just ok (not too flashy)
Heavy ( I guess the weight gives stability to the)
Lack of high ref codecs (only SBC and AAC)
Lighting effect is just ok (not too flashy)
An expertly tuned Portable Bluetooth Speaker for all occasions
The Earfun UBoom X is a large (and heavy) Bluetooth speaker that probably looks fairly “generic” in photos, but it has 2 (maybe 3) things which I think set it apart from other bluetooth speakers in this price range.Earfun really wanted to make this speaker have “proper” sound and after using it for a few weeks I do believe they made some smart choices and those choices are the only reason I decided to write up a review of the speaker.

But before I get into the details I thought I would provide some context as to why I am even looking at bluetooth speakers.
An ongoing journey to get decent audio in the garden
So I have had a love/hate relationship with bluetooth speakers. Mostly they are a convenient way to have audio in a garden or park once the weather starts to get better and each year, for the past few years, I have bought a bluetooth speaker thinking this one “is the one” but up to now, every one of those speakers has been a let-down as far as sound quality.Last year I thought the much hyped Soundcore M600 (which even had some “audiophile” friendly reviews) was going to be the one, but sadly it was not. I still have it, and it is a very nice looking speaker with its metal case but I ended up deciding I would not review as it didn’t really offer anything sound wise, other than a gimmick of “surround sound” that didn’t really work that well. I even tried to use some of Soundcore EQ capabilities to see could I get something reasonable from that speaker but the lack of any bass at any decent volume meant it was not much better than the tiny “pocket-able” bluetooth speakers you see on Amazon all the time.

So I was somewhat cautiously optimistic a few months ago when I spotted some reviews about the Earfun Uboom X. But I waited a few months to see if there was any negative sentiments and in general I think it has gone well with most people (there will always be ‘fanboys’ and ‘haters’ on the internet). So since there is no point in buying a mainly ‘outside’ speaker in the middle of the winter, I waited until a few weeks ago before deciding that this speaker would be this year’s attempt at decent outdoor audio.
Note: I have had a generally a great experience with Earfun products, while often their marketing can still be very much in the Amazon consumer “boomy” audio market (competing directly with Soundcore and JBL), I believe, there is a part of that company that believes in audio science, good tonality and providing an accurate reproduction of sound.
While I bought this on Amazon.ie for roughly €160 and I believe there are often discount coupons available which means you can probably pick it up for the equivalent of €120/$120. I did contact Earfun before finishing this review for some clarifications about the tuning of this speaker.
And if you are interested in finding more information about this product, click here.
So lets get into what you get with the UBoom X.
Unboxing and Build Quality
The EarFun UBoom X arrives in a sturdy box that protects the substantial speaker inside:
Here is the back of the box:

Opening the box reveals the speaker itself:

And finally here are all the contents of the box:

In the box, you’ll find:
- The UBoom X speaker
- USB-C charging cable
- A strong carrying strap
- User manual
- Warranty information

If you have any decent bookshelf speaker around your house, you will always notice the difference in weight the designers have done to reduce vibrations, against cheaper lightweight bookshelf speakers which typically have no internal padding. There are 2 x 30W woofers on each end of the UBoom X:

The design is relatively understated but functional, with a convenient carry handle that makes transportation easier despite its weight:

The control buttons are located on top of the speaker, providing easy access to all functions:

Note: One minor drawback is the lack of backlighting on these buttons, which might make operation in low-light conditions more challenging but was not a problem for me.
The UBoom X features multicolor LED lighting that can be customized through their app. And compared to some large “fun” bluetooth speakers I think these lights are nicely understated, but if you want a full lightshow, I think you might want another speaker:

| 
|
With an IP67 rating, the UBoom X is fully waterproof and dustproof, making it suitable for outdoor use in various conditions, there is an excellent flap on the connectors on the back of the UBoomX:

Features and Connectivity
The UBoom X comes packed with features that enhance its usability across different scenarios:EarFun Audio App and Oluv’s Tuned Presets
Perhaps the most significant feature is what the integration with the EarFun Audio App provides:
So you get the now typical features like firmware updates, modify latency ( via ‘Video mode’) and adjust the lighting settings via the App

Here is that lighting effects configuration screen:

And there is the now typical 10 band EQ available for some personalised customisation of the sound:

But the real benefits here are the very detailed and tasteful presets that Oluv Sone have specifed. These presets go way beyond the 10 band EQ customisations using various DSP ’tricks’ where appropriate to really emphasis aspects of the sound in different real-life scenario’s:
Oluv’s Tuned Presets in Practice
The real magic happens when you start exploring Oluv’s custom presets and other than the excellent bass performance and this is really my second reason for writing this review.
The app offers exceptional customization options, but the highlight is undoubtedly the Oluv's tuned presets that include:

| 
|
- Indoor (neutral, studio-monitor-like response)
- Indoor+ (enhanced stereo width with subtle bass and treble boost)
- Outdoor (optimized for outdoor listening with controlled upper bass)
- Outdoor+ (maximum stereo enhancement with strong bass)
- Boom xXX (for those who prefer pronounced bass)
- Ground O (optimized for placing the speaker on the ground)
- Studio (neutral presentation without enhancements)
This level of attention to detail in the presets represents something truly unique in the portable speaker market.“Unlike mentioned everywhere these ‘EQs’ are complete DSP programs, consisting of several sections not only EQ, but the entire compressor/limiter, dynamic EQ, psychoacoustic effects for stereo enhancing and bass, volume curve etc.”
Each preset creates a noticeably different listening experience optimized for specific scenarios and I thought it would be worth including Oluv’s own explanation for each of these presets:
Indoor vs. Outdoor
Switching between the Indoor and Outdoor presets reveals thoughtful adjustments designed for these different environments. The Outdoor preset reduces certain bass frequencies that become boomy outdoors while enhancing others to maintain presence, and boosts treble to ensure clarity at a distance.As Oluv explains:
“The outdoor modes have a completely different approach to compression than the indoor modes, which are rather conservative and should retain most bass up to maximum with overall volume not being pushed that much. I also tried to get the most kick out of the outdoor modes up to maximum volume and you should notice that the UBoom X has more attack with more basskick than most other similar speakers.”
Ground O Preset
The “Ground O” preset is particularly clever, compensating for the boundary effect that occurs when placing a speaker on the ground:“Ground O which stands for ground omnidirectional should offer you the most bass possible when placed at the ground due to the boundary effect without the boominess you would get with Boom xXX, at the same time treble is boosted a lot to allow for omnidirectional listening when the speaker is aimed upwards.”
Advanced Bluetooth 5.3
The UBoom X utilizes Bluetooth 5.3, providing stable connections with minimal latency. During testing, I experienced no dropouts or connection issues, even when moving around with my phone at a reasonable distance from the speaker.Party Connect Mode
The UBoom X supports pairing with up to 50 additional UBoom X speakers for enhanced stereo output and greater volume. While I obviously didn’t test this feature with multiple units, it’s sounds like a crazy appealing option for larger gatherings, I am surprised Earfun haven’t sponsored some ‘world record’ outdoor audio experience.Power Bank Functionality
This particularly feature is very useful I think. I have gone on a few picnics where after a few hours I need to charge up my mobile so having the ability to use the UBoom X as a power bank to charge other devices via USB-C, making it a dual-purpose companion for extended outings.Battery Life
EarFun claims up to 30 hours of playback, which seemed fairly accurate at moderate volume levels during my testing if you play louder this will be much less, though I never found it lacking on any trip I have brought it on the battery has been down at 60% after 7 or so hour’s playback, so I would guess 15/20 hours easily at louder volumes.Sound Quality
The sound quality of the UBoom X is where this speaker truly excels, especially when utilizing Oluv’s custom presets.Given the customisation options available I thought I would just provide an overview of the “default” profile here which is one preset by Earfun themselves.
Default Sound Signature
The UBoom X delivers an impressive audio performance with its 80W (2 x 40W) four-driver design and JumboBass technology. The bass response is particularly noteworthy those large “heavy” drivers really do provide a deep resonant bass response that you can ‘feel’ across the room. I would not bother with the JumboBass unless you are a “Bass Head”.The mid-range is well-balanced, allowing vocals and instruments to come through clearly without being overshadowed by the bass.
The treble is detailed without becoming harsh, even at higher volumes.
Overall the default sound signature might be described as neutral with a bass emphasis.
Bass
The bass performance is exceptional for a speaker of this size. Testing with bass-heavy tracks like Massive Attack’s " Angel" reveals deep, controlled low-frequency response that you can feel as well as hear. Unlike many competitors, the UBoom X produces actual sub-bass rather than just a mid-bass hump, creating a more authentic listening experience.Mids
Vocal clarity is excellent, with both male and female voices reproduced with natural timbre. In tracks like Adele’s " Someone Like You," the subtleties of the vocal performance come through with impressive detail.Treble
High frequencies are crisp and detailed without becoming harsh or fatiguing. Cymbal crashes and high-hat details in jazz recordings maintain their sparkle and presence without overwhelming the mix.Specifications and Measurements
| Specification | Details |
| Bluetooth Version | 5.3 |
| Bluetooth Codecs | SBC, AAC |
| Output Power | 80W (4-driver design) |
| Battery Life | Up to 30 hours |
| Connectivity | Bluetooth, 3.5mm aux |
| Charging | USB-C, 30W fast charging |
| Water/Dust Resistance | IP67 |
| Dimensions | 400 x 150 x 215 mm / 15.7 x 5.9 x 8.5 inches |
| Weight | 415g / 9.1 pounds |
| Additional Features | Power bank function, Multi-color LED lighting, App support |
| Presets | 7 Oluv-tuned audio presets as well as many standard Earfun presets |
Note: One thing I didn’t mention earlier was the codec support which is limited to SBC and AAC so does lack LDAC or AptX codecs, so while not ideal I didn’t find it affected the sound quality though I was mainly streaming from an iPhone using the AAC codec.
As I mentioned earlier the Boom X is a heavy speaker - here is what I got on my weighing scales with the carrying strap also attached:

Measurements
Measuring a bluetooth speaker is difficult for a number of reasons - there isn’t just one driver to measure as a typical bluetooth has many drivers in different locations around the speaker. Bluetooth speakers are also typically moved and placed in various locations, so it doesn’t really make sense to worry about specific placement or distance from a back wall. So what I tried to measure capture “typical” indoor placement (on a coffee table) and outdoor measurements (on a table and on the ground) and showing the relative difference of the various presets.Also, it is mostly impossible to measure distortion outside so I will just show one of the indoor distortion measurements to give you an impression of how the speakers handle being pushed.
Note: I have talked allot about presets but if you never switch presets, the default Earfun sound signature will be “good enough” but in my opinion it won’t give you the real differential that this bluetooth speaker provides.
Frequency Response
Note: because Oluv’s presets are more than just DSP frequency response tweaks, these measurements only really give a feeling of the tonality changes but there will be other DSP changes (like a compressor) that you won’t see in these measurements.So lets start with the default UBoom X profile compared to the Jazz profile:

Note: I mainly focused on Oluv’s presets in these measurements but for example the Jazz profile does a subtle increase in midrange and treble (i.e. a decrease in bass).
So here is some Indoor measurements comparing the Jazz preset with Oluv Indoor and Indoor+:

While these do show a ‘bright’ treble I thought it was interesting to compare the ‘brightness’ of the outdoors and outdoors+ when measured indoors and outdoors - you can see an almost inverse treble, so I think whether you get ‘bright’ treble or dark is very dependent on position:

The outdoors and outdoor+ presets do very well outdoors in my measurements:

I thought this was interesting also - slightly different position for the outdoor measurements:

And this measurement maybe makes it clearer than ourdoors+ is more V-shaped:

I tried the ground preset on a few different surfaces and depending on the surface you can get more or less of a bass boost:

I thought this presented the different presets you might use outdoors with a nice contrast:

Finally, this is Oluv’s Indoor preset showing mostly a well controlled FR with very little distortion for a bluetooth speaker:

Rating
The EarFun UBoom X earns a 5-star pragmatic rating for several compelling reasons:- Exceptional sound quality that genuinely impresses, especially in the bass department
- Oluv expertly tuned presets that adapt to different environments and preferences
- Excellent value for the features and performance offered
- Robust build quality with full waterproofing
- Long battery life with fast charging and power bank functionality
Conclusion
The EarFun UBoom X is an exceptional “portable” Bluetooth speaker, it is heavy, but can deliver audiophile-grade sound quality if you use the right preset in the right scenario. For me, it has worked well so far and I hope the Irish Spring weather continues, so I can enjoy this speaker in the garden and out on a few picnics.For anyone looking to enhance their outdoor gatherings this season with quality audio, the UBoom X represents one of the most compelling options available outside a dedicated outdoor sound system. The collaboration with Oluv has resulted in a speaker that doesn’t just sound good “for a Bluetooth speaker” – it simply sounds good, period.
Attachments

Last edited:
K
kjjones1211
Thanks for the awesome review! I have tried other EarFun speakers and have been really impressed. I'll have to look at this one for future use!
Redcarmoose
I just suggested this to my Brother, who is on the look-out for one as a Christmas present!
jeromeoflaherty
100+ Head-Fier
Pros: Lots of input options (including usb, optical, coaxial, RCA, photo and bluetooth)
Subwoofer output
Remote Control
FiiOControl companion application with 31 band PEQ
Lots of little things (like stand by mode) and bass boost dial
Subwoofer output
Remote Control
FiiOControl companion application with 31 band PEQ
Lots of little things (like stand by mode) and bass boost dial
Cons: Set you expectations appropriately as it is a very small speaker so cannot play that loud
Distorts in the bass when pushed too hard so only good for near field or small room (with subwoofer)
Distorts in the bass when pushed too hard so only good for near field or small room (with subwoofer)
Small Speaker, Big Features
The FiiO SA1 Desktop Speaker is a feature-packed, budget-friendly solution for desktop audio. Available in two colors, I personally went for the white but the classic wood look with the brown is also very nice.It delivers an unexpected level of connectivity and for its size it delivers excellent performance. Its compact size makes it a perfect desktop companion, and when paired with a subwoofer, tuned some of the configurable onboard PEQ, it transforms into an excellent sounding system for a home working space or even a bedroom.

After a few weeks of intensive use, I think I can describe what is great about the SA1 and where it has some limitations. So hopefully this review will be able to give you some insights.
I would like to thank FiiO for providing the SA1 desktop speaker for the purposes of this review.
If you are interested in finding more information about this product, here
So first, let’s see what you get in the box.
Unboxing and Build Quality
The unboxing experience with the FiiO SA1 is straightforward but does come in a big box:
And the back of the box:

Opening the box you see some cables, the remote and the power supply:

Removing this top layer reveals the speakers underneath in their protective covers:

I specifically went for the white as I felt it would work better in a minimalist workspace setup and as you will see later I think it worked out nicely, but I did try it in a few different places around my house, I think my wife thought I was a bit crazy.
Upon opening, you find:

- Main Speaker
- Secondary Speaker
- Custom Infrared Remote Control (requires 2 AAA batteries)
- Power Adapter
- RCA to 3.5mm Audio Cable
- Main and Secondary Unit Connection Cable
- Quick Start Guide

If you set your expectations relative to its size, I think you will be ultimately be impressed, but there is only so much you can drive a tiny speaker without a little help but thankful FiiO does provide a few ways that you can decent sound from this speaker.
The Speaker itself

Driver setup:
- Woofer: A 3.5-inch wood fiber construction.
- Tweeter: A ¾ inch aluminum-magnesium alloy dome tweeter.

I do think it is a pity you cannot remove the grills easily- but I see those screws around each driver so will be possible to open this speaker up easily:

The right Speaker has the Volume which you can push to switch inputs, a bass boost dial and a power button:

| 
|
Bass boost dial
This bass boost dial is really just a simple way to boost the overall bass frequency, ultimately when pairing this with a subwoofer, I actually lowered this to the lowest possible value as I wanted to avoid pushing that tiny woofer too much and if you plan on playing this speaker even slightly loud without a subwoofer I would also lower this value as the bass does distort easily.But if you listen a lower volumes (especially in a small desktop setup) it will be ok to use dial to give the speaker a little bass boost and I do appreciate that this is a super simple way to give the sound a little bass boost without resorting to having to use the FiiO Control app to switch PEQ profiles.
The back and sides
The back of the Left side has nothing other than the cable connection from the right hand side:
The other sides mostly just have the very nice wooden finish:

| 
|

So you get an incredible extensive set of connections:
- Usb-c from a computer
- Optical input
- Coaxial input
- Phono or RCA (including a ground terminal) and a Photo/RCA switch
- Subwoofer output
- Aux input

DAC Input
When using it as a USB-c DAC options on my Macbook when using the SA1 you get a reasonable support with up to 24bit/96Khz:Specifically the supports up to 192Khz over coaxial:

- USB (Type-C, supporting up to 96kHz/32bit)
- Coaxial (supporting up to 192kHz/24bit)
- Optical / Toslink (supporting up to 96kHz/24bit)
Bluetooth support
You also get Bluetooth input you get LDAC from Android and AAC from IOS as well as the standard SBC protocol using Bluetooth 5.4. You can also control the SA1 over bluetooth from your mobile with the FiiO Control application, more on this application in a bit.Some setups
I thought it might be interesting to setup the SA1 in a couple of different ways:Small Working from Home - Desktop setup
This was why I picked the white colour as I felt it would go well in this room and I think it does and crucially both the SA1 and the JDS Element IV that was feeding it RCA output take very little space away from the desk:

It sounds great in this space, even without the subwoofer (which is hidden under the table) but especially with the subwoofer and some room correction PEQ configuration.
With some turntables
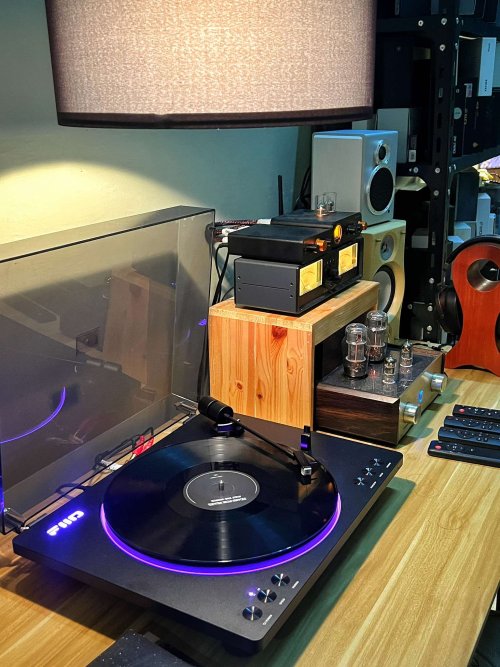
I thought I would test both the Phono and RCA inputs with 2 different turntables my old Audio Technica which is now in my converted garage space and the new FiiO TT13:

| 
|
With the TT13 in this much larger space, I definitely needed that subwoofer next to the table, but I did quiet a few measurements which I will present later in this setup.
Features
I thought it might be worthwhile to just pick up some of the many features of the SA1 that I think are important so lets start with the amplifier used:Internal Amplifier
The speaker is powered by two Texas Instruments TPA3118 class D digital amplifiers, delivering 20W2 for the woofer and 5W2 for the tweeter. I have seen this class D used in many class D amplifiers from companies like Fosi Audio and Aiyima, and it is reasonable good class D chip (though not as good or powerful as the TPA3255) but given you get 2, one in each speaker it is easily adequate for driving the SA1.FiiO Control and PEQ Capabilities
One amazing feature for a speaker at this price it comes with both a built-in DSP and a companion application. FiiO have nicely integrated the same application with many of their devices including the recent K17 and the SA1:
You get reasonable useful remote control of the SA1 from your mobile (over Bluetooth):

Including switching inputs:

But the best feature for me (and one that is very rare in a powered speaker at this price) is the ability to configure a 31-band high-precision PEQ using this the FIIO Control app. So you get some built-in sound presets (pop, jazz, classical, R&B, dance, and a monitoring-style curve):

And then ability to save three custom PEQ setups which I think is fantastic feature especially if you understand a little about room correction and have access to a measurement microphone like a Umik-1:

Note: As you can see above as a test I lower a bit of “room mode” bass and the midrange need a bit of adjustment to get a more neutral response, I will show the effect later on in the measurement section.
Remote
I also like that the speakers come with a useful remote to change the inputs and the volume:
Note: As someone with lots of similar remotes I really appreciate FiiO have started to put the device name on the remote, it is a nice simple touch.
Standby support
I also like that there is automatic standby and wake-up time is pretty fast.Subwoofer support
The inclusion of an RCA subwoofer output I think is crucial. And ultimately how I rated this speaker. Without it, I feel it will the SA1 will be limited the places where it is only used near field, where do not need to push the woofer too much.But with the inclusion of a subwoofer you can now use these tiny speaker in many more setups, while it doesn’t suddenly transform the SA1 into a “home theatre” killer, it does allow you, when paired even with a cheap subwoofer to get decent “full range” sound in smaller rooms and even worked well for me in my medium size converted garage space.
Sound Impressions
For its size the FiiO SA1 delivers a well-balanced and dynamic sound, though due to its size the bass does roll off significant and if boosted too much it will distort, but ultimately pair it with a subwoofer, do a little room correction using the PEQ filters, and then it became a different speaker, one that can compete with much more expensive setups.Here’s how it performs across the key audio elements:
Bass
While its compact design naturally limits deep bass output, the 3.5-inch woofer produces a rich and warm low end. When paired with a subwoofer, the bass extension down well below 65Hz and really comes to life, making for a satisfying low-frequency performance during movie nights or bass-heavy tracks.Mids
The midrange is clear and detailed, ensuring vocals and instruments are rendered with natural warmth and precision. The customizable DSP and PEQ settings allow you to fine-tune the mids to suit any genre, from classical arrangements to modern pop.Treble
The SA1’s ¾ inch tweeter provides crisp and articulate highs without sounding overly bright or harsh. The result is a smooth treble that adds sparkle and clarity, bringing out the finer details in your music. I did find you can tune the treble a little by either toeing it in towards you ( a bit brighter) or toeing out ( a bit darker ).Soundstage and Imaging
Despite its small footprint, the SA1 manages to produce a surprisingly spacious soundstage. Its imaging allows you to pinpoint individual elements within a mix, making for an immersive listening experience even on a desktop.Specifications and Measurements
| Specification | Details |
| Woofer | 3.5-inch wood fiber woofer |
| Tweeter | ¾ inch aluminum-magnesium alloy dome tweeter |
| Amplifier | TI TPA3118 Class D digital amplifiers |
| Power Output | 20W2 (woofer) + 5W2 (tweeter) |
| Analog Inputs | RCA/Phono, 3.5mm AUX |
| Digital Inputs | USB (Type-C, up to 96kHz/32bit), Coaxial (up to 192kHz/24bit), Optical Toslink (up to 96kHz/24bit) |
| Bluetooth | High-res LDAC, Bluetooth 5.4 |
| PEQ | 31-band high-precision lossless PEQ (with FIIO Control app support) |
| Additional Features | Built-in phono preamp, built-in DSP, custom remote control, RGB status indicator, TF card support |
| Cabinet | High-density MDF with 9mm imitation solid wood veneer |
| Subwoofer Output | Yes (for 2.1 system integration) |
Measurements
So, I used my Minidsp UMIK-1 setup on a tripod to measure (as best I could) the performance of the SA1, setup on a desktop (as per the pictures earlier).Frequency Response in Room:
So first I thought it was interesting to see the difference of the bass boost button and when the bass boost and a subwoofer is blended (yellow) into the sound:
So, obviously you get a much lower bass response with the subwoofer, but the crucial difference is the level of distortion between these 3 measurements, as you can see below - the (yellow) measurement has the least distortion and especially with the bass boosted the SA1 is generating a lot of distortion:

I then looked at applying some PEQ and measuring the overall frequency response I got at roughly 80dbSPL:

Note: I only used 2 PEQ adjustments for this I could easily use some of the other 29 PEQ filters to get a much smoother FR, but I thought this REQ equaliser recommendation showed how well it can measure (and sound) with a little EQ and a subwoofer blended.
Next, I thought I would just compare the default sound without PEQ or the subwoofer with those simple changes and you can see below the sub-bass extension goes way down and this subwoofer isn’t anything special it just happended to be one that I was not using, it is a Yamaha SW050:

Distortion with and without the Subwoofer
Specifically focusing on the distortion as speakers this small (really woofers in speakers in small) will struggle when pushed and the difference when I removed the bass from SA1 by lowering the Bass boost and tuning the bass with the PEQ. So the orange distortion measurement here shows how well you can lower the distortion by offloading all bass to the subwoofer:
And again as I mentioned above the least distortion and the most balanced sound:

So in summary, on its own the SA1 will struggle playing even at 80dbSPL but lower the bass and add a subwoofer and you get a pretty good sounding yet tiny desktop speaker setup for very little money.
Rating
I feel the FiiO SA1 without its extra features would be a fairly average tiny desktop speaker, but it hassome outstanding features and some of those features, like the subwoofer and the 31 band PEQ can make a real difference to the sound you get. Other features like the remote and the ability to use a companion mobile app really set this speaker apart from the competition at this price.
So, I am giving the FiiO SA1 a very pragmatic rating of 5 due to these features. I feel this speaker makes a very nice desktop or small bedroom speaker and when paired with a subwoofer and some PEQ configuration applied to remove some “bassy” room modes, you can get some outstanding quality at a very reasonable price.
I also think this would make an excellent first speaker for someone to tinker with and start to understand audio, maybe paired with their first turntable and with all its input and the various controls available in the FiiO Control app this could really be a “gateway” speaker into the whole home audio hobbie.
Conclusion
In conclusion, the FiiO SA1 Desktop Speaker is a shining example of smart design and value in the budget audio market. Its rich feature set—including multiple input options, advanced digital processing, and intuitive control—ensures that it stands out among similarly priced competitors. While its compact size makes it best suited for desktop use, pairing it with a subwoofer unlocks an expansive, immersive sound experience.If you’re looking for a desktop speaker or small bedroom setup that doesn’t compromise on connectivity or performance, the SA1 is certainly worth considering.
Last edited:
Moon5123
I don't understand why people don't compare products or services perspective when declaring words like crips, spacious, warmth, etc. it loses its meaning without a comparision in sound impressions.
Example: when a salesman show you a apartment he can call that the appartment is spacious but when you actually visit the site it's not.
Wouldn't it be much easier if the salesman give the perspective like the apartment is spacious than tipical dorm room in japan which gives you enough idea that flat is not spacious as per your need.
But true why would that saleman put a axe on his own leg.
So, yeah good review anyways. Thanks
Last edited:
jeromeoflaherty
100+ Head-Fier

Pros: Lovely build quality - feels great in the hand
Nice analog tuning dials for that retro experience
Optional usb dac cable
Earbuds provided - so a complete retro package (good as a present)
Bass Boost option
Very reasonable priced for everything you get.
Nice analog tuning dials for that retro experience
Optional usb dac cable
Earbuds provided - so a complete retro package (good as a present)
Bass Boost option
Very reasonable priced for everything you get.
Cons: Lack of PLL tuning (so doesn't stay connected to weaker radios)
Earbuds don't sound that great
Usb DAC is merely ok - (worse than the Apple Dongle)
Earbuds don't sound that great
Usb DAC is merely ok - (worse than the Apple Dongle)
FiiO RR11: Retro Revival in Your Pocket
The FiiO RR11 Portable FM Radio brings a refreshing blend of old-school charm and modern functionality. It is built for those who not only love radio but also appreciate the tactile nostalgia of analog design. The aluminum alloy knob create an experience that feels both retro and contemporary.
I would like to thank FiiO for providing the RR11 Portable FM Radio for the purposes of this review.
If you are interested in finding more information about this product, here
After spending a few weeks with the RR11, I feel I have a good sense of what you get with the RR11. Basically, you get a very high quality retro design with very nice feel in the hand and especially those the analog tuning dial, take you back to those older portable radios. And in typical FiiO fashion that retro feel is subtly mixed with some modern features.
While it’s easily the cheapest of FiiO range of retro products (also including the CP13, TT13 and DM13 ), it may not appeal to audiophile in the same way as those other products, as I will explain later.
But let’s get into the details of what you get in the box
Unboxing and Build Quality
The RR11 comes in a now typical FiiO design:
Nothing too exciting on the back:

Opening it up you see a quick start manual first:

Removing the manual reveals the RR11 and in a nice surprise you get some retro earbuds to use the RR11 immediately:

The earbuds:

| 
|
I felt including these earbuds was a nice touch making the RR11 an excellent present for someone. My wife almost immediately when she spotted it started using the RR11 with its earbuds while spring-cleaning in the back garden.
But in general the audio quality of earbuds like is poor compared to IEM’s, thankfully while the earbuds do provide added “aerial” for the internal FM tuner, you any IEM’s with the RR11, and it will also act as an external aerial.
Removing the top layer reveals the usb-c cables and some eartips for the earbud:

One of those usb-c cables is special though, so don’t lose it as its provides usb-c dac feature I will describe later.
Taking everything out of the box:

- RR11 Unit
- JF11 Retro-style Earbuds
- Warranty Card
- Type-C to Type-C Digital-to-Analog Cable
- Quick Start Guide
- Earbud Sponge Covers

FiiO have a few matching colours for their retro products, the silver of the RR11 blends well with my TT13:

Let’s have a quick tour of the RR11:
Analog volume + 3.5mm connector
| Analog tuner, DAC switch + bass boost
|
FM band switch:
|

Features and Performance
The RR11 is more than just a radio but at its heart it has an analog PVR tuner:Analog Tuning
The tactile feedback of this analog-inspired dials are really the core retro experience FiiO are providing with the RR1:But while this is great to have that older radio experience, it is also the weak point in the RR11 and one that might be addressed if FiiO decide to release an RR13 or RR15 model:
Two Weak points of the RR11:
Unlike the retro feel of touching physical media like a tape, a CD or even some vinyl, a radio was never physical and radio never “went away” to be “rediscovered” as we are still surrounded by generally good radio experiences, especially in our cars. Those radios have “digital” PLL tuners which effectively lock onto and stabilise weaker FM radio signals.So, in my experience, with the RR11 it was fine with more powerful local FM stations but would lose the connection very quickly with weaker stations especially when out walking around the neighbourhood.
The other modern convenience that we are all well-used to with our radios is having a set of preset “favourites”, typically that requires some “digital” display of the RDS name of the station and maybe a separate switch where the “analog” dial is merely jumping between saved favourites rather than “tuning in” a different station.
But I guess these type of features will make good enhancements for a RR13 or RR15 should FiiO decide to enhance this retro radio line of products and given the price FiiO are selling the RR11 at it is probably unfair to expect to much in the most basic model.
DAC Amp
Included with the RR11 is a DAC cable. When paired with an analog headphone amplifier adapter cable, the RR11 transforms into a dongle-style headphone amp system.
Take special care with this cable with the arrows, I initially didn’t notice the arrows on the cable and I had it connected the “wrong way” between my smartphone and the RR11.
When connected to my Macbook you get a good set of options:

Note: I have some measurements later, but in summary it is not the best DAC and something like FiiO’s KA11 is a far better DAC to pair with your smartphone, but it is a nice feature to have in your pocket.
Clear Indicators and Immersive Sound Effects
The thoughtfully designed orange-yellow retro lighting clearly indicates stereo status, tuning mode, and battery level, ensuring your always informed at a glance.
Ultra-Wide FM Band Coverage
As you can see in the photo above there are 3 separate FM ranges.I believe some of those ranges are more applicable to countries like Japan, but in some countries use some of those extra frequencies can pick up specialized college or campus frequencies or even taxi or police broadcasts. Though I didn’t pick up anything in Ireland outside the normal FM1 band.
Bass Boost feature
And as another extra feature, the RR11 features custom Bass Boost with option sound effects options:
So MAGIC BASS 1 (bass boost) or MAGIC BASS 2 (bass boost + 3D surround) certainly change the sound, for me this bass boost was too much and I measured it, and you will see those measurements later on. But it’s a nice option if you are a “bass head” and you get that bass boost when using the RR11 as an usb DAC.
Specifications and Measurements
| Hardware solution | SoC | MS430 |
| FM radio | SI4831 | |
| Analog sound effect & amp chip | FIIO DDB AS100 (custom chip) | |
| Color Options | Titanium Gold / Black / Red / Silver | |
| Dimensions & Weight | Dimensions | ~83.2 x 39.4 x 13 mm |
| Weight | ~46 g | |
| FM Frequency Bands | FM1 | 87–108 MHz |
| FM2 | 76–90 MHz | |
| FM3 | 64–87 MHz | |
| Volume Control | Volume knob | |
| Adaptive Impedance Range | 8–100 Ω | |
| Power Supply & Charging | Power supply | DC 5V / ≥1A |
| Charging time | ~2 hours | |
| Battery Life | FM mode (3.5mm out) | ≥8.5 hours |
| AMP mode (3.5mm out) | ≥17.5 hours | |
| Battery Test Conditions | Audio input (FM/AMP) | FM / AMP |
| Load | 32 Ω | |
| Volume level | 40 mV out | |
| Track format | MP3 44.1kHz / 16-bit | |
| FM Mode Performance | Output amplitude | L+R ≥ 4mV + 4mV |
| THD+N | < 0.3% | |
| Noise-limited sensitivity | ≤15 dBuV (S/N = 30 dB) | |
| SNR | ≥45 dB (A-weighted) | |
| AMP Mode Performance (3.5mm out) | Output power (16 Ω) | L+R ≥ 30mW + 30mW (THD+N < 1%) |
| Output power (32 Ω) | L+R ≥ 40mW + 40mW (THD+N < 1%) | |
| Output power (300 Ω) | L+R ≥ 5mW + 5mW (THD+N < 1%) | |
| Output impedance | < 1 Ω | |
| Crosstalk | ≥65 dB | |
| Output amplitude | 1.1 Vrms | |
| THD+N | < 0.04% (1kHz / -24 dB @ 32 Ω) | |
| SNR | ≥100 dB (A-weighted) | |
| Frequency response | 20 Hz–95 kHz: attenuation < 3 dB | |
| 20 Hz–20 kHz: attenuation < 0.1 dB | ||
| Noise floor | < 10 μV (A-weighted) | |
| Peak output voltage | 3 Vpp | |
| Input sensitivity | 0.9 V |
So while 40mw into 32 Ohms is fine as a basic DAC and similar to an Apple Dongle, the FiiO KA11 in comparison can get
up to 200mw into 32 Ohms.
Measurements
So, as basic measurements, I first measured a FiiO FD15 with an Apple Dongle and then using the RR11 as a comparison:
As you can see there is a little sub-bass roll off which is typical of cheaper USB dongle dacs.
Comparing the distortion shows it has a little bit more distortion than the Apple dongle:

Note: This distortion % is the combined FD15 + dongle distortion so will be different than "rated" figures.
I decided to see the DAC aspect of the RR11 and see what the Bass Boost modes do to the sound:

The bass boost mode do make a nice boost to the bass and I think for those who enjoy a little more bass this is a nice simple “EQ” they can apply.
Finally, I measured the frequency response from the FF11 earbuds with different placements in my KB501X pinna:

As you can see the frequency response varies greatly when you place the earbuds in different positions. This is one of those subjective things you will notice with earbuds, you need to “fiddle” with the seating to get a satisfying sound and even then the bass is never good (either too boomy) or with a large roll-off.
Rating
I have given the RR11 a pragmatic score of 4 out of 5. It looks and feels fantastic and for the price is jam packed with extras like the earbuds, the DAC and the bass boost features, but if you want it just for the radio experience I feel the lack of a PLL tuner that “locks” onto a signal might disappoint those in “weaker” FM signal areas.Conclusion
The FiiO RR11 Portable FM Radio stands out as a beautiful fusion of retro aesthetics and some modern functionality. Its ultra-thin, aluminum alloy design, tactile tuning experience, and retro radio reception would make it a nice present for audio enthusiasts who love radio and value both style and substance. Whether you’re reminiscing about the golden age of FM radio or seeking a versatile device for on-the-go listening, the RR11 delivers that retro radio experience.FiiO’s dedication to blending the best of retro audio “history” with contemporary tech takes another step forward with the RR11.
Last edited:
F
FiiO Willson
Thank you for your review.
Today, it's much easier to make digital adjustments than it is to make manual adjustments. But it's the manual adjustments that have the original feel, and that's a difference we made on purpose.
Exchangeable batteries and external amplifier, due to volume limitations, this one did not do, I think the back of the product we will focus on these considerations!
jeromeoflaherty
100+ Head-Fier

Pros: Excellent metal work and general build quality for the price
Innovative metal magnetic ring used to convert any large earpad into a Magnetic earpad for the Verum 2
Cool "steam punk" look (especially with the Pearl colour)
Great bass extension and sub-bass boost with the Bass Post
Midrange forward tuning - providing more imaging depth to more midrange focused music
Very easy to EQ
Different earpads can significantly change (For better or worse) the sound signature
Cons: Cardboard box is a bit of a disaster
Cable is fine but poor for even for a €300 headphone
Midrange might be "shouty" to some
Style won't be for everyone
Cable is fine but poor for even for a €300 headphone
Midrange might be "shouty" to some
Style won't be for everyone
Verum 2 : Forged in a War zone
The Verum 2 builds upon five years of community feedback and engineering advancements. Designed to transcend its price category and compete with flagship models, the Verum 2 aims to deliver an uncompromising planar magnetic experience.

So does it deliver on this promise? Let’s find out.
I purchased mine via the kickstarter campaign the basic €300 offering.
And this webpage is still the best place for information about this headphone. In hindsight, I regret not going for the more expensive €400 as the hard case and the second pair of earpads would have been an excellent upgrade.
I have been listening to the Verum2 for more than a month now and comparing it with various headphones in my collection, I will say upfront its styling and tuning won’t suit everyone but for me and those who like a collection of unique headphones, especially at this price, it should be one to add to your collection.
The Elephant in the Listening Room
Before diving into the sound, build, and technology of the Verum 2, it is necessary to address the context surrounding its creation. The Verum 2 is the work of Garuspik, a controversial figure in the headphone community, whose past behavior has sparked justified criticism. While his previous model, the Verum 1, was widely regarded as an exceptional performer, it was overshadowed by troubling comments and actions that alienated many.I have worked with many Ukranians and Russians over the past few years, and they can be very abrasive especially when under pressure and I cannot imagine a more stressful environment to try to build a headphone company than within a warzone, but that should not excuse his past behavior.
However, this review will focus on the product itself rather than the creator. I believe that this headphone deserves to be judged on its own merit, while also acknowledging the hope that past missteps have led to growth and lessons learned.
With that addressed, let’s get into the details of the Verum 2, starting with probably the weakest part of the experience for me the unboxing.
Unboxing
So, I heard previously of issues with the delivery of the original Verum 1, but my heart sank when I opened the door and was handed this box with the Verum 2:
I quickly open it up and thankfully there was enough wrapping around the Verum 2 that it was not damaged in the shipping.

The cable that mine came with is fine but nothing special, I didn’t use this cable:

While I love that every penny was saved for the headphone itself, I feel maybe adding $50 to the overall price and using a higher quality box and possible UPS or FedEx shipping would remove any danger of the headphone being damaged in shipping. As you will see the headphone itself deserves a better box.
Note: There was a “Kit offering” which I now regret not opting for via the kickstarter campaign, which included alternative cables, a second set of earpads (hybrid ones) and a carry box.
But with this aspect out of the way lets get into the good stuff:
Build, Design and Comfort
The Verum 2 is a striking headphone, available in five distinct colors: Pearl, Yellow, Red, Kickstarter Green, and Black.
My unit, in Pearl, exhibits a sleek, slightly retro steam punk aesthetic that combines industrial durability with a refined finish:

When the kickstarter launched I was watching the Arcane TV show and I fell that the overall look of Verum 2 would work perfectly in that show.
I thought it would make a nice unusual headphone for my collection, and I was not disappointed this headphone looks better in person than these photos show:

But I would imagine this look will not be for everyone:

The hardened steel headband, powder-coated metal components, and shockproof ABS cups already suggest much more longevity to this headphone over the Verum 1:

| 
|
I love the mechanical design of the headband adjustment mechanism combined with the extension allowing great flexibility both supporting various head sizes and supporting angled earpads without uneven pressure around your ears:

| 
|

| 
|
There is a foam material behind the metal frame that I imagine protects driver from the outside, but I feel might deteriorate over time so that might be a problem and possible a weak point in this design:

Nice detail in and around the connector:

The overall weight is 450 grams which considering the amount of metal in the design is reasonable:

Overall, once you adjust the headphone it does feel very comfortable wearing for long periods:

Technology & Engineering
At the core of the Verum 2 is a very large 105mm planar magnetic driver, which incorporates several advancements over the Verum 1, this information is derived from the Kickstarter page:- Ultrathin diaphragm: At just 2.5µm, the new membrane is ten times thinner than its predecessor, significantly reducing mass and improving transient response.

- Silver conductive traces: Unlike the aluminum traces of the Verum 1, the Verum 2 employs silver, offering better conductivity and reliability.
- Enhanced magnet structure: Featuring 44 rare-earth neodymium magnets (up from 28 in the Verum 1), the Verum 2 generates a more powerful and uniform magnetic field, improving efficiency and dynamic control.
- Bass-reflex port system: A unique addition, these ports within the earpads enhance sub-bass response below 70Hz while also improving ventilation, addressing one of the common limitations of planar magnetic headphones.

- Magnetic Earpads Another unique solution I loved with the Verum 2 is how simple and ingenious the metal ring used for the Earpads:

| 
|
This metal ring makes super easy to attach to the earpads that are roughly 100mm in size and makes swap earpads very easy, but I found the stock angled earpads were very comfortable.
Ultimately, while I did swap earpads many times and even found some sonic benefits using alternative earpads, I continued to use the stock angled ones with a little bit of EQ to my personal tastes:

But I would love Verum Audio to sell the metal rings separately as I am someone who does like to swap pads regularly, and it would be nice to quickly A/B test different earpads.
I actually found my perforated angled sheepskin earpads were a good alternative though they lack the bass port so provide a more neutral sound but you loose that sub-bass boost:

| 
|
Sound Performance
The Verum 2 is designed to challenge the notion that price dictates quality, and in practice, it succeeds though it does provide a more midrange vocal forward tuning which might not suit everyone. I know some people can hear this type of tuning as “shouty” and possible ’nasally’ but I mostly found it worked well for most of my reference indie rock and folk playlist and a nice addition to some of the other planars that I have been listening to recently.Though this is a very competitive market with some exceptional planars like Hifiman Sundara and the FiiO FT1 Pro been the most obvious competitors to the Verum 2.
Bass
Unlike many planar headphones that rely on EQ to achieve deep bass, the Verum 2 delivers sub-bass naturally, thanks to its innovative bass-reflex system. While the tuning leans slightly cool in its tonality—lacking a bit of warmth in the mid-bass region—it never feels thin or anaemic. Instead, it offers definition and texture that allow basslines to sing without muddying the rest of the spectrum.Track 1: “Royals” by Lorde — The sub-bass presence is clean, controlled, and atmospheric, emphasizing the track’s minimal yet deep rhythm section.
Track 2: “Redemption Song” by Bob Marley (Live) — The low-end textures of the live guitar and subtle bass lines carry a delicate clarity that underlines the headphone’s ability to portray natural timbre with extension.
Mids
This is where the Verum 2 steps confidently into the spotlight. The midrange is forward and engaging, offering remarkable vocal presence and acoustic clarity. It reminded me in some ways of high-end Focal headphones, where detail and intimacy walk hand-in-hand. Instruments are vivid, lifelike, and never veiled, although some may find this forwardness bordering on analytical in the wrong chain.Track 1: “Tears in Heaven” by Eric Clapton (Unplugged) — Clapton’s vocal and acoustic work sound tactile and haunting, with every string pluck rendered in detail.
Treble
Treble is detailed, resolving, and airy—but also slightly hot for my personal taste. Out of the box, I found the upper frequencies a bit too elevated, especially on long listening sessions. I ended up lowering the treble slightly using EQ to bring it closer to my preferred darker tuning. That said, treble lovers and those seeking microdetail will likely be thrilled.Track 1: “Take Five” by Dave Brubeck Quartet — The cymbals shimmer with precision and energy, but on louder volumes, can verge on sharp without adjustment.
Soundstage & Imaging
The soundstage is good but not as wide as my more “soundstage” focused headphones like the Edition XS. But I think this tuning can help with imaging provided a very nice layered experience especially with rock and pop music as it increase a sense of depth rather than width.Track 1: “Hotel California (Live Acoustic)” by Eagles — You can trace the positioning of guitars relative to vocals with perceived accuracy.
Track 2: “Redemption” by Dermot Kennedy — The intimate production and vocal layering take full advantage of the Verum 2’s imaging strengths within its moderately wide, but highly controlled stage.
Comparisons & Value
At approximately €400 (€300 if you managed to get one like I did via the Kickstarter), the Verum 2 occupies an aggressive price point in the planar magnetic market. Competing models, such as the Hifiman Sundara, Audeze MM-100 and since the Kickstarter was launched the Verum 2 also has a new competitor with the FiiO FT1 Pro.Here is the Verum 2 with some of my other recent ‘artisanal’ headphones that I have reviewed though these are much more expensive with the Mirph1 being double the price and the Modhouse tungsten 4 times is 4 times the price.
Build quality compares well with both the Modhouse Tungsten and the Mirph1, the metal work especially on the Verum2 makes it stand out which is pretty incredible given its €300 price tag:

The earpads on all three of these headphones make nice contrasts. I personally like larger “round” internal shape to earcups as I feel this allows me to move the headphone on my head without affecting but the deep angled shape of the Verum 2 is still very nice and comfortable headphone:

The earpads have a similar size to the Tungstens, but I would probably take the Modhouse Tungsten more neutral midrange tuning over the Verum 2 with EQ:

With a little EQ, I think the Verum 2 compares very well much more expensive headphones.
Specifications and Measurements
| Driver Type | Planar Magnetic |
| Driver Size | 105 mm |
| Diaphragm Material | 2 µm Mylar + 0.5 µm Silver conductive layer |
| Magnet Count | 44 rare-earth neodymium magnets |
| Impedance | 12 Ω |
| Sensitivity | 94 dB/mW |
| Distortion (@106 dB SPL) | ~0.05% across most of the frequency range |
| Distortion Below 100 Hz | ≤ 0.2% |
| Bass Extension | Bass-reflex ports in pads enhance extension below 70 Hz |
| Build Materials | Hardened steel headband, natural sheepskin earpads, shockproof ABS cups |
| Connector Type | 3.5mm German-made connectors in each cup |
| Color Options | Pearl, Yellow, Red, Kickstarter Green, Black |
| Retail Price (approx.) | ~€300 (Kickstarter) |
Measurements
Note: The following measurements were taken with my KB501X soft ear Pinna and a 711 clone coupler. They are available on my measurement database here.Frequency Response
So in the FR you can see that midrange forward nature of the Verum 2:
For comparison here are my measurements adjusted for my and compared with my HD600:

I spotted that @ludoo over on SBAF measured his Verum2 on his flat measurement rig and compared it to his HD600:

Obviously different rigs will generate different results, but I hope the 2 graphs above shows the relative differences between the Verum 2 and a HD600, mainly the sub-bass extension and that forward midrange area.
Here is a comparison using the alternative “perforated” earpads which I used for several days on the Verum 2:

I highlight a few areas - mostly to show that earpads can make a huge difference in the sound profile you get:
- The sub-bass is much better with the “Bass port” on the stock pads
- The midrange is much closer to harman with the perforated pads
- The treble can get boosted with these earpads
So comparing both with my Sundara's:

I also measurement different “positions” of the stock pads on my measurement rig and when using glasses:

Mostly the different is with the bass, but I was very impressed that the wearing glasses doesn’t makes much of a difference with this headphone.
I went a bit crazy one day measuring about 7 or 8 different earpads and as you can see you can get very different results:

One of the best overall was a cheaper “velvet” earpads, but they were less comfortable for me, so I didn’t spend much time using these actually listening to music:

Overall, the selection of earpads can make a huge difference with this headphone, but I mostly like the stock earpads with some EQ the best.
Distortion
As is typical of planars the harmonic distortion is low:
And as a percentage:

EQ recommendation
This was the EQ profile I have mainly been listening to the Verum 2 with, especially after the first week:
Mainly this is just about lowering that midrange and then I also applied some tweaks that I personally felt where necessary in the treble, but will be different on everyone’s head so I am not providing them below.
Filter 1: ON PK Fc 1100 Hz Gain -3.7 dB Q 1.600
It should also be said that this area is probably the most consistent area to apply EQ too, but give this headphone a go without EQ and if you feel its a bit "shouty" I feel this EQ will fix that tonality.
Rating
I debated whether I would give this a 4 star or a 5 star pragmatic rating, in the end I felt, for me and for the price, it deserved a 5-star rating. I personally would EQ any headphone and I do EQ the midrange here.I do know its looks won’t be for everyone, but I feel it has a very clever design, is very comfortable from the stock angled earpad and that bass port provides a lovely sub-bass boost and overall it delvers a unique sound profile that itself is easy to EQ should you feel it necessary.
While the controversy surrounding its creator cannot be ignored, the Verum 2 offers a redemption of sorts and by itself deserves recognition for what it is as a unique and compelling planar magnetic headphones that competes very well in the sub $1000 price range.
Conclusion
The Verum 2 is an exceptional planar magnetic headphone that defies its price point, delivering almost exceptional build and sound for a fraction of the cost.For those willing to separate the art from the artist, the Verum 2 is an audiophile gem, for those building a pragmatically priced collection of headphones I feel the Verum 2 is an excellent addition to that collection offering a few things that none of its competitors offer.
Attachments


Last edited:
T
thnkdifferent
Nice write up. Thanks for the measurements! I'm sure enjoying my green Ukranian Verum 2 with my green Ukranian Rebel Amp!
jeromeoflaherty
100+ Head-Fier

Pros: Gorgeous minimalist design perfect for desktop
Amazing Volume Dial
Extensive PEQ Capabilities
Excellent 3.2W of power from 6.35mm Jack
Auto Gain
USB, SPDIF inputs
RCA output (toggle on back to between headphones and RCA)
Amazing Volume Dial
Extensive PEQ Capabilities
Excellent 3.2W of power from 6.35mm Jack
Auto Gain
USB, SPDIF inputs
RCA output (toggle on back to between headphones and RCA)
Cons: Only Singled Ended output so no XLR or 4.4mm outputs
Minimalism Meets Perfection
The JDS Element IV is a minimalist desktop headphone amplifier and DAC, designed for audiophiles who seek powerful, pure sound without the clutter. The Element IV promises clean aesthetics, high power output, and intuitive, versatile EQ capabilities and in this review I won’t keep you in suspense, it delivers on its promises.
I would like to thank JDS Labs for providing the Element IV for the purposes of this review.
If you are interested in finding more information about this product you can find it here.
So after a month of extensive use, the JDS Element IV has become an indispensable place as my main working from home desktop amplifier setup. It effortlessly powers all headphones I own and any ones I have borrowed for review purposes, it simplifies connectivity to both my desktop speakers and my Macbook Pro, and provides stellar EQ functionality, all wrapped in a beautifully minimalistic design that takes up very little space on my Desk.
Now, let’s dive into what makes this ‘minimalist’ amplifier special.
Unboxing and Build Quality
Unboxing the Element IV is a straightforward as it comes in environmentally friendly packaging:
| 
|
Inside, you’ll find the amplifier itself, a robust power adapter, USB Type-C cable, and some documentation. Although minimal, the contents reflect the clean design philosophy.

The Amplifier itself
The Element IV’s design is exquisitely simple, with an understated aluminum chassis and a mesmerizingly smooth, oversized volume control. It shouldn’t be possible to fall in love with a volume control, but the Element IV’s control feels uniquely satisfying with its buttery-smooth rotation and precise feedback.
Build quality is impeccable; it feels substantial without taking up unnecessary space, perfectly suited to a tidy desktop setup.
The 2 key visual aspects of the design are the massive volume control that just begs to be touched:

Headphone or RCA toggle
Clicking on the volume button toggles between the Headphone and RCA Preamp outputs, the Element IV cleverly remembers the volume and EQ between the headphone and the preamp outputs allows you to have for example some Room correction EQ on the RCA outputs while at the same time having dedicated EQ for your headphone.This together with the Auto Gain feature (which I will explain a little bit more later) are ingenious solutions to keep the Element IV clean, minimalistic and most importantly ‘button free’.
Screen
And the small screen which discretely shows relevant information for a few seconds then will turn black again:
Note: This glass is actually tinted and is made from Gorilla glass so should width day to day usage for a long time.
Typically, it displays the Input Mode (usb, optical), Format, Bitrate, current Volume, Output mode and current Gain:

But also can be used to change configuration options:
Options menu:
Clicking and holding the volume button for 3 seconds shows the “options” menu on the display with a huge amount of configuration options:
But as you will see you can also configure these settings via the Web UI, but for example here is the DAC submenu:

On the back:
On the back you get both an usb-c DAC input and an optical/SPDIF input as well as RCA outputs.
Even when “fully” loaded the back of the Element IV does not feel cluttered:

You can configure the ‘mode’ button to have a different behaviour but the simplest (and default) is to toggle between the usb-c and optical inputs.
Desktop setup
I have been using the Element IV daily for the best part of a month now while working from home, and I think it is actually the perfect desktop headphone amplifier, it is small but easy to reach:
It also has more than enough power to effortlessly drive any headphone including very power hungry ones like the Modhouse Tungsten and the Sennheiser HD800s both of which I used for hours daily with the Element IV:

Features
Let’s get into some of the important ‘internal’ features of the Element IV:Powerful Output:
Delivers up to 3.2 watts per channel into 32-ohm loads, effectively driving a wide range of headphones, from sensitive in-ear monitors to demanding planar magnetics. Parametric Equalization (EQ):
Features a 10-band parametric EQ accessible via the JDS Core™ web app, allowing precise sound customization to match user preferences and headphone characteristics.To use this you simply need to browser to https://core.jdslabs.com on Chrome or similar browser (but not Safari or Firefox) then you select to the JDS Element IV from the dialog that pops up to allow access to the “usb serial port”:

Once you connect you can tweak the EQ:

JDS have done a lovely job with the UI here allowing you to drag the EQ to your liking without needed to enter any vales should you want it. You can decide if you want the EQ immediately applied or not. So for example, a bass boost can be a good thing to visually adjust the bass while listening to get your preferred level.
You can also import an exported PEQ from various popular measurements databases including Squig.link, graph.hangouts. com and of course Pragmatic Audio IEM and Pragmatic Audio Headphone databases.
I really like that you can have a list of presets for both the headphone output but also for the RCA pre-amp output.
Finally, once you have imported a EQ profile it is available as a “My Presets” on the right-hand side:

You can have many presets in this area and quickly switch between profiles.
Because I liked how well this works, I am planning adding a new feature to Pragmatic Audio where you can push PEQ directly to Element IV presents menu.
Overall, the core JDS website is a pleasure to use to edit and configuration PEQ filters, I feel it does everything you should expect and more from a PEQ tool.
Other Configuration options
As well as the PEQ configuration you have access to change all the DAC configuration options via various core website:
| 
|
And you can configure even change the behaviour of the buttons on the via these configuration screens:

Auto Gain Functionality:
This is a super clever feature and one I hope lots of manufacturers adopt but the Element IV supports automatically adjustments to the gain settings based on volume levels, ensuring optimal performance without manual intervention. Basically, as you approach 0 dbSPL it will switch from low gain to high gain in a gradual fashion seemlessly support a huge range of gain.RCA Auto Gain
You can also configure the RCA pre-gain to be manual if you want:
Perfect Channel Balance:
Maintains precise channel balance down to -127.5 dBFS, enhancing soundstage accuracy and overall listening experience.Robust Build Quality:
Constructed with a sleek, all-metal chassis and a tactile volume control, combining durability with aesthetic appeal, I had been using the FiiO K11 in this space (as it is a similar size):
But the added power and especially the EQ capabilities of the Element IV meant it was an easy upgrade in every way, and though the K11 build quality is excellent for its price range, the Element IV is easily worth the upgrade. I have added a more detailed comparison with the new FiiO K17 later in this review.
Sound Impressions
The Element IV shines through its powerful, clean, and very neutral presentation, allowing headphones to reach their full potential. The power provided on the headphone jack is outstanding meaning I never felt that something was missing from even my most demanding headphones and the auto gain feature is super handy if you are switching between demanding headphones to IEMs.Bass
The bass reproduction is impressively clean, fast, and authoritative even with the most demanding headphones.Testing with tracks like Daft Punk’s “Instant Crush” showcases deep, controlled lows that never muddy the sound.
Mids
Vocals and instruments sound incredibly natural and detailed. Listening to Norah Jones’ “Come Away With Me,” the midrange clarity and richness are captivatingly lifelike.Treble
The treble response is smooth yet detailed, offering exceptional clarity without harshness. “Hotel California” by the Eagles beautifully illustrates the Element IV’s ability to deliver sparkling treble detail without fatigue.Soundstage and Imaging
The soundstage is spacious and impressively precise, offering excellent separation and imaging accuracy—perfectly demonstrated by Pink Floyd’s “Money.”Specifications and Measurements
| Specification | Details |
| Output Power | 3.2W @ 32Ω (Single-ended) |
| DAC | ESS Sabre DAC |
| Input | USB Type-C |
| Outputs | Headphone Out, RCA Line Out |
| EQ Configuration | Browser-based real-time adjustments |
| THD+N | <0.00008% |
| Dimensions | Compact desktop footprint |
The DAC supports up to 32/384khz though if you enable the DSP this is then limited to 32/192Khz as you can see from my Mac:

Measurements
For precise measurement references, I suggest diving into both Amir’s detailed analysis at AudioScienceReview and Cameron’s comprehensive measurements at Headphones.com as both highlight the Element IV’s exceptional performance, with negligible distortion and flat frequency response.But I thought I would highlight some of the key aspects of both these technical reviews so first both the Audio Precision Dashboard get effectively the same result:
| Amir dashboard from ASR: | Cameron’s dashboard from Headphones.com: |

| 
|
And I thought this was excellent as both got the same result of 3.1w into 32 Ohms:
| Amir’s result from ASR | Cameron’s results from Headphones.com |

| 
|
Often when you see specifications like 3.2w Ohms into 32 Ohms from manufacturer who have to be a bit skeptical but in this case you can see both Amir and Cameron got very close e.g. 3.14W in 32Ohms. While I would encourage everyone to check out both reviews this was mostly all I needed to know, we have clean and powerful output from the Element IV verifed separately by 2 independent websites.
Comparison with the FiiO K17
This is probably an unfair comparison, comparing the Element IV with a more expensive “desktop” amplifier but since I have been using both for the past few weeks I thought it might be useful.
The JDS Labs Element IV and the FiiO K17 are both high-performance DAC and headphone amplifier offering eq capabilities, but beyond that each company have gone in very different but interesting directions, the FiiO is following their trend of Retro inspired designs with lots of ‘buttons’ and pretty extensive connections on the back while JDS have gone for a minimalist design, both will have their fans but for a desktop setup I liked the Element IV much better (and I said this in my recent K17 review).
Here’s a comparative overview:
Power Output:
- Element IV: Delivers up to 3.2 watts per channel into 32-ohm loads, effectively driving a wide range of headphones, including demanding planar magnetics.
- K17: Offers a substantial 4.0 watts per channel in balanced mode, providing ample power for high-impedance and power-hungry headphones.
Digital-to-Analog Conversion (DAC):
- Element IV: Utilizes an ESS Sabre DAC renowned for its low noise and high-fidelity audio reproduction. 
- K17: Features a dual-DAC setup with AKM AK4191 and dual AK4499EX chips, aiming for a rich and detailed sound signature. 
Equalization and DSP:
- Element IV: Equipped with a 10-band parametric equalizer (PEQ), allowing precise sound customization via the Core™ web app.
- K17: Potentially offers a 31-band high-precision lossless PEQ, managed through its integrated DSP, enabling detailed frequency adjustments. 
User Interface and Controls:
- Element IV: Features a minimalist design with a prominent horizontal volume knob and a small OLED display for clear status information.
- K17: Boasts a 3.93-inch LCD touchscreen, providing an intuitive interface for navigation and settings adjustments. 
Connectivity:
- Element IV: Includes USB Type-C and optical (TOSLINK) inputs, along with RCA preamp outputs for integration with various audio systems. 
- K17: Offers extensive connectivity options, including dual-band Wi-Fi (2.4Ghz/5Ghz), Ethernet port, Bluetooth, and RCA inputs, catering to both digital and analog sources. 
Design and Build:
- Element IV: Presents a sleek, compact form factor with a focus on functionality and ease of use.
- K17: Features a retro-inspired aesthetic with tactile controls, combining modern technology with classic design elements. 
Price Point:
- Element IV: Priced competitively around $549 USD, offering a balance of performance and affordability.
- K17: Positioned in the higher-end segment at approximately $899 USD (though I think the Tariff changes might cause this price to increase), reflecting its advanced features and robust build quality. 
Rating
I am giving the Element IV a 5-star pragmatic rating because it does what it sets out to do perfectly, as is the perfect desktop companion. With lots of power, phenomenal EQ functionality, and gorgeous minimalist aesthetics, it is genuinely an endgame desktop amplifier under $600.Conclusion
The JDS Element IV redefines minimalism and precision, offering fantastic sound quality, impressive power, and intuitive configuration and EQ features. It truly stands alone in its category as the ideal desktop amplifier especially if you like a clean look.So, If you are looking for a minimalist headphone amplifier with power, precision and all the flagship level features you might need the JDS Element IV is an easy recommendation.
Last edited:
OneEyedHito
@LarsNL go to Squig.link and get them PEQ settings that match your taste there.
jeromeoflaherty
Well what is great about the Element IV is it will scale beautifully to even very hard to drive headphones like the Tungsten, so really it is more about what headphone you want, I am really enjoying some Meze headphones with it currently ( that I have on loan).
I would suggest if you know where and when you will use the Element IV that should dictate the headphone, if it is your desktop setup a comfortable all day headphone might be best, if it is your evening amplifier maybe go for a big planar. I quiet like my Edition XS with it also
I would suggest if you know where and when you will use the Element IV that should dictate the headphone, if it is your desktop setup a comfortable all day headphone might be best, if it is your evening amplifier maybe go for a big planar. I quiet like my Edition XS with it also
jeromeoflaherty
100+ Head-Fier

Pros: Amazing Design and Engineering
Extremely comfortable
Very nice slightly warm yet balanced Meze sound
Easy to take apart and repair for long term maintenance
Good case and 2 nice cables provided
Extremely comfortable
Very nice slightly warm yet balanced Meze sound
Easy to take apart and repair for long term maintenance
Good case and 2 nice cables provided
Cons: Not for those seeking a Neutral sound signature (as mid-bass is warm and lower treble is slightly emphasized)
The Meze 104 AER is a very similar headphone for 1/2 the price
The Meze 104 AER is a very similar headphone for 1/2 the price
Stunningly beautiful headphone that embodies the emotional side of audio
Meze Audio has long been known for its stunning industrial designs and premium craftsmanship, and the Meze 109 Pro is no exception.As the company’s first open-back dynamic headphone, it combines a 50mm dynamic driver with high-quality materials such as black walnut wood, copper-zinc alloy, and manganese steel. The result is an elegant, lightweight, and beautifully crafted headphone that exudes luxury while delivering an exceptionally engaging sound.

I would like to thank Meze Audio for providing the 109 Pro for the purposes of this review.
If you are interested in finding more information about this product, you can check it out here.
After spending a few weeks with the 109 Pro, I can confidently say that it is a perfect blend of design, comfort, and sound. It is one of the rare headphones under $1000 that can impress in all three areas and this is the reason I am calling the 109 Pro a perfect coffee table headphone:
With every headphone I review, I do a little test of friends and family and how they react when they see something I might have left on the coffee table, often they completely ignore it or my kids might even tell me something is ‘stupid’ or ‘ugly’, but the 109 Pro literally “turned peoples heads” and generated a few “wows” on first sight.
A headphone that “turns heads”
I think the 109 Pro is the first headphone that got a “3-wows” in my little subjective test, after the initial “wow” that is a gorgeous headphone, I would ask if they want to try it on and would generally get a 2nd “wow” and finally I played some music for them and got that 3rd “wow”.I do think this is what distinguishes high-quality high-end audio products from other products, everyone can appreciate the looks, the build quality, the comfort and ultimately this is what helps bring people into the audio hobby.
I think together these are the “emotional aspects” of the audio experience deserve credit and credit to Meze they produce some gorgeous, comfortable headphones that have a unique rich / warm sound signature.
Basically, in summary I think the 109 Pro is a complete package for $800. I had been listening to and recently also reviewed to the Meze 104 AER and in lots of way it is a very similar headphone but for 1/2 the price as Meze cleverly gave that headphone a little bit of the magic of the 109 Pro, but the 109 Pro looks more premium and its sound is just a little richer than the 104 AER. I even recommended some EQ for the 104 AEE to get it closer to the 109 Pro. So, if you are chasing that Meze ‘rich’ sound the 109 Pro delivers without EQ.
Meze have always tuned their headphones with a balanced yet unique sound signature, positioning their various headphones cleverly where you get a little bit better build quality and some tweaks to the sound as you move up the headphone range.
What led up to the 109 Pro?
The 109 Pro was built on a rich heritage of Meze building quality headphones:| Year | Model | Type | Driver Type | Notes |
|---|---|---|---|---|
| 2015 | Meze 99 Classics | Closed-Back | 40mm Dynamic | Meze’s first major success; known for warm, musical sound and premium wooden earcups. |
| 2017 | Meze 99 Neo | Closed-Back | 40mm Dynamic | A more affordable version of the 99 Classics with plastic earcups instead of wood. |
| 2018 | Meze Empyrean | Open-Back | Planar Magnetic | Flagship planar magnetic headphones developed with Rinaro Acoustics; revolutionary dual-membrane driver. |
| 2021 | Meze Liric | Closed-Back | Planar Magnetic | Portable, high-end planar magnetic headphones using the same Rinaro driver technology as Empyrean. |
| 2022 | Meze Elite | Open-Back | Planar Magnetic | Successor to the Empyrean; more refined tuning, increased resolution, and lighter build. |
| 2022 | Meze 109 Pro | Open-Back | 50mm Dynamic | Meze’s first open-back dynamic headphone, featuring a custom dual-composite driver. |
Unboxing and Build Quality
The Meze 109 Pro arrives in a stylish square box featuring a cool geometric design on top:
Everything about the unboxing exudes elegance with subtlety touches like the impression of the headphone on the back:

Inside, you’ll find a well-designed hard-shell carrying case:

The carrying case is very nicely built:

Removing the carry case you can see some documentation underneath:

Finally opening up the case we get to see the 109 Pro:

And overall this is very consistent with Meze’s luxurious packaging aesthetic:

Along with a leather pouch containing two detachable 3.5mm cables—one long and one short.

The Headphone Itself
Meze never fails to impress when it comes to design and build quality, and the 109 Pro continues this tradition:
Inspired by the original 99 Classics, this model elevates the aesthetic further with an intricate spider-design earcup, real walnut wood, and copper-zinc alloy details.

I love the level of detail you get in every aspect of this headphone, for example, the copper mesh over the driver itself is quiet beautiful:

The entire structure is flexible yet robust, ensuring longevity and sustainability every part is easily replaceable, which is a hallmark of Meze’s commitment to long-term usability.
Meze even have a publicity photo showing all the individual components that make up the 109 Pro:

You can see the screws in these photos:

| 
|
The 3.5mm connectors provide a secure fit and allow for easy aftermarket cable swapping, making it versatile for those who enjoy customizing their setup, but Meze themselves have an excellent boom mic cable which fit perfectly:

While similar in design to the newer 105 AER, the 109 Pro is clearly the more premium headphone:

| 
|
Comfort and Fit
Despite its relatively compact earcups, the 109 Prooffers excellent comfort.
Replacing / upgrading these earpads is relatively easy as there is a plastic ring around the back of the earpads offering some rigidity and a small lip to secure the earpads:

| 
|
It has a self-adjusting headband, ensuring a perfect fit without requiring manual adjustments:

| 
|
The clamping force is just right—snug enough for stability but never too tight.

The velour earpads strike a balance between firmness and plushness, preventing your ears from touching the driver while maintaining comfort over extended listening sessions. And thanks to its lightweight design (375g), you can wear it for hours without fatigue.

I do think both the 104 AER and the 109 Pro offer the right compromise for most peoples heads between super large ear cups and tiny earpads. For example here is the size compared to my Hifiman Edition XS:

Internal Driver Architecture
At the core of its design is a dual-composite diaphragm, composed of three carefully selected materials: a Beryllium-coated polymer for the dome, a cellulose-carbon fiber composite for the driver membrane, and a copper-zinc alloy stabilizer at the center.This combination optimizes rigidity, damping, and weight, ensuring fast transient response, low distortion, and excellent frequency reproduction.

You can see this driver clearly if you remove the earpads:

| 
|
The Beryllium coating enhances stiffness while maintaining low mass, allowing for precise treble extension without harshness. The cellulose-carbon fiber blend reduces resonances and contributes to a natural midrange with excellent instrument separation, while the copper-zinc stabilizer minimizes unwanted vibrations, improving clarity and dynamic impact.
Sound Impressions
The Meze 109 Pro is a rich, immersive, and dynamically engaging headphone. Meze are known for having a rich ‘house sound’ but the 109 Pro is probably the most neutral and balanced headphone in their collection. It has a full-bodied midbass and a matching slightly emphasised treble which work harmoniously to create a highly musical and enjoyable yet balanced sound. It can be a sound to fall in love and has helped Meze gather a huge world-wide following.Bass
The midbass is rich and textured, adding warmth and depth to the presentation. While it doesn’t extend into the * deepest sub-bass* as some planar models do, it provides a satisfying and organic bass response that complements many genres well.Test Track: “Angel” - Massive Attack
- The bass hits with depth and control, never overpowering the mix but always present.
- Layering and texture are excellent, adding realism to each bass note.
Mids
The midrange is lush, warm, and smooth, characteristic of Meze’s tuning philosophy. Vocals and instruments have a * rich timbre*, making this headphone particularly engaging for vocal-centric music.Test Track: “Hotel California” - Eagles (Live)
- Vocals sound natural and full-bodied, with excellent texture.
- Acoustic guitars have a realistic bite, maintaining clarity without harshness.
Treble
While some treble enhancement is present, it never gets harsh or sibilant. The upper frequencies add a sense of air and detail, making for a lively yet non-fatiguing presentation.Test Track: “Bubbles” - Yosi Horikawa
- Percussion and high frequencies sound crisp yet smooth.
- There’s no excessive brightness, but enough presence to keep details engaging.
Soundstage & Imaging
The soundstage is wider than most dynamic driver headphones, providing an open and spacious presentation. Imaging is excellent, allowing instruments to be placed with precision across the stereo field.Specifications and Measurements
| Specification | Details |
|---|---|
| Transducer Type | Dynamic |
| Driver Size | 50 mm |
| Impedance | 40 Ω |
| Sensitivity | 112 dB SPL/mW at 1 kHz |
| Frequency Response | 5 Hz - 30 kHz |
| Total Harmonic Distortion | <0.1% at 1 kHz |
| Weight | 375 g (13 oz.) |
| Ear Cups | Black Walnut Wood |
| Input Connector | Dual 3.5mm TS Jack |
The important specifications here are the impedance and sensitivity which show this is a super easy to drive headphone. While I have been listening to it with some price equivalent amplifiers like the JDS Element IV and the new FiiO K17, it does work exceptionally well with everything from my Macbook Pro and even the Apple USB-C dongle.
Frequency Response
Note: The following measurements were taken with my KB501X soft ear Pinna and a 711 clone coupler. They are available on my measurement database here.
I added a few areas to highlight what sound you can expect from the 109 Pro:
- Great bass extension
- Rich sounding mid-bass
- Recessed 1K-2K region typical of headphones aiming to provide a decent soundstage
- Great treble which extends deep (balancing that rich mid-bass)

And, here is a comparison with the Meze 105 AER:

On this graph, I added two areas to note, the 109 Pro has a richer mid-bass (1) and has a fuller more extended treble (2)
And finally with the Frequency Response, here is a comparison with the Hifiman Edition XS and the Modhouse Tungsten:

All 3 are excellent headphones in completely different price ranges with the Meze 109 Pro in the middle but also probably the best built and arguable the most comfortable.
Distortion
I thought it would be useful to check the distortion, specifically for those who want to drive it hard and also maybe use EQ.As you can see there is minimal distortion even playing over 100dB:

And as a percentage it looks pretty good with around 2% in sub-bass:

Rating
The Meze 109 Pro earns a 5-star Pragmatic Rating due to its exceptional combination of build quality, comfort, and sound performance.Here is a breakdown:
- Build Quality: (Outstanding)
- Comfort: (Effortless to wear for long periods)
- Sound: (Rich, Engaging, musical, and dynamic)
- Value: (Great at its price point, but you could look at the 105 AER something almost as good)
Conclusion
The Meze 109 Pro is one of the most complete headphone packages under $1000. It stuns with its beauty, impresses with its comfort, and delivers a rich emotionally engaging sound.If you’re in the market for a stunningly crafted and emotionally engaging headphone, one that will impress your family and make your friends jealous, the Meze 109 Pro should be at the top of your list.
Attachments


Last edited:
jeromeoflaherty
100+ Head-Fier

Pros: Exceptional Hardware and Build Quality - aluminum alloy chassis, tactile physical controls, and a high-resolution 3.93-inch touchscreen.
Retro aesthetics with modern functionality.
Dual AK4499EX DACs, 4000mW per channel balanced output, and a discrete Class AB amplifier
Lots of Input and Output Options (USBx3, RCA, coaxial, optical, XLR, 4.4mm) and wireless (Bluetooth, AirPlay, WiFi)
Roon Certified and with other some decent streaming capabilities (Airplay, local usb playback)
Cons: Maybe a bit big for some home desktop setups
I would like more streaming options (DLNA, Tidal Connect, Spotify Connect, Plex)
I would like more streaming options (DLNA, Tidal Connect, Spotify Connect, Plex)
FiiO’s Retro revolution continues with the outstanding and updated K17
FiiO has been at the forefront of the modern “retro” audio movement, releasing nostalgia-inspired products such as the CP13 cassette player and TT13 turntable. With the K17, FiiO integrates this classic aesthetic with the latest in high-end DAC and amplifier technology, creating a product that is both visually appealing and sonically exceptional.The K17 is not only an evolution of the highly regarded K9 Pro, but also a step into new territory, offering an unparalleled blend of retro cool, power, audio precision, and features.

I would like to thank FiiO for providing the K17 for the purposes of this review.
If you are interested in finding more information about this product, click here.
Beyond its stunning retro-inspired design, the K17 is an exceptional feature packed DAC/Amp that can drive even the most demanding headphones with ease. I have been using it with some fairly challenging headphones in recent weeks using it when evaluating the Modhouse Tungsten, various demanding Sennheiser's and also with the Hifiman HE6S2 V2 all of which scaled implacable well with the 4W in the K17:
I really appreciate how the K17 feels like the culmination of several design and feature trends we’ve seen in FiiO products in recent years. It brings together high-quality internal components, a wealth of advanced features including robust PEQ support and a screen that greatly enhances navigation and configuration. It also confidently embraces a retro-inspired aesthetic that sets it apart.
Review Updated:
When I originally wrote this review, I felt the K17 still had a few too many bugs and was still missing some key features, but I have noticed many firmware updates in the last few weeks, especially the latest firmware that it received over the weekend:
These updates combined with some updates to the FiiO control mobile app has finally sorted out most of the issues that was holding the K17 back, and therefore I felt I should update this review for more clarity. I highlight some of the section with a “Update:” prefix below to show which sections where updated.
But let’s start with the unboxing experience.
Unboxing and First Impressions
The FiiO K17 arrives now in the typical impressive premium package that immediately sets the tone for a high-end experience:
Back of the box:

Opening it up you get a warning about the power supply:

There is actually a switch for 120V or 220V on the underneath so important that it is setup correctly for your voltage requirements.

Removing the warning you see the K17 wrapped in a protective cover:

Taking everything out of the box, you’ll find:

- The K17 unit
- Power adapter and cable ( I got 2 with a UK and a EU plug )
- USB cables (Type-C and Type-A)
- Optical and coaxial cables
- Infrared remote control
- 6.35mm to 3.5mm headphone adapter
- XLR protective cap
- User manual and warranty card

The remote is a nice feature for those you want to set up the K17 in a Rack or even just outside of arms reach, I like some of the button choices on the remote including the ability to switch EQ profiles:

There is plenty of cooling grills on the K17 though it never felt hot to me:

| 
|
Build quality
The build quality is exceptional. With an aluminum alloy chassis, tactile physical switches, and a gorgeous color LCD screen, the K17 exudes both a premium, vintage HiFi feeland it feels modern.
The back is equally impressive with plenty of connections:

A VU meter animation adds a touch of nostalgia:

Both the black version (which I have been using) and the silver version are showstoppers, evoking memories of classic 1970s and 1980s stereo components with the various dials, yet it still has the modern touches you need in 2025, like the touchscreen and displaying Album Art and metadata when streaming or local playback.
The dials are well-thought-out with the volume and a quick menu selector on the right hand side:

Here is a brief animation of the menu navigation using the menu dial:

The device is relatively compact for its capabilities, featuring an intuitive 3.93-inch LCD touchscreen that makes navigation effortless. I really like the usb-c connection on the front, this makes it easy to connect a laptop or a mobile when setup in your high rack or possible when using the K17 as a DAC in a desktop setup like this one:

Though to be honest I think it is a little big for a working from home desktop setup (at least in my little setup), especially if you want desktop speakers on the same desk, so I mainly used it in my main hifi setup.
For comparison, the JDS Element IV is much practical device for a smaller desktop:

And of course FiiO own K11 is a much smaller device for these smaller setups:

Wired Inputs
As you can see in the photos above there are a lot of wired connections:- USB x 3 (2 on the back, one larger USB ideal for an external USB device)
- A RS232 “usb” interface (for firmware updates)
- A 12V Trigger input
- Optical
- Coaxial
- RCA Line-In
- Ethernet (it also has Wifi and Bluetooth)
- A 4.4mm balanced input ( an unusual option, but I guess they didn’t have room for a XLR balanced input)
Wired Outputs
- RCA Line-Out
- XLR Balanced Out
- Coaxial
- Optical Digital Outputs
Features
The K17 is so packed with features that I couldn’t include all of them, so I picked a few key things I think everyone should know about the K17.First some details about the internals which you can peak at through the grills:

FiiO provides lots of technical information on their website here, but I liked this diagram showing the physically separate boards used in the design:

Flagship AKM DAC Implementation
- AK4191 + Dual AK4499EX DAC Chips for reference-level sound quality
- Advanced power supply design with physically separated circuit boards for reduced noise
- Fully balanced design for minimal crosstalk and enhanced clarity
High-Powered Amplification
- 4000mW per channel (balanced output)
- Discrete Class AB transistor current amplifier for powerful, clean output
- Can drive everything from sensitive IEMs to high-impedance headphones with ease
Firmware updates
My unit received a software update within a few days of being setup. This update was split into 2 parts one worked via the local usb disk method to update it:
But the second part of the update required using a computer and mine got stuck when using my Macbook to apply the MCU update but when I switched to my Windows Laptop the update was quickly applied:

This initial update was pretty extensive, I would hope future updates are easier and happen automatically:

Update: I am currently on v193 and most of the issues I had with the K17 are now solved and the update process is now OTA so a much simpler process.
Streaming Support
FiiO talk about 8 different modes of playback and as well as RCA Input, Balanced Input, Optical and Coaxial there are a few “Streaming” modes.Roon
One of the standout features of the K17—particularly if you’re a Roon subscriber—is its native Roon support, which makes it feel like a truly complete device. Simply link your Tidal account within Roon, and you’re presented with a visually elegant and highly functional streaming solution housed in a beautifully designed unit. From there, all you need are your headphones (and perhaps a pair of powered speakers) to enjoy a fully integrated, high-end audio setup:
Bluetooth and Airplay
These options work as you might expect - though you need to be using the right input for the K17 to be seen when “cast” via bluetooth or Airplay.With bluetooth you clearly see the codec being used:
APTX-HD | LDAC |

| 
|
I tested with my iPhone, and it supports the AAC codec as well.
Note: One of the annoying bugs still in the current firmware is my K17 freezes (hangs and I have to switch it off and on again via the hardware on/off on the back) after I use the bluetooth interface for a while.
But when using an Apple device you can use Airplay 2, but as ever with Airplay 2 you can see the iPhone has converted the bitrate down to 16Bit/44Khz:

USB DAC
But for those who want lossless audio the USB DAC works great presenting lots of high def audio output options:
Local playback and the FiiO Music Application
Another option for lossless playback is using your own local files. Simply load up a USB drive with lots of own FLAC / MP3 files, and you can update the built-in local music with metadata including album art and use the remote or navigate the music using the onscreen browser:
| 
|
You can actually use the FiiO Link support with the FiiO Android and IOS apps to remotely control and navigate your local music library while not quiet as convenient as an App like Roon or WiiM’s mobile app for their Streamers, it is a perfectly good solution for remote controlling playback of music from your Smartphone.
Note: On my iPhone, I had to enter the IP Address of the K17:

But once I did I could remotely control the playback - though the album art was not shown in the App but was on the K17 screen:

| 
|
On Android, it was slightly easier to find the K17 and launch the FiiO Link support:

Though it does “hang” when I try and remotely configure the K17:

But you can still control the music remotely which is nice:

Update: Analog and Digital inputs
I forgot to mention in my original review the quality of the digital inputs, but I have been using my DM13 cd player both as a “cd transport” into the coaxial input of the K17 and as a test into the balanced input. It sounds excellent using either path:
Screen and UI Navigation
The on-screen menu system is very intuitive with a Home and a Back on each screen:
Update: 31-Band Parametric EQ (PEQ)
You can switch on EQ and switch between the different presets both physically on the device as well as using the remote as seen in this little video:
And you can finally edit the EQ using the FiiO Control application both on IOS and Android:

| 
|
I can now finally assign one EQ profile specifically for my external speakers via the Line Out, while reserving other customizable PEQ profiles for various headphones and IEMs in my collection. This level of flexibility significantly enhances the K17’s appeal for users with diverse listening setups.
Sound Impressions
The FiiO K17 delivers an incredible powerful transparent sound signature. Unless you want a “warm” Tube sound from your Amplifier, this is the sound you should strive for. A true end-game level of power and quality.Bass
The bass is tight, textured, and authoritative, never overpowering but deep and controlled. The K17 delivers * clean sub-bass extension* without bloat, making it an excellent choice for bass-heavy genres and orchestral music alike.Mids
The midrange is lush and natural, with superb vocal clarity. Whether it’s jazz, acoustic, or rock, vocals sound intimate yet spacious. Instruments have a lifelike presence, making the listening experience truly immersive.Treble
Treble is smooth yet well-extended, free of harshness or excessive brightness. Cymbals have natural decay, and details are presented effortlessly without fatigue.Specifications and Measurements
| Specification | Details |
| DAC Chips | Dual AK4499EX + AK4191 |
| Amplifier Output | 4000mW per channel |
| PEQ Bands | 31-Band High-Precision Parametric EQ |
| Inputs | USB x2, Optical, Coaxial, RCA, Bluetooth |
| Outputs | RCA Line-Out, XLR Balanced, Optical, Coaxial |
| Bluetooth Codecs | aptX HD, LDAC, aptX Adaptive |
| Headphone Outputs | 6.3mm, 4.4mm balanced and balanced XLR |
| Streaming Support | Roon Ready, AirPlay, Bluetooth 5.1 |
| Display | 3.93-inch LCD Touchscreen |
| Power Supply | 35W Low-Noise Linear Power Supply |
| Dimensions | 244.6 x 213 x 66.8 mm |
| Weight | 2.75 kg |
Audio parameters:
6.35mm Single-Ended Headphone Output
| Parameter | Ultra High Gain Mode | Super High Gain Mode |
| Output Power (16Ω) | ≥1800mW + 1800mW | ≥1800mW + 1800mW |
| Output Power (32Ω) | ≥1850mW + 1850mW | ≥1000mW + 1000mW |
| Output Power (300Ω) | ≥240mW + 240mW | ≥120mW + 120mW |
| Output Impedance (32Ω) | <1Ω | <1Ω |
| Crosstalk (32Ω, 1kHz) | ≥76dB | ≥76dB |
| THD+N (32Ω, 1kHz) | <0.0005% | <0.00056% |
| Noise Floor (A-weighted) | <5μV | <5μV |
| SNR (A-weighted) | ≥124dB | ≥121dB |
| Frequency Response | 20Hz20kHz: <0.05dB attenuation20Hz90kHz: <3dB attenuation | 20Hz20kHz: <0.05dB attenuation20Hz90kHz: <3dB attenuation |
| Peak Output Voltage | >24Vp-p | >17Vp-p |
4.4mm/XLR4 Balanced Headphone Output
| Parameter | Ultra High Gain Mode | Super High Gain Mode |
| Output Power (16Ω) | ≥1800mW + 1800mW | ≥1800mW + 1800mW |
| Output Power (32Ω) | ≥4000mW + 4000mW | ≥3900mW + 3900mW |
| Output Power (300Ω) | ≥950mW + 950mW | ≥480mW + 480mW |
| Output Impedance (32Ω) | <1.5Ω | <1.5Ω |
| Crosstalk (32Ω, 1kHz) | ≥119dB | ≥119dB |
| THD+N (32Ω, 1kHz) | <0.00049% | <0.00054% |
| Noise Floor (A-weighted) | <7.9μV | <7.9μV |
| SNR (A-weighted) | ≥124dB | ≥123dB |
| Frequency Response | 20Hz20kHz: <0.05dB attenuation20Hz90kHz: <3dB attenuation | 20Hz20kHz: <0.05dB attenuation20Hz90kHz: <3dB attenuation |
| Peak Output Voltage | >48Vp-p | >34Vp-p |
Line Output
| Parameter | Single-ended RCA Output | Balanced XLR3 Output |
| THD+N (1kHz, -10dB@10kΩ) | <0.00053% | <0.00045% |
| SNR (A-weighted) | ≥121dB | ≥125dB |
| Crosstalk (1kHz@10kΩ) | ≥118dB | ≥121dB |
| Noise Floor (A-weighted) | <2.2μV | <2.6μV |
| Frequency Response | 20Hz20kHz: <0.05dB attenuation20Hz90kHz: <3dB attenuation | 20Hz20kHz: <0.05dB attenuation20Hz90kHz: <3dB attenuation |
| Line Output Level | 2.5Vrms (1kHz@10kΩ) | 5Vrms (1kHz@10kΩ) |
Measurements
Note: These are some measurement FiiO provided - I have them copied here for completeness:32 Ohm Single Ended output to the headphone jack on ultra-high gain - gets a very respectable SINAD value of 105/106:

32 Ohm Balanced Output to the headphone jack on ultra-high gain also get a very similar SINAD score:

And finally Balanced LO and RCA where similar (this is the Balanced):

Note: This isn’t SOTA but is respectable and above any level where you might hear noise.
The frequency response curves were flat to > 40K, so I didn’t bother to include them - but you can check them out here
Distortion
Distortion is excellent:
Update: Rating
I have now given the FiiO K17 a 5-star Pragmatic Rating. From a hardware perspective, it was always an outstanding end game device offering a striking retro design, robust build quality, and ample power for virtually any use case. And finally with the latest updates, it feels like a finished product.The K17 now performs exceptionally well across multiple use cases whether as a standalone DAC, a high-power headphone amplifier, or a Roon-ready streaming endpoint. It really is a Jack of all trades and a master of most of them device. With the latest fixes I feel now the K17 is a category-leading audiophile product in the sub $1000 range.
Conclusion
The FiiO K17 feels like an end game device, one that FiiO have been leading up to for a few years with the 3 pronged approach to audio products, embracing retro designs, incorporating high quality audio components, providing massive amounts of power and adding key audio features like PEQ filters.Operating the K17 is a joyful, tactile experience, thanks to its physical switches and intuitive touchscreen interface. The VU meter animation, though slightly laggy, adds to the vintage charm. If you’re looking for a high-end DAC/Amp with no compromises, especially if you are a Roon user the K17 is an easy recommendation.
Attachments


Last edited:
Moon5123
No, that's fine.
I believe Fiio are honest with their graphs most of the time.
I also found it wierd the bal line out is 5V but the graph for balanced is on 4V then I see that the graph is for headphone out or may be pre out. Given the measurements are very good.
Any ways that's for the details review on K17
I believe Fiio are honest with their graphs most of the time.
I also found it wierd the bal line out is 5V but the graph for balanced is on 4V then I see that the graph is for headphone out or may be pre out. Given the measurements are very good.
Any ways that's for the details review on K17
Syan25
Sounds like it's got analog sound. I hope it's not necessary to use a pc to connect to it.
Hoping I can pick one up as a source for my active speaker in one room but also for headphones listening. Looking for warm/lush sound. But not intimate. Hoping soundstage is good enough.
Hoping I can pick one up as a source for my active speaker in one room but also for headphones listening. Looking for warm/lush sound. But not intimate. Hoping soundstage is good enough.
B
BomboPAPA
Jerome thank you for the quality review as always.
Usually I buy something only after your reviews, this time I decided to make blind buy of K17, right from the first batches, based on your review I was not mistaken")
You also have excellent musical taste, I really like when you add music tracks and feelings from them on a specific device, I have added many of your albums to my music collection.
You are my favorite reviewer on head-fi
Usually I buy something only after your reviews, this time I decided to make blind buy of K17, right from the first batches, based on your review I was not mistaken
You also have excellent musical taste, I really like when you add music tracks and feelings from them on a specific device, I have added many of your albums to my music collection.
You are my favorite reviewer on head-fi
jeromeoflaherty
100+ Head-Fier

Pros: Excellent Bass without the 5 Ohm Adapter (and even more with the adapter)
Nice Harman Midrange
Treble excellent for most people (especially if you like Harman Treble) but Foam tips needed for younger listener or those who hate that upper treble
Excellent Cable and decent selection of eartips (including lots of Foam eartips)
Better Fit and Nozzle than previous Truthear Zero's
Still amazing value for what you get
Cons: Harman IE 2019 Treble is not for everyone
Changes significantly with different eartips ( I measured many in this review)
Lots of very decent competition now (unlike when the original Truthear Zero was launched)
Changes significantly with different eartips ( I measured many in this review)
Lots of very decent competition now (unlike when the original Truthear Zero was launched)
A refinement on the Original but is it too "technical"?
Truthear’s collaborations with Crinacle have consistently aimed to deliver Harman-tuned excellence at budget-friendly prices. The Zero Blue 2 is the latest iteration of their dual dynamic driver (DD) IEM tries to outdo the previous Truthear Zero models, the original Zero and the Zero Red but did it “fly too close to the sun” with its treble tuning?It has been hard to ignore the hype both positive and negative surrounding this IEM and with Crinacle's new brand CrinEar also announcing 3 other IEMs it seems like this IEM has been under extra scrutiny, this is especially true with the main suggestion to only use Foam eartips.

However, after using the Zero Blue for a few weeks now (both the pre-production unit and production unit) I can confirm that tip selection can be crucial but not for everyone needs to worry and there are some other alternatives to using foam ear tips which i will present later in the review.
While Foam tips deliver an excellent Harman tuning even for those sensitive to upper treble by helping to dampen down the treble, I think the inclusion of the 5 Ohm adapter to boost the bass beyond Harman and even Crinacle own preferences indicate to me that a Harman++ shaped tuning with extra sub-bass balanced with extra upper treble was one of the goals of this IEM, but these options make the Zero Blue 2, a versatile high quality IEM to add to your collection.
I would like to thank Shenzhenaudio for providing the Zero Blue 2 for the purposes of this review.
If you are interested in finding more information about this product, you can check it out here.
But before we get into the sound, let’s dive into the unboxing experience.
Unboxing and Build Quality
Truthear keeps things minimalist but functional. The Zero Blue 2 arrives in a compact box:
I do like it when an IEM has a frequency response on the back which shows both the normal FR and the bass boosted one you get with the 5Ohm adapter:

Sliding the box out of its sleeve you get an internal box:

Opening up you get a brief manual:

Removing it you finally get to see the Blue 2 and the carry case:

Taking everything out of the box this is what you get:

Inside, you’ll find:
- The IEMs
- A soft carrying pouch
- A very decent detachable cable - this cable is similar but better than the one in the Truthear Gate:

- A good selection of ear tips (foam and silicone)

- A 5Ω adapter

The IEM Itself
The Zero Blue 2retains the sleek, transparent shell aesthetic:
The build quality is solid, feeling durable without being too heavy.

Comfort and Fit
The smaller nozzle makes a massive differencein comfort.
While the original Zero Blue had nozzle fit issues for many, the Zero Blue 2 resolves this and should accommodate more ear shapes without discomfort:

They have also changed the angle of the nozzle compared to the original:

Here are some size comparisons with the Truthear Zero:

| 
|

This for me is even more crucial for nozzle size as I do find the original and the Zero Red move slightly in my ear when I used them out walking but after a few days with the Zero Blue 2 I find it stays very secure with an excellent fit.
Technical Advancements over the original
Like its predecessors, the Zero Blue 2 features dual dynamic drivers, but with significant internal modifications. The 7.8mm driver, responsible for mids and highs, now utilizes a larger magnet (25% increase) and an expanded dome area (50% increase). These changes enhance conversion efficiency, treble extension, and overall resolution.The driver structure incorporates:
- LCP (Liquid Crystal Polymer) dome diaphragm for improved rigidity and transient response.
- Flexible polyurethane suspension to enhance smoothness in frequency transitions.
- Refined high-frequency conductive structure, leading to clearer, more transparent upper frequencies.

These advancements were designed to make the Zero Blue 2’s treble significantly more refined while retaining the Harman tuning balance in the lower frequencies, but does it go too far?
This is why I cheekily mentioned it might have “too much ’technicalities’” but let’s get onto my subjective opinions and these might surprise you a little.
Sound Impressions
The Truthear Zero Blue 2 continues to nail the Harman IE 2019 tuning, offering a balanced sound signature that should appeal to a wide audience while this time adding that extra technical prowess in the treble but also with the optional 5Ω adapter for bass heads. So there are quite a lot of options for those who like to tweak sound without using EQ.I only briefly used the adapter as normally for me, a Harman tuned IEM has a little too much bass but in this case, that added treble mostly balanced out nicely with very nice Harman “tuned” bass provided. I did play around with using both the silicon tips, foam tips and many other third party ear tips. It it wrong to say “silicon bad - foam good”, I would suggest find the ear tips that work for you as this IEM will respond differently to different eartips (as you will see in the measurements).
Overall impressions
Overall, I think the bass is exceptional better than the 2 previous Zero’s, the midrange is superb. And while I am more of a fan of a JM-1 like tuning, the specific treble peaks, that show up on the measurements, did not subjectively bother me at least. Treble is the area of massive subjective differences between how people hear things and I think this IEM with silicon tips might exaggerate this differences, it certainly does on the measurements rigs. As we get older that 15K / 16K upper treble can actually do with a boost in these regions as we move into our 40’s:
So for me, the Blue 2 sounded like it has we used to call “good technicalities”, that extra little “shimmer” on high-hats and a very detailed sound that many will appreciate. So, I would suggest giving the Zero Blue 2 a go, you might be surprised, especially if you are a fan of Harman tuning.
If there was one area of the treble that I personally would change, it is the 4-5K region, as I have come to appreciate a JM-1 tuning more over the past year but given even the most recent research shows
Harman and a JM-1 target are both perfectly acceptable ‘scientifically proven’ popular targets.
Here are some more details:
Bass
The dual DD configuration ensures a well-extended, clean bass response. Out of the box, bass is tight, punchy, and well-controlled, but those who prefer more warmth can use the included 5Ω adapter to increase low-end presence slightly.Test Track: “Billie Eilish - bad guy”
- Impactful and clean bass, no muddiness
- Great sub-bass extension without overpowering the mids
Mids
The midrange is neutral and clear, benefiting from the Harman tuning. Vocals are well-placed and transparent, never too recessed or too forward.Test Track: “Fleetwood Mac - Dreams”
- Vocals are natural and textured
- Acoustic instruments sound organic and lifelike
Treble
Treble is where the Zero Blue 2 differs the most from its predecessor. High frequencies are **more detailed and airy **, giving the IEMs a sense of greater technical precision. However, as I mentioned earlier if you are suspectable to treble sibilance the silicone tips might make treble overly sharp for you. While foam tips dampen things perfectly..Test Track: “Daft Punk - Giorgio by Moroder”
- Cymbals and high hats are crisp and resolving
- With Silicone tips it was excessibe brightness
Soundstage & Imaging
The Zero Blue 2 has a spacious soundstage for an IEM in this price range. Imaging is precise, allowing instruments to be well-placed across the stereo field, this is one area where extra treble can help allowing the upper harmonics of certain instruments stand out given them depth.Specifications and Measurements
| Model | ZERO:BLUE2 |
| Driver | 10mm + 7.8mm Dynamic Drivers |
| Diaphragm | LCP Liquid Crystal & Polyurethane Suspension |
| Impedance | 5.8Ω ±15% @1kHz |
| Sensitivity | 119.5dB/Vrms @1kHz |
| THD | <0.3% @1kHz @94dB |
| Frequency Range | 9-41kHz (IEC61094, Free Field) |
| Effective FR Range | 20-20kHz (IEC60318-4, -3dB) |
[th]
Specification
[/th][th]Details
[/th]Frequency Response
Note: The following measurements were taken with my KB501X soft ear Pinna and a 711 clone coupler. They are available on my measurement database here.Let’s start with the FR and the channel matching using the Silicon tips:

I highlighted 2 areas on this initial FR, the extra bass ’tuck’ (1) and that 15K peak (2).
Now the difference with the Foam tips and the Silicon ones:

You can see the Foam tips mostly low the extreme peak but also change other areas of the treble. Whether this will work better for you will be very subjective, my suggestion is to give it a go you might not hear that peak as a peak and the foam might introduce a peak that you can hear in a different area.
I noticed that smaller foam has less of a seal and therefore lowered a bass a little:

And I tried slightly longer third party ‘red’ foam tips also:

For a bit of fun I also tried a triple flange (which typically works better for those with long ear canals)

This again changed the treble considerable but didn’t have the same peak as the silicon eartips.
I had received a pre-production pair so it was also interesting to compare the differences between these and what was “changed” for the production version:

| 
|
[th]
Silicon
[/th][th]Foam
[/th]Finally, I measured the 5 Ohm and the 10 Ohm (from the Zero Red) to see the difference in Bass:

Comparisons
First lets compare with the KE4 and the Truthear Zero Red:
The Zero Red has less bass (1) (at least without the 10 Ohm Adapter), but the 5 Ohm adapter from the Blue 2 on the Zero Red might actually be a nice option, and you can see that lack of a mid-bass ’tuck’ with JM-1 tuned IEMs like the Kiwiears KE4 and finally i highlight that the even with the Foam tips there might be a little bit too much pinna gain (3).
Adding the Aful Explorer and the silicon tips :

I highlight the different in mid-bass tuning (1) and especially the different in the pinna / presence region (2) and that 15K treble peak (3).
Finally comparing with some recent Harman tuned IEMs that I like:

Distortion Measurements
The Zero Blue 2 (like the Red) show incredible low distortion ( and much improved over the original Blue ):
Showing these distortion as a percentage you can again see the treble distortion but its is less than 0.5% so nothing to worry about:

An alternative ‘pairing’ option
So, one extra thing I thought might be useful is I did play with some EQ for the Zero Blue 2, and specifically I tried it out walking with FiiO UTWS5 (2025 edition) and I liked how this combination worked forcomfort and for those who want to keep using the silicon tips and tweak the sound using EQ:

| 
|

| 
|
Rating
I have given the Truthear Zero Blue 2 a 4-star Pragmatic Rating. It offers a lot of improvements over the previous generation of Truthear Zero’s at effectively the same price (given inflation and tariff increases):- Much better internal design, improving both the bass and treble especially
- A much smaller nozzle, improving fit over the oversized original
- A significantly upgraded cable
- An optional microphone cable
- A 5Ω adapter, which slightly increases bass presence for those who prefer a warmer tuning
Here is a breakdown of my opinions:
- Build Quality: (Durable and a great cable so good improvements over the original)
- Comfort: ☆ (Smaller nozzle improves fit, but tip selection may be critical)
- Sound: (Balanced Harman tuning with great detail )
- Value: ($65 is an outstanding price for this performance)
Conclusion
The Truthear Zero Blue 2 takes an already excellent budget IEM and makes meaningful improvements. The better cable, smaller nozzle, and added tuning flexibility make it a clear upgrade over the original Truthear, but you if you are fan of Harman tuned IEMS you might still prefer the Truthear Red tuning slightly over than the Truthear Blue 2, it is all in the “technicalities”.But for just $65 (or $70 with a mic), this is a no-brainer recommendation for those seeking top-tier tuning at an affordable priceand a great option to add to your collection.
Attachments

jeromeoflaherty
100+ Head-Fier

Pros: Comfort - The open-ear design ensures a comfortable fit without in-ear intrusion
Decent Midrange - perfect for most audio and especially podcasts / audiobooks
Very decent Treble - given the distance from the ear I didn't expect the treble to smooth
Personalized Sound: Customising the sound is vital as everyone ear size / shape is different
Long Battery Life - no complaints about the battery life - lasted all day for me a few times
Cons: Limited Sub-Bass: The open design means no subbass
No isolation: This should go without saying but obviously you will hear all external conversations and noise.
No isolation: This should go without saying but obviously you will hear all external conversations and noise.
A New Listening Experience – Open-Ear Comfort
The EarFun OpenJump is not like your typical TWS or IEM. Instead of sitting inside your ear canal or even sitting in your ear like an earbud, the OpenJump features an open-ear design with small directional drivers that rest just outside your ear, directing sound toward your eardrum. This means there is no physical contact inside your ear, making it an excellent choice for those who dislike in-ear headphones, but this style has become very popular with athletics who need to be totally aware of their surroundings to be safe while running on footpaths.
But having used the OpenJump for a few weeks now I think they offer something special even for those who like listening to audio in other environments. Specifically, if you take the time to set up a sound profile using the Earfun application you get a very decent audio experience only lacking in sub-bass which is understandable given there is no seal.
I would like to thank EarFun for providing the OpenJump for the purposes of this review.
If you are interested in finding more information about this product, click here.
Open Ear headphones
If you watched some of the highlights of the CES show in Las Vegas you will have noticed that there were many similar open ear devices launched, some like this NVM one wireless headphones where trying to mimic headphone:
But the OpenJump was not only one the cheapest of these new devices, but I believe it is the only one that is targeted at those who like good audio quality providing both personalised tuning and EQ profiles within its companion application. I appreciate companies who spend their money on audio research rather than solely on marketing and Earfun have shown over the past few years with some excellent tuned products that they do care about providing a customisable reference sound.
But let’s get into the unboxing experience first:
Unboxing and Build Quality
The EarFun OpenJump comes with minimal but functional packaging, reflecting its straightforward purpose.
The back of the box:

Opening the box reveals the case of the OpenJump:

Inside the box, you’ll find:

- OpenJump headphones
- USB-C charging cable
- User manual
Build quality and Comfort
The case itself is nice but larger than “normal” earbud style cases
Here is a comparison with some other cases for a size comparison with the smaller Apple Airpods with ANC and the much larger FiiO UTWS5 :

The build quality feels sturdy, and the earhooks provide a secure fit for various ear shapes.

The OpenJump is also rated IPX7 waterproof, making it a great companion for workouts, runs, and outdoor activities.

The most important thing about the comfort is the fact that OpenJump sits on you ear with the driver pointing into you ear but never touching your ear. I also liked how compact the size was compared to other “earhook” style bluetooth devices like this FiiO UTWS5:

Earfun have built a very nice but tiny driver for this purpose:

Battery Life and Microphone Performance
The OpenJump has impressive battery life. I used them throughout an 8-hour workday, switching between music and calls, and they lasted without any issues. The microphone quality is also solid, particularly in indoor settings. During outdoor calls, performance remains stable unless in heavy wind conditions.Earfun Companion Application
The Earfun application keeps getting better and I immediately got notified of a firmware update when I connected the OpenJump:
Once I had the update the launch page shows all your earfun devices:

Select the OpenJump you get to see the battery life and some other key customisations for the OpenJump:

Game Mode will lower the latency and limited bluetooth codecs, so I left off.
If Theatre Mode is enabled you cannot EQ or personalise the sound profile so I also left that switched off.
The “Find my Headphone” works by getting it to play a loud sound:

You can also lower the volume for the Voice Prompts which is a nice touch:

Dual Device setup is a nice configuration option to have:

Within the customise audio section, you can either choose a preset, customise the sound using the now standard 10 band graphical equaliser but also crucially you can personalise the sound:

The Importance of Personalization – EarFun App
One of the most crucial aspects of getting the best sound out of the OpenJump is using the “My Sound Profile” feature in the EarFun app. Since the open-ear design means the sound source sits slightly away from your ear, the listening experience can vary depending on your ear shape.
I came up with a few personal profiles mainly because I found I was using the OpenJump both inside in a queit environment but also outside where I need to compensate for the “masking” effect of external noise.
The app guides you through a personalized hearing test, adjusting the EQ to suit your hearing preferences. Once I set up my custom profile, I noticed a significant improvement in clarity and balance. This personalization process ensures that you get the best possible sound while preventing audio leakage to those around you.

I did try to push the sub-bass to its max, but it sounded like the driver was distorting in heavy bass songs while still not providing that much extra bass, so I left it slightly less that max.

| 
|
Sound Impressions
The OpenJump delivers a surprisingly good audio experience for an open-ear design, but due to its design people need to set expections around the sub-bass, so don’t expect a “critical listening” experience similar to what you might get with good open back headphones, but you do get a very respectable audio experience, where the midrange and treble shine through beautifully.Bass
The bass is present but restrained as I mentioned given the design. While sub-bass lacks impact, mid-bass remains decent, allowing bass-heavy tracks to still sound enjoyable. In tracks like “Billie Jean” by Michael Jackson, the bassline remains clear and defined, but without the deep resonance of closed-back headphones.Mids
The midrange is the star here, with excellent clarity and natural tonality. Vocals in songs like “Shape of You” by Ed Sheeran sound crisp and well-articulated. Speech clarity is also fantastic, making these great for podcasts and voice calls.Treble
Treble is well-extended without being harsh. Listening to “Clair de Lune” by Debussy, the higher frequencies come through clearly without any unwanted sibilance. The open design helps create a natural airiness to the sound.Soundstage and Imaging
Due to its open-ear design, the OpenJump offers a wider soundstage compared to traditional TWS earbuds but it still does match an good open back headphone for soundstage. Instrument separation and image is pretty good, making it easier to distinguish different elements within a track.Specifications and Measurements
| Bluetooth version | V5.3 |
| Bluetooth profile | A2DP, AVRCP, HFP, HSP |
| Bluetooth transmitted power | <7dBm (for EU) |
| Battery capacity | 60mAh x 2 (earbuds); 550mAh (charging case) |
| Charging time | 1 hour (for earbuds) |
| 2 hours (for charging case via USB-C) | |
| 3.5 hours (for charging case via wireless charger) | |
| Playtime | (Varies by volume level and audio content) |
| LDAC OFF: Up to 11 hours, Total 42 hours with case | |
| LDAC ON: Up to 8 hours, Total 30.5 hours with case | |
| Dimensions | 76.1 mm x 66.9 mm x 27.3 mm |
| Weight | 73.5g |
[th]
Specification
[/th][th]
Details
[/th]
I feel these battery life figures are generally accurate though I was mainly using the OpenJump with my iPhone and easily got more than 8 hours.
Note: LDAC only works on Android so on IOS you only get the basic SBC codec and not the more typical AAC codec.
Measurements
All measurements were taken using my personalized profile from the EarFun app using my KB501X soft wear pinna, here is a photo of the OpenJump in the Pinna:
These measurements are available on my measurement database here
So lets start with the frequency response I got after my custom tuning:

As expected, there is a bass roll-off, but the midrange and treble remain well-balanced. Custom EQ adjustments can help slightly boost the low-end, but excessive bass boost may introduce distortion.
Here is a comparison of the OpenJump without a customised tuning, and you can see it is well worth spending to 5 minutes required to create your custom profile:

So you can increase the bass performance and lower that treble peak a little.
Distortion
At normal listening levels, distortion remains minimal. However, boosting the bass significantly can introduce distortion as the small drivers struggle to handle excessive low-end energy:
This larger level of sub-bass distortion also shows up when looking at the distortion percentage:

Comparisons
So if you were following CES this year you might have noticed this type of TWS seem to be the new cool with many brands coming out with their variation, but of the devices I have reviewed I think the nearest comparison is with the “Airpods with NC” but I included some earbuds I have reviewed here also:
The earbuds greatly boost the mid-bass but this overpowers the midrange, while the Airpods with NC does a subtle DSP based boost of the bass to give a better bass response than the Openjump, but they do cost 2 times as much and are in my opinion less uncomfortable as they sit in your ear.
Rating
I am giving the EarFun OpenJump a 5-star pragmatic rating. Due to its design it is not an audio device for critial listening but if you are happy with its limitations around bass performance and having no “isolation”, it offers fantastic comfort, personalization features, make it a great device to just listen to stuff all day. It’s all day battery life and the microphone quality are added bonus which make it even more pragmatic for those of use you have to stay connected but like to listen to audio all day.Conclusion
The EarFun OpenJump is a fantastic device for those who need to stay aware of their surroundings, but it is also for people who hate the feel of IEMs or even earbud like devices. Whether you are a street runner, an office employee or just someone who enjoys music or podcasts the OpenJump is an excellent product to use.The personalized sound profile makes a huge difference, ensuring an optimal listening experience tailored to your hearing. With excellent comfort, solid battery life, and good microphone performance, the OpenJump has earned a permanent spot in my daily use when working in a shared space.
Last edited:
jeromeoflaherty
100+ Head-Fier

Pros: Very Well-tuned with a natural tonality, controlled bass, and good midrange clarity
Comfortable Fit with decent sized earcups
Outstanding Battery Life
Great Codec Support & Wired Options
Good ANC Performance for the Price
Comfortable Fit with decent sized earcups
Outstanding Battery Life
Great Codec Support & Wired Options
Good ANC Performance for the Price
Cons: No Companion App for Customization
Treble is a little inconsistent - might seem dark to some but others might get a treble peak
The 3.5mm Analog sounded awful (might be an issue with my model)
Treble is a little inconsistent - might seem dark to some but others might get a treble peak
The 3.5mm Analog sounded awful (might be an issue with my model)
A Budget ANC Headphone with Audiophile Ambitions
Kiwi Ears has made a name for itself with high-quality IEMs, but in recent months they are bringing that expertise to the headphone market and now specifically in the ANC Headphone market with the Kiwi Ears Ardor.
Priced at $99, the Ardor is positioned to compete with other pragmatically priced “Audiophile friendly” ANC headphones in that sub $200 range, such as the Final Audio UX3000 or the Sennheiser Accentum Series, by focusing on great sound quality out of the box rather than the typical bloated bass that most ANC headphones provide. Featuring a dual-driver setup it seems like Kiwi Ears are bringing some of that IEM knowledge of multiple driver configurations and crossovers to the headphone market.
I would like to thank Kiwi Ears for providing the Ardor for the purposes of this review.
If you are interested in finding more information about this product, click here.
So, having spent a few weeks with the Ardor, using it both indoors, but mainly I used it in various noisy environments, walking around a noisy city center, in a coworking environment and on public transport to get proper idea of the quality of this headphone. So were Kiwi ears successful in creating an audiophile friendly ANC Headphone?But before we get into the sound quality lets start with the unboxing experience:
Unboxing and Build Quality
The Ardor comes in nice clean packaging, with all the essentials included:
Here is the back of the box:

But it was a nice surprise to see an excellent carrying case at this price point:


Everything is stored inside the carry case:

I do like the look of the back “plate” on each ear cup - more premium texture that what is typical in the price range:

| 
|

- The headphones themselves
- A USB-C charging cable
- A 3.5mm audio cable (for wired listening)
- An excellent quality carry case
Design and Comfort
One of the standout aspects of the Ardor is its comfort. Specifically when compared to competitors like the Final Audio UX3000, the larger earcups on the Ardor provide a more spacious fit, making it an excellent choice for long listening sessions.Here are some measurements:

| 
|

The headband is also well-padded:

And the overall weight distribution ensures that clamping force is gentle yet secure unlike say the Sennheiser Accentum Plus which was very stiff and had very high clamping force.
Some comparisons
To give an idea of the comparative size the ear cups here are 2 photos of the Ardor with my Final Audio UX3000 (on the left) and my Sennheiser Accentum Plus on the right:
| 
|

Finally, here are 2 more comparisons with more “consumer” orientated ANC headphones a Soundcore Q30 and an Earfun Wave Pro:

| 
|
Features
Lets drilldown into the feature set:Physical Controls
The physical controls are straightforward and easy to use, with tactile buttons for volume control, playback, and ANC modes:
| 
|
But there is no companion app, meaning sound adjustments are limited to what’s built-in and no way of adjusting say the ANC levels that has now become common place on ANC headphones. That said as you will see Kiwi Ears has tuned the headphones well out of the box to compensate for this limitation, so compared to “consumer” ANC headphones like for example the Soundcore Q30 above there really is mostly no need to reach for an EQ within a companion App to get some decent audio.
Coaxial Dual-Driver System
The Ardor’s coaxial dual-driver setup is possible one of its unique features. Unlike most ANC headphones that rely on a single driver, the Ardor combines a 40mm driver for deep bass and mids with a dedicated 10mm driver to enhance treble clarity and soundstage width. This type of setup is very typical in IEM’s, and it is a welcome innovation to see this type of dual driver setup on ANC headphones, whether it provides the same benefit it can with the typically tiny drivers in IEM’s is debatable, but let’s get into my sound impressions and the ultimately some measurements.Active Noise Cancellation (ANC)
The Ardor features a custom hybrid ANC system with a 5-microphone array, reducing ambient noise by up to **35dB ** for a flawless listening experience. Compared to the Final Audio UX3000, ANC performance is noticeably stronger, particularly in low-frequency noise reduction.But again the lack of a companion app means there’s no way to adjust ANC levels for different conditions like Wind ANC, which some even cheaper ANC headphone models offer, for example the Earfun Wave Pro. Despite this, for a sub-$100 ANC headphone, the noise cancellation is impressive and makes a significant difference in blocking out everyday noise. I found the ANC to be as effectvely as the $200 Sennheiser Accentum Plus but not as good as the state of the art ANC that my Apple Airpods Max provide.
Exceptional Battery Life
The Ardor offers up to 140 hours of playback with ANC off and 72 hours with ANC on, making it one of the longest-lasting ANC headphones at any price point. A quick 10-minute charge provides 8 hours of playback, making it perfect for users on the go. I mainly used this Ardor with ANC enabled (I have lots of other headphones to listen to in quieter environments) but I never felt the need to charge the Ardor even after a few days usage.USB & Wired Support
For those who prefer wired listening, the Ardor supports USB playback with its built-in DAC/AMP chipset, allowing for high-resolution music playback across Apple, Android, and Windows devices.
The inclusion of a 3.5mm jack further extends its versatility, but I did find some issues with the sound when just using the 3.5mm jack which I will demonstrate later with the measurements, basically the bass rolle off much earlier when using the 3.5mm jack.
Sound Impressions
The tuning is clearly aimed at audiophiles who prefer natural tonality and clarity over excessive bass boosts the bass is nicely ended into the sub-bass, but I did not get any mid-bass bloat which is typical of cheaper ANC headphones. The midrange was excellent but the treble has some unevenness and possible this is related to the dual driver setup but let’s get into the detailsBass
The bass performance is well-controlled with a tight and punchy low-end response. It avoids the overblown, muddy bass that plagues many budget ANC headphones, offering a more refined and articulate bassline instead. Sub-bass reaches deep but never overwhelms the midrange.Mids
The midrange is natural and full-bodied, making vocals and instruments sound clear and lifelike. Whether listening to acoustic music, vocals, or orchestral pieces, the mids remain coherent and detailed. Compared to the Final Audio UX3000, the Ardor has a slightly warmer midrange with more emphasis on clarity and separation.Treble
This is where the Ardor has a slight drawback. While the treble is definitely airy and detailed, there wassome noticeable sibilance on some tracks for me as high frequencies were a bit harsh at times. This would benefit from EQ adjustments, but since there is no app, users will need to rely on external EQ solutions. That being said, it still outperforms most sub-$ 100 ANC headphones in clarity and extension.
Specifications and Measurements
| Specification | Details |
|---|---|
| Model | Kiwi Ears Ardor |
| Drivers | Coaxial dual dynamic (40mm + 10mm) |
| Battery Life | 140 hours (ANC off), 72 hours (ANC on) |
| ANC Modes | Hybrid ANC (35dB reduction) |
| Connectivity | Bluetooth 5.3 |
| Codec Support | SBC, AAC |
| Wired Mode | Yes (3.5mm + USB DAC) |
| Charging Port | USB-C |
| Weight | ~260g |
found on my Android DAP that I could only activate SBC or AAC:

Measurements
Note: The following measurements were taken with my KB501X soft ear Pinna and a 711 clone coupler. They are available on my measurement database here.Frequency Response
Let’s start with a look at the frequency response within the boundary and other than that treble peak I mentioned you see an exceptional tuning:
It compares well even against the FiiO FT1:

So, I added 2 talking points to this graph:
- The sub-bass boost - which is very typical of ANC headphones and as ANC headphones are mainly used in noisy environments a little sub-bass boost is welcome
- Treble peak - this was the one area that is problematic with the Ardor sound profile as it was not just a measurements artifact as I could hear some sibiliance in some tracks, and it showed up while doing a “sweep” in that area.
I also noticed that moving the headphone forward on the measurement rig caused a different FR where that treble peak disappeared:

I noticed that the Ardor took to wearing glasses (even thick framed ones) very well:

ANC on and off only subtly changed the Frequency response:

And the USB and ANC performance was similar but the analog input one seems poor as if one of the dual drivers was not configured correctly via analog:

Here is a comparison of the Ardor with some other ANC headphones I mentioned earlier in the review:

Overall I thought it does very well against these headphones, the Ardor is the cheapest headphone on this graph.
Finally, here it with the 2 other Kiwi ears headphones I have recently reviewed.

And you can see of these 3 headphones it stays well within the preference bounds for most of the frequency response:

Distortion
Distortion levels are well within acceptable ranges:
And as a percentage:

Rating
I am giving the Kiwi Ears Ardor a 4.5-star pragmatic rating because it provides excellent sound quality, decent ANC, and great comfort at a budget-friendly price. The lack of a companion App for updates, ANC configuration and to provide some basic EQ specifically for that treble peak means I cannot give it a full 5-star rating, but it was close as it still outperforms most other sub-$100 ANC headphones and competes very well in sub-$200 ANC headphone market.Conclusion
The Kiwi Ears Ardor is an impressive first entry into the ANC headphone space, bringing Kiwi Ears’ IEM expertise into a wireless format. With a decent sound profile, strong ANC, and excellent codec support, it’s one of the best budget ANC headphones for audiophiles. While the lack of an EQ app limits customization for those who like to customise things but the out-of-the-box tuning is well-executed, making it a fantastic value at $99.Attachments

Last edited:
Redcarmoose
@jeromeoflaherty,
Great, amazing review! Cheers!
Great, amazing review! Cheers!
4ceratops
Thanks, great review. There was just a total mess about what codecs this model is actually equipped with. All previous reviewers claim it only has basic SBC and AAC. You, however, come up with the claim that it also handles the great APTX Adaptive. Could you take a screenshot to confirm this? Thanks.
jeromeoflaherty
Yes sorry I was incorrect. I was mainly using it with my iPhone when out of the house so forgot to check with my Android DAP. But I can confirm it does only have SBC and AAC - I have amended my review and added a screenshot showing AAC as the only high-res codec on my Android DAP.All previous reviewers claim it only has basic SBC and AAC. You, however, come up with the claim that it also handles the great APTX Adaptive. Could you take a screenshot to confirm this? Thanks
jeromeoflaherty
100+ Head-Fier

Pros: Lightweight and comfortable Design
Deep, Well-Extended Bass
Detailed and Airy Treble
Well-Balanced, Engaging Tuning – A subtle twist on familiar targets, offering a refined alternative to standard Harman or JM-1 tunings.
Good Build Quality
Deep, Well-Extended Bass
Detailed and Airy Treble
Well-Balanced, Engaging Tuning – A subtle twist on familiar targets, offering a refined alternative to standard Harman or JM-1 tunings.
Good Build Quality
Cons: Potentially some Treble Peak in Upper Registers
Stock Cable Tangles Easily
Stock Cable Tangles Easily
An airy lightweight IEM with a knockout sound
The Kiwi Ears Airoso is a new entry in the mid-tier IEM market, featuring a hybrid driver setup with a custom dynamic driver and four balanced armatures all in a very comfortable and lightweight package.
Because Kiwi Ears have released some of my favourite IEMs in the past few years, especially the Orchestra Lite and the KE4, I was delighted with the opportunity to try the Airoso.
I would like to thank Kiwi Ears for providing the Airoso for the purposes of this review.
If you are interested in finding more information here is a non-affliated link for this product click here.
So, having listened to the Airoso for a few weeks now, there are many things I really like about the Airoso including its comfort but especially that the tuning is a subtle twist on some familiar tuning targets, but to find out if you should add it to your collection, please read on.
Let’s start with the unboxing:
Unboxing and Build Quality
The unboxing experience of the Kiwi Ears Airoso is simple yet elegant, reflecting its premium-tier status:
Though not that much information on the back:

Sliding it out of its sleeve reveals the box:

Opening the box we finally we see the Airoso:

The carry case is a nice upgrade on some previous Kiwiears cases I received with a more premium texture:

And you get a good selection of eartips in 3 bags - though mostly these are fairly generic eartips:

I used my own eartips for the majority of my listening tests, but I did do my measurements of the Airoso with a medium-sized stock eartips.
Cable
The detachable cable is of decent quality, though not outstanding. While it’s lightweight and functional it does tangle a little too easily:
The 2-pin connectors ensure easy cable updates though I actually prefer recessed 2-pin connections for extra security:

The IEMs
The Airoso’s shell is small and exceptionally lightweight, making it one of the most comfortable IEMs I’ve worn for extended listening sessions, here is a little video showing the Airoso from all angles:
The CNC aluminum alloy and titanium faceplate give it a high-end feel while maintaining durability.


The nozzles are medium-sized and have a good angle at least for me, ensuring a very secure fit even when out walking:


They are also a good length, some IEM’s like the Truthear Zero family are very long and not always that comfortable:

Here are some comparison photos and videos - first with the Kiwi ears KE4, Orchestra Lite, the new Truthear Zero Blue 2 and the smaller FiiO FD15 - hopefully this shows with the Airoso, Kiwi ears went for good compromise of size (and it is lightest of these IEMs):


Some photo comparisons - the Airoso is on the right :

And just with the larger IEMs:

A close comparison with the other 2 Kiwi ears IEMs:

| 
|

| 
|
Sound Impressions
So “Airoso” is a Spanish and Italian word that translates to “airy”, “graceful”, or “melodious” in English. It is often used in musical contexts to describe something flowing, expressive, and elegant, and these descriptions align extremely well with the tuning philosophy of the Kiwi Ears Airoso providing a spacious, detailed, and well-balanced sound.That name might make you feel the Airoso has limited bass but that would be the wrong assumption this IEM has exceptional sub-bass extension as well as that airy upper treble textures that the name implies, though I never found the treble to be sibilant.
Bass
The bass is deep, textured, and well-extended, thanks to the custom dynamic driver with an LCP+PU composite diaphragm. It delivers a satisfying low-end punch without overwhelming the mids. Compared to the KE4, the Airoso offers a slightly more powerful sub-bass response, while the Orchestra Lite leans towards a more neutral presentation.Mids
The midrange is clear and natural, though slightly recessed due to the V-shaped tuning. Vocals come through with good presence, and instruments retain a realistic tonality. Compared to the FiiO FD15, the Airoso maintains better balance, ensuring mids are not overly overshadowed by the bass.Treble
The four balanced armature drivers shine in the high frequencies, offering excellent detail retrieval and an airy presentation. The treble is crisp and extended but never harsh, making it a more refined option than the Truthear Zero Blue 2, which can sometimes exhibit sharpness in the highs.Soundstage and Imaging
The Airoso’s soundstage is wider than expected for an IEM in this price range. Imaging is precise, with a strong sense of instrument separation. While the Orchestra Lite may have a slightly more spacious presentation, the Airoso holds its own with strong spatial cues.Specifications and Measurements
| Specification | Details |
|---|---|
| Model | Kiwi Ears Airoso |
| Impedance | 18Ω |
| Sensitivity | 110 dB SPL/mW |
| Frequency Response | 20Hz - 20kHz |
| Cable Length | 1.2m (detachable) |
| Connector Type | 3.5mm TRS |
| Weight | 12g (each earbud) |
Frequency Response
The Airoso has in my opinion a very nice tuning which mostly Harman but with 2 nice twists:
The slightly warmer bass is very typical of the new “JM-1 with bass boost” still tuning as is the slightly darker treble in the 4-6Khz region. The only thing possible worth considering might be that “airy” upper treble peak.
If that peak is too much for you, swapping to Foam eartips alters that treble region for the better:

I thought it was worth a little comparison and analyse between 2 of my favourite IEMs from last year, the “JM-1” / “New Meta” favourite the KE4 and the nicely tuned Harman Meze Alba :

I marked a few areas of interest:
- They all have similar sub-bass and bass
- The KE4 has a now typical JM-1 recessed midrange
- The Alba has a more typical Harman presence in this region
- The Airoso as I mentioned earlier possible has a treble peak (measurements in this region are never accurate to you may not hear a peak)
Distortion
The Airoso maintains low distortion levels across all frequencies, showcasing its high-quality crossover implementation and driver design.
And from a percentage minimal distortion:

Rating
I am giving the Kiwi Ears Airoso a 5-star pragmatic rating due to its exceptional comfort, superb bass, and detailed treble performance especially at its price point. I like how Kiwi Ears have filled their line-up with good alternative tunings and the Airoso fits that exactly, it is not Harman 2019 tuned and not “JM-1” but something very pleasing in between those targets and a very good addition to Kiwi Ears lineup.Conclusion
The Kiwi Ears Airoso is an outstanding choice for those seeking a mildly V-shaped tuning with deep bass, some warmth, very decent midrange and clear highs, all in a very comfortable lightweight design. With a well-executed hybrid driver setup and excellent build quality, it’s a solid recommendation for audiophiles and casual listeners alike.
Last edited:
jeromeoflaherty
100+ Head-Fier

Pros: Current open box deals offer incredible value at $400
Excellent bass extension
Nice Midrange (slightly forward)
Great smooth treble (I believe the grill modifications 'open up' the treble without making it harsh)
Excellent bass extension
Nice Midrange (slightly forward)
Great smooth treble (I believe the grill modifications 'open up' the treble without making it harsh)
Cons: A bit dated now (compared to the new Unveiled Hifiman's)
Modded sound signature might not suit everyone
Modded sound signature might not suit everyone
V2 of the classic planar that might have inspired a new trend
The Hifiman HE6SE V2 was/is a modern reimagining of one of the most iconic headphones in the audiophile world: the original HE6. Known for its incredible detail retrieval, natural timbre, and an open-back design that provides an expansive soundstage, the HE6SE V2 brings these characteristics into a refined, more accessible package, though arguably not as good as the original.
A big thank you to @BuddhistFoolish for generously lending me more of his incredible high-end headphones. This has given me the time to truly appreciate them and put together a thoughtful set of reviews. The generosity in this hobby never ceases to amaze me, and I’m truly grateful for this opportunity.
The HE6SE V2 has been discontinued but Hifiman are offering an incredible Open Box discount at the moment here for $399 down from $1899 so an incredible discount.
However, make no mistake: this headphone like its more famous predecessor still requires proper amplification to unlock its full potential, so I thought I should cover power before getting in the subjective and objective qualities of this headphone:
Power requirements
The HE6SE V2 is not a headphone for casual listening. Its 50Ω impedance and incredibly low sensitivity of 83.5dB/mW mean it needs significant power to truly shine. But for those willing to invest in a proper amplifier. I would recommend at least 1W of power, the HE6SE V2 can offer a fantastic listening experience.To give you an idea if we leave say 10dB/mW “headroom” for either EQ (and I feel the V2 does need EQ or specifically the modified version I was loaded does need some EQ ) and/or tracks that with large dynamic range, for example, I always play the start of Pink Floyd “Wish you were hear” at much louder SPL than the rest of that album to get that spine tingling effect when the guitars start, but that needs power.
So using a power calculator and putting in 73dBmw (instead of 83dB/mw) in we get the following power recommendation for 85dB output, which is really the minimum requirement to allow for some headroom:

Some Initial thoughts
After using this modded HE6SE V2 for a few months, I have lots of thoughts, specifically on how the mods affect my sound impressions and how the various modded backs of the earpads on this headphone may have inspired Hifiman to go full unveiled with the various official ‘Unveiled’ versions of some of their classic headphones over the past few months.Well I will get into the details later but first let’s get into the unboxing experience first:
Unboxing Experience
Since this HD6SE V2 was both customised and loaned to me for a few months it retail box obviously was previously opened:
The back of the box has those hard to drive specifications I mentioned earlier:

Once you open the box you do more premium experience:

• The HE6SE V2 headphones normally comes with:
• A 1.5m detachable cable with 3.5mm terminations
• A 6.35mm adapter
• Owner’s manual and warranty card

While the unboxing experience is straightforward, it’s worth noting that Hifiman has focused on the essentials, ensuring the headphones and accessories are well-protected.
Design, Build Quality, and Comfort
The Hifiman HE6SE V2 retains the iconic design of its predecessor, with some modern updates for improved comfort and usability. Since I am using a modded version for this review I thought before I get into the look of the modded grills, it was only fair to remind you of what the “stock” grills look like:
But with the modded version, it completely opens up the back:


I do remember about 4 years ago there was a huge trend for modding the grills on this specific Hifiman headphone, and possible that trend gave Hifiman the idea to do the research and development which lead to their recent highly acclaimed headphones the Susvara Unveiled, HE1000 Unveiled and the Arya Unveiled.
Here is the Susvara unveiled:

I will get into what this “unveiling” concept does for the sound later with some references to the original “modders” but the typical benefits of removing or in the case of this modded HE6SE V2 minimizing the grill is to remove internal reflections and so have a much more consistent treble experience, basically your ears should hear just the driver and not the extra reflections of sound bouncing back of each earcup.
Zooming in you see some interesting details:

Build Quality and Comfort
The earcups are constructed from high-quality aluminum, giving the HE6SE V2 a lightweight yet durable frame.
The suspension-style headband style is probably a bit old school now having been used in many other HifiMan headphones, but it was a redesign for better weight distribution, and the yokes feel sturdy and reliable.
Comfort was significantly improved over the original HE6. The new headband is well-padded, and the hybrid earpads ( combining velour and pleather) are plush and breathable, allowing for extended listening sessions without fatigue.
However, the clamping force may feel a bit tight for some users, especially during the first few uses, my model was well-used and exceptional comfortable.
Sound Quality
The Hifiman HE6SE V2 delivers a highly resolving and dynamic sound signature that excels in transparency and detail. It’s a headphone that rewards careful listening and excels with well-recorded material.Bass
The bass on the HE6SE V2 is tight, well-controlled, and extends deep into the sub-bass region. Tracks like “Angel” by Massive Attack reveal the headphone’s ability to reproduce clean, impactful bass without any bloat or muddiness.Midrange
The midrange is neutral and highly detailed, making vocals and instruments sound lifelike and engaging. Listening to “Adele – Hello” showcases the headphone’s ability to present vocals with clarity and warmth, capturing every nuance of her performance. Compared to say the Edition XS and the Sundara the V2 is much closer to the Sundara as far as midrange.Treble
The treble is detailed and extended, with just a touch of brightness that adds air and sparkle to the presentation. Tracks like “Hotel California” by The Eagles (Live Version) highlight the HE6SE V2’s ability to resolve fine details in cymbals and high-pitched instruments without sounding harsh or fatiguing. I believe the ‘unveling’ modification with the grills has greatly enhanced the consistently of the treble and brought some magic to the V2 that you cannot see in measurements. Together with the Mod house Tungsten that recently reviewed the treble was some of the best that I have heard.Soundstage and Imaging
The open-back design provides an expansive soundstage with excellent depth and width. Imaging is pinpoint accurate, allowing you to easily place instruments and vocals within the soundstage. This makes the HE6SE V2 an excellent choice for orchestral and live recordings.Specifications and Measurements
| Specification | Details |
|---|---|
| Driver Type | Planar Magnetic |
| Impedance | 50 Ω |
| Sensitivity | 83.5 dB/mW |
| Frequency Range | 8Hz-65kHz |
| Weight | 470g |
| Cable Details | 1.5m detachable cable with 3.5mm terminations |
| Extras | 6.35mm adapter, premium storage box |
It pairs best with high-powered amplifiers especially as I mentioned earlier if you want good dynamic range and to use some EQ. I used it with various decent power amplfiers like the Schiit Midgard and the new FiiO K17:

Measurements
Note: Measurements were taken with my KB501X soft ear Pinna and a 711 clone coupler. Data is available on my measurement database here.Before I get into my measurements, since this is a modded version, I have also used some measurements from this original post over at Audio Discourse which may have inspired many modifications of this headphone:
So first the changes between the original and ’no grill’:

And these are the changes with some alternative earpads:

Frequency Response
The Modded HE6SE V2 has a mostly balanced frequency response, but you can see that slightly elevated 1K-2K from the Dekoni pads, but in every other way this is an exceptional frequency response with a lovely linear bass and great treble:
Note: I labelled them as Stock pads above but they are the Dekoni Leather pads as in the previous set of graphs.
I actually tried some different earpads (in this case some perforated Angled earpads), but while the increased the bass response they did change the midrange for the worse:

Here is also a little comparison with my Edition XS and the Mod house tungsten:

You can see all 3 have exceptional bass and the V3 and Tungsten have similar treble with the XS having some peaks.
Distortion
Distortion is impressively low, even at high listening levels:
And similarly as a percentage it has very low distortion:

EQ Recommendation
While the HE6SE V2 sounds excellent out of the box especially at the open box price of $400. I do feel the some ofthe modifications made while they changed the treble for the better, gave the midrange a little bit too much energy and therefore some EQ can restore that balance.
• -2dB at 6kHz
• +1dB at 30Hz for a touch more bass weight
Rating
The Hifiman HE6SE V2 earns a pragmatic 4-star rating for its exceptional sound quality, improved comfort, and premium build. The Grill modification almost certainly opened up the treble but the earpads did cause the tonality to be less ideal than some of the other Hifiman headphones like the Sundara that excel in that region. While its demanding power requirements may deter casual users, those with the proper setup will be rewarded with one of the finest listening experiences available especially at the openbox price of $400.Conclusion
The Hifiman HE6SE V2 is a headphone that demands respect. With these modifications you get a combination of incredible resolution and expansive soundstage makes it a standout choice for audiophiles seeking the ultimate in performance. While it requires significant amplification to reach its potential, the effort is well worth it for those willing to invest. But with Hifiman recently Unveiled line of headphones the need for this specific headphone especially with easy modifications might have caused Hifiman to discontinue the line. Still if you can get that open box deal it a classic headphone to add to your collection.
Last edited:
jeromeoflaherty
100+ Head-Fier

Pros: Fantastic linear bass extension
Great midrange
Wide soundstage
Expertly tuned treble response ( possible the best I have heard)
Very comfortable to wear with nice stock pads ( ZMF Caldera hybrid pads )
Amazing cable ( Viking Weave )
Clever magnetic alignment of the pads with the driver
Great midrange
Wide soundstage
Expertly tuned treble response ( possible the best I have heard)
Very comfortable to wear with nice stock pads ( ZMF Caldera hybrid pads )
Amazing cable ( Viking Weave )
Clever magnetic alignment of the pads with the driver
Cons: Rough 3D printed texture (so not as "smooth" or "professional" as similar priced high-end headphones)
Very hard to drive needs a decent desktop Amplifier (so not a "portable" or "mobile" headphone)
Long wait time
Very hard to drive needs a decent desktop Amplifier (so not a "portable" or "mobile" headphone)
Long wait time
A handcrafted masterpiece with a natural sound signature
The Mod house Tungsten is the latest headphone from Mod house Audio and is one of the most hyped headphones in the market. There is at least a 6-month delay if you were to order one from their website.
Mod House Audio are a small boutique brand previously best known for its meticulously handcrafted modifications of some classic headphones. But with the Tungsten they moved to a different level, designing a headphone from scratch using 3D printing to handcraft this headphone exactly they way they wanted, and it shows.
A big thank you to @BuddhistFoolish for generously lending me more of his incredible high-end headphones. This has given me the time to truly appreciate them and put together a thoughtful set of reviews. The generosity in this hobby never ceases to amaze me, and I’m truly grateful for this opportunity.
If you want to learn more about the Tungsten and after spending a few months with them, I really think it is worth checking out the Modhouse product page for the Tungsten here.
I’ve been listening to the Tungsten for the past few months, and I’m genuinely shock by how good its sounds especially once you give it the power it deserves. It is also one of the few headphones I have heard that does not need, in my opinion, any EQ to sound fantastic.
Mod house have delivered a headphone that not only comfortable, visually striking but also offers a sound signature that blends some warmth, lots of detail, and a spacious soundstage.
Before getting into the details on the sound, lets get into the unboxing experience.
Unboxing Experience
The Tungsten comes in simple yet functional “fishing tackle” like box, that reflects Mod house’s artisanal approach:
Open this box reveals the Tungstens protected with some foam packaging:

Removing the foam you see the headband and a small pouch containing the cable:

While it doesn’t have the elaborate unboxing experience of mass-market brands, the focus is clearly on the headphone itself.

Inside the box, you’ll find: • The Modhouse Tungsten headphones • A high-quality braided cable (available with different terminations) • A soft carrying pouch • A warranty card and care instructions
Modhouse online checkout process does offer a range of customization options, including different cables and headbands, allowing you to tailor the Tungsten to your preferences. The most important customisation is whether you want a single-sided or double-sided model. I borrowed a single-sided model for this review, I will show some measurements comparisons later of both models but my impressions in this review are based on that single sided model.
Design, Build Quality, and Comfort
The Modhouse Tungsten is a visual interesting headphone:
But a little rough to the touch where you can really feel that 3D printed finish:

Build Quality
So while it is built with a strong emphasis on durability, some may find raw finish compared to the finely polished finishes of many mainstream flagship models at similar price ranges.
And, for example, when compared with the Mirph1 that I recently review (another 3D printed ‘Artisal headphone’), the Tungsten feels ‘cheaper’ even though it is double the price:

However, this design choice aligns well with the Tungsten’s identity—purpose-driven, practical, and built to perform rather than simply to impress with visual refinement.
The steel rods used for adjustments feel sturdy and are designed for long-term durability.

| 
|

Though not the lightest headphones around, the Tungsten distributes its weight well, allowing for extended listening sessions without discomfort.

Cable quality
The Viking-Weave cables provided with the Tungsten are exceptional, some of the nicest cables I have used:
I love the feel of the cable:

And the splitter is high quality:

It comes with some quality dual 3.5mm terminations:

The specific one that came with the Tungsten I borrowed as the XLR cable:

And it looks great in the Tungsten:

Comfort
Comfort is one of the Tungsten’s strong points. The earcups are large and well-padded, providing ample room for your ears to breathe. These are the stock ZMF Caldera Hybrid pads:
The earpads are made from plush memory foam and covered in high-quality velour or leather, depending on your preference.

Each earpads is attached via strong magnets which clever attach in the right location so the driver grills are aligned for the best sound quality:
| Magents on back of earpads: | Alignment on the earcups: |
|---|---|

| 
|

Power requirements
Before I get into my subjective opinions I thought it would be useful to highlight the unique power requirements of the Tungsten.Note: this information was originally provided in a post by Solderdude over on ASR, but I thought these recommendations were the most sensible and realistic way to describe powering the Tungsten, as there are lots of “subjective” opinions around the internet.
120dB peak SPL
- To achieve 120dB peak SPL (impressively loud levels - don’t listen this loud):
- Requires 50V, equivalent to 300W from an 8-ohm amplifier.
- For 110dB peak SPL (loud levels - also too loud for even though this is peak):
- Requires 16V, equivalent to 30W from an 8-ohm amplifier.
- For 100dB peak SPL (comfortable loud levels):
- Requires 5V, which is achievable with a headphone amplifier capable of delivering 80mW into 300 ohms or 0.8W into 32 ohms.
For the past few weeks though, I mainly used the Tungsten with the FiiO K17:

| 
|
But it worked comfortable well with the other 2 amplifiers in the first photo, specifically the Schiit Midgard and the JDS Labs Element IV.
I was even able to power it to reasonable listening levels (roughly 80dB SPL) using a FiiO JM21 DAP via its balanced (capabale of 500mW of power at high gain), this provided enough power for some portable listening on a few walks around my neighbourhood, but this was on max power.
Basically, expect to need a decent desktop headphone to power it to good levels especially with some headroom (for high dynamic range tracks and EQ).
Sound Quality
The Modhouse Tungsten delivers an astonishingly natural sound signature with excellent detail retrieval and a spacious soundstage. It’s a headphone that feels equally at home with delicate acoustic tracks and more dynamic, bass-heavy genres.Bass
The bass on the Tungsten is deep and extremely well-controlled, with a slight emphasis that adds warmth without overpowering the rest of the frequency range. Tracks like “Billie Eilish – Bad Guy” showcase the Tungsten’s ability to deliver punchy, textured sub-bass that feels satisfying and immersive.Midrange
The midrange is natural and slightly forward, making vocals and instruments sound lifelike and engaging. Listening to “Norah Jones – Don’t Know Why” is a treat, as her voice is rendered with exceptional clarity and warmth.Treble
The treble is smooth and detailed, with a slight roll-off that prevents harshness. This makes the Tungsten a non-fatiguing headphone, even during long listening sessions. Tracks like “Vivaldi’s Four Seasons” highlight the Tungsten’s ability to handle high-frequency detail with finesse.Soundstage and Imaging
The open-back design gives the Tungsten an expansive soundstage that rivals more expensive headphones. Imaging is precise, allowing you to easily locate instruments and vocals within the soundscape. Tracks like “Pink Floyd – Money” demonstrate the Tungsten’s excellent spatial capabilities.Specifications and Measurements
There are subtle differences between the Single Sided and Double Sided Tungstens so I thought it might be useful to put them in a table:| Specification | Single-Sided (SS) | Double-Sided (DS) |
|---|---|---|
| Driver Type | Planar Magnetic | Planar Magnetic |
| Magnet Configuration | Single-Sided | Double-Sided |
| Diaphragm Material | 24K Gold Trace | 24K Gold Trace |
| Impedance | 135 Ohms | 155 Ohms |
| Sensitivity | 76 dB/mW | 78 dB/mW |
| Sensitivity (dB/V) | ~85 dB/V | ~86 dB/V |
| Weight | 520 grams | 515 grams |
| Headphone Type | Open-Back | Open-Back |
| Connector | Dual 3.5mm (Standard Hifiman Pinout) | Dual 3.5mm (Standard Hifiman Pinout) |
| Cable | Viking Weave OCC Litz (4.4mm/XLR option) | Viking Weave OCC Litz (4.4mm/XLR option) |
| Stock Earpads | ZMF Caldera Hybrid | ZMF Caldera Ultra-Perf |
| Pad Swap Mechanism | Magnetic Mounting | Magnetic Mounting |
| Frame Material | MJF Nylon 12, Stainless Steel Rods | MJF Nylon 12, Stainless Steel Rods |
| Headband Material | Spring Steel, Alcantara Strap | Spring Steel, Alcantara Strap |
| Amplifier Requirement | High Voltage Output Recommended (~20V @ 150Ω) | High Voltage Output Recommended (~20V @ 150Ω) |
| Included Accessories | Hard Case, Cable, Metal ID Plate | Hard Case, Cable, Metal ID Plate |
| Price | $1,499 | $1,999 |
Measurements
Note: Measurements were taken using my KB501X soft ear Pinna and a 711 clone coupler. Data is available on my measurement database here.Frequency Response
The Tungsten has an exceptional smooth bass and midrange response:
It also has that now popular 1K-2K “soundstage” dip.
Here are some comparisons with some of my other headphones:

I highlighted a few areas:
- The Bass, the Mirph1 was tuned to give a little bass boost, while the HD800s in this comparison has replacement pads which did bring the sub-bass down but both the XS and the Tungsten have exceptional linear bass
- All these headphones go for that recess in the 1K-2K region for “soundstage”
- The Mirph1 has gone for a different treble tuning but the other 3 measure similar treble but, if I listen using a sweep, the Tungsten has no obviously treble peaks or dips while all these other headphones did have some HRTF artifacts, so specifically for me, I would say the Tunsgsten has the best treble.

So the US Apple usb-c and the FiiO JA11 ‘dongles’ were not really able to power it to any sufficient listening level, but the JM21 DAP as I mentioned earlier could get it to a decent level on max gain and the top measurement here was the FiiO K17 on medium gain at about 60.
Distortion
Distortion levels are impressively low across the frequency range with no peaks:
And as a percentage:

Rating
The Modhouse Tungsten totally deserves a pragmatic 5-star rating, while not cheap it delivers on sound quality and comfort to levels that are very hard to match at any price. It is the first headphone I have reviewed that I feel is properly “Endgame” for sound quality, where it needs no EQ adjustments at least to my tastes. While it is a little on the heavy side and the rough 3D printed feel does slightly let’s down compared to similar priced headphones from Meze, ZMF or Audeze, I still feel this headphone easily justify its price.Conclusion
The Modhouse Tungsten is a beautifully crafted headphone that combines the best of artisanal design with outstanding sound quality. Whether you’re an audiophile looking for a warm and natural headphone or a music lover seeking a comfortable, well-built option, the Tungsten is an excellent choice.Its combination of great sound, build quality, and modularity makes it a standout in it any price range, and it’s a headphone I highly recommend checking out and one that I will miss when I return it to its owner.
Last edited:
jeromeoflaherty
100+ Head-Fier

Pros: Fantastic open spacious sound
Great tonality
Incredible well built and easy to fix
Very comfortable
Great tonality
Incredible well built and easy to fix
Very comfortable
Cons: Odd looking ( compared to similar priced Meze, Audeze, ZMG, DCA headphones)
Hard to get official replacement ear pads and third party ones change sound signature
Proprietary cable connections
Hard to get official replacement ear pads and third party ones change sound signature
Proprietary cable connections
A legendary headphone with unparalleled soundstage and detail
The Sennheiser HD800S is one of the most revered headphones in the audiophile community. As the successor to the HD800, the HD800S refined the already exceptional sound of its predecessor by addressing some of the minor complaints audiophiles had but kept the amazing sonic attributes, build quality and comfort.
A big thank you to @BuddhistFoolish for generously lending me more of his incredible high-end headphones. This has given me the time to truly appreciate them and put together a thoughtful set of reviews. The generosity in this hobby never ceases to amaze me, and I’m truly grateful for this opportunity.
If you want to learn more about the HD800 S, here a link to the official product page on Sennheiser’s website. Typically, the HD800 S costs $1800 though occasionally goes on sale.
So, I’ve been listening to the HD800 S for several weeks now and I initially wasn’t as impressed as I felt I should be, possible it was the hype associated with this headphone. But, it has not only grown on me, but I now think (with a little bit of EQ) this is the best headphone I have had the pleasure of reviewing.So, I think it is a headphone that you “grow” into and while it looks a bit “goofy” and mostly made of plastic, the level of comfort, the ruggedness of the build and especially the sound quality are exceptional at any price.
And it’s also a headphone that requires some careful pairing and proper amplification to reach its full potential. But let’s dive into the details.
Unboxing Experience
Sennheiser knows how to deliver a premium experience, and the HD800 S packaging reflects that. The headphone comes in a high-quality box:
With foam inserts to protect the headphones during transport:

Note: These are not my pictures - but they are indicative of the unboxing experience.
Inside the box, you’ll find:
• The HD800 S headphones
• a 3m 6.3mm terminated cable and a 4.4mm balanced cable
• A microfiber cleaning cloth
• Documentation and a quick-start guide
The inclusion of both single-ended and balanced cables is a great touch, ensuring compatibility with a wide range of setups right out of the box.
Note: The HD 800s which I borrowed, only came with the 6.3mm cable, but it is a very high quality cable:

| 
|

This is connector where you plug this cable into the HD 800 S:

Design, Build Quality, and Comfort
The HD800 S shows excellent engineering, and you can tell this headphone will last a lifetime but compared to other $1000-$2000 headphones its looks will not sell it.
Note: When I asked my family to guess how much it cost were so far off it price I started laughing, but I had them previously guessing the price of some Meze Headphones so as far as judging a headphone by its looks is obviously an unfair test.

But the build quality is outstanding, with a combination of metal and high-grade plastic that ensures both durability and a lightweight feel. The black and silver finish gives the headphone a sleek and professional look.
Here are some closeups to give you an idea of the build quality:

| 
|

| 
|
Build Quality
The large earcups are made from a durable polymer material that helps keep the weight down without compromising on strength.
The headband features metal reinforcements for added durability:

And the yokes are designed to provide just the right amount of clamping force:

I also like the subtly space at the top of the foam of the headband to reduce the heat build up at the top of your head:

The earpads themselves are large and shaped to maximize the angle of the driver to help create that immensive soundstage:

Note: The unit I borrowed is using third party replacement earpads and as you will see later in the measurements alternative earpads do subtly change the frequency response.
Comfort
Comfort is where the HD800 S truly shines. The large, oval-shaped earcups completely surround your ears, and the microfiber earpads are incredibly soft and breathable.
Sound Quality
The HD800 S is all about precision, detail, and soundstage. It’s a headphone that excels in delivering an analytical yet musical listening experience, making it ideal for audiophiles and professionals alike.Bass
The bass on the HD800 S is tight, controlled, though I initially felt it was missing a little sub-bass (or specifically I thought the bass sounded more like my HD600), but when I investigated I realised the earpads were replaced with third party ones and their bass roll-off was a little deeper than from the original Sennheiser stock pads. Therefore, I did investigate a little sub-bass EQ, and ultimately I used that EQ to for most of my listening experience.So, while it’s not bass-heavy, it’s incredibly accurate, making it perfect for genres like classical, jazz, and acoustic. Tracks like “Billie Jean” by Michael Jackson reveal the clarity and punch of the bass without any hint of muddiness.
Midrange
The midrange is where the HD800 S really excels. Vocals and instruments are presented with stunning clarity and separation. Listening to “Someone Like You” by Adele is an emotional experience, with every nuance of her voice captured perfectly. I think its is crucial that this headphone provides that accurate midrange while not loosing that large soundstage, too often there is a trade-off between soundstage and midrange tonality but not with the HD 800 S, you get a tonally accurate headphone with a wide spacious soundstage.Treble
The treble is detailed and airy but very smooth with no treble peaks. Tracks like “Vivaldi’s Four Seasons” highlight the HD800 S’s ability to reproduce high-frequency details without sounding harsh and across my typical 5-hour audiophile playlist, I did not hear any excess treble yet was astonished again and again with the subtle detail the HD800 S provided.Soundstage and Imaging
The soundstage of the HD800 S is nothing short of legendary. It’s wide, deep, and immersive, giving you the feeling of being in a concert hall. Imaging is pinpoint accurate, allowing you to place every instrument and sound effect with precision. Tracks like “Hotel California” (Live) by Eagles are a perfect showcase for the HD800 S’s spatial capabilities. On other tracks like Bjork’s “The Hunter” the 3D aspects of the soundstage was amazing with detailed pinpoint accurate placement of the instrument swirling around your head.Specifications and Measurements
| Specification | Details |
|---|---|
| Driver Type | 56mm Dynamic Driver |
| Impedance | 300 Ω |
| Frequency Range | 4Hz-51kHz |
| Sensitivity | 102 dB SPL (1kHz, 1Vrms) |
| Weight | 330g |
| Cable Details | 3m OFC cable (6.3mm + 4.4mm balanced) |
I tried it with the both the new FiiO K17 (providing a little EQ sub-bass boost):

And also with the JDS Labs also new and excellent Element IV as my desktop Amplifier of choice that also provides a little EQ sub-bass boost:

Measurements
Note: The following measurements were taken with my KB501X soft ear Pinna and a 711 clone coupler. They are available on my measurement database here.Frequency Response
The HD800 S has a neutral tuning with slight bass roll-off and a smooth natural treble, but Sennheiser has used some clever tricks with the Frequency response to give and added sense of soundstage. Specifically in the 1Khz-2Khz region.The following graph compared 2 HD800s with stock earpads with model I borrowed using the Dekoni Earpads and you can see that extra roll-off in the sub-bass, which I EQed to preference anyway so not a big deal for me:

I did decide to investigate the changes with different earpads and Dekoni to their credit do publish the changes these earpads make and as you can see here it does show that extra roll-off in the bass region:

So I thought I would leave an unaffiliated link these dekoni pads should people be interested:
https://bloomaudio.com/products/dekoni-audio-elite-earpads-sennheiser-hd800?variant=39929092341835
One thing I was asked to look at with the HD800s was positional variations and the effect of glasses on the frequency response and I have got to say it is fantastic where there is almost no change in the FR with various placements, and different clamping force and even when using glasses:

Distortion
Distortion levels are incredibly low, even at higher volumes:
And showing the distortion as a percentage you can see it is minimal:

So this headphone will easily take to EQ should you want to apply some and I did specifically in that sub-bass region.
The waterfall chart of the HD800s is also excellent one of the best I had seen:

EQ Recommendation
While the HD800 S is fantastic out of the box, I did do a little sub-bass boost, so specifically I pulled up the sub-bass initially to compensate for the differences in replacement earpads in this sub-bass region, but mainly for my personal preferences.This is eqMac when playing a sub-bass heavy track to show the effect of that bass EQ change:

Rating
I’ve given the Sennheiser HD800 S a pragmatic 5-star rating. It’s a headphone that excels in all the areas that matter most to audiophiles: tonality, soundstage, detail, and comfort. While not the best looking headphone it grew on me immensely over the past few months and I will be sad to return it, but happy to have been given the opportunity to give it the time it deserves to write this review.While it’s not cheap, it is a purchase that can last a lifetime and together with its exceptional performance it easily justifies the price.
Conclusion
The Sennheiser HD800 S is a headphone that has earned its legendary status. Whether you’re a seasoned audiophile or someone looking to invest in a true flagship headphone, the HD800 S should be at the top of your list. Its combination of unmatched soundstage, precise imaging, and exceptional comfort makes it a joy to use for both music listening and professional applications.If you’re looking for a headphone that delivers an immersive and analytical listening experience, the HD800 S is a worthy choice, I finally understand why this is a legendary headphone.
Last edited:
jeromeoflaherty
100+ Head-Fier

Pros: Decent Power especially from the 4.4mm balanced output
Excellent Features with full Google Android 13
Decent storage 32GB easily expandable via MicroSD
Lots of decent Audio tweaks especially within the FiiO Music application
A perfect size for a DAP with a decent screen
All for a very decent price
Excellent Features with full Google Android 13
Decent storage 32GB easily expandable via MicroSD
Lots of decent Audio tweaks especially within the FiiO Music application
A perfect size for a DAP with a decent screen
All for a very decent price
Cons: Lightweight design means smaller battery so some careful management is needed
FiiO Equaliser is not system wide (like their other DAPs)
Plastic design means it is less rugged than more competitors
3GB RAM means keep it focused on music apps
FiiO Equaliser is not system wide (like their other DAPs)
Plastic design means it is less rugged than more competitors
3GB RAM means keep it focused on music apps
Introduction
The FiiO JM21 is a compact lightweight Digital Audio Player (DAP) that combines some great features like Android 13, dual Cirrus Logic CS43198 DACs, and up to 700mW output power all at a budget-friendly price.
Note: I would like to thank FiiO for providing the JM21 for this review.
If you are interested in more information about the JM21 this is their product page with lots of technical information.
So, after using the JM21 for more than a month now I think I have a very good idea for its capabilities and an idea of its limitations compared to some higher end DAPs, but overall it is a great DAP in this price range.
So read on to find out more but let’s start with the unboxing:
Unboxing and Build Quality
The JM21 arrives in nice box typical of the latest FiiO/Jade Audio products:
The back of the box has some specifications:

Opening it up:

And removing the manual you finally see the JM21 in a protective sleeve:

Taking the JM21 output of the box it has its protective sleeve already:

Here is everything you get in the box:

- JM21 DAP
- USB-C charging cable
- Pre-applied PET screen protector
- Transparent silicone protective case
- Quick start guide
- Warranty card
Design and Build Quality
The FiiO JM21 is impressively slim and lightweight, making it extremely portable.
The JM21 does have a slightly cheaper / ‘plastic’ feel at least compared to much more expensive DAPs but using plastic rather than metal will keep its weight down.
The 4.7-inch HD display is sharp enough for its price, although not as bright as premium models, requiring at least 50% brightness for indoor use and 100% for outside use.
It is also much thinner than most other DAPs which also means there isn’t a lot of space for a large battery, but again this makes it much more ‘pocket-able’ DSP than most other DAPs (the Hiby R1 that I recently reviewed is more pocketable but is not Android):
With the plastic casing having a good protective case is great, so I would suggest to use it in the case immediately:

To give you an idea of the relative size here it is compared to a Retro Nano, a Hiby R1 and a FiiO M23:

Buttons and Ports
Left:Power/lock button and volume control.
Right:Playback controls (play, pause, next) and microSD slot (supports up to 2TB).

Bottom: Both 3.5mm single-ended, 4.4mm balanced headphone jacks, and USB-C port.

Features
Let’s get into some of the key features:Audio Performance
With dual CS43198 DACs and SGM8262 amps, the JM21 delivers clean and powerful audio. The balanced 4.4mm output provides up to 700mW of power, enough to drive demanding headphones like the HiFiMAN HE400se or Sennheiser HD650. The 3.5mm single-ended output supports SPDIF and Line Out modes, making the JM21 a versatile source for external gear.Smooth User Experience
Powered by the Snapdragon 680 processor, the JM21 runs smoothly with Android 13. During testing, the device showed no noticeable lag or software glitches especially after I upgraded to 1.0.5.Android 13 UI
So as well as a newer processor the Snapdragon 680 FiiO have used a newer version of Android in this DAP than they have previous, both of these 2 decisions gives you a very snappy UI that is fast at navigation but will more than likely still seem a little slower than your smartphone UI.
But let’s get into some of the screens in this new Android 13 build, first I would suggest updating the firmware immediately as FiiO have fixed many of the battery issues that the earlier reviews mentioned.
Firmware Update
I got a system updated immediately to 1.0.4:
but most of my experience for this review was using version 1.0.5, and it fixed many issues with the earlier builds especially around battery life:

Settings screens
Next let’s look at the settings menu’s and some of the key sub-menus:
Mode Choice Option
The mode choice gives you the option to switch modes:
The JM21 offers multiple modes for diverse use cases:
- Android Mode: Full functionality with streaming apps like Spotify, Apple Music, and Tidal.
- Pure Music Mode: Restricts functionality to focus on music playback.
- Bluetooth Receiver Mode: Works as a high-quality Bluetooth receiver.
- USB DAC Mode: Functions as an external DAC for PCs and phones.
- AirPlay Support: Wirelessly streams audio from iOS devices.
You get a slightly different experience switching modes options within the Pure Music Mode:

Global settings

Key options here were the Power off Timers (which greatly help with battery life) and make sure that double tap to wake is disabled (which I disabled to save battery life).
Audio Settings
There are a lot of Audio Settings to allow you to tweak the sound:
And more when you scroll down:

You get SPDIF output from the LO if you want to offload an external DAC

With Bluetooth options you get an excellent set of codecs:

Battery Life
Despite its compact size, the JM21 offers decent battery life:- Single-ended output: ~12.5 hours.
- Balanced output: ~9.5 hours.

Recharging is quick, with the USB-C port supporting fast charging.
FiiO Music
The FiiO Music application is good, but I imagine most people will use the native Music application, Spotify, Tidal, Qobuz or Apple Music but the FiiO Music application has some nice features. I have 3 other music applications that I find excellent on DAP that I will show later on but lets get into some of the FiiO Music features.FiiO have built a few other applications, e.g. FiiO Link and Equaliser application that all work well with the Music Application:

The Lab features option has a few more options to experiment with:

For example enableing the extra Sound effect options including a stereo expander:

You can get an idea of the level of customisation available when looking at the extensive amount of audio playback in the Settings option on this screen:

| 
|
The layout of the music is pretty sensible showing the music stored on the microSD card, so all the artists:

Selecting an Artist shows their albums:

Then playing an Album:

The Now playing screen is nicely minimal (and can have a theme applied) and it has a nice subtle graph equaliser playing at the bottom of the screen:

You have lots of extras on the menu when playing a song like Car Mode:

And lyrics when playing you own music:

When the screen is rotated you get a nice alternative layout for the now playing screen - this time I swapped to a different Theme:

You might see the VU button next to the Song Name, clicking that shows a nice VU Meter:
VU Meters
I am a sucker for VU Meters:
And you can have dual VU Meters when you rotate the screen:

Themes
I mentioned earlier there are some alternative themes to switch too:
Screen rotation
And I like how the Application works well in landscape mode so that is an easy switch:
| 
|
Equaliser Application
The now standard (and pretty good) FiiO Equalizer application is available within the FiiO Music:
Sadly for now this seems to only apply EQ to music playing within the FiiO Music App. I believe this is a restriction with the way it works with Android 13, but since its Android I did find some third party EQ applications in the Play Store here is an example of one:
Alternative system-wide EQ Application
So I used Poweramp equalizer which provided EQ for third party streaming applications (like Plexamp):
You get some customisation options for each Streaming Application inside Poweramp:

And of course you have full PEQ with import capabilities:

Alternative Music Applications
While there are probably 1000s of alternative Music Applications for Android, I thought I would highlight 3 that I use and that work very well with the JM21 (as they have easy offline storage options) for when you are not on Wifi.PlexAmp
So as well as a subset of my music on the MicroSD card, I have a Plex server with my full collection and PlexAmp is a nice way to stream that collection remotely, but I do like that it has easy offline downloads, so I have various playlists downloaded for offline playback, very handy on an Airplane or even just out for a walk when not on a Wifi network.There is an automatic playlist called recently added which I automatically have set for offline access - great way to listen to the latest music even if you are not on Wifi:

Roon Arc
While you can obviously run Roon on the JM21 I think Roon Arc with its “Download” capabilities is a better alternative with an even nicely UI that PlexAmp:
And the offline screen:

Radio Paradise:
Another nice Streaming application with offline capabilities is Radio Paradise - I like how you can download a few hours worth of a few of the different streams. Very handy when getting on a long flight:
Sound Impressions
The FiiO JM21 delivers an enjoyable and extremely balanced sound signature. Here’s a breakdown:Bass
- Clean and balanced with good body and texture.
- Sub-bass extension is satisfying without being exaggerated.
- Excellent control even with complex tracks like Slipknot’s “People = crap”.
Midrange
- Smooth and transparent, with natural timbre.
- Vocals are rich and engaging, with no harshness in the upper mids.
Treble
- Well-extended and airy, providing a pleasant sparkle.
- Non-fatiguing and smooth, even at higher volumes.
Specifications and Measurments
| Specification | Details |
| DAC | Dual Cirrus Logic CS43198 |
| Processor | Qualcomm Snapdragon 680 (6nm, 8-core) |
| Amplification | 700mW+700mW balanced (32Ω) |
| Battery Life | 12.5 hours (SE), 9.5 hours (balanced) |
| Battery Capacity | 2400mAh |
| Outputs | 3.5mm SE, 4.4mm balanced, SPDIF |
| Bluetooth | v5.0 (LDAC, aptX Adaptive, AAC, SBC) |
| Screen | 4.7-inch HD |
| Storage | 32GB internal (22GB usable), 3GB RAM |
| Expandable Storage | Up to 2TB microSD card |
| Operating System | Android 13 |
| Weight | 156g |
The battery figures above while accurate I would definitely recommend auto switching off the JM21 when idle as the battery does drain faster than older DAP Android devices when on idle, I believe this is a mixture of the smaller battery, Android 13 and the way the Wifi works on the JM21.
That is an easy option within the settings and I set it to 10 minutes:

I was initially concerned with only 3GB of RAM compared to most Android smartphones with 8GB or more but having used it for a month I noticed no problems especially if you keep the JM21 focused on playing music and do not load all your social network applications onto it, it is not a problem.
Here are the specification for the output power:
Single-Ended (3.5mm) vs Balanced (4.4mm) Output
| Parameter | SE (3.5mm, High Gain) | Balanced (4.4mm, High Gain) |
| Output Power | 360mW + 360mW @ 16Ω 245mW + 245mW @ 32Ω 30mW + 30mW @ 300Ω | 605mW + 605mW @ 16Ω 700mW + 700mW @ 32Ω 80mW + 80mW @ 300Ω |
| Output Impedance | <1Ω | <1.5Ω |
| Crosstalk | ≥70dB | ≥110dB |
| Peak Output Voltage | 7.9Vp-p | 13.2Vp-p |
| SNR (A-weighted) | ≥124dB | ≥129dB |
| THD+N (1kHz/-4dB @ 32Ω) | <0.0012% | <0.0006% |
| Frequency Response (20Hz - 80kHz) | Attenuation <0.7dB | Attenuation <0.7dB |
| Frequency Response (20Hz - 20kHz) | Attenuation <0.02dB | Attenuation <0.03dB |
| Noise Floor (A-weighted) | <1.6uV | <1.7uV |
So that THD+N value of 0.0006% is equivalent to SINAD of 105 so not state of the art, but even my AudioScienceReview standards an excellent result but FiiO did provide a graph showing the balanced output at 30Ohms that there is slightly higher THD+N are some slightly higher frequencies with a THD+N of 0.003% which is still way below any audible noise level:

The frequency response is completely flat / neutral so other than the PEQ capabilities above the JM21 will provide the music exactly as it was recorded with no colorisation, here is again the balanced output at 30Ohms:

I found the balanced output to be excellent and on high gain I was able to drive my current hardest to drive headphones, the Modhouse Tungsten to deafening levels. I decided to measure this max output at both low and high gains for a practical measurement comparison:

If you want to utilise EQ, or maybe you like massive amounts of dynamic range you might need a little bit more power but for me the JM21 drove them perfectly at about 80% on high gain and really shows that you can probably cover 99% headphones and all IEM’s with the output power of the JM21.
Comparisons
So the reason I referenced that old fairy tale “Goldilocks and the 3 Bears” in the subtitle of this review was because as DAPs go there are smaller ones (with fewer features and less power) and larger ones which are much more expensive and are much less portable, so it seemed appropriate that the JM21 was that perfect middle ground DAP.As an example I have both a Hiby R1 and a FiiO M23 both of which are exceptional good DAPs in their price ranges, so I thought these 2 would be good comparisons:

JM21 vs. Hiby R1
JM21:- Larger screen easy to read with lots of Android customisations (Font sizes, Rotation etc)
- More power output Balanced output really bring out the best in the JM21.
- Android OS This is probably the biggest difference - I love the ability to have many streaming apps.
- Cheaper at less than 1/2 the price the R1 is an incredible bargain for a DAP
- System wide EQ I do love the MSEB and other audio customisations available on the R1
- No Balanced output Ultimately the R1 has limited output so fine for IEMs and easier to drive headphones but don’t expect miracles
- What are you going to use the DAP with? IEMs or Headphones?
- Streaming or your own Music? R1 has some streaming options (Tidal, Qobuz) but not nearly the same as the JM21.
JM21 vs. FiiO M23
JM21:- Affordable Price Point: At $199 USD, the JM21 offers exceptional value for its features. 
- Compact and Lightweight: Weighing just 165 grams, it’s truly pocket-sized, making it an ideal travel companion. 
- Latest Android OS: Runs on Android 13, ensuring compatibility with modern apps and a smooth user experience. 
- Less Internal Storage: Comes with 32GB of internal storage compared to 64GB on the M23 
- Large Size: Fairly large form factor and larger screen. 
- Robust Build Quality: Beautifully constructed with a premium feel, enhancing durability and aesthetics. 
- Superior Audio Performance: Features flagship AKM DACs and THX AAA 78+ amplification, delivering powerful and neutral sound.
- Some Extra Features: You get some extra features like system-wide EQ and desktop mode with super high gain.
- How much power do you need? The M23 has the edge
- Is a larger battery more important than portability
Rating
I had to give the JM21 a 5-star pragmatic rating, it has the power, the lightweight portability and almost all the features you could want all for less than $200. I would love a future firmware update to provides FiiO EQ system-wide but as I showed earlier there are third party PEQ applications that can mostly provide that capability.The only other thing possible to be concerned about would be battery life but with the latest firmware this has not been a problem especially since I enable the idle shutdown.
Conclusion
The FiiO JM21 sets a new benchmark for budget Android DAPs. At under $200, it offers a level of performance and versatility that’s hard to beat. Whether you’re streaming music, using it as a USB DAC, or simply enjoying your local files, the JM21 delivers a smooth and enjoyable listening experience.While it has some minor drawbacks, a smaller battery and no system-wide PEQ functionality, these are forgivable at this price point. The JM21 is a “Goldilocks DAP”, striking a perfect balance between portability, power, and features.
Highly recommended for anyone looking for an affordable yet capable Android DAP.
Last edited:
jeromeoflaherty
100+ Head-Fier

Pros: Excellent sound quality and measurements.
Built-in DSP tuning for endless customization.
Great build quality and design.
Versatile compatibility across devices.
Exceptional value at $19.99
Built-in DSP tuning for endless customization.
Great build quality and design.
Versatile compatibility across devices.
Exceptional value at $19.99
Cons: Power output could be higher for a balanced 4.4mm DAC/AMP.
Companion app still needs improvement.
Larger size compared to simpler dongles.
Companion app still needs improvement.
Larger size compared to simpler dongles.
A DSP enabled 4.4mm balanced DAC/Amp for your easy to drive headphones
You can probably think of the Moondrop Echo B as a 4.4mm usb-c dongle DAC version of the excellent Moondrop FreeDSP cable (which along with its sibling the Moondrop Echo A) allows you to transform your headphone Frequency response via PEQ Filters controlled via the Moondrop Link App.
Note: A big thank you to ShenzhenAudio for providing the Moondrop Echo B for this review.
You can check out the product page here.
Having used the Echo B for a few weeks now I feel it is an excellent choice for those looking to add PEQ tuning options to their listening experience especially if they want to standardise on using 4.4mm cable for their IEM or headphone collection. I was slightly let down assuming we would get more power since it has a 4.4mm output but in every other way this is one of the best usb-c DAC amp you can buy in this price range.But before we get into the details let look at what you get in the package:
Unboxing
The Moondrop Echo B comes in a simple but functional package.
The back of the box has some specifications:

Including:
- ECHO-B DAC/AMP
- Manual
- Certificate
- After-service card
- QR code card for app download
Design and Build Quality
The Echo B features a sturdy aluminum chassis with a sleek, modern aesthetic. Its 4.4mm TRRS balanced output adds versatility for those using balanced headphones or IEMs. However, its size is notably larger than simpler dongles like the Apple USB-C adapter or the FiiO/Jade Audio JA11:
This might be a drawback for users seeking a extremely compact solution but for me it doesn’t matter as these are like extensions of the headphone cable.
The build quality is excellent for the price, and the USB-C connector ensures wide compatibility with Android devices, PCs, Macs, and even newer iOS devices.
Features
The Moondrop Echo B has a few features that make it stand out:- Interactive PEQ tuning via Moondrop Link Android App offers endless customization options, allowing users to tweak their sound signature.
- THD+N as low as 0.001% and a dynamic range of 120dB, ensuring clear and distortion-free sound.
- 4.4mm fully balanced HiFi output can provide better channel separation and lower noise compared to single-ended outputs.
- 32-bit/384kHz high-resolution hardware decoding ensures excellent audio fidelity.
- Plug-and-play compatibility with no drivers required.

Moondrop Link App and DSP Tuning
The Moondrop companion app allows users to fully customize the sound signature via graphical DSP tuning. Once you connect your EchoB it appears within the Moondrop Link App home screen:
While the app is functional and is getting better it still feels somewhat underdeveloped, e.g. the buttons are tiny on my Android DAP and therefore difficult to configure the filters. An Improved UI and stability could make it a much stronger complement to the Echo B’s hardware.
But for me the main feature is that editing of PEQ filters so let’s have a deeper dive on what you can expect:
PEQ Capabilities
There are a couple of different PEQ options available, including some preset EQ options in the “Tune EQ” section:
And there is the now typical online catalog of PEQ filters you can search which is confusingly called “Configuration”:

But the “Custom EQ” editing screen is probably the most import allowing you full editing of the 10 PEQ filters:

Saving any new EQ Setting will require the App to be given permission to write to the Echo B device:

Sound Impressions
The Echo B delivers a clean and neutral sound signature out of the box, with excellent detail retrieval and clarity. Here’s a breakdown of its performance:Bass
The bass is well-controlled, with excellent extension into the sub-bass region. The balanced output ensures punchy yet tight bass, suitable for genres like electronic, hip-hop, and rock.Midrange
The midrange is natural and detailed, with clear vocals and instruments. It avoids any harshness or muddiness, providing a balanced presentation across tracks.Treble
Treble performance is good but not overly emphasized, making it suitable for longer listening sessions. The interactive DSP tuning allows users to enhance treble if needed.Specifications and Measurements
| Feature | Details |
| Output Jack | 4.4mm TRRS |
| Plug Type | USB-C |
| SNR | 117dB (A-weighted) |
| Dynamic Range | 120dB (A-weighted) |
| THD+N | 0.001% (AES17 20kHz, no-load) |
| Decoding | PCM: 32-bit/384kHz, DSD512 |
| Compatibility | Android, iOS, PC, Mac |
The PEQ tuning capabilities and hardware-level decoding elevate this product beyond simple dongles, making it a versatile addition to any portable audio setup. But it is noticeable there are no publish power rating and this is because you get the same output power as the standard Apple usb-c Dongle (roughly 30mW).
I decided to verify this below comparing this dongle with 2 others, and it shows that the output power is very similar.
Measurements
The Echo B’s published measurements are exceptional for its price:- THD+N: 0.001% ensures distortion-free playback.
- Dynamic Range: 120dB provides excellent clarity and headroom.
- Noise Floor: <1.5μV, ensuring a black background for sensitive IEMs.
Here are the results of various different measurements run all at 100% volume:

The important ones are 7, 8 and 10 (all 3 dongles at their Max without any EQ).
So not unsurprisingly none of these Dongle is really able to drive the Modhouse Tungsten to any decent lavel, but all 3 dongles gave similar results (I did have to slightly move the Modhouse Tungsten when swapping cables hence why they are not exactly the same frequency response).
The other 4 measurements on this graph as the changes with EQ, so with EQ enabled with the JA11 (Measurement 9 above) you immediately loose 12dB of Gain (though you can manually re-enable it in the FiiO App) but the Moondrop Link App clever calculates the right max gain level based on the EQ filters. I also added some of the preset EQ’s - so you can see the effect of the Normal, Bass++ and Soundstage Presets. So the Moondrop Link App does a better job than the FiiO app in preserving the best gain settings when EQ is enabled.
Distortion
Note: This is really just measuring the distortion from Modhouse Tungsten when using the Echo-B, but it was so low I thought I would add it to the review:
And as a percentage:

Rating
I have given the Echo B a very pragmatic 4-stars, it is exceptional to see a 4.mm usb-c adapter with full PEQ capabilties, but most people would expact a 4.4mm balanced output you get more power than a 3.5mm single ended output and in the case of the Echo-B it does not have more power, so for me, it is perfect for IEM’s and easier to drive headphones but will struggle with many higher end headphones, especially the ones that you might want a power boost and are currently using with a 4.4mm connection.Conclusion
The Moondrop Echo B is a fantastic value for users looking for an affordable DAC/AMP with PEQ tuning and balanced output. Its clean sound, excellent measurements, and versatility make it a great choice for most IEMs and portable headphones. However, users with more demanding headphones may find the power output lacking. Despite minor drawbacks, the Echo B offers an exceptional listening experience at a very pragmatic price.
Last edited:
