


D2000
100+ Head-Fier
- Joined
- Jul 3, 2012
- Posts
- 159
- Likes
- 70
My beautiful D2K's have served me very well over the years. Since purchasing them I've re-terminated the end 5 times, shortened the cable, swapped in Cocobolo Rosewood Cups and it seems the headband was feeling left out, so it decided to break on me - forcing a complete rebuild rather and repair.
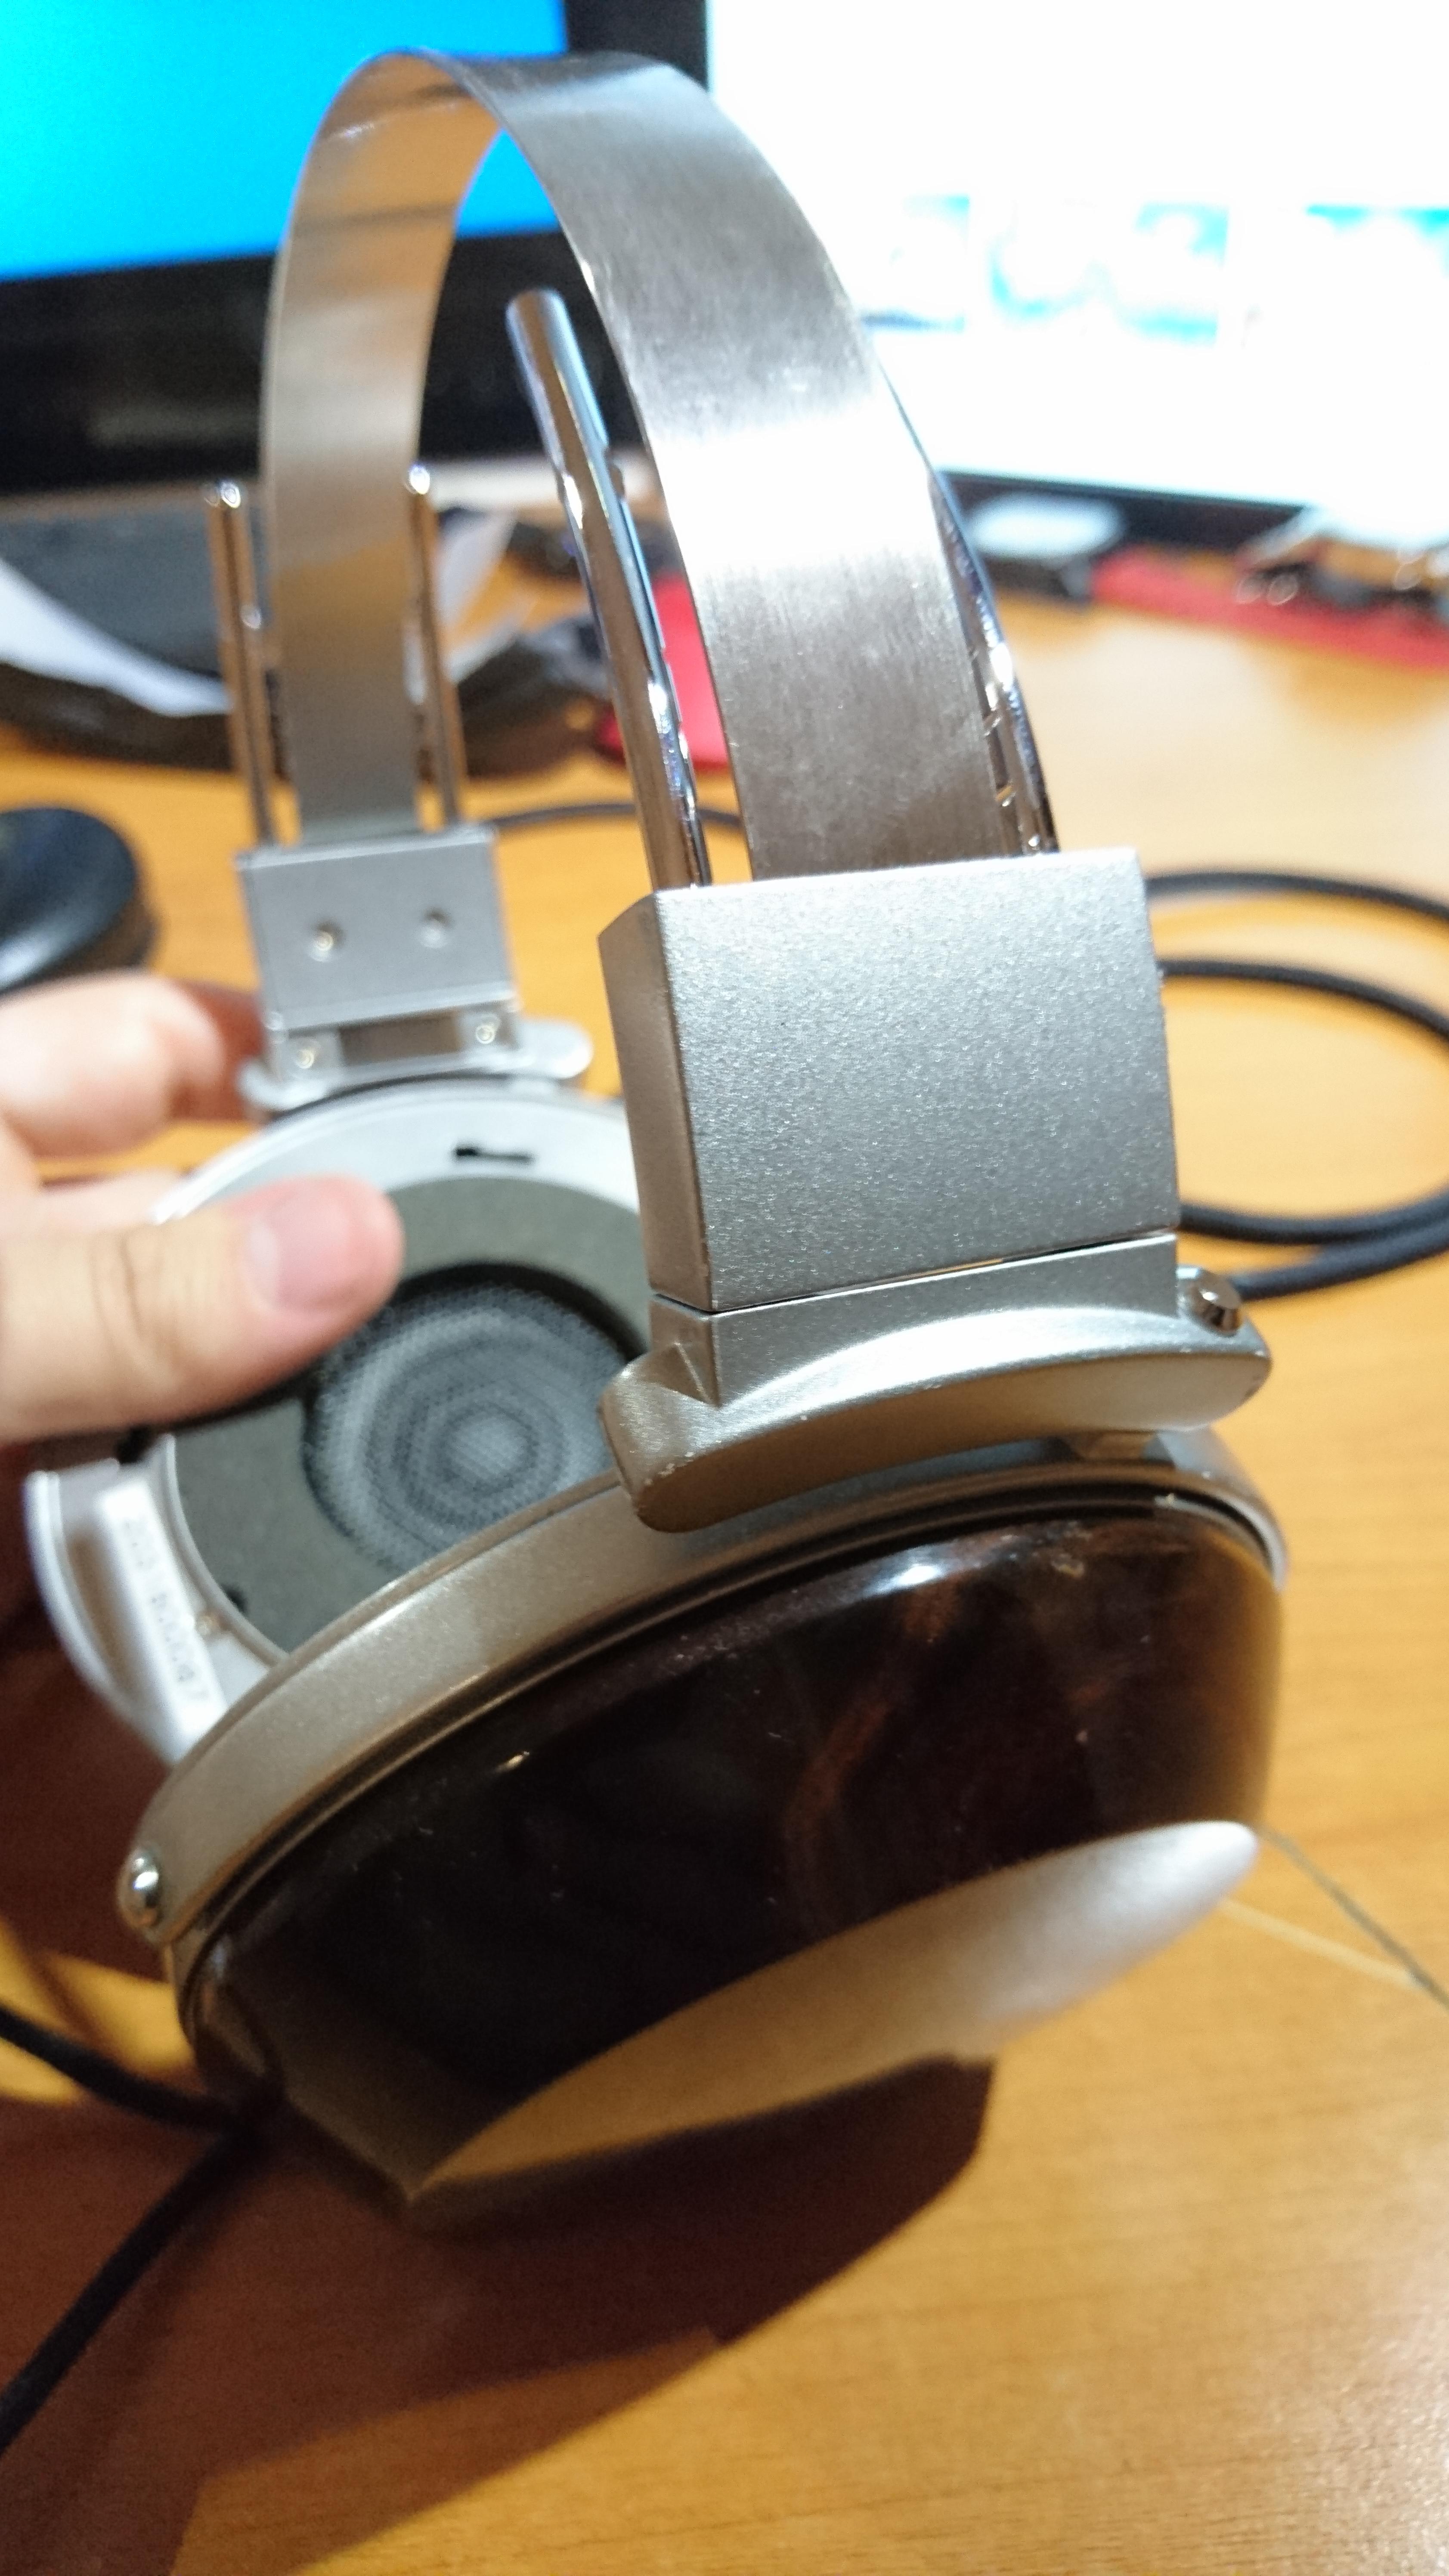
The original headband is a poor quality fake leather and padding that wraps around 2 pieces of slim plastic, spring steel, and the adjustable rails. Many hours of listening and transit over the years have caused it to deteriorate and the final straw was the screw mechanism inside the housing breaking. See photos below.
YOU WILL NEED:
- Phillips head screwdriver
- A sharp blade (I used a box cutter and x-acto knife)
- Double Sided tape. (Fantastic for the temporary bonds)
- PVA glue or contact bond.
- 2x Leather Stitch needles (you could use large sewing needles)
- A leather punch ( I used a 4 prong)
- A scribe.
- A flexible yet springy material for the structure (I chose wooden veneer strips)
- Leather: soft and pliable, no thicker than 1.5mm. (I used upholstery leather (buffalo hide chrome-tanned)
- Leather stitching thread (wax coated linen thread is most common)
Onto the build... (ALL PHOTOS LINK TO HIGH-RES VERSIONS)
Open the 2 screws on the panel. The fraying leather and exposed mechanism are within. The central screw became loose and threaded over time. This was tapped with a larger tapping thread for use with a larger more robust screw.
Disassembly: Removing the pads will help handling the HPs.
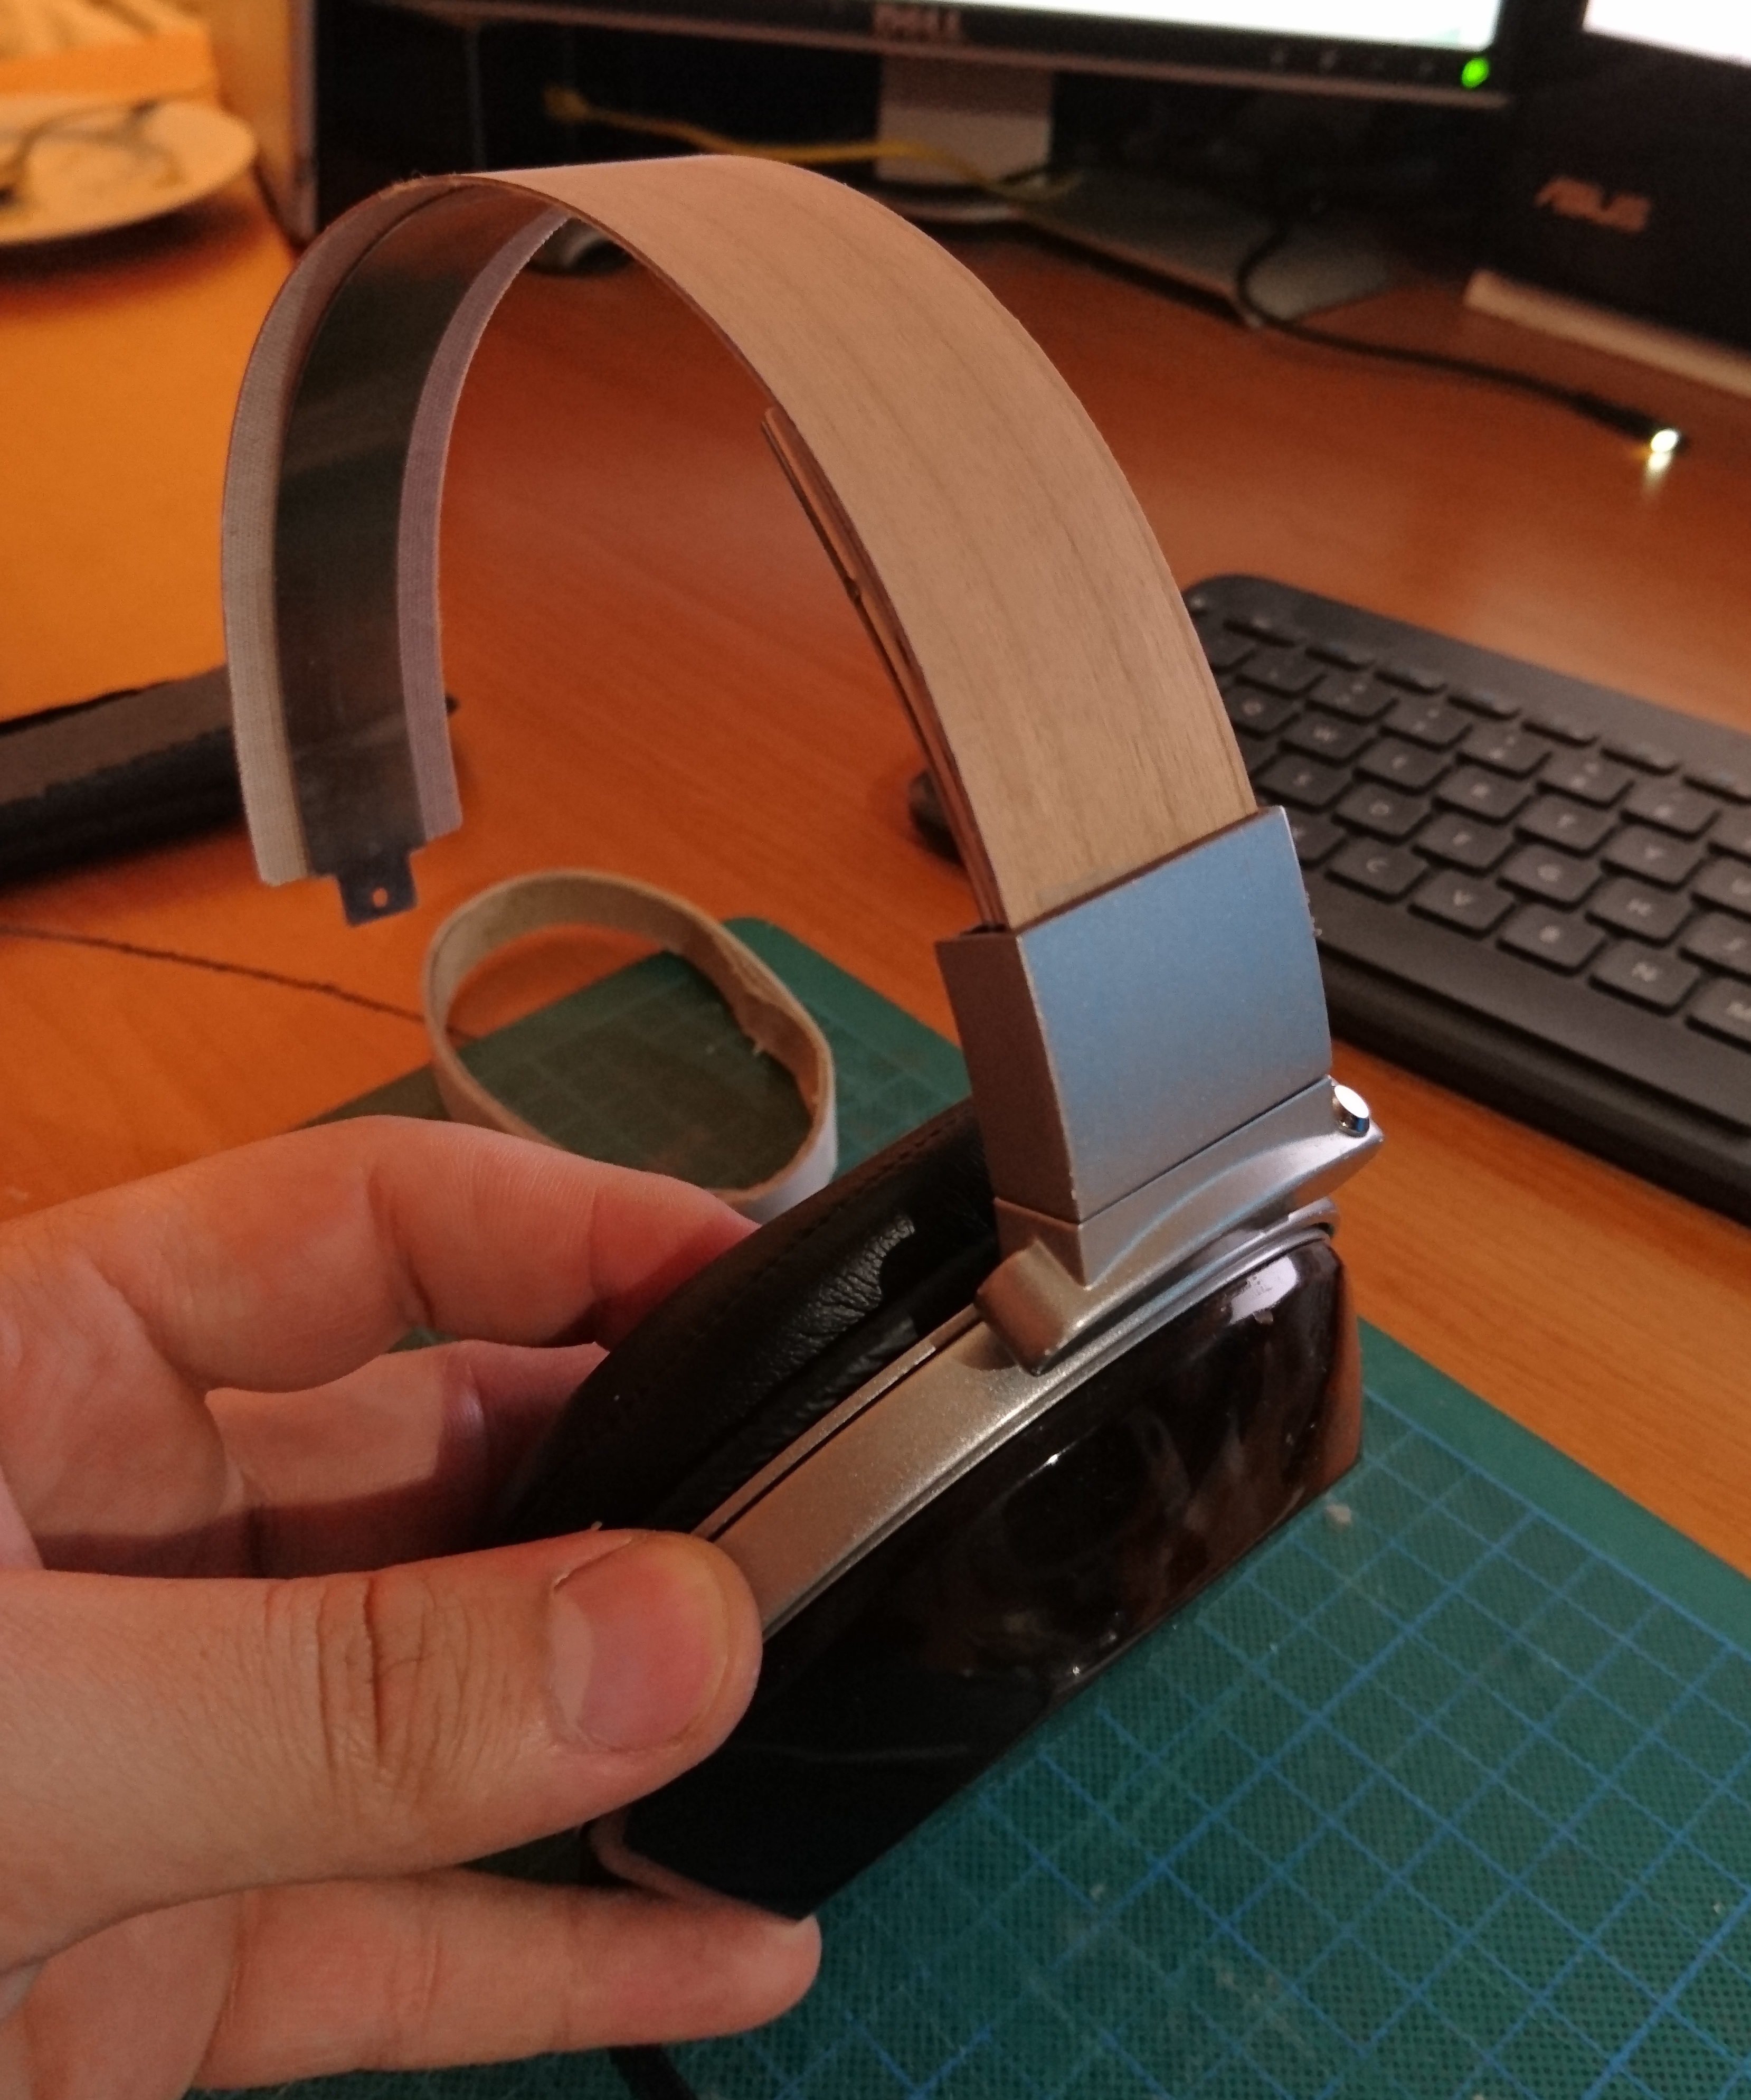
Cut away the previous fake leather and padding and keep the metal frame. This will act as the core. It's springy qualities were essential for the build.
Here I used strips of 1.5mm veneer, held temporarily in place with doublesided tape, and glued with PVA glue. Contact bond is flexible and would also be ideal, if not better. When dry the veneer gives a bit more rigidity to the springiness and more compression, which is what I was looking for (as Denon's are on the light side of headsqueeziness)
I placed the metal core in the middle as this was ideal for fitment and made sense.
Layer up to the desired rigidity and shape. Make sure you do multiple dry fitments first before gluing. Ensure your layers fit especially with the rails inside the band. Notice in the above photo the gaps that I've left for the adjustable rails. If you plan on using leather you will also need to accommodate for the thickness of the leather you use. I run into that problem later in this build which you will see.
Place a spot of tape at the top of the band. This holds it all together whilst allowing the freedom to remove the cups during fitting. At this point if you're happy with the way it feels, place tape at the crucial points to keep it together.
If you choose a beautiful wood laminate you could even get away with no leather, as I too was contemplating. But perhaps that's another build. Anyway...
Choose your cushioning of choice and cut to size. Double sided tape is a wonder here and great for quick placement.
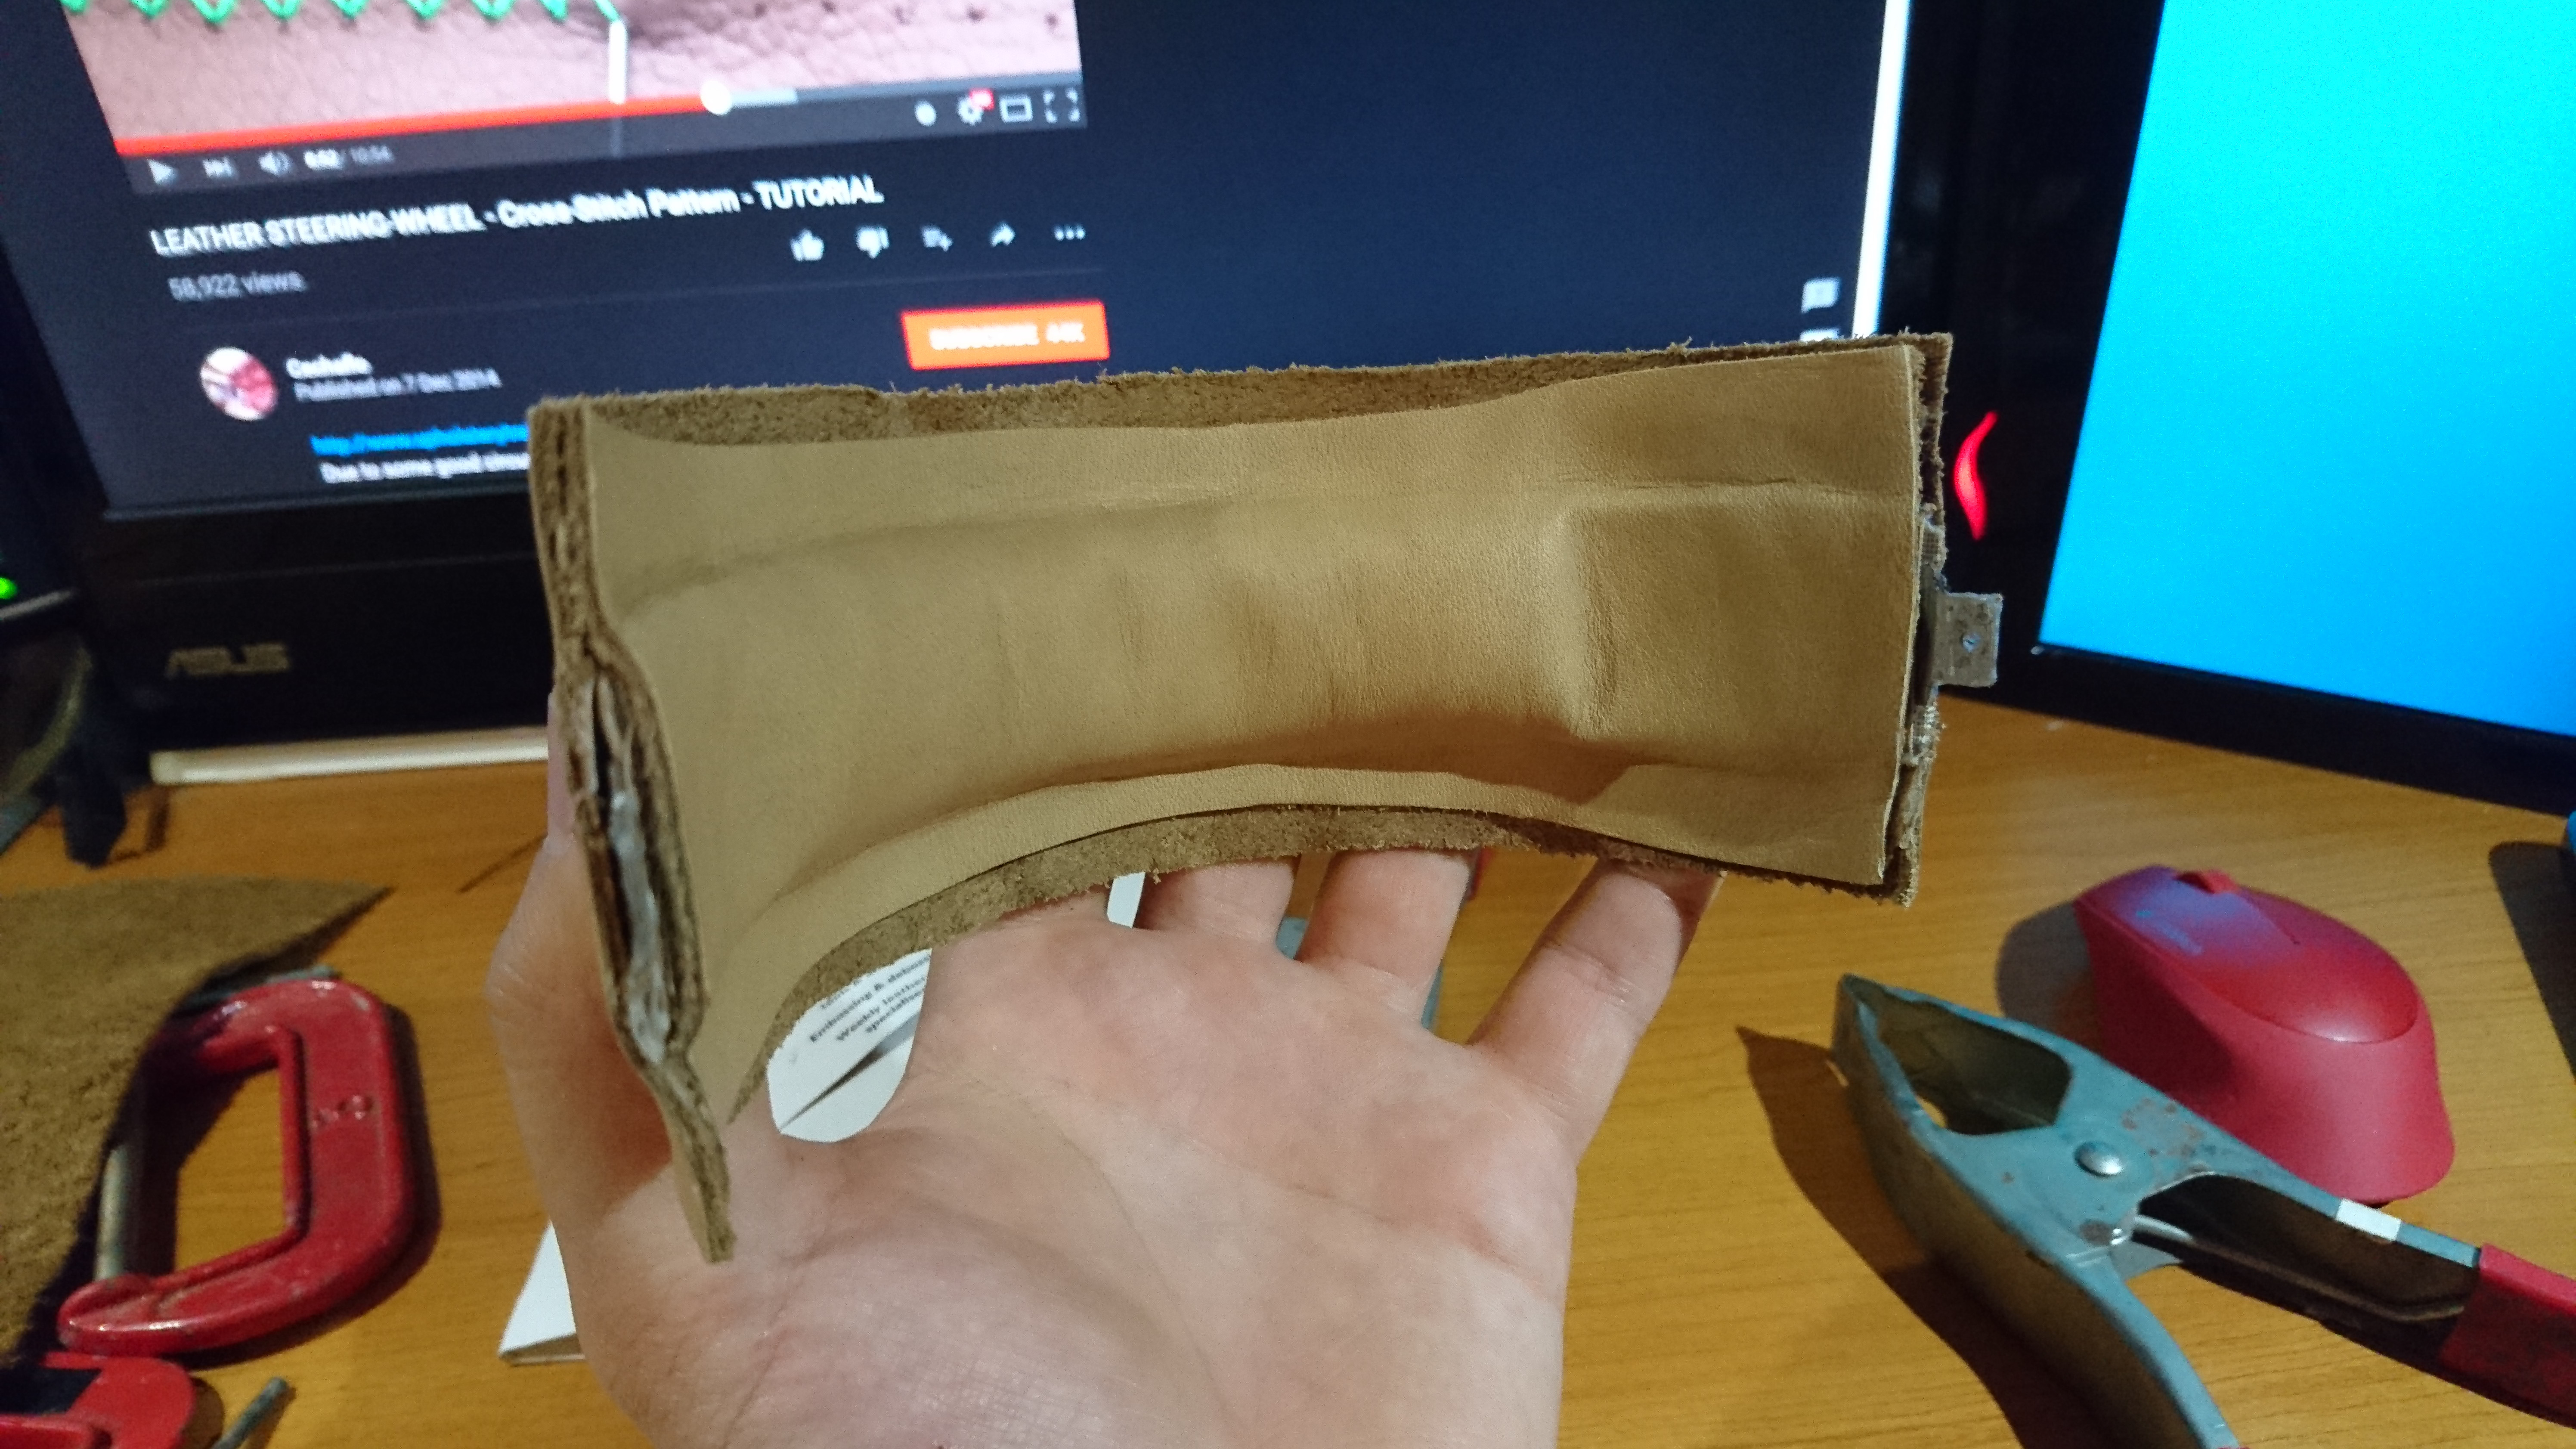
Cut the leather to size so that it overlaps the whole frame - even the metal tabs. This is important as when the leather is set in place it will move and having more rather than less gives you more freedom to work. Some leathers will stretch more than others, so be sure to check yours.
Here I've covered the whole metal and wooden band in double-sided tape. It grabs the suede side of the leather particularly well and is closer to a permanent bond than temporary. Press down only when you're happy with the placement.
The inside layer of leather will need more length due to the contours it has to mould around, hence always have extra. You can trim later.
Start from one end and work your way down, pressing the leather firmly into the shape and contours. Dont be afraid to add more doublesided tape.
I ended up with something like this and now it's ready for hole punching the stitch lines.
The idea is to simultaneously punch through both layers. This is why the tape is so handy.
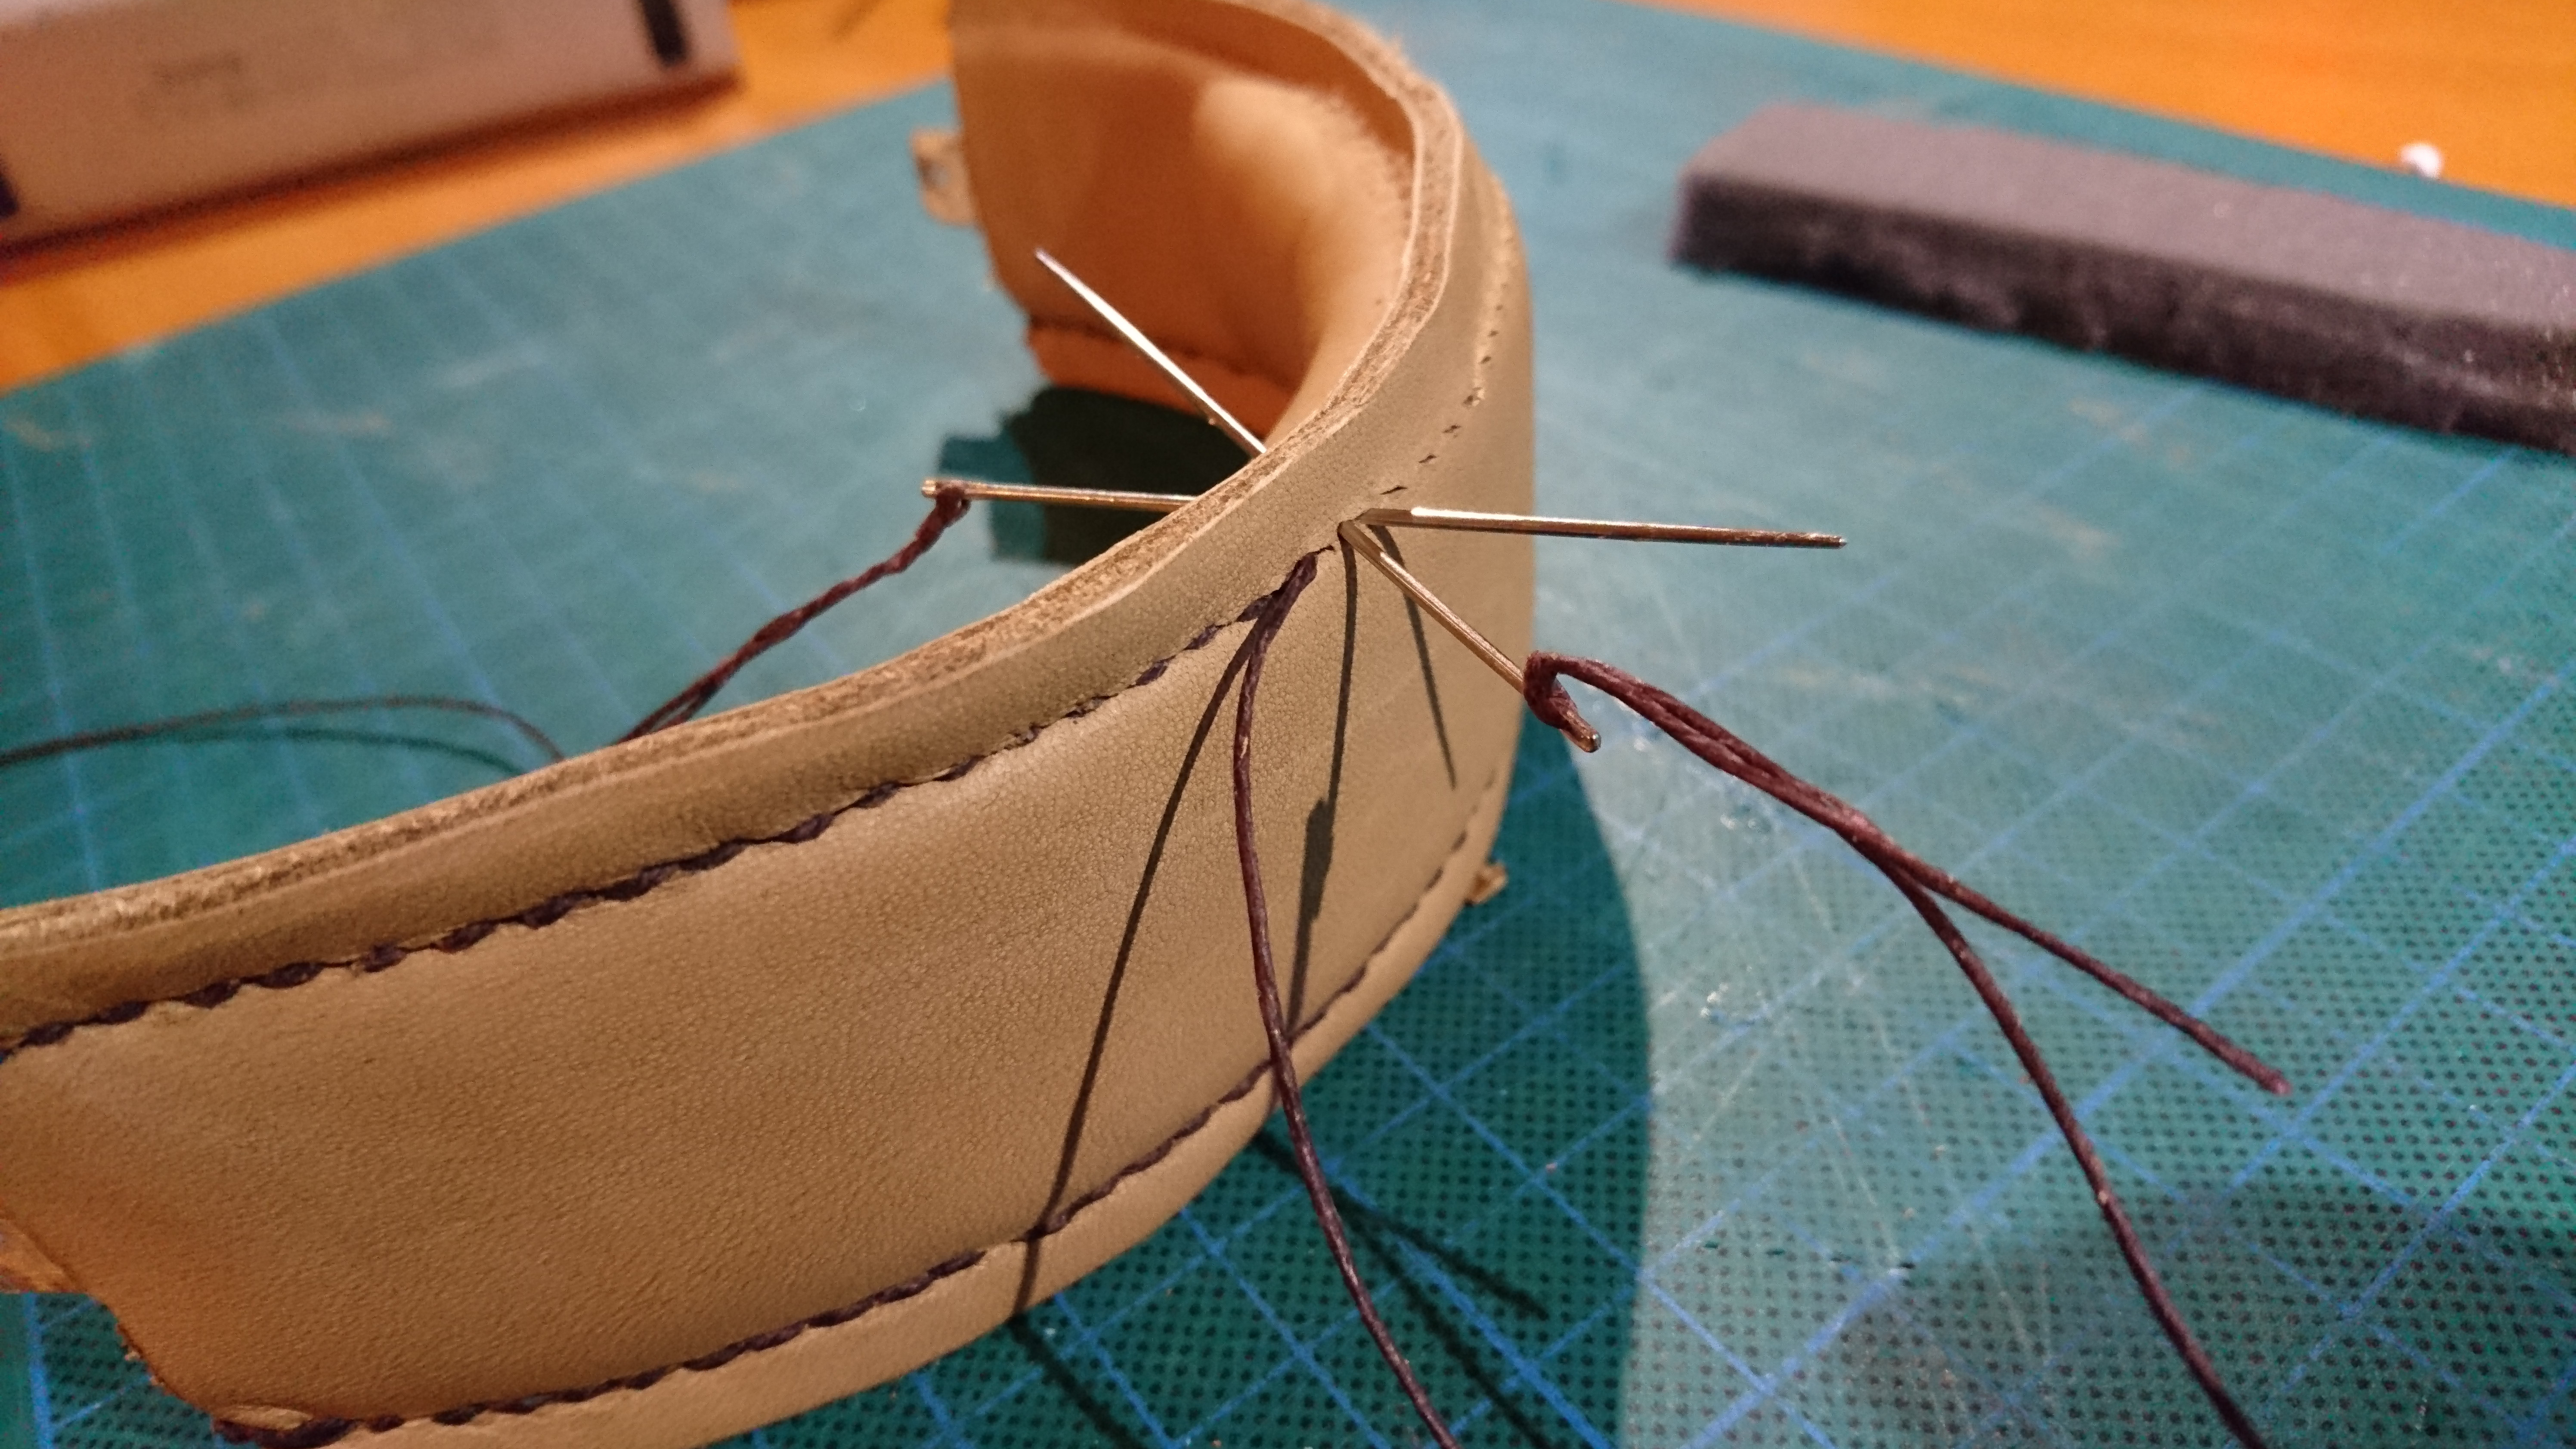
The hole punch works best with some force. Ensure you have a firm but safe material for the hole punch to go into. If you don't have a hole punch a sharp thin scribe will do, but will take longer. Work your way down both sides. The hole needs to only be large enough for the needle and thread.
There are plenty of great guides on how to stitch leather so I'll just link the guide I used. The idea is to stitch both sides together. Ian Atkinson - Hand Stitching Leather
After you secure both sides down it can be helpful to remove some of the excess with a nice sharp blade or scissors.
After it's been securely stitched you can slide it back onto the rails and re-attach the metal tabs to the screw points. Once again ensure the thickness was correctly anticipated before this point to ensure you can seal the leather into the housing. I made that mistake and trying to adjust the thickness at this point was very painful and laborious. Trimming the edges is essential if you do this style of stitching. Notice the overhang in the inside photo compared to the adjusted trimmed first photo.
I also trimmed the excess leather to a consistent border (with a SHARP blade) and burnt the fray edges off with a flame.
If you've made it this far - awesome! Well done. Your headphones should look amazing by now.
Hopefully you've found this post enjoyable. Comment with questions or your own build if you DIY.
Thanks for reading.
David

")
 Just took these so I will have to get some when lighting is a bit better.
 I think it would be ideal for comfort, grip and finish.