Help needed: Audio Technica ATH-W10VTG head pads replacement
May 9, 2020 at 2:38 PM Thread Starter Post #1 of 7

nabwong

Headphoneus Supremus
Joined
Jun 24, 2005
Posts
2,916
Likes
70
Hello all.

It’s been a long time since I’ve been active here. Life happened and I’m finally finding the time to get back into headphones.

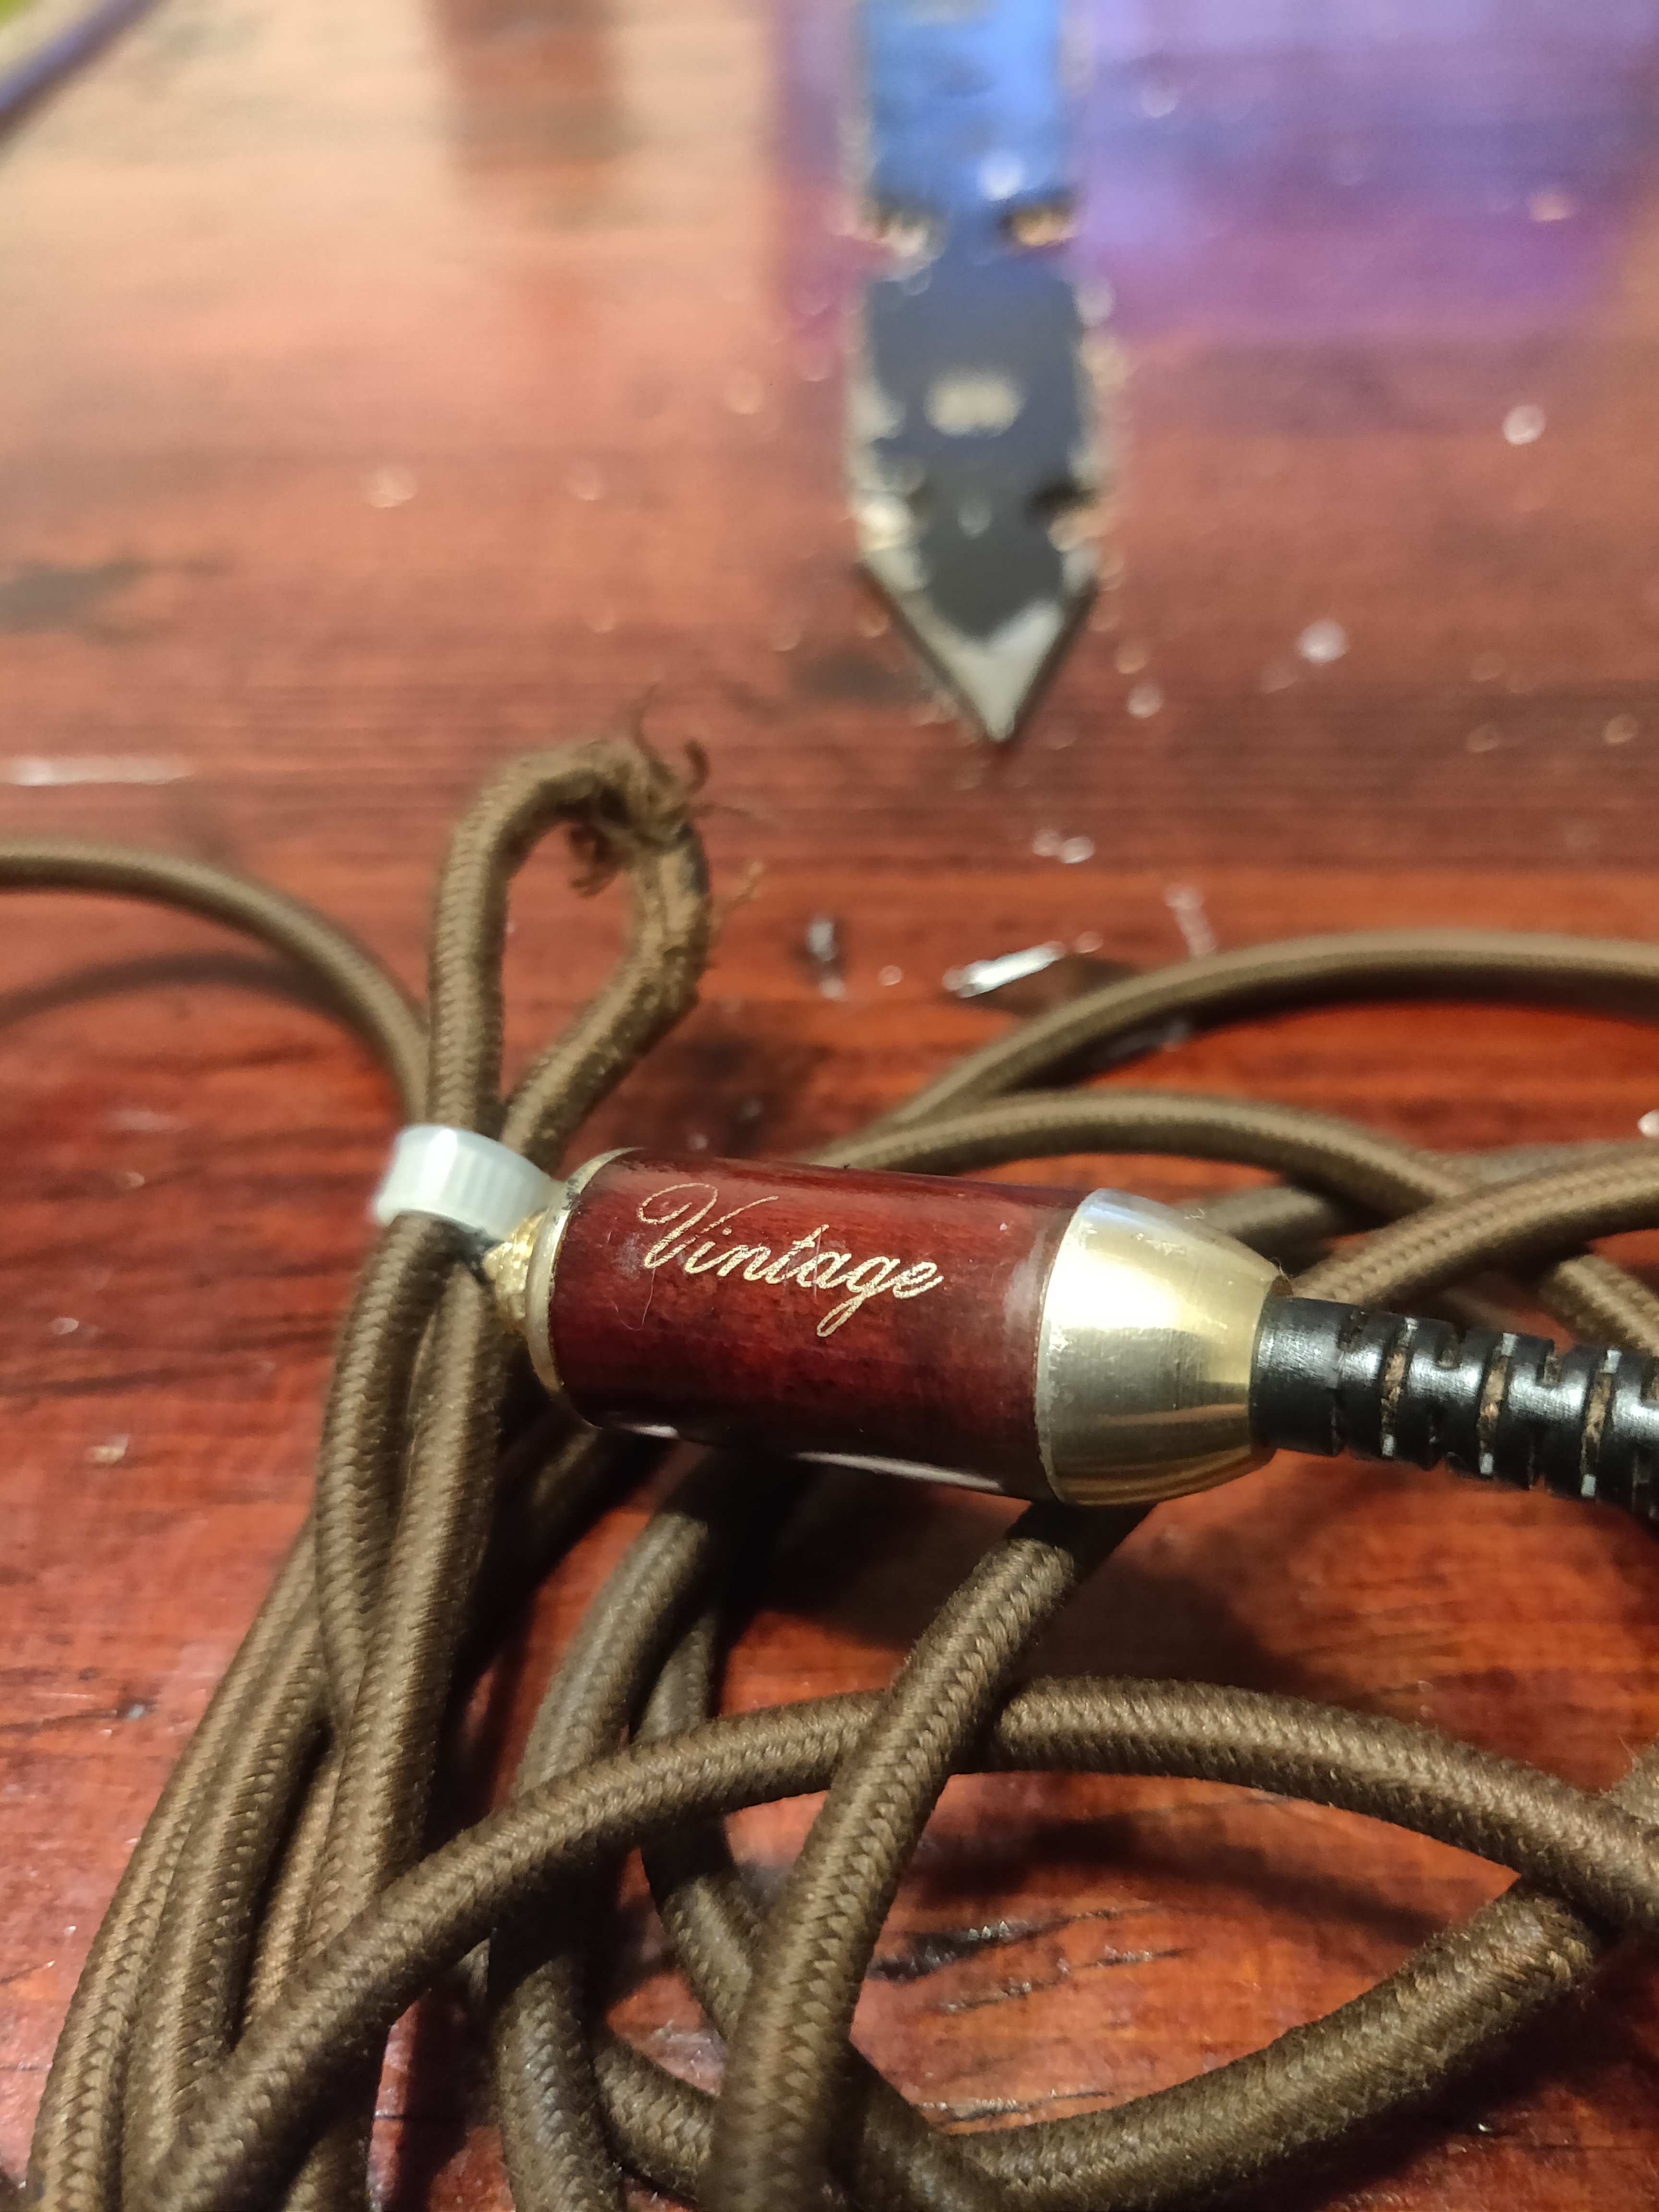
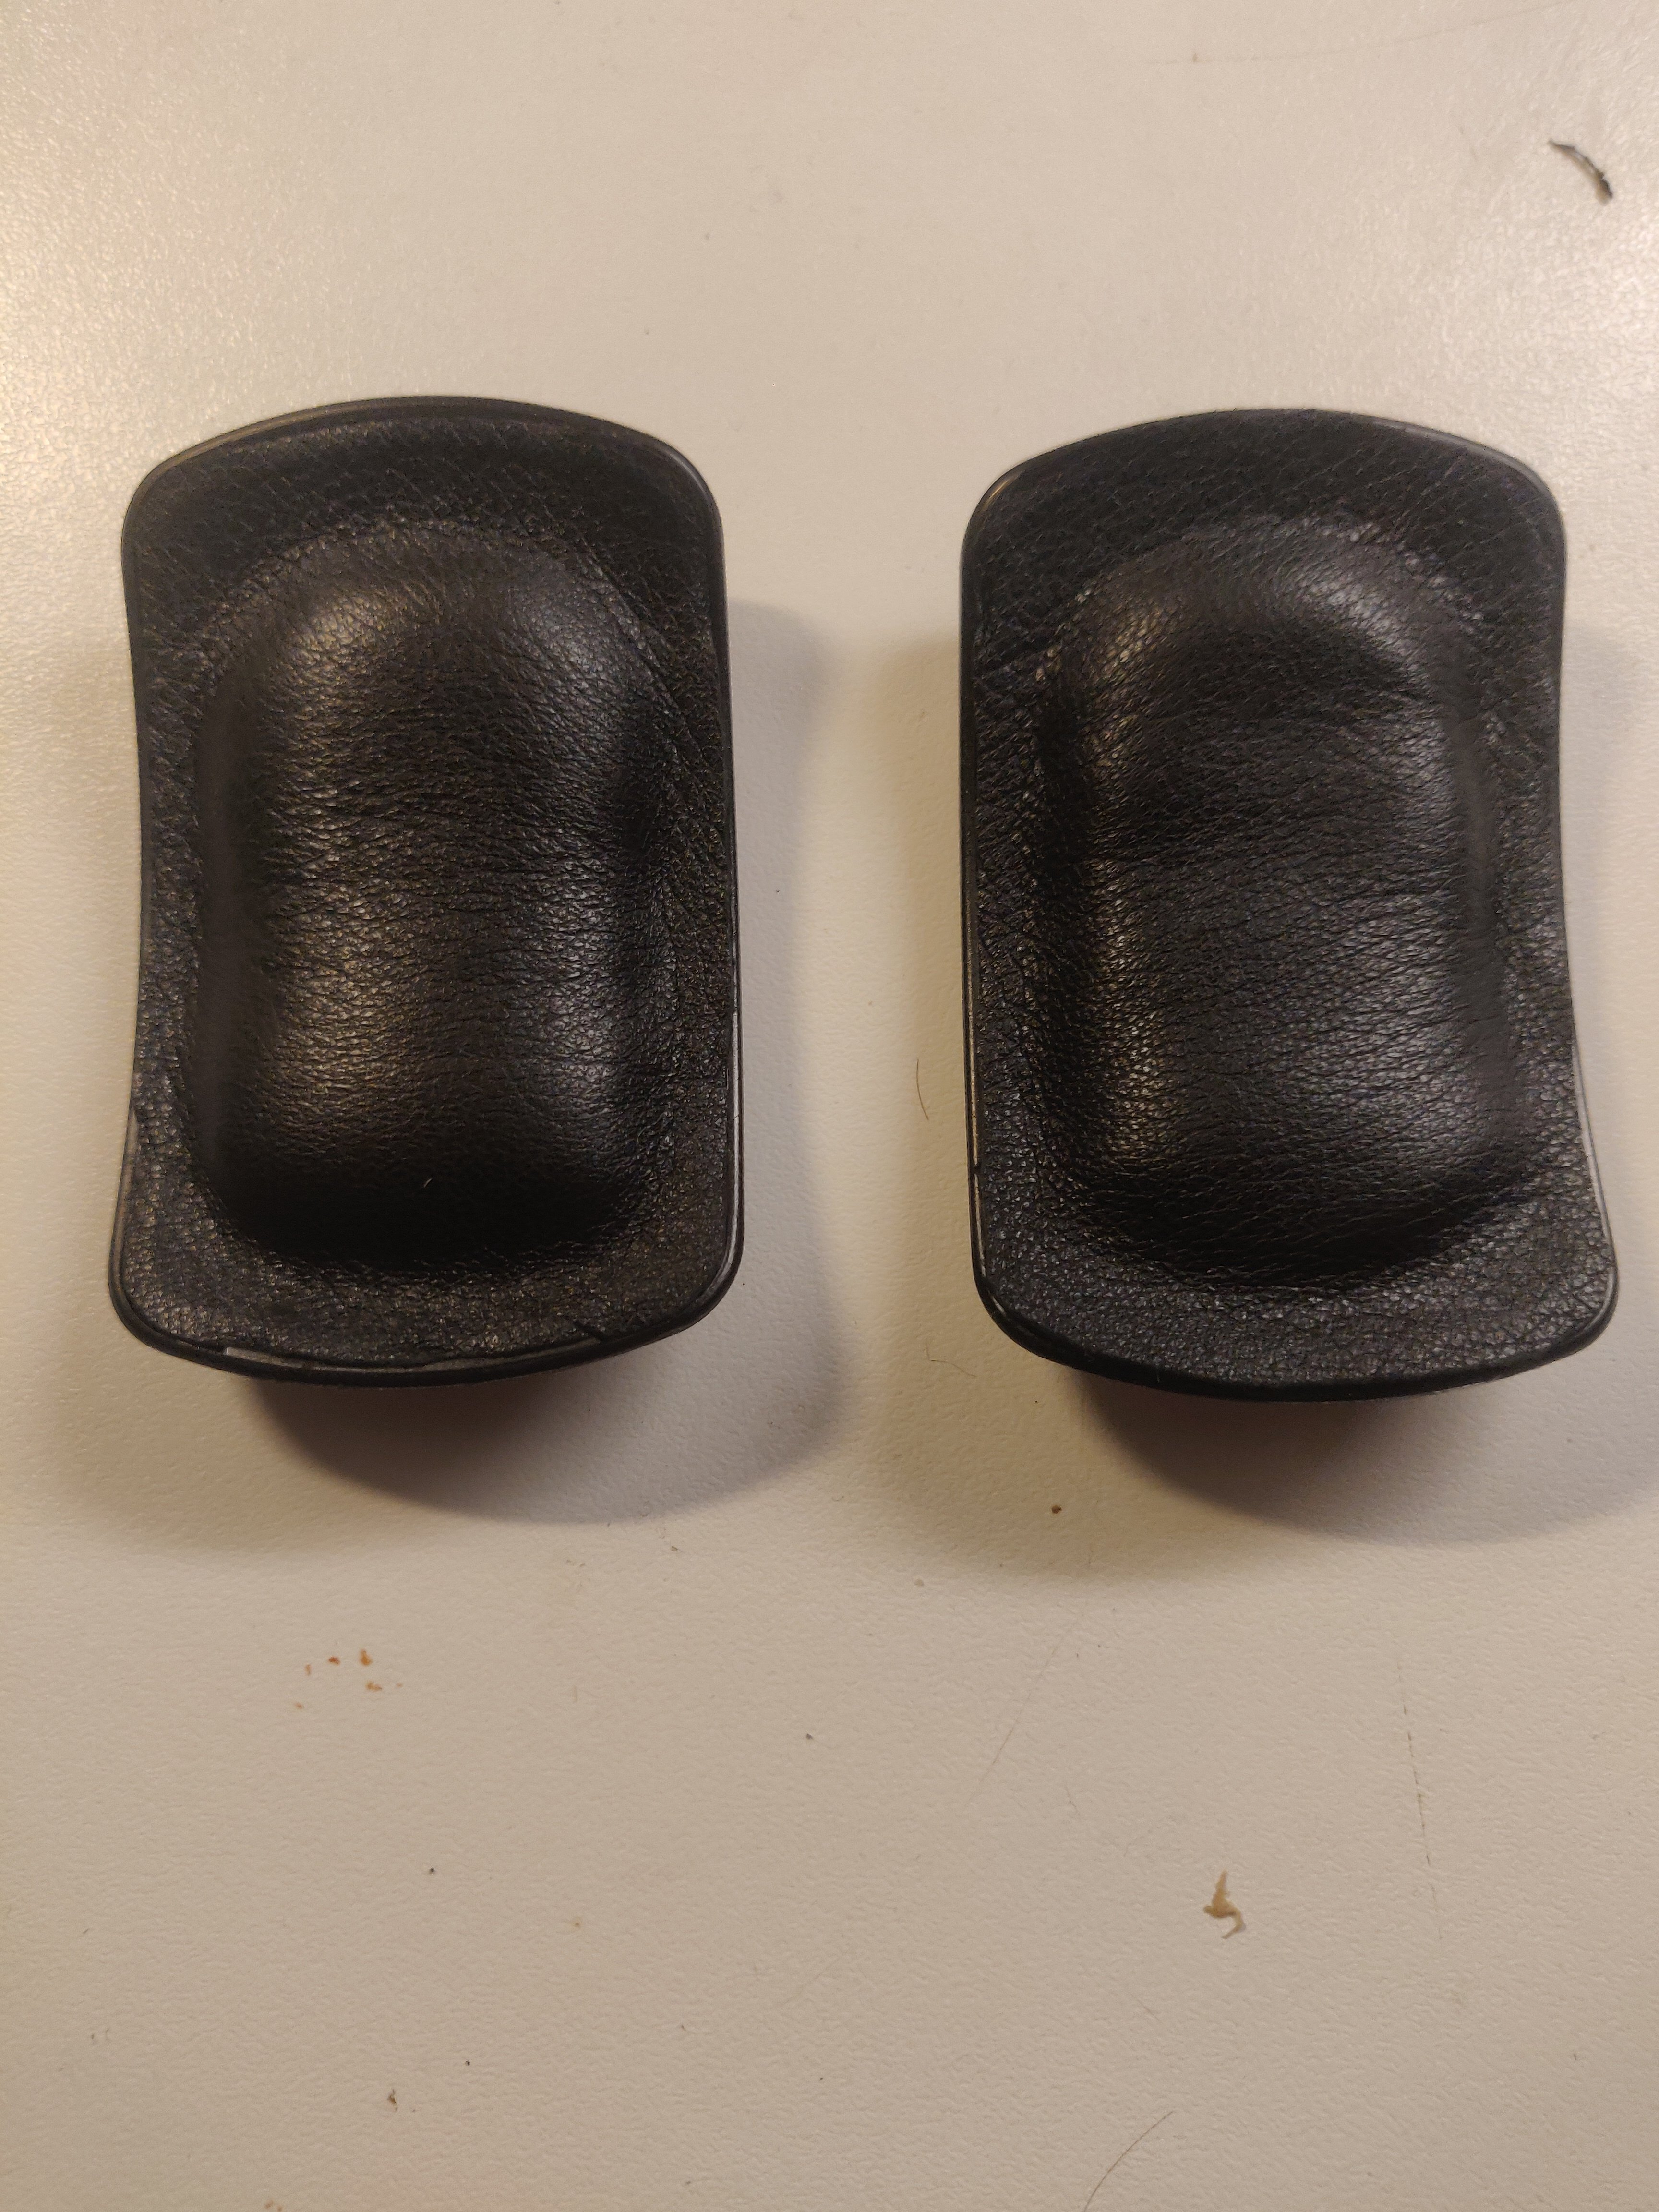
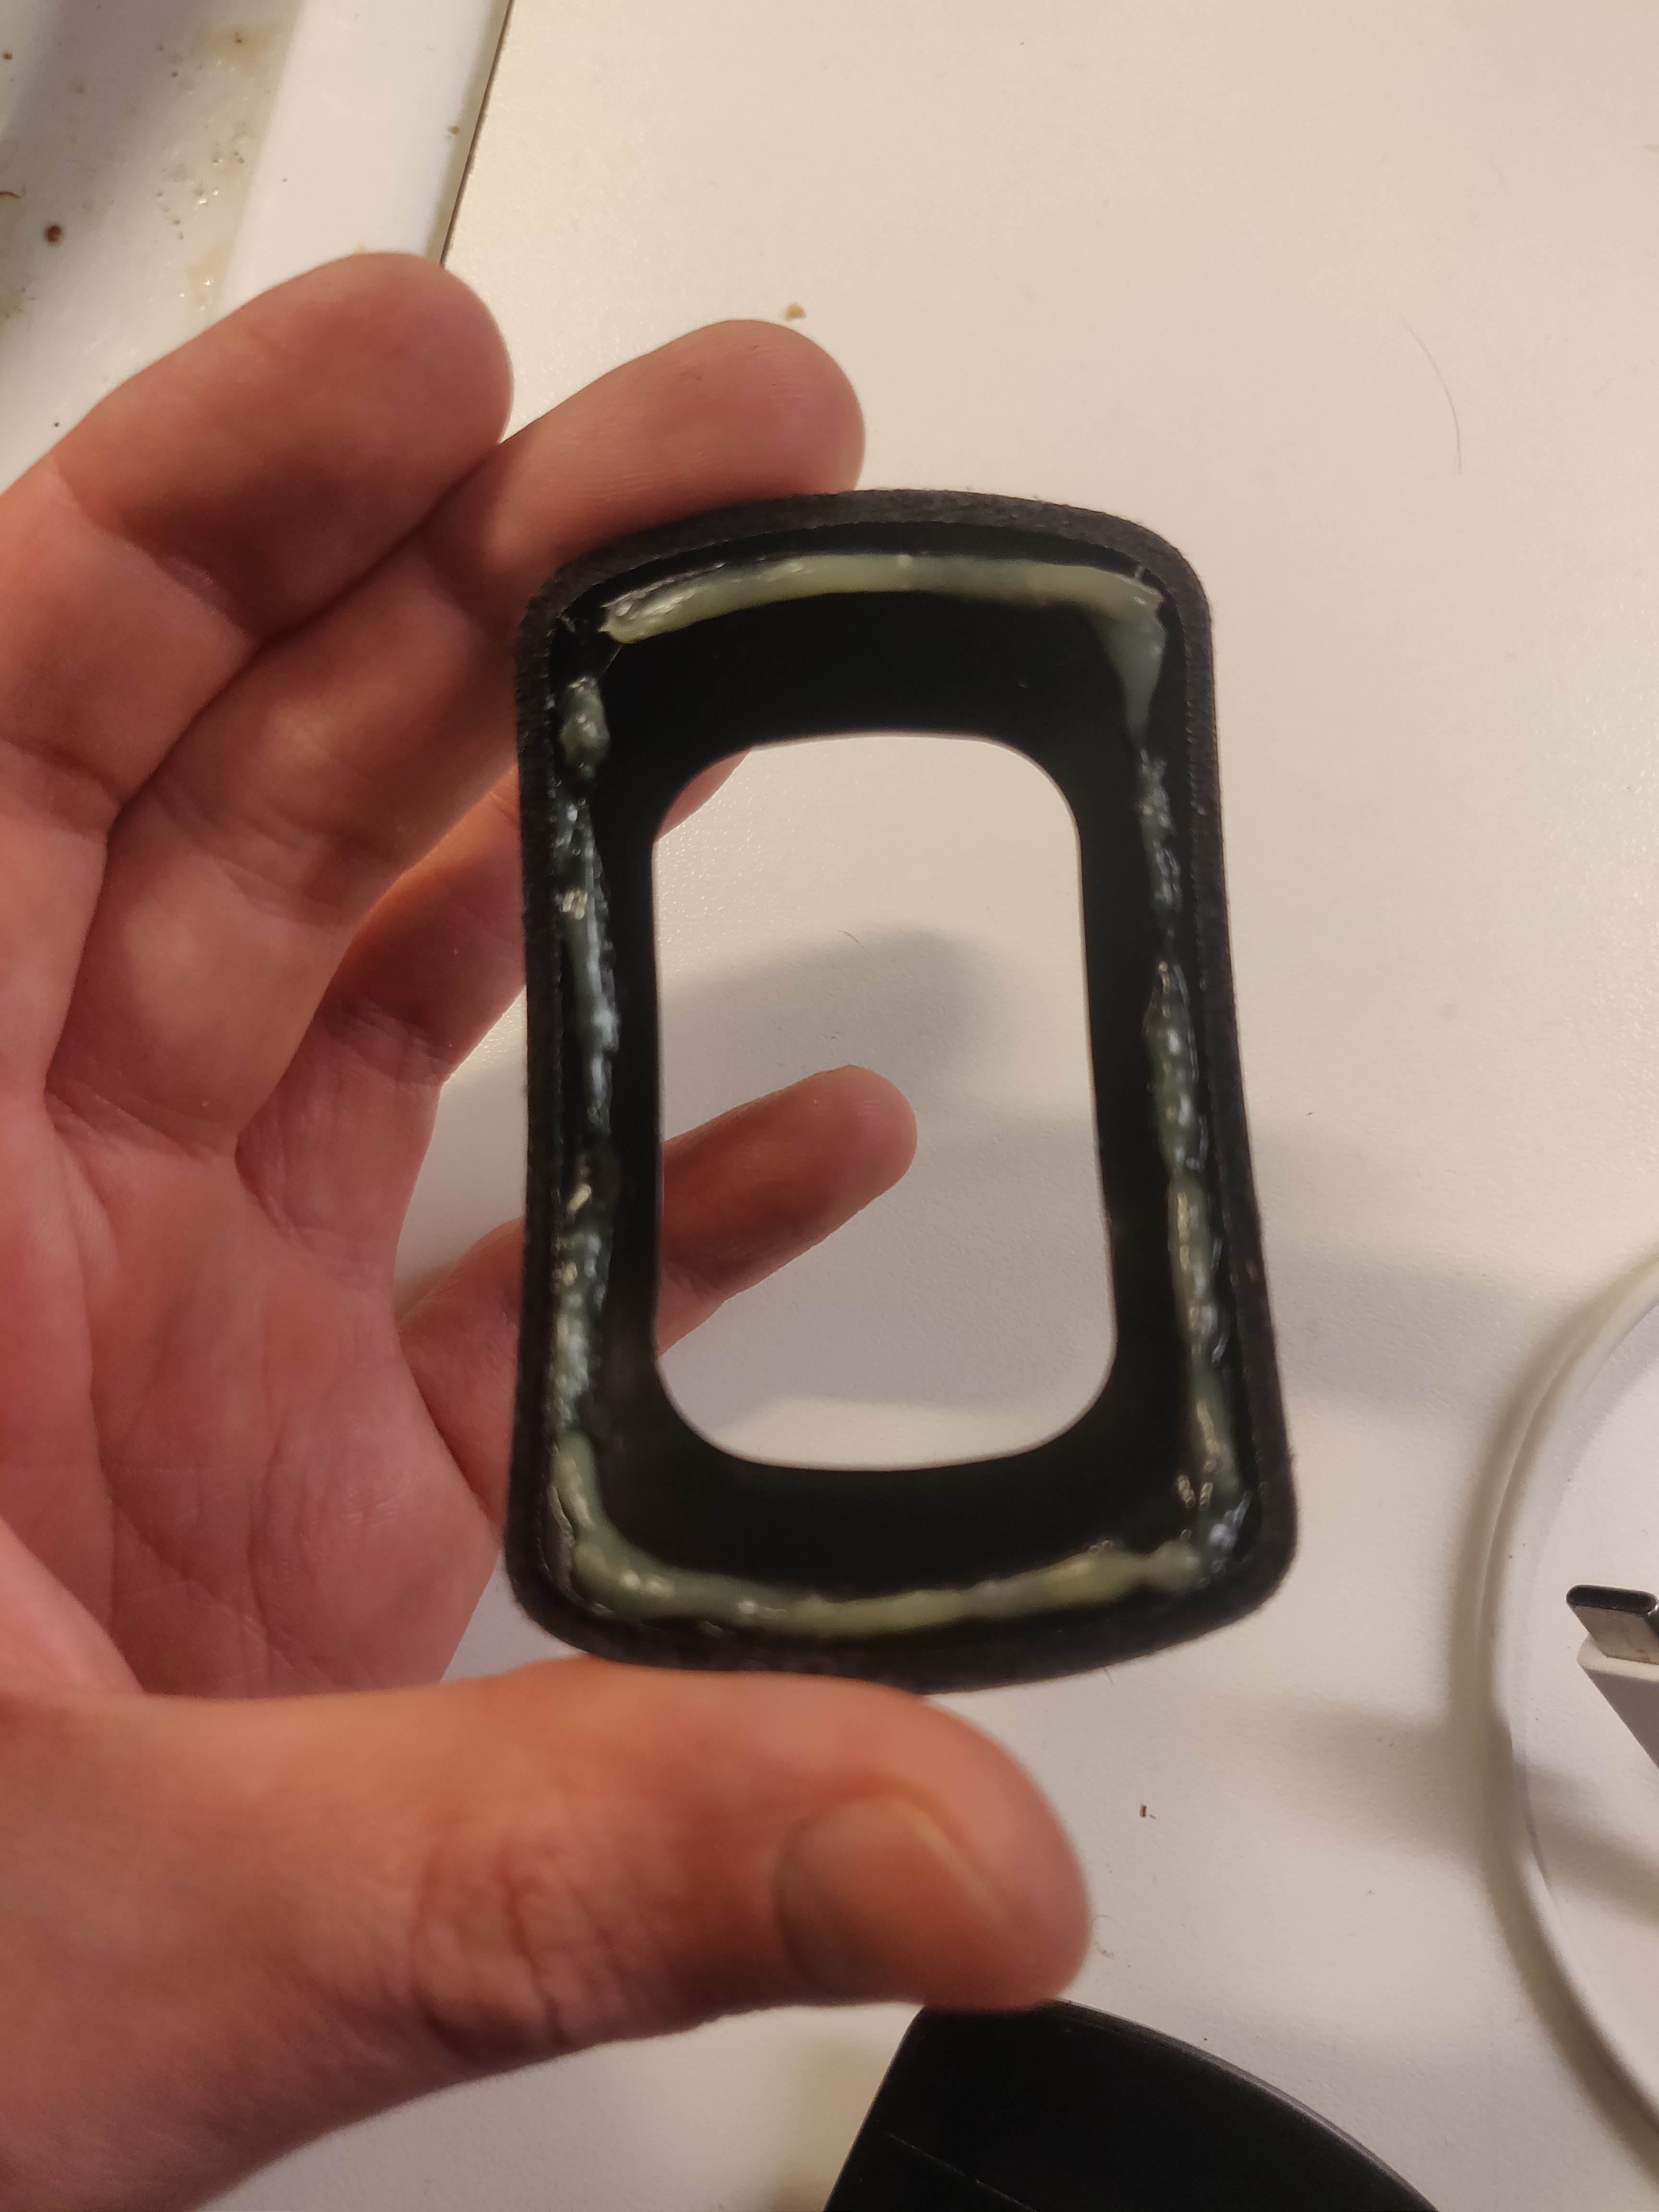
My W10VTG has been in storage for a while and I’ve noticed that the head pads (not sure of the technical term) are deteriorating. Does anyone have any advice on how I can replace them? Thanks!

237E4A90-A4C1-47C4-B1F7-F690F9B7893E.jpeg
9B5E50B2-27E5-4E3E-A209-CCA98B752790.jpeg
 
May 10, 2020 at 12:05 PM Post #2 of 7
Last edited:
May 10, 2020 at 12:14 PM Post #3 of 7
Dec 20, 2020 at 5:41 PM Post #4 of 7
I'm restoring beat up w10vtg's and also needed new wing pads. Dekoni Nuggets are overpriced in europe, official replacements were triangle shaped and ones on AliExpress were made of cloth. So I made my own. I hope this might be helpfull for someone. Process was surprisingly easy.

Materials needed:
- Foam / some other soft material (I used foam from a headphone packaging)
- Leather (old leather jacket)
- Scissors
- Glue (Something gooey thats is
easy to work with. Nothing that attaches permanently too fast)

1. Pop off the pad and remove old padding material from the mounting part. I cut a hole through the fabric first. After that it was easy to tear it off.

IMG_20201220_192315.jpg

2. Cut a piece of leather larger than the mounting part. Spread the glue but not on the whole area. Too much on the outer edge might make a mess and inner side is needed for the foam.
IMG_20201220_210642.jpg

3. Glue the plastic part to the leather.
IMG_20201220_210900.jpg

4. When the glue is allmost dry start making space for the foam by pushing the leather under the plastic. Be carefull not to detach the glued parts on the outer edges. When ready cut the leather carefully around the outer edge of the plastic.
IMG_20201220_210958.jpg


5. When the glue has fully dried stuff the foam inside through the hole.
IMG_20201220_213429.jpg

6. Pad is now ready and should just click right back in place. It's not perfect but good enough for me. If you're braver then me leave smaller portion glued so bigger foam can be fitted. I was worried glue might not hold so there is a lot of glued surface.
IMG_20201220_213639.jpg

IMG_20201221_003524.jpg


All in all it was about 10minute job. :)
 
Dec 20, 2020 at 5:48 PM Post #5 of 7
Last edited:
Dec 20, 2020 at 6:11 PM Post #6 of 7
@Roderick

Wow, that's amazing!

What do you think about the legendary Woodie? What's your take on it?

Btw, the best earpads are the W5000 sheepskin pads and my favorite is the Yaxi pads - https://www.yaxi.jp/product-gallery/a2000z-ad2000x/
Thanks! Unfortunately I've never heard a working set. I bought mine in scrapped condition. Atleast one of the drivers is broken, cable broken and jack too. No earpads. Big scratches on the cups. All the foam parts detoriated. I'm working on fixing it using other drivers and trying to restore some of it's original beaty. I'll make a 3.5mm single sided detachable cable for it. Golden socket looks pretty good with the gold writing on the cups and on left/right markings.
IMG_20201219_230857.jpg

I would like to use wood part on the plug with the new cable but so far I've been unable to remove it. Frustrating...
IMG_20201221_011019.jpg


I'll tag you when I'm ready and have something to show of the process and post it somewhere . :)
 

Users who are viewing this thread

Back
Top