Nebby
Headphoneus Supremus
- Joined
- Aug 31, 2004
- Posts
- 2,201
- Likes
- 19
I know this is head-fi and all, but I've been noticing a few posts here showing woodworking projects so I thought maybe you folks might be interested in my feeble attempt at making a HT sub

I've been working on this during my free time, so it's been a work in progress for a while, but I'm nearly there now. The reason I went with the 8" subs is because I tried out a few large diameter subwoofer drivers. They put out plenty of bass to shake the house down but they all were far too sloppy when it came to stiff precision bass, or when I tried to play music. I found these speakers on sale on the Apex Jr site and I couldn't resist for the price!
Stats:
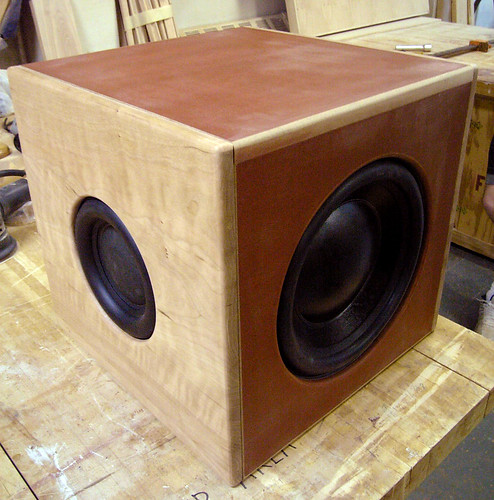
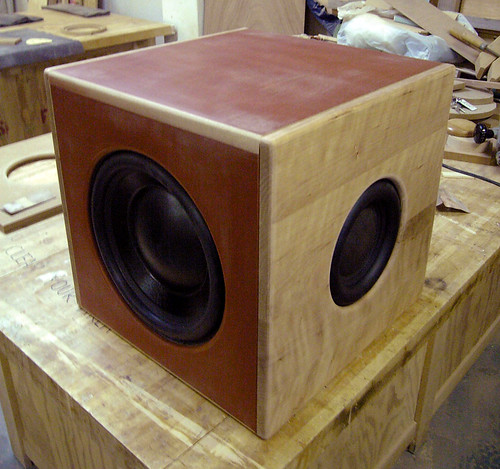
Two 8" subs on the sides with a 12" passive radiator. Internal box is MDF, left and right sides are cherry, and top/front is going to be MDF painted black with a satin finish (most pictures will show the primer). For power I am using a 350watt Rythmik Audio amp.
Pictures are taken either with a camera phone or a canon point and shoot...so sorry for the average pic quality
 I also did a quick passthru photoshop to get rid of the bad green tinge the cameraphone tended to put on the pictures, so not all of them have proper color balance.
EDIT: latest pics:
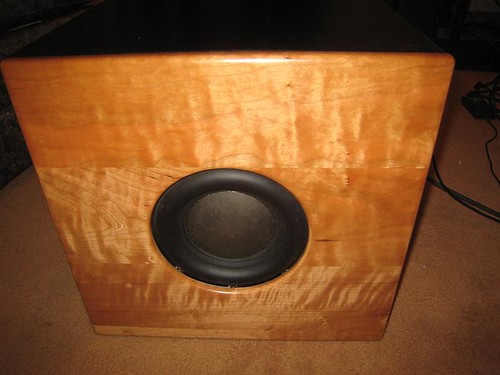
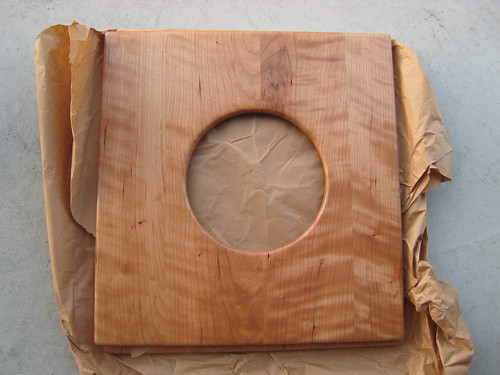
Right side:
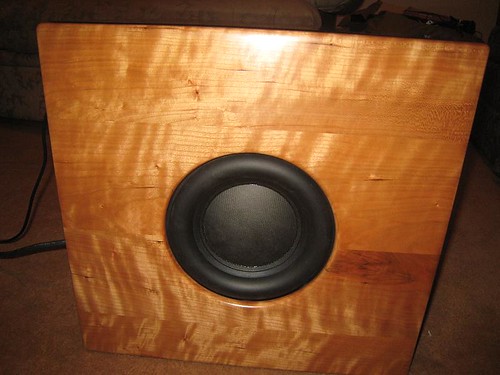
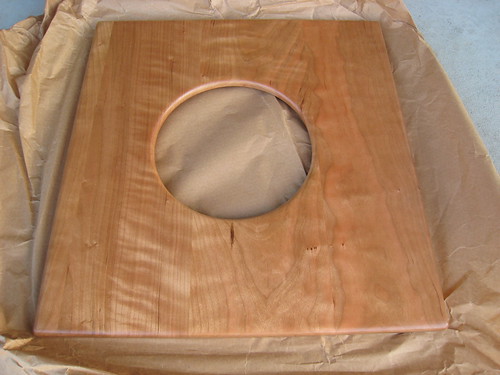
Left side:

Cherry Figure:
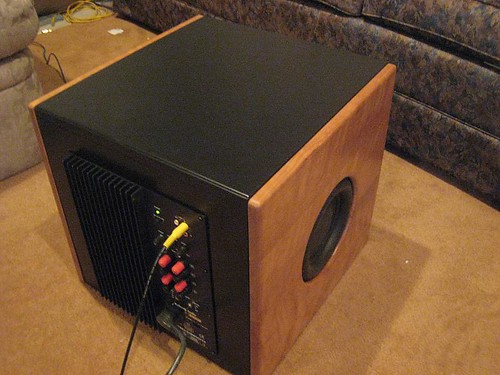
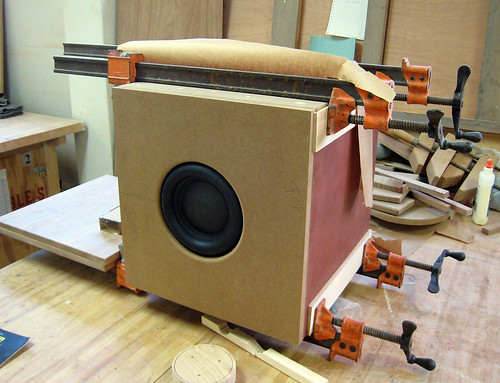
Actual MDF box done with the the two subs and the passive radiator installed

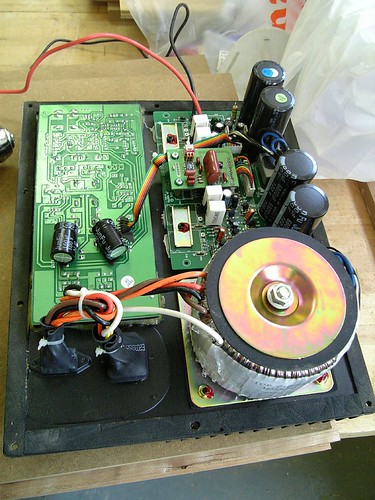
Rythmik amp
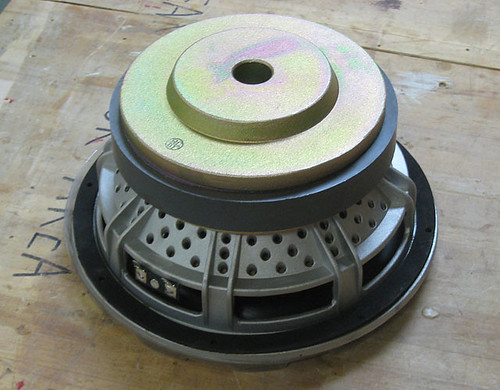
Apex Jr 8" Subwoofer magnet view
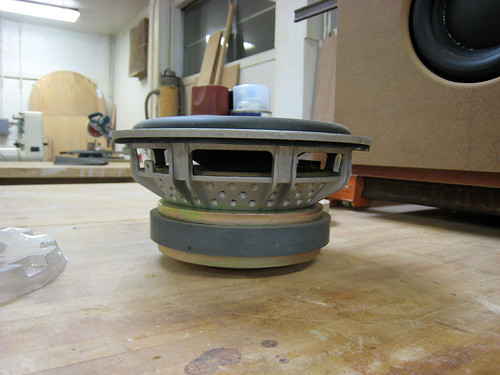
Side View
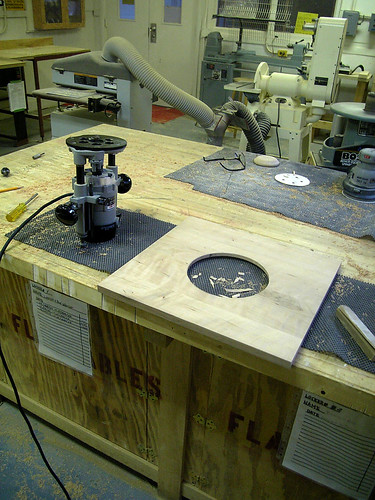
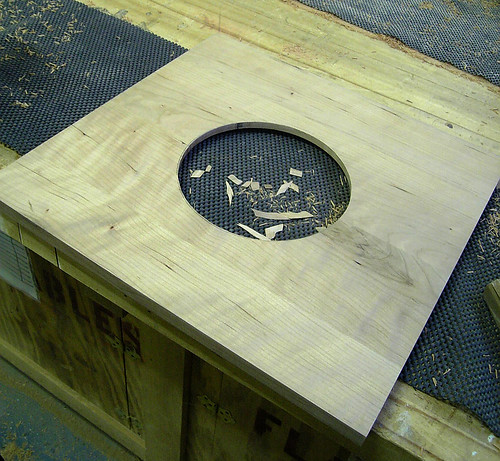
Test fitting of the side panel prototype; this one was done before the Jasper circle cutting jig arrived, so it was rather time consuming
 You can also see the primered top in this picture
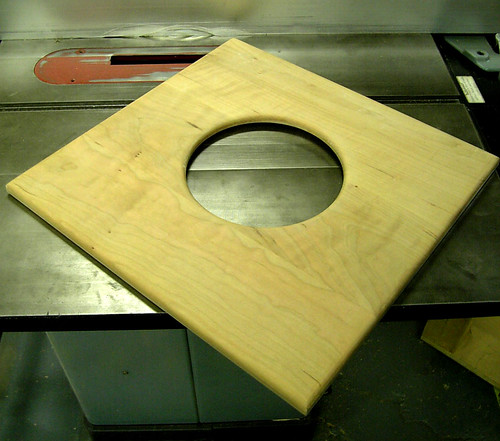
Finished cutting out groove and punched out the remaining circle on the inside
All ready for the roundover!
Rounded over and lightly sanded
Dry fit of all panels, left side panel
Dry fit of all panels, right side panel
Hope you enjoyed my deluge of pictures, and maybe if people are interested I guess I might update this post with final product pics when I finish?

Disclaimer: This is indeed my first woodworking project, I've never stepped into a wood shop prior to this project, so please....don't flame me for my poor woodworking skills
 (or poor grammar and spelling for that matter, it's nearly 2am right now, eek!)
Update:
I've been using the sub in semi-finished state (3-4 coats of black on the middle section with no clear) but I've decided to finally get around to complete the finishing, so I've been painting, sanding, painting, sanding.....about 9-10 coats now. No pictures till it's done, but here are two of the side panels that have aged quite gracefully imho:
I've been working on this during my free time, so it's been a work in progress for a while, but I'm nearly there now. The reason I went with the 8" subs is because I tried out a few large diameter subwoofer drivers. They put out plenty of bass to shake the house down but they all were far too sloppy when it came to stiff precision bass, or when I tried to play music. I found these speakers on sale on the Apex Jr site and I couldn't resist for the price!
Stats:
Two 8" subs on the sides with a 12" passive radiator. Internal box is MDF, left and right sides are cherry, and top/front is going to be MDF painted black with a satin finish (most pictures will show the primer). For power I am using a 350watt Rythmik Audio amp.
Pictures are taken either with a camera phone or a canon point and shoot...so sorry for the average pic quality
EDIT: latest pics:
Right side:
Left side:
Cherry Figure:
Actual MDF box done with the the two subs and the passive radiator installed
Rythmik amp
Apex Jr 8" Subwoofer magnet view
Side View
Test fitting of the side panel prototype; this one was done before the Jasper circle cutting jig arrived, so it was rather time consuming
Finished cutting out groove and punched out the remaining circle on the inside
All ready for the roundover!
Rounded over and lightly sanded
Dry fit of all panels, left side panel
Dry fit of all panels, right side panel
Hope you enjoyed my deluge of pictures, and maybe if people are interested I guess I might update this post with final product pics when I finish?
Disclaimer: This is indeed my first woodworking project, I've never stepped into a wood shop prior to this project, so please....don't flame me for my poor woodworking skills
Update:
I've been using the sub in semi-finished state (3-4 coats of black on the middle section with no clear) but I've decided to finally get around to complete the finishing, so I've been painting, sanding, painting, sanding.....about 9-10 coats now. No pictures till it's done, but here are two of the side panels that have aged quite gracefully imho:


