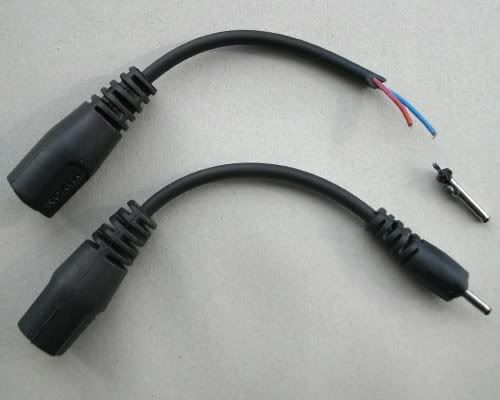
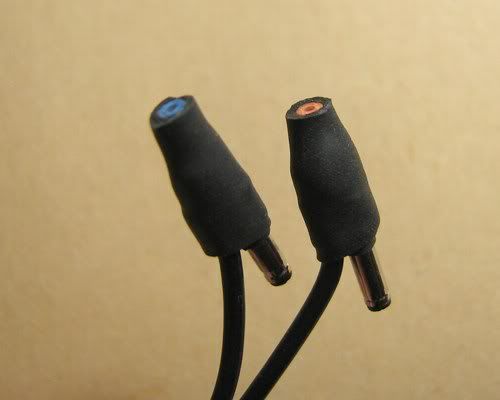
Sleek-Audio earphone plugs share the same type and size connector as charger plugs for recent Nokia mobile phones.
Here's how I made a cable for my SA6 earphones:
1. I bought two cheap Nokia CA-44 compatible power adapter cables, and extracted the barrel connectors, which turned out to be longer than ones on original Sleek-Audio plugs. It's possible to shorten them, but tricky. I wanted them to be long anyway.
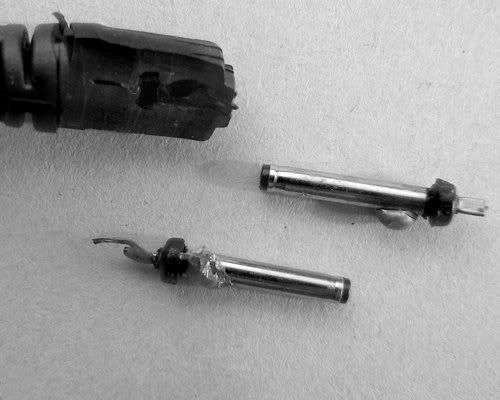
2. Trimmed off excessive plastic and solder. There was the inner contact tube sticking out from the back of the connector, trimmed about a half of that too.

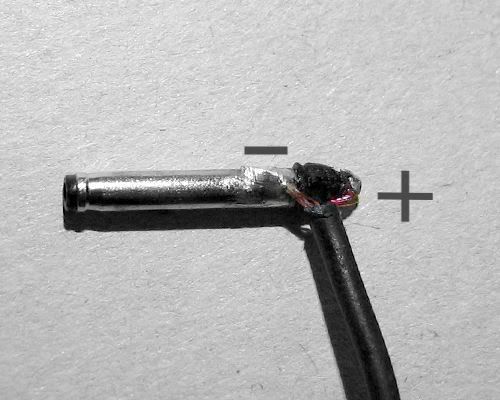
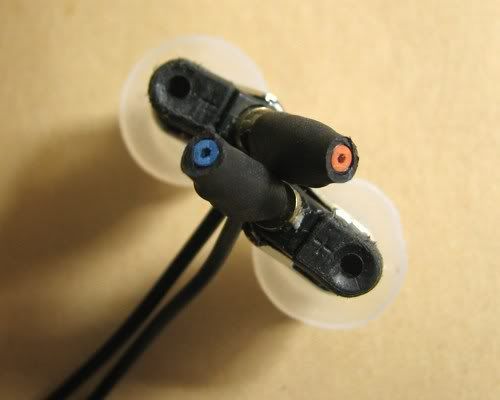
3. Soldered together the Left side of my headphone cable to one connector, Right to the other. The outer side of the barrel connector is negative (-), the inner is positive (+). Tested by plugging the new connectors into SA6 and listening to the music from mp3 player. Sound was clear as from original cable, no noises or any distortion. Technically the cable was ready at this stage, need some housings for the new earphone plugs now.
4. Creative part.
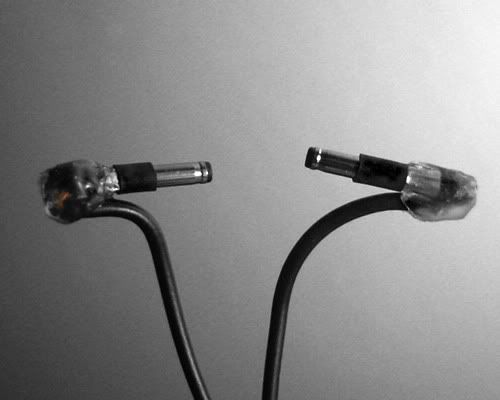
Applied some hot glue with a glue-gun
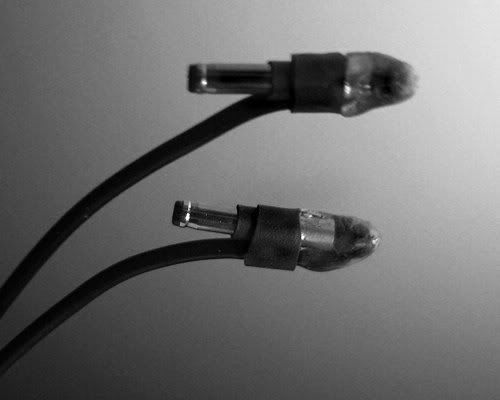
5. 2.5 mm diam. heatshrink on the barrel
6. 5 mm diam. heatshrink around the barrel and cable.
7. A large piece of 5mm heatshrink for a housing to cover it all up.
When I was heating the heatshrink with a lighter, the glue (applied in the step 4) began melting, which came in handy: it gathered in the back of the heatshrink, filled it in fully and formed a bubble at the end.
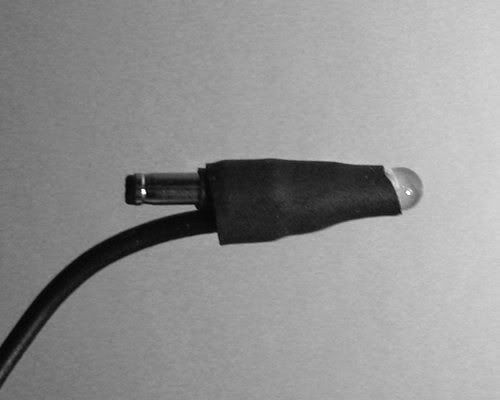
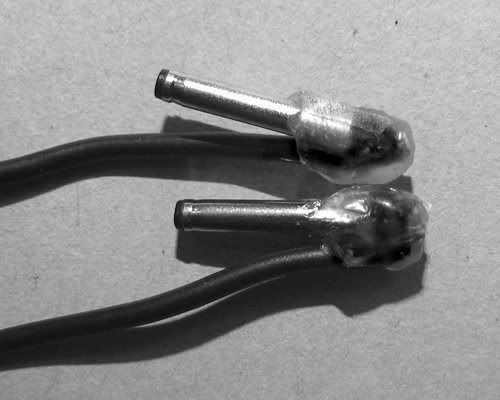
8. I pressed red and blue color indicators into the hot glue, let it cool down, then trimmed off a little bit for a finished look. Done!
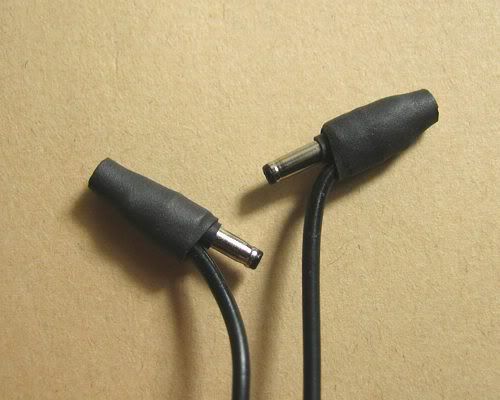
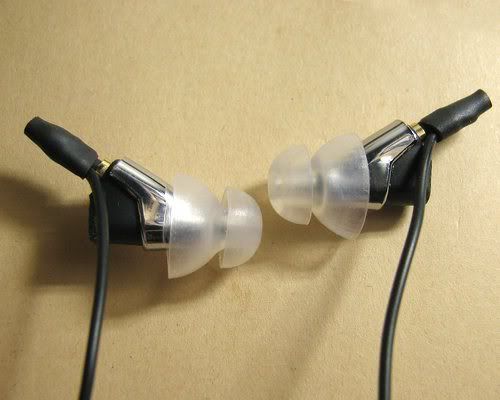
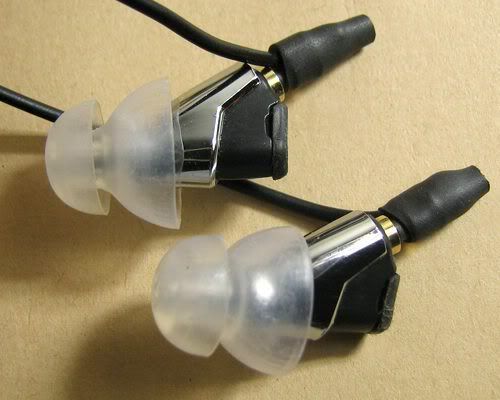
The plug-to-cable angle is exactly what I wanted - comfy for wearing over-ear or normally. Thanks to the large connector housings it's very easy to put the earphones in the ears and get them out, even in gloves. Winter is coming soon and I'm ready now.
Post pictures of your DIY plugs and cables for Sleek-Audio phones here!
Here's how I made a cable for my SA6 earphones:
1. I bought two cheap Nokia CA-44 compatible power adapter cables, and extracted the barrel connectors, which turned out to be longer than ones on original Sleek-Audio plugs. It's possible to shorten them, but tricky. I wanted them to be long anyway.
2. Trimmed off excessive plastic and solder. There was the inner contact tube sticking out from the back of the connector, trimmed about a half of that too.
3. Soldered together the Left side of my headphone cable to one connector, Right to the other. The outer side of the barrel connector is negative (-), the inner is positive (+). Tested by plugging the new connectors into SA6 and listening to the music from mp3 player. Sound was clear as from original cable, no noises or any distortion. Technically the cable was ready at this stage, need some housings for the new earphone plugs now.
4. Creative part.
Applied some hot glue with a glue-gun
5. 2.5 mm diam. heatshrink on the barrel
6. 5 mm diam. heatshrink around the barrel and cable.
7. A large piece of 5mm heatshrink for a housing to cover it all up.
When I was heating the heatshrink with a lighter, the glue (applied in the step 4) began melting, which came in handy: it gathered in the back of the heatshrink, filled it in fully and formed a bubble at the end.
8. I pressed red and blue color indicators into the hot glue, let it cool down, then trimmed off a little bit for a finished look. Done!
The plug-to-cable angle is exactly what I wanted - comfy for wearing over-ear or normally. Thanks to the large connector housings it's very easy to put the earphones in the ears and get them out, even in gloves. Winter is coming soon and I'm ready now.
Post pictures of your DIY plugs and cables for Sleek-Audio phones here!

