Bluedio T3
Apr 27, 2016 at 2:40 PM Thread Starter Post #1 of 11

iddqd23

New Head-Fier
Joined
Jul 1, 2015
Posts
32
Likes
14
 
Hey yall,
since i haven`t found anything here on the latest Bluedio cans, here`s my short summary of them..
As to the packaging you really see Bluedio are trying to aim for that upper segment, as goes for the build-quality of the cans..
Zink-alloy instead of brittle plastic...they weigh a bit more due to that, (380ish grams) but sure worth it..
they really feel more like 200-300$ cans from the build-quality alone..
The foam seems to be memory foam, pretty easy on the head´for hours.
The cans themselves are not really over the ears, then again my ears are XXL, so for some they might even by "OTE"..
let`s get to the sound..
stupendously exquist,if you are into electronic musci (who ever came up with the term EDM should be punished...)
highs, middles and lows are more then you could ever ask for from 60$ cans.
treble aswell.
period.
to be honest i`m blown away, had the original turbine and the t2s but Bluedio surely stepped it up a notch as in build-quality and sound.
should be noted, they are pretty bass-heavy, but that`s exactly what i want..
Can`t seriously think of any other cans that would offer THIS bang for the buck, literally..
great cans.
cheers


Apr 27, 2016 at 3:58 PM Post #2 of 11
They were around 40€ during the Aliexpress sale, should have pulled the trigger. They look very promising.
 
Apr 27, 2016 at 4:16 PM Post #3 of 11
hey Krist2an,
missed that aliexpress sale, heard about it though...60€ (im in germany) is the cheapest you can get them these days i guess..
as to the comfort i haven`t had any trouble up til now,(first day of wearing), but i wear them over a beanie mostly tbh,so might add cushion-wise...
as to the mids and highs i really miss the built-in EQ, but this can be fixed with external EQ`s as far as i heard..haven`t got to that as of now..
And yea, i mostly wear them outdoors, and they are a blast to listen to, cancelling the noise superbly aswell..
Haven`t got anything bad to say up to this point, really..
cheers
 
Sep 2, 2016 at 4:50 AM Post #4 of 11
Just got my T3 + cans this week. Love the sound. I let my automotive mechanic listen to them. He claims that the sound is better than "Beats" (I find Beats to be overrated and overpriced). The microphone sensitivity is fantastic (the mic picks up really faint noises that I can barely hear normally). The only issue I have with my pain is that my pair drops out of my bluetooth connection on both my android device and my PC. I am wondering if anyone else is having similar issues with the cans dropping its bluetooth signal? 
 
Sep 7, 2017 at 12:52 AM Post #6 of 11
To all Bluedio T3 owners:

As you have probably determined, the Turbine models are heavily bass-boosted. The bass is very bloated, and there is usually distortion at higher volumes and also on more congested tracks.

Luckily it's very easy to correct this - eliminate the bloat and distortion - and make them much more enjoyable. They will still be v-shaped, but the bass will be much more tame, tighter, and cleaner sounding.

The whole process takes 10-15 minutes and doesn't cost a dime. The below mod shows the T3, but the mod is basically the same for the other models.

Materials needed:
  • Small phillips screwdriver
  • Something with a sharp edge - spudger tool, guitar pick, non-serrated paring knife, pocket knife blade, etc
  • Some sort of tape - scotch/cello, masking tape, blue painter's, green "frog" tape, clear packing, aluminum HVAC tape - whatever. DO NOT use duct tape or electrical tape, as it will loosen and fall off over time.
Steps:

1. Remove the pads. They are just held on by (4) plastic tabs. You just gently pull them with your fingernail and they pop off.


2. Mark the bottom center of each of the plastic driver cover. I used a Sharpie. This will help later when it's time to reassemble.


3. Only work on 1 cup at a time. Don't move into the other cup until the 1st cup is done and back together.

4. Use a small Phillips screwdriver and remove the (3) screws on the plastic driver cover. DON'T LOSE THE SCREWS! Also, make sure the screws don't fall into the driver, which is easy to do because as soon as they fully loosen, they'll be magnetically attracted to the driver.

5. Next locate the "seam" between the back of the cup and the front plastic driver cover. Insert a spudger tool, guitar pick, or paring knife into this seam, and pry outwards (use the same motion like you are turning a key). The 2 halves are basically clipped together, and the goal here is to pop the clips with the spudger/pick/knife. It doesn't take much pressure, but you may have to pop the clips in 2 different spots (opposite to one another). If you accidentally break 1 of the clips (as you might be able to see in the Step 6 photos, don't worry as the screws will hold the cups together just fine).


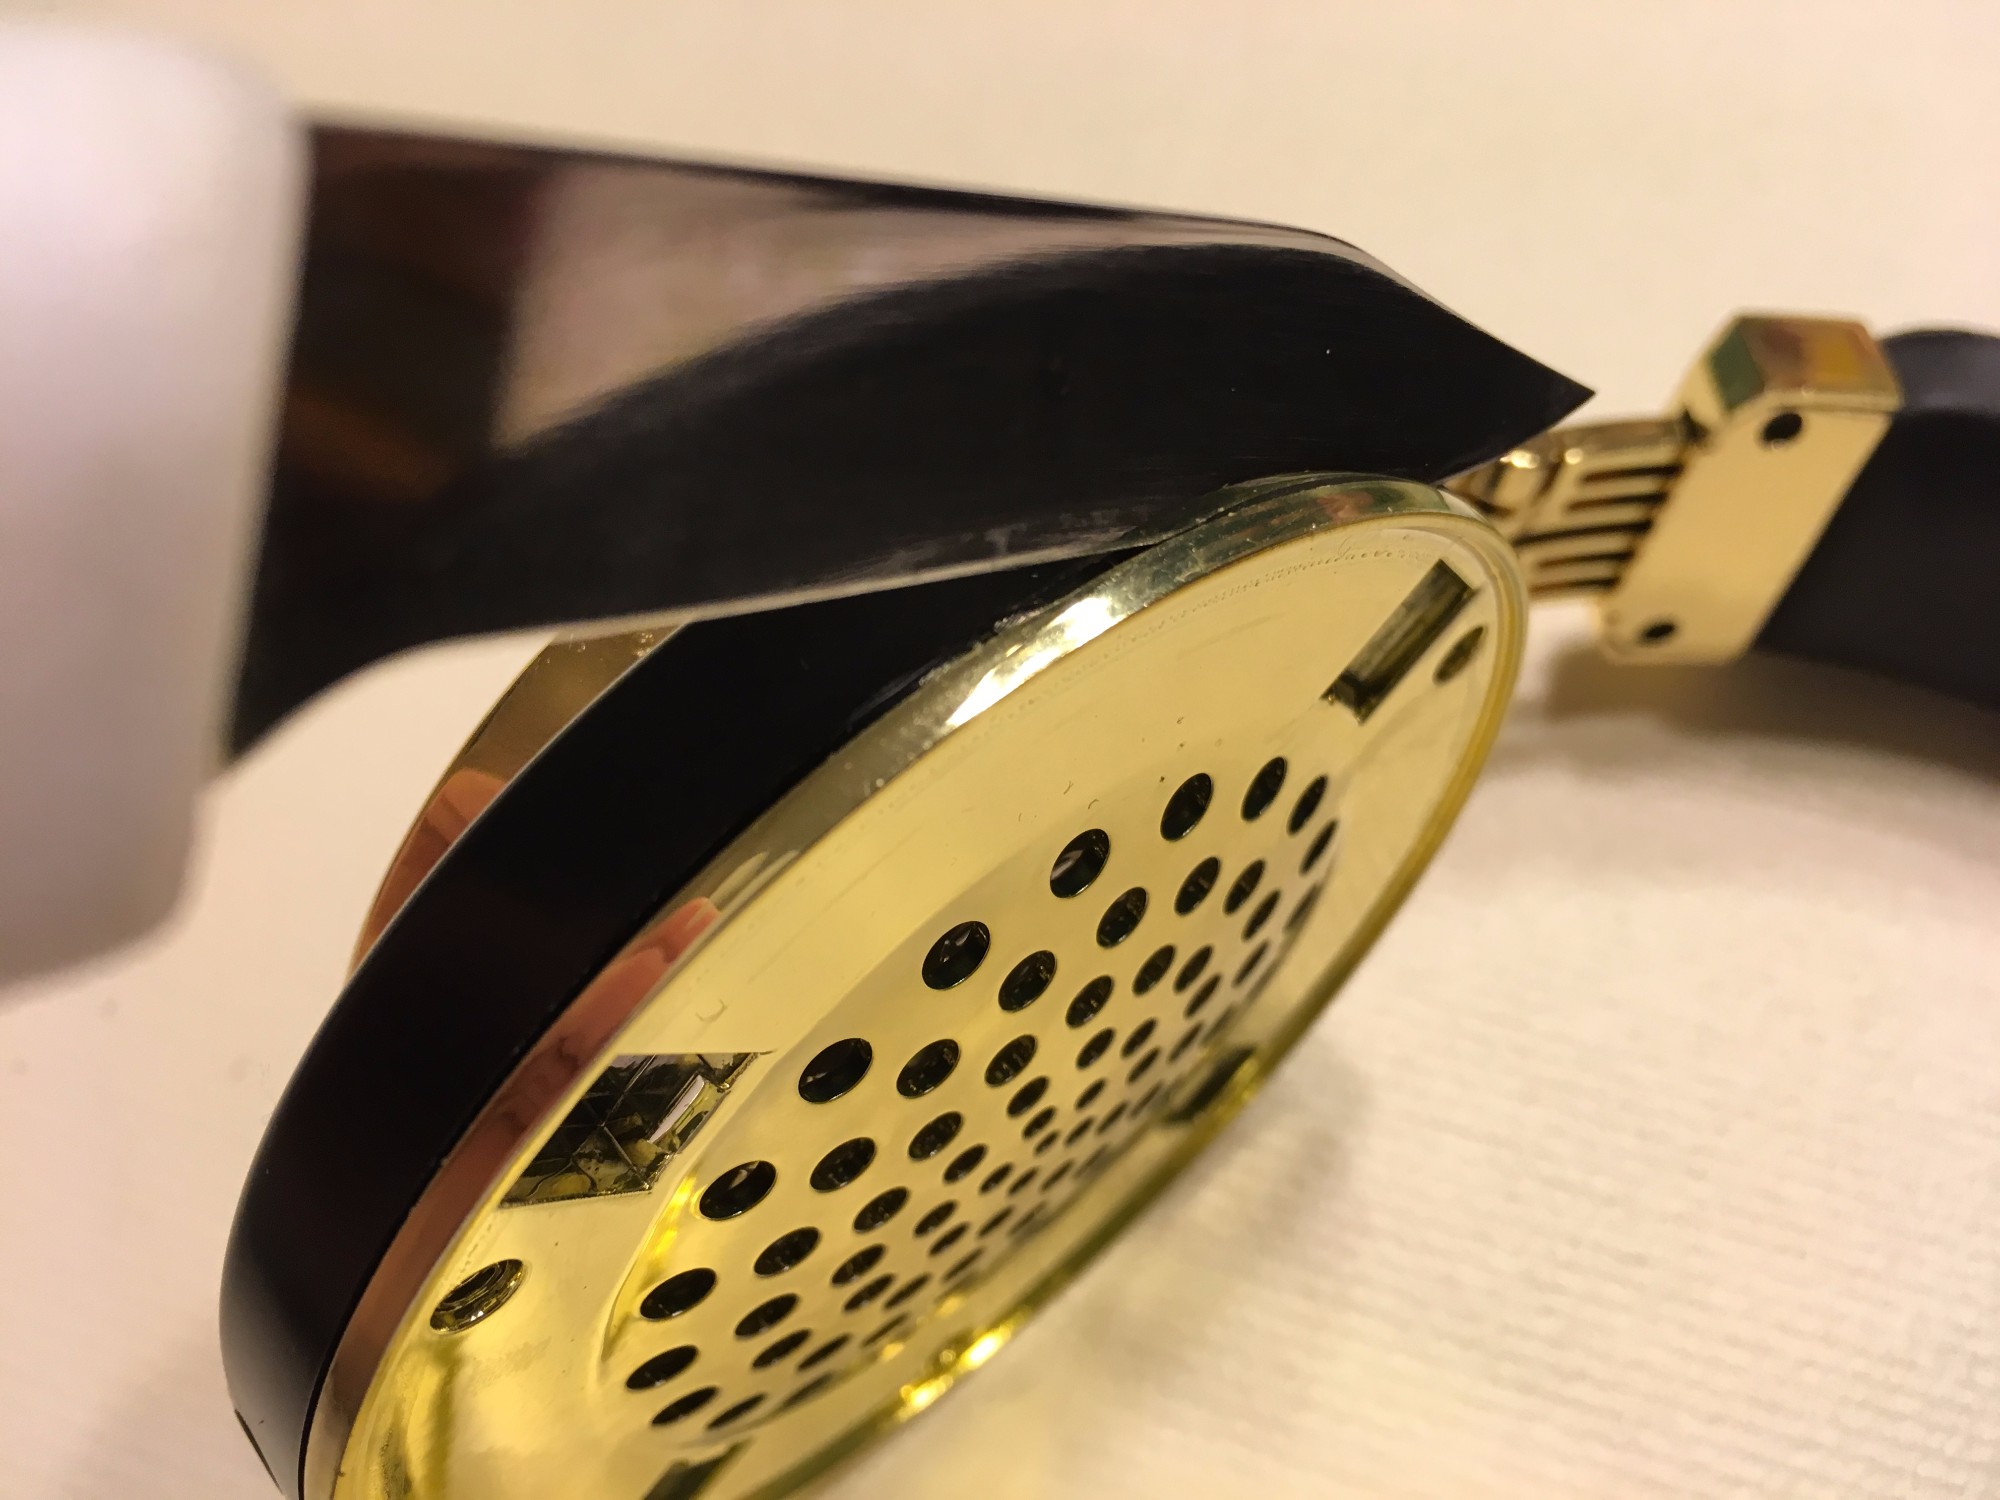
6. Once the halves are split, lay the half with the driver flat on the table so you can work on it. Be careful not to move it too far away or you risk ripping the wires off! Now you will see (2) or maybe (3) vent holes in the driver magnet (some models have 2 holes, and some have 3 but it doesn't matter which you have). What you want to do is completely tape off all of the holes but 1. You only need a tiny square of tape for each hole. If your driver has (2) holes, completely cover (1) hole. If your driver has (3) holes, completely cover (2) holes. Now for the single remaining hole, cover 75-80% of the, leaving only 20-25% of the hole open. You will end up with what I show in this photo. I have also illustrated it on the drawn diagram.


7. Once you are done with the taping, snap the 2 halves back together. This is where the Sharpie mark comes in handy. You also have to make sure that the (3) screws holes are lined up properly before snapping the halves back together (as seen in the photo). Go all the way around the circumference to make sure it's snapped together fully. Once it's all snapped together, replace the (3) Phillips screws you removed before, and reattach the pad (which snaps on with the 4 clips). With the pad - just like with the plastic halves - go all the way around the circumference to make sure the pad is snapped down fully and evenly.


7. Repeat steps 4-7 for the other cup.

8. Once you are all done, listen and enjoy the vastly improved sound (less bloated, cleaner bass, crisp and tight).

Also, feel free to try other variations of the hole taping. I've spent hours testing and tweaking. Covering all holes, covering all holes but 1, covering all holes but varying portions of the final hole.

What you see is what I settled on, but you can dial in as little or as much bass as you want by varying the amount of holes you cover. Just make sure however much you end up with, that you do the EXACT same thing on the other channel. If not, you'll end up with an imbalance between L and R sides.

This mod will also benefit other Bluedio models that use the same 57mm titanium driver (HT, T2-T5, and possibly many others). All of these 57mm titanium driver-based models I've ever tried seem to suffer from the same bloated bass and distortion due to the driver magnet vents. It's kind of Bluedio's house sound, as they were started by ex-Beats engineers.
 
Last edited:
Sep 7, 2017 at 1:03 AM Post #7 of 11
BTW, my daughter's T3+ died after heavy use (ie thousands of hours). I thought it was the battery so I swapped it out with no luck. Apparently the problem was the main circuit board, and I was unable to repair it.

Anyways, since I couldn't fix them, instead of throwing them away I decided to convert them into standard headphones (ie non-bluetooth). As you know, despite being bluetooth they can also be used wired with a 3.5mm cable plugged into the left cup.

I reused the stock wiring and 3.5mm jack, but gutted all of the bluetooth stuff - external control buttons, faceplates, circuit boards, battery, etc - and converted them to fully open. They turned out pretty nice, and they do sound better converted to fully open vs closed (mostly better soundstage). A bonus is that they are lighter with all of that junk removed (which is nice because the stock T3 is not exactly lightweight).

All of my T3s have the same driver tape mod outlined in the above post (including the open-modded version).

Here's a few pics of the final product (open-modded vs bluetooth version):


Last edited:
Sep 7, 2017 at 3:45 AM Post #8 of 11
Awesome work !!! :thumbsup::thumbsup::thumbsup:

Was wondering if using surgical tape instead of masking tape work as well/ better/worse ?

As it would allow the holes to breathe that little bit even when covered up. Its something which seemed to work on IEMs such as the Xiaomi HD Pro, wondering if it applies to here as well ??
 
Sep 7, 2017 at 5:40 AM Post #9 of 11
Awesome work !!! :thumbsup::thumbsup::thumbsup:

Was wondering if using surgical tape instead of masking tape work as well/ better/worse ?

As it would allow the holes to breathe that little bit even when covered up. Its something which seemed to work on IEMs such as the Xiaomi HD Pro, wondering if it applies to here as well ??

Thanks!

As far as the surgical tape, I'm not sure. Great suggestion though. If I ever get some micropore I'll be sure to test it out and update the thread.

The advantage of the method I outlined, is that it will work for anyone, as everyone out there has some form of "standard" tape. Whereas not that many people would have micropore tape just laying around.
 
Sep 7, 2017 at 11:13 AM Post #10 of 11
Agreed. Its a straightforward mod with materials that almost everyone will have.

The surgical tape suggestion really was looking at the possibility of fine tuning of the bass response. Some might like it that little bit more, some a little bit less.

The permeability of the tape could mean sticking multiple layers to illicit a different tuning. Its an idea that may nor may not work with such big drivers as the amount of air they push is vastly different but it seems to work well with the Xiaomi HD Pro IEM.

And at the current prices of the T3 / T3+, this mod of yours presents sensational value for a pair of headphones too! :)
 
Sep 7, 2017 at 4:22 PM Post #11 of 11
Agreed. Its a straightforward mod with materials that almost everyone will have.

The surgical tape suggestion really was looking at the possibility of fine tuning of the bass response. Some might like it that little bit more, some a little bit less.

The permeability of the tape could mean sticking multiple layers to illicit a different tuning. Its an idea that may nor may not work with such big drivers as the amount of air they push is vastly different but it seems to work well with the Xiaomi HD Pro IEM.

And at the current prices of the T3 / T3+, this mod of yours presents sensational value for a pair of headphones too! :)

Good point.

The margin of error would be pretty narrow though. In my testing I found there to be an extremely fine line between improved sound and horrible sound with regards to the size of the vent hole.

The BEST solution would be to seal off all vent holes completely, and then use a tool of known and controlled diameter to poke the vent hole in 1 of the tape pieces (such as 0.75mm, 1.0mm, 1.5mm, etc). This is the best way to tune the vent holes on IEMs.

I was actually going to do this method, but they aren't that great of headphones to begin with, so the value in spending all the extra time to obtain that level of tuning perfection isn't really worth it with a can like this.

Heck, after all of the time I already have sunk in tuning them, my daughter didn't even notice the difference (or even complain about the bloated muddy mess the stock headphones had to begin with). I just did it out of father's love, because no one should have to be forced to listen to a crappy headphone if it can be helped haha
 
Last edited:

Users who are viewing this thread

Back
Top