linuxworks
Member of the Trade: Sercona Audio
- Joined
- Oct 10, 2008
- Posts
- 3,456
- Likes
- 69
for grins and giggles I wanted to try to mod my knob

this knob came from a behringer a500 amp. it looked ugly on that amp but it can look OK in the right context. I'm hoping
here's the knob, untouched, on my amp before the surgery:
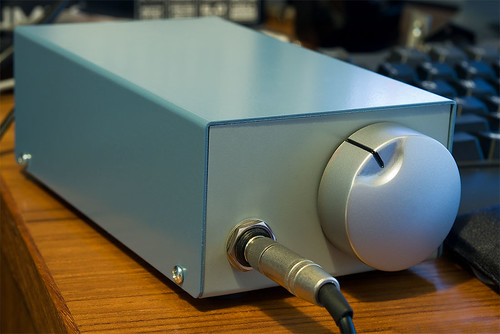
it looks ok and it matches. but it can be better.
here's the process:
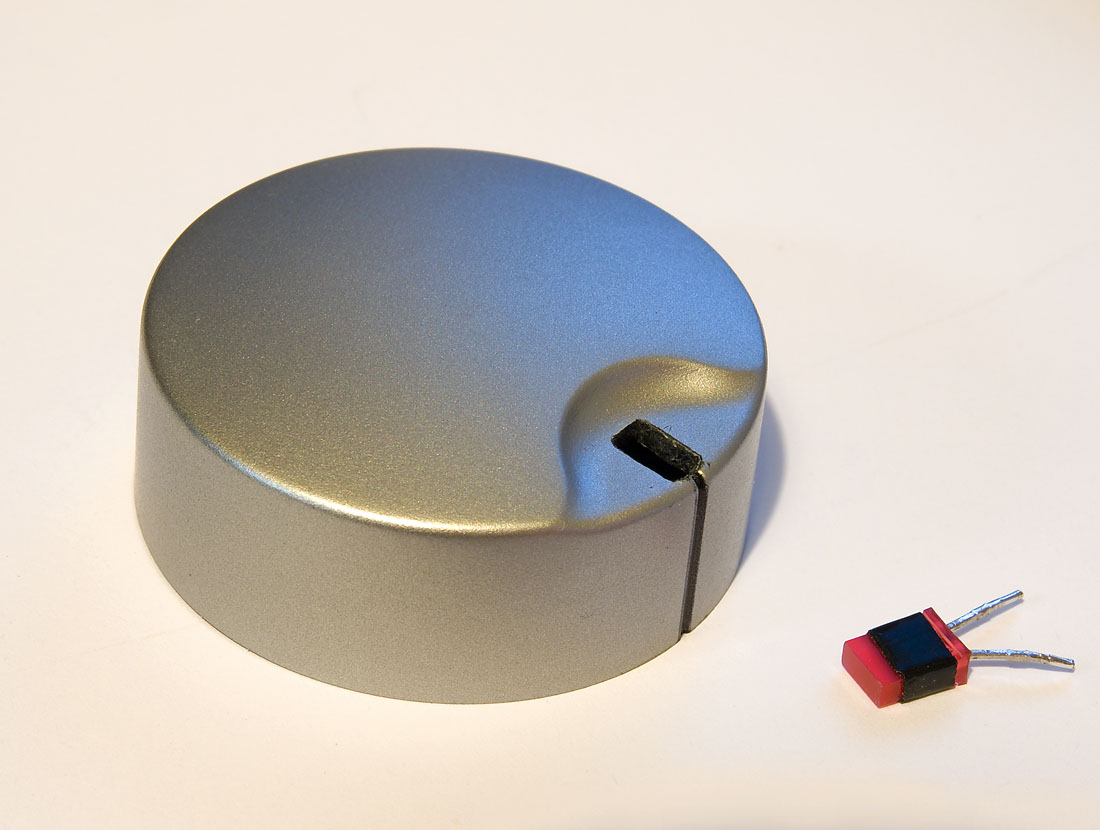
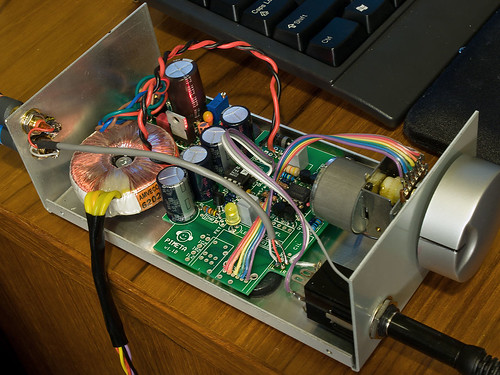
cut a small square hole in the knob. I started the hole with the hot tip of my soldering iron and then used an xacto hobby knife to whittle away the plastic until it was as square as I could get it. keep trying with your target LED so that you don't take too much plastic out.
from behind, use glue (I like hot-melt) and secure that sucker in there:
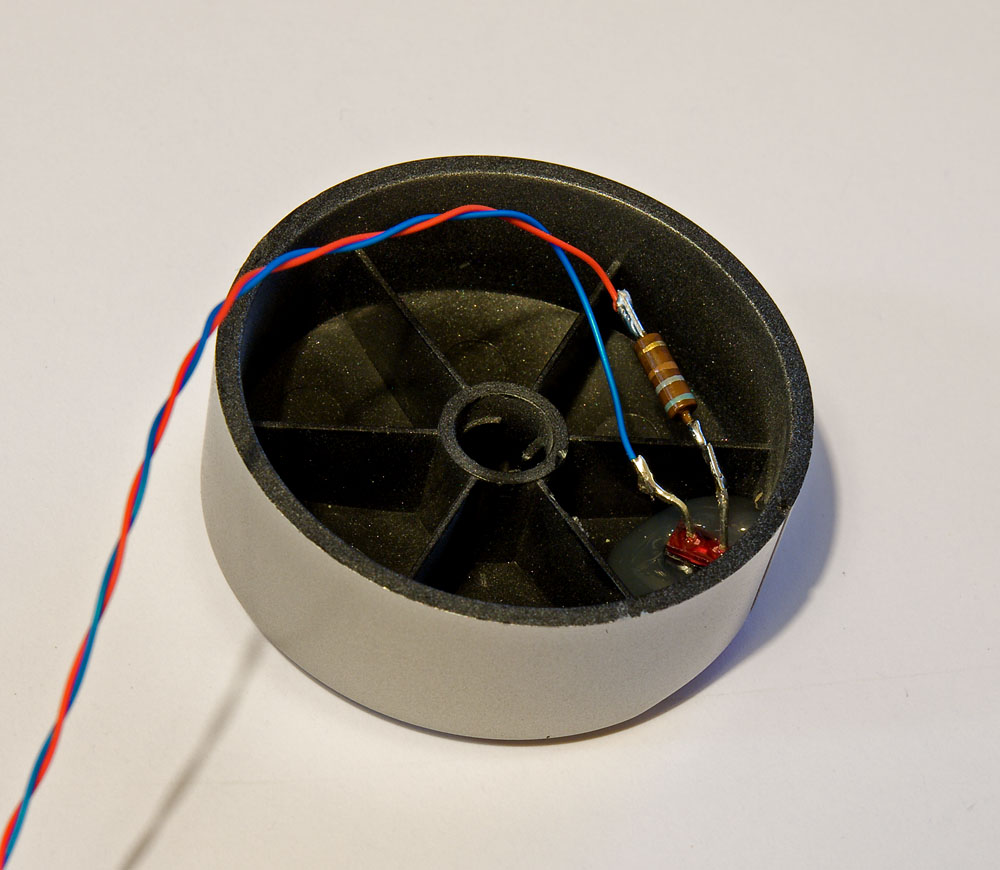
use flexible wiring. this shows wire-wrap wire but my later version has a pair of ribbon cable wires that are multi stranded. I'm hoping that will stand up to the repeated flex due to turning the knob.
does it work?
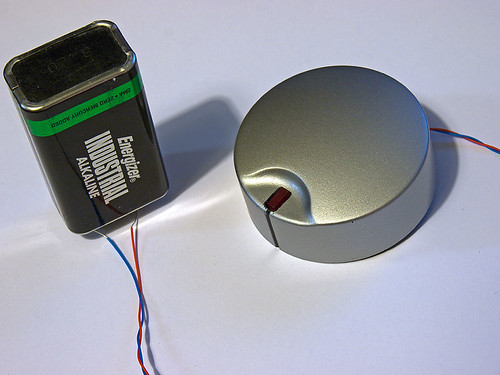
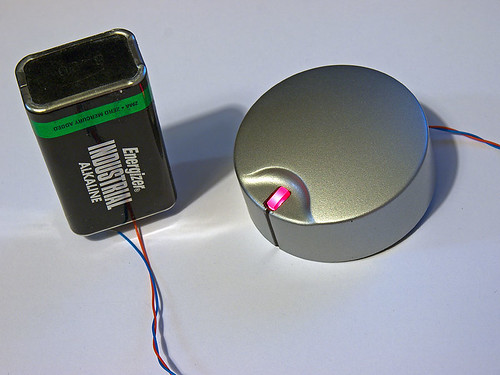
...it seems to work
to finish the job you simply drill a very small hole near the shaft of the pot (on the front metal chassis) and be sure it clears the back of the pot as well as being 'inside' enough so that the knob will fully cover the wire.
wrap the wire enough the shaft of the pot so that lock-to-lock rotation does not bind the wire and it stays inside the confines of the hollow knob body.
end result:
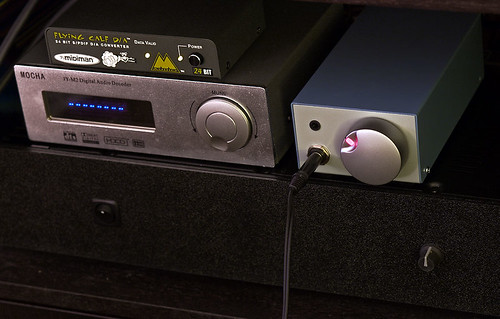
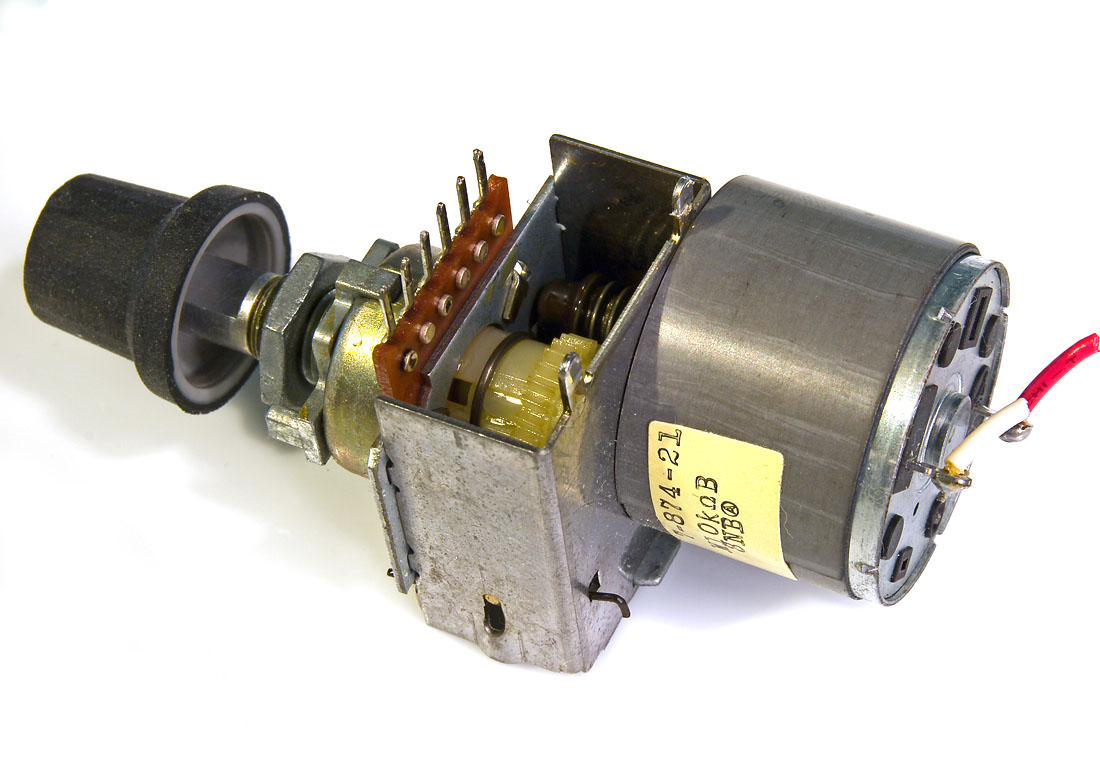
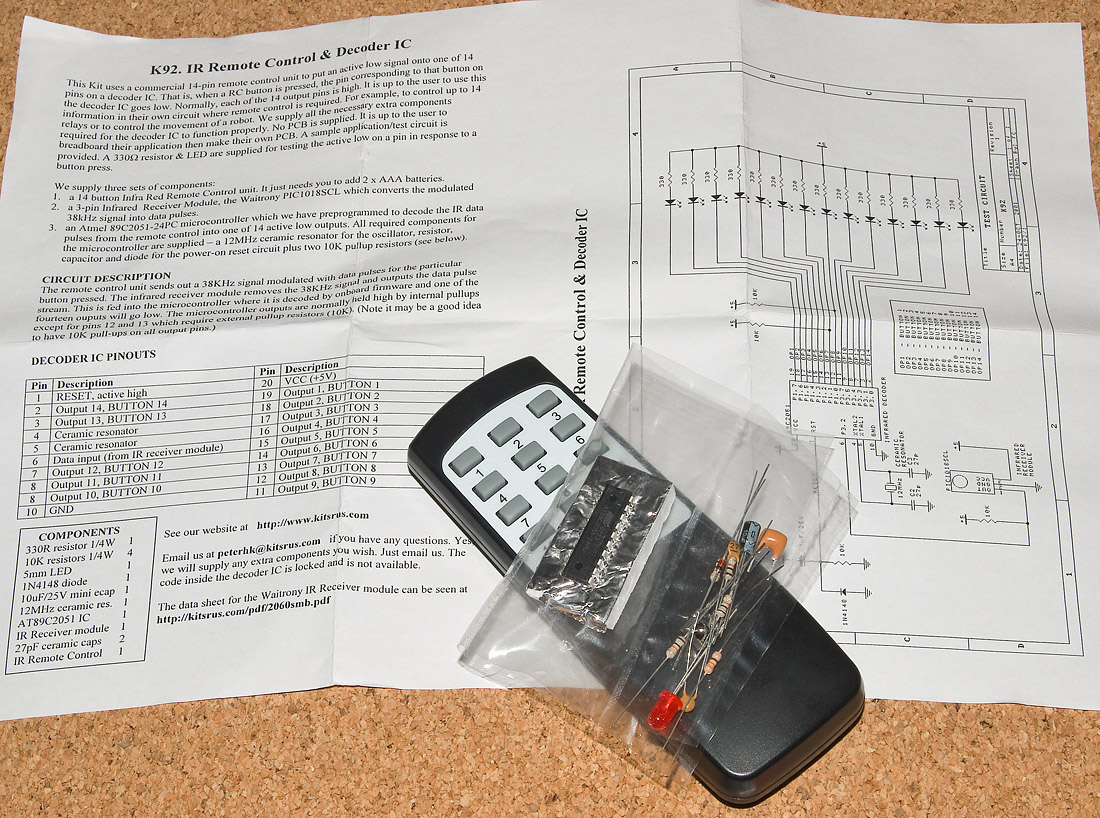
what you can't see from the pics is that the pot is a *motorized* pot and so when you use a remote control and turn the pot, its quite a neat effect to have the LED 'point the mark' out for you
part 2: I intend to use that LED in a creative way. to be continued....
this knob came from a behringer a500 amp. it looked ugly on that amp but it can look OK in the right context. I'm hoping
here's the knob, untouched, on my amp before the surgery:
it looks ok and it matches. but it can be better.
here's the process:
cut a small square hole in the knob. I started the hole with the hot tip of my soldering iron and then used an xacto hobby knife to whittle away the plastic until it was as square as I could get it. keep trying with your target LED so that you don't take too much plastic out.
from behind, use glue (I like hot-melt) and secure that sucker in there:
use flexible wiring. this shows wire-wrap wire but my later version has a pair of ribbon cable wires that are multi stranded. I'm hoping that will stand up to the repeated flex due to turning the knob.
does it work?
...it seems to work
to finish the job you simply drill a very small hole near the shaft of the pot (on the front metal chassis) and be sure it clears the back of the pot as well as being 'inside' enough so that the knob will fully cover the wire.
wrap the wire enough the shaft of the pot so that lock-to-lock rotation does not bind the wire and it stays inside the confines of the hollow knob body.
end result:
what you can't see from the pics is that the pot is a *motorized* pot and so when you use a remote control and turn the pot, its quite a neat effect to have the LED 'point the mark' out for you
part 2: I intend to use that LED in a creative way. to be continued....