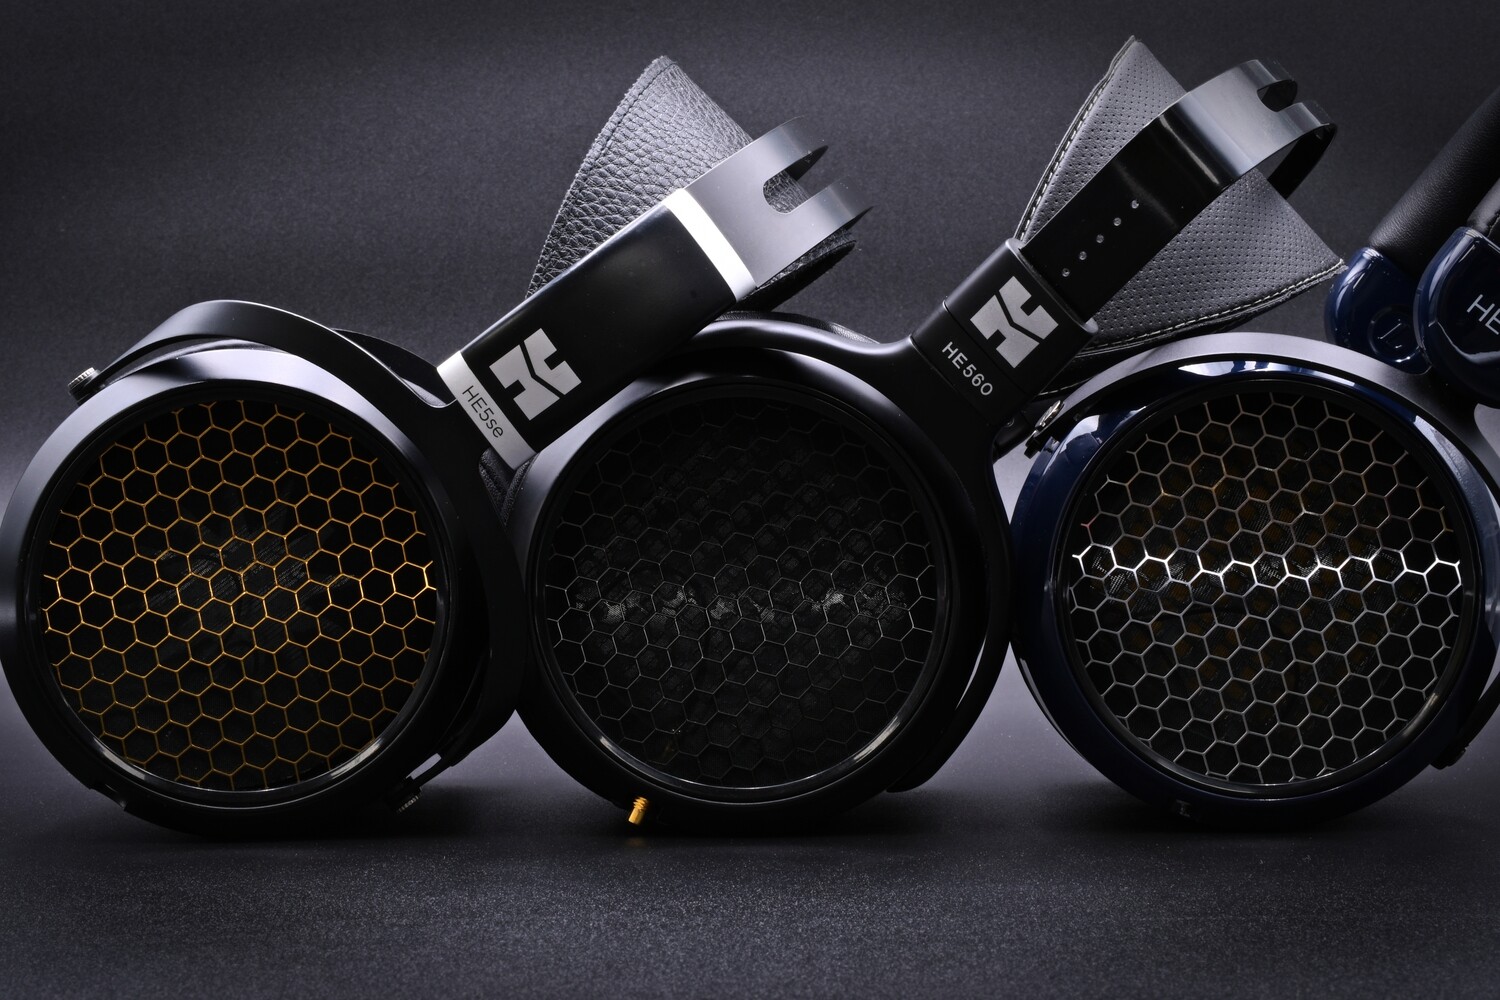
Mine had no cotton damping. What you see in the images above is how mine came. I assume that yes, the damping that you are seeing is what people removed. I'm just confused as to why it is absent in mine, unless Hifiman stopped putting it in later productions.
It's just a dust screen. I can't see how it would have any sort of damping effect. Air passes right through it with zero resistance, and it's not solid enough to reflect any discernible amount of sound.
mine had some kind of cloth also over my original grill..it was glued to it...but the sound changed for the better after i used the grill i now use...the cloth only lifted the veil a bit..
mine had some kind of cloth also over my original grill..it was glued to it...but the sound changed for the better after i used the grill i now use...the cloth only lifted the veil a bit..
I would imagine that changing the grill to a less obtrusive one would make a bigger change in the sound than removing that dust screen. But the screen in mine is a sort of very fine plastic netting, not a cloth. So I'm thinking mine is different from what you guys are describing.
It's just a dust screen. I can't see how it would have any sort of damping effect. Air passes right through it with zero resistance, and it's not solid enough to reflect any discernible amount of sound.
The dust screen fabric adds a slight damping effect on the treble extremes, which is why observant listeners can detect a slight lifting of a "veil" in the treble, with the dust screen ripped out.
But yeah changing the actual metal grills has a bigger effect (albeit in a different frequency range it seems).
I would imagine that changing the grill to a less obtrusive one would make a bigger change in the sound than removing that dust screen. But the screen in mine is a sort of very fine plastic netting, not a cloth. So I'm thinking mine is different from what you guys are describing.
No, ALL Hifiman full-sized headphones have the exact same grills, with the same netting dust screen as yours have. Everyone here is just describing the exact same thing in different words.
Tremendous value at stock form and DIY. Still a very good value if you buy everything assembled. Maxxed out? I dunno - the trannies are expensive - and with added dac board you're looking at m51/hilo ballpark.
If you want a diy dac that can be upgraded/tweaked over and over - better to go with the TPA Buffalo imo
True, it indeed seems for starters one of these kits would be ideal over anything else I can get for around $500. If so, I'm ready to break out my soldering iron! Unfortunately right now my budget for this component is limited, so I want to try to get the best I can and I definitely don't mind some DIY to get there. What I gather with either the DDDAC1794 or Buffalo is that I can start off with the minimum (or stock) configuration to get it up and running and still have a great unit, but have the flexibility to improve it or add more components when funds permit. So, you feel the Buffalo would be better in this scenario? I have read up on that one before but it went off the radar a bit. There seems to be a good bit of info and build logs for the Buffalo DACs.
True, it indeed seems for starters one of these kits would be ideal over anything else I can get for around $500. If so, I'm ready to break out my soldering iron! Unfortunately right now my budget for this component is limited, so I want to try to get the best I can and I definitely don't mind some DIY to get there. What I gather with either the DDDAC1794 or Buffalo is that I can start off with the minimum (or stock) configuration to get it up and running and still have a great unit, but have the flexibility to improve it or add more components when funds permit. So, you feel the Buffalo would be better in this scenario? I have read up on that one before but it went off the radar a bit. There seems to be a good bit of info and build logs for the Buffalo DACs.
The Buffalo is much more complex than the DDDAC. With the DDDAC you have rather limited things to do: stack moar boards; rolling different output caps; use trannies or at the extreme change around i/v resistor, shunt ...etc
The Buffalo has lots of thing to tweak around. Voltage vs current output, different i/v board, different clock - part choices and experimentation plays an important role. I've even heard a buffalo with a tube output stage. Let's just say that it's great fun, but unless you know what you're doing, it may end up being really expensive, not to mention time consuming.
My take on this is to just get a affordable dac (says the DDDac/Octave) and use it as your benchmark to audition more stuff. As fun as DIY is, again I think you really need to know what you're doing (instead of stuffing boutique caps everywhere and put in the most expensive components) to make it cost effective. I.e, it's possible to soup up a Buffalo so that it sounds as good as say, the Auralic Vega - but the time and cost invested might buy you said Dac without tinkering around
Is step 2 necessary? Do I really need to cut the main section?
And if I got it right, I'll have to cover the entire cable with heat shrink tubes? So why the need to cut it? can't I just cover everything without cutting?
Sorry if I've asked any stupid question. I'm really not very knowledgeable on this subject. I'll let my father do everything (he has some soldering skills).
I would think you do not need to cut the main section if you do not want a shorter cable.
I would also assume you need to cut the cable at the "Y' to get the right sized heat shrink on the cable, Unless you can find a sleeve material that you can stretch enough to get over the connectors that will still be tight enough on the cable to do its thing.
I believe someone else earlier in the thread used a braided wrap over the cable, but I think they also had to cut the connectors off to get the braid on. There is a woven wrap you could try call "Roundit 2000" it is slit along its length and you would secure it in place with tape. There may be better sources but a quick search came up with this: http://www.cableorganizer.com/woven-wrap/
1 - Can't say for sure yet, but so far I tend to think they're just more forward and "fuller".
2 - Yes, HE-500's treble is smoother. It's more forgiving on the source, although there's still a lot of sparkle.
3 - IMO HE-400's bass is indeed better. It's noticeable cleaner, but maybe it's because of HE-400's more spacious sound, making bass notes to be heard more clearly.
4- Honestly? No. They're just different. HE-500 is smoother, fuller sounding, while HE-400 is more spacious/airy with more recessed mids and elevated treble, granting it a better sense of dynamics overall.
Is step 2 necessary? Do I really need to cut the main section?
And if I got it right, I'll have to cover the entire cable with heat shrink tubes? So why the need to cut it? can't I just cover everything without cutting?
Sorry if I've asked any stupid question. I'm really not very knowledgeable on this subject. I'll let my father do everything (he has some soldering skills).
Step #2 is only if you want a shorter cable like in my case. The sleeve go over the entire main section and the L/R cables. Heat shrink tubes are for holding the sleeve in place at the 1/4 plug, at the "Y" and at the cup connectors. Plan ahead with the all heat shrink tubes and put them in before soldering, but after sleeving of course.
I would think you do not need to cut the main section if you do not want a shorter cable.
I would also assume you need to cut the cable at the "Y' to get the right sized heat shrink on the cable, Unless you can find a sleeve material that you can stretch enough to get over the connectors that will still be tight enough on the cable to do its thing.
I believe someone else earlier in the thread used a braided wrap over the cable, but I think they also had to cut the connectors off to get the braid on. There is a woven wrap you could try call "Roundit 2000" it is slit along its length and you would secure it in place with tape. There may be better sources but a quick search came up with this: http://www.cableorganizer.com/woven-wrap/
This site uses cookies to help personalise content, tailor your experience and to keep you logged in if you register.
By continuing to use this site, you are consenting to our use of cookies.