I know, I know - you are probably thinking "what is this guy talking about?"
I have done a minor Mod on my Mojo, that I like to share.
It has two benefits, one was by intent (by design) and the other by accident!
Those of you who have a Chord Mojo, do know about the heating issue.
Well not much of an issue really, but are aware of it. It is specially vivid while charging and listening, when it gets really warm!
So here is what I did:
- Put a clean towel on a table, and ground myself.
- using the correct size tool (don't damage those hex bolts), I carefully opened the back, taking care to open it with the bottom plate facing up, otherwise you may loose those marbles!
- carefully disconnect the battery.
- there are two screws holding the board to the bottom shell, open them and carefully remove the board and put it somewhere safe.
- there are thermal-pads used in computers that aid cooling by thermally connecting microchips to metal heatsinks,
such as this.you need 1.5mm thickness.
- Simply cut pieces and cover the bottom shell, where circuit board goes, making sure you remove protective plastics from both sides of the pad..
- put the board back in, and screw it down - you can
gently press the board down so it would sink into the pad a little - don't worry, the pad is not electrically conductive.
- reconnect the battery lead.
- use very small (I mean small) amount of thermal paste
(such as this) to the top shell where the two parts meet. this is to make sure the two Alu shells make a thermal contact after re-assembly.
- gently put the two halves together (top shell on the table - back shelf going on) -
DO NOT PRESS JUST YET.
- gently drop the hex bolts back in the holes - finger tighten the middle four bolts gently, not too tight yet - simply slide and align the the half shells perfectly, you may need to loosen and tighten the bolts slightly to get a perfect fit. once you are satisfied, tighten the middle four bolts first and then the outer four bolts.
- wipe off any excess paste from sides with a paper tissue.
- make sure the unit turns on, sometimes it may not, in that case you have to open it, detach the battery, wait a few seconds and reconnect.
The results;
- the thermal pad takes the excess heat from board to sends it to the botton shell, which in turn shares it with the top shell. with all that exposed metal surface, it looses heat faster. All of the metal surface would reach the same equilibrium temperature (no hot spots), which is a little lower and it would feel cooler.
- by some miracle! (because I don't know why!) the battery lasts longer

. I get about an extra hour min. The battery indicator just takes longer to go from blue to green, and stays on green longer.
- sonically, it remains its excellent self.
From Elsewhere on Headfi:
2nd Update:
Recently I asserted that :
we are not clever enough to re-engineer this device!
I am about to tell you what I have done in stark contrast to that statement, just for fun and for the heck of it.
While I had the Mojo opened up, I thought I do something about the Heat management within Mojo.
So with the circuit board loose on a towel, I connect everything up to see from where the heat comes from.
While playing most of the heat comes from the two large chips in the centre (the system/input chip and the FPGA gate array)
Warning first ; Be really carefull if you open it up, specially the click-buttons as their metal caps are only held in place with a tiny tape - I almost lost mine.
These chips are stuck to the underside of the battery, so they heat up, they transfer their heat to the battery, which is not a good idea - specially that their centers are the hot spots, so they heat up two spots on one side of one of the batteries. I thought I do something about that.
Next I connected the charger, to get the thing really hot!
Incidentally, the battery remains cool as a cucumber discharging or charging, so none of the heat is due to the batteries.
While charging, the circuit components on the underside of the board near the charging socket get really hot! enough to burn your finger if you keep it on it more than a few seconds. These components are sitting in an airgap (about 1-3 mm) above the bottom shell. They were next on my list.
The cluster of components on the left and centre can get really hot while charging.
Also the underside of the board where the large hot chips from otherside sit, also get hot - next item on the list.
So I carefully located these hot sections, and stuck 1.5mm and 2.5mm heat conducting pads on the bottom shell. these pads are widely used for cooling in computer systems.
This would thermally bond the hot components to the bottom shell, fairly easy.
To take the heat from the two large chips on the top away from the battery and to the shell to dissipate out, needed more effort.
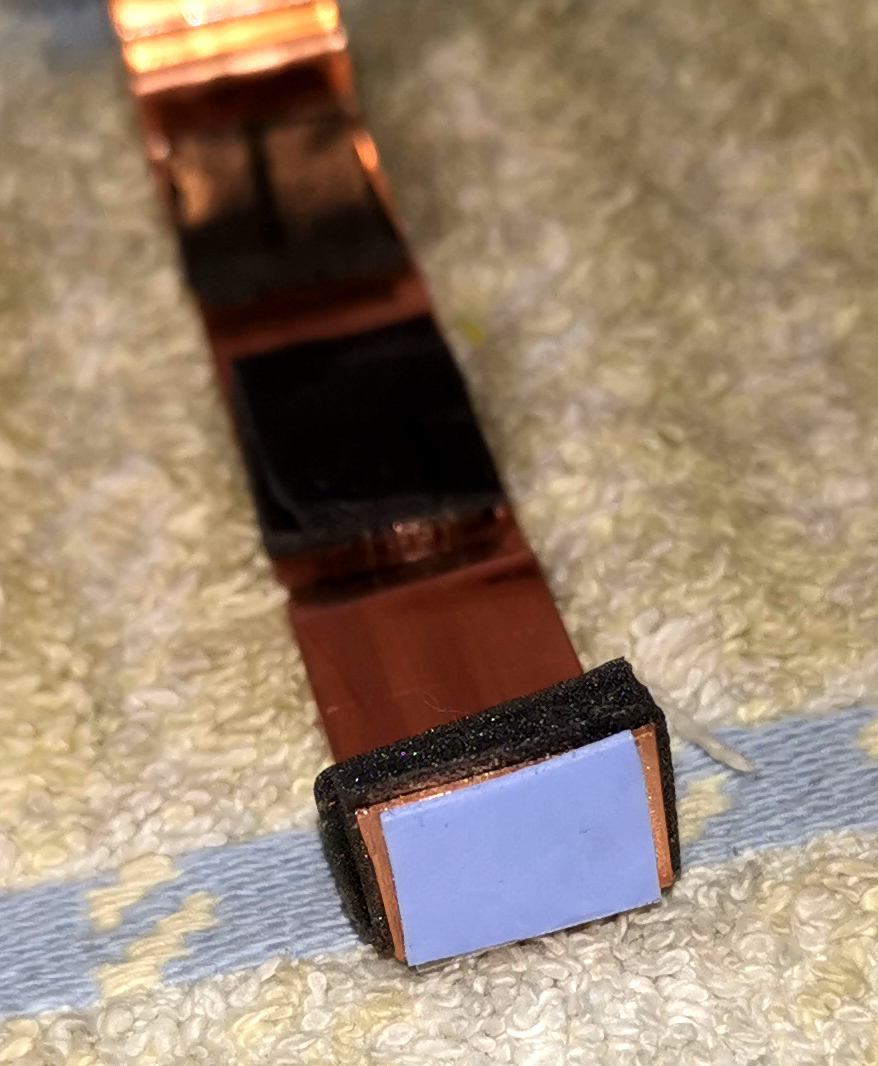
So I cut a strip of pure copper sheet (17mm X 100mm X 0.5mm thick) and bent it into this shape.
It is so shaped so it would touch the tops of the chips, but avoid anything else on the circuit, the end wings have thin thermal pads attached to them, because ultimately they would be touching the inside of the top shell to pass the heat on. The two black pieces of sponge would press the copper to the chips to make a good contact.
Thermal pads are attached to the chips (0.5mm thick), and the copper heatsink is inserted on the top shell.
Lastly, a tiny amount of heatsink compound is applied to the top shell contact areas with the bottom shell, and the shells are brought together gently.
The foam inserts on the strip cause the shells to sit apart a few mm's - as I tighten the screws gently and in sequence, the shell would close up, squeezing a little paste out. no worries, it cleans up easily with white spirit and tissue paper.
The strip of copper is now sitting with a small airgap to the battery, hopefully it is cooling the chips and conducting the heat to the outer shells.
So what did it achieve?
- Mojo is a few grams heavier, not by much, but you can tell!
- Within a minute of switching on, the entire case starts to get warm, much faster than before, it may even feel like it is warming more, but it is not.
- Charging and listening at the same time, causes the case to warm up really quickly, I take this as a good sign. It means the heat is getting out quickly so it can dissipate faster, causing the final temperature equilibrium to be a few degrees lower.
Provided you don't use a case, as it would nullify all this effort.
- Wonderfully the
initial fizzing noise while charging is gone! I assume the thermal pads stop the buzzing components from vibrating. Mojo just goes into charge mode without making any noise.
- The entire shell is at same temperature, no hot spots.
- As I write this it has been playing for 3 hours straight, it is just warm to touch - Just!
- I believe the battery lasts a little longer, but I have not actually tested this.
(A few days later I wrote:
Since last night I have been running the Mojo to see how long the battery lasts.
So far it has done about 8.5 hours - still going, but the battery is flashing red, it surely lasts longer (USB Input).
The current battery is about a year old.)
Well I had fun doing it.
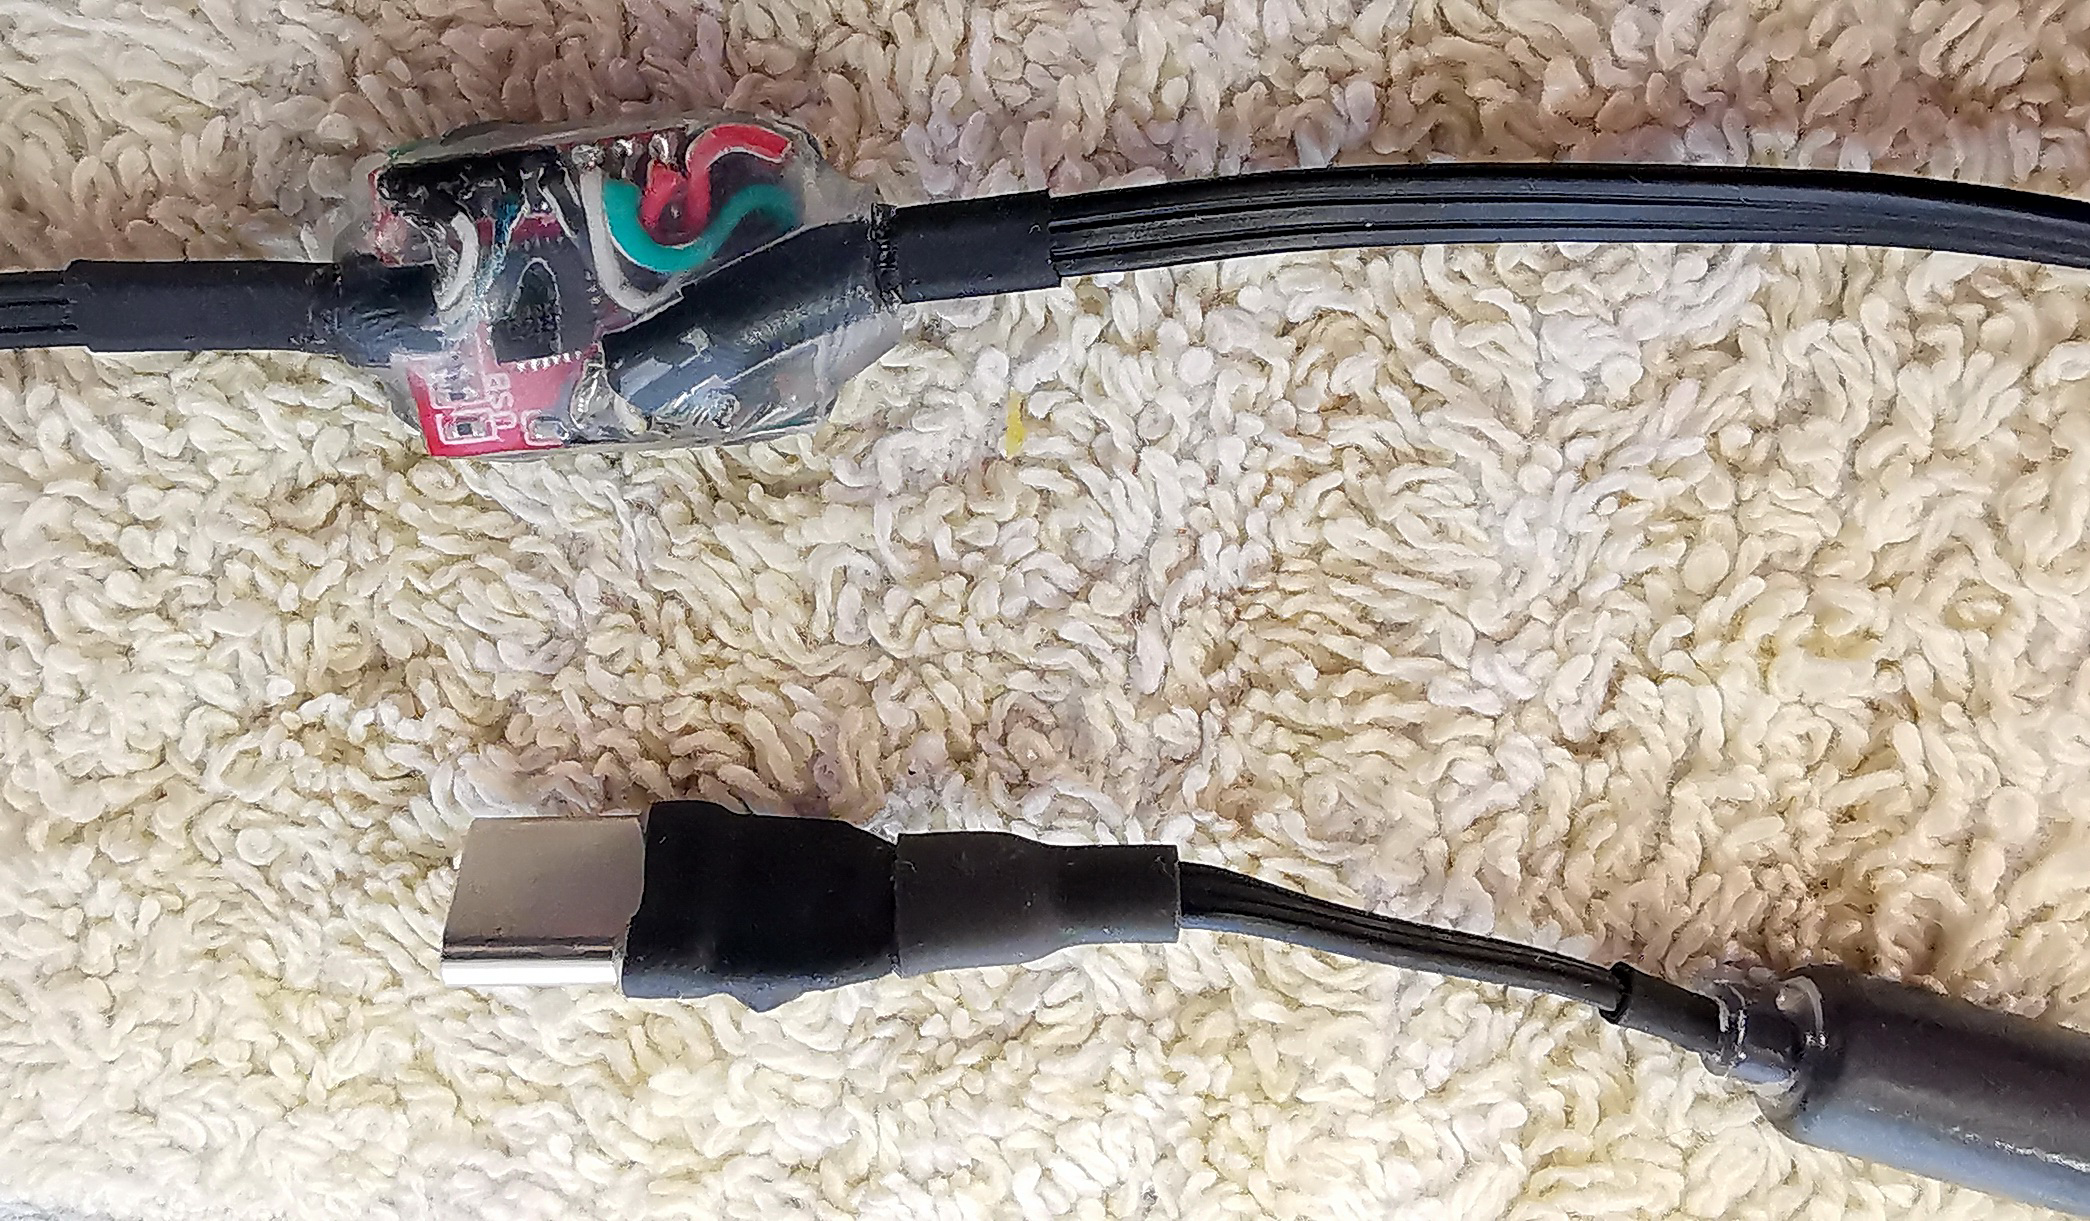
BTW - this is my DIY interconnect from my phone to Mojo.
It is about 750mm long, has a tiny USB hub and a MicroSD card reader soldered in the middle, two small ferrite cores at ends. The MicroSD card is 512GB, it holds my music. The phone detects both the card and Mojo through the same cable. Cable is super flexible 3mm X 2mm.
Yet another Mod. related to Chord Mojo (copied from another thread)
BLUETOOTH ADDON FOR MOJO
Review of XDuoo 05BL Pro and Chord Mojo
Ok - The item arrived from China today faster than expected.
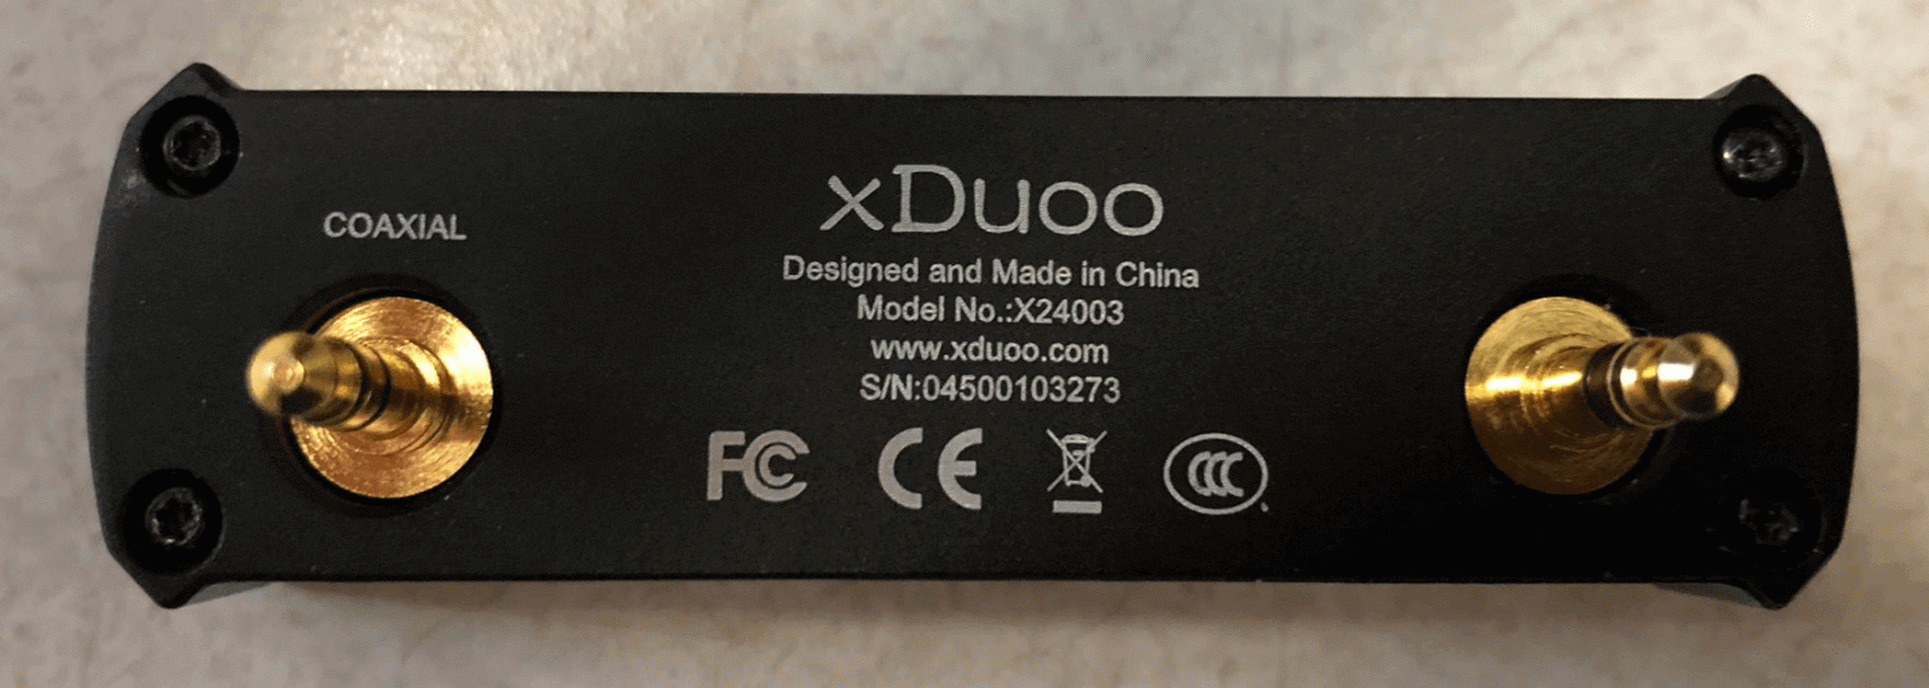
For those of you not familiar with this device - this is a
$58 (Nov 2020) Bluetooth reciever with a single digital coax output. It is made for XDuoo's own DAC, but as it happens can be connected to a Chord Mojo to add bluetooth to it.
So here is my quick find after about an hour or two with the device.
Pros:
- Small, cute, light. Does function properly as it should!
- better sound quality than expected (after some minor discoveries)
- pretty good range! see later
- easy to use, media buttons work too.
- cheap enough
Cons:
- Not a lot actually
This item is about 1mm thinner than Mojo, not counting its flared ears at ends. And internally the whole thing is actually a littler smaller than Mojo's width - so technically for those who are good with DIY and a fine saw, it can be made to fit the exact size of Mojo's end with cutting off the sides carefully and repositioning the jack, to make it look like a mini
Poly ! Those who dont want to do so much, can simply resolder the output leads internally to the other (otherwise not connected) jack, and remove the current jack, to make a reasonable fit for Mojo.


 I found a piece of plastic that fitted into the optival input of the Mojo, a drop of glue and a bit of black nail varnish later - it looks like this - not so pretty, but functional
Indeed it does have LDAC, aptX HD etc. at varying bitrates and sampling frequencies - they all function well, and Mojo responds to differing sampling frequencies with colour change.
Sound quality:
You see I did have a Fiio BTR5 and I did put it through its paces extensively. This guy is better by a good margin!
For one thing, Fiio had a terrible range with LDAC 990kb/s - less than a meter sometimes! XDuoo managed a good 4 meters in opensight, it only started to crackle once I stepped out of the room.
Distortion is low acros the bandwidth. BUT the bandwidth becomes narrower - the very low bass and very high treble gets muted a little.
Also compared to USB, sound looses that extra
airiness that Mojo can resolve around instruments - sound stage flattens a bit.
Remember, I am comparing a lossless USB direct connection to a compressed (by the phone) BT alternative. A lot of it is/was to be expected - so I am nit-picking, there is no way a compressed audio BT connection was going to match a direct lossless connection.
Indeed the device is doing very well. I am impressed.
Codecs, Sampling Frequencies & bit rates
I played with those settings, to cut the long story short, the best combination was
LDAC 16bit 48kHz 990kb/s
Indeed 24bit made no improvements to my ear (still early days though), 660kb/s sounded as good too. However 44.1kHz and 96kHz settings made the sound loose a bit of its three dimensionality, perhaps because of extra data the codec has to compress.
However, somehow on well recorded SACD material the sound was a little better on 24bit 96kHz, but on standard CD, I preferred the mentioned setting.
Mistakes I made at first !
this is a little warning section, so you don't repeat my mistakes.
- If it is the first time you connect anything to COAX input of Mojo, the volume is set at zero! remember to put it up, or you wonder why there is no sound! Also Mojo remembers the volume setting for different inputs independently.
- I use Neutron player on my Android phone, I forgot to set
High-Res Bluetooth under
Generic driver settings. This meant that Hi-res audio was not routed directly to BT codec.
- My bloody phone activated its internal
Dolby Atmos crap enhancer by default on bluetooth, so what I heard at beginning was very off-putting. took me a little while before I realized the damn thing comes on by itself.
Once it was switched off the sound became a very close version of USB direct connection.
Conclusion
to add bluetooth functionality to a Mojo at this price is a
steal! never mind one that sounds good enough not to embarrass itself.
Besides apart from
Poly I do not know of another alternative! do you ?
I have not checked battery performance yet - I will report anything else I find.
Weirdly! or is it I am imagining it, my Mojo seems to keep its cool connected to COAX compared to USB , I mean it has not warmed up yet after about an hour so far! Curious . . .
I have known myself to change my mind after long auditioning a device.
But until (if) I do, I recommend this, it really impressed me.
Diana Krall, on
the girl in the other room sounds very clear and lush with XDuoo and Mojo - I easily listened to the entire album while writing this.


 . I get about an extra hour min. The battery indicator just takes longer to go from blue to green, and stays on green longer.


