


jerg
Headphoneus Supremus
- Joined
- Aug 11, 2010
- Posts
- 6,143
- Likes
- 901
[size=25.0pt]Hifiman HE500 & HE400 Jergpad Mod v2.5[/size]
By Jerg & Modulor
Feb 16, 2014 -
@modulor just notified me that he will be closing reservations for Batch 3 orders now. Scroll down to spoilered message past big tutorial link for details.
Jan 27, 2014 -
@modulor is up for making new Jergpads in Q1 of 2014! Just PM him for details.
Sep 23, 2013 -
Tutorial for version 2.5 of the Jergpad is out!
It is written by Modulor, and incorporates much of his optimized approaches at doing the 4 modding steps (damping holes, velour top, backvents, adhesion mods) inherent in v2.0 guide I wrote, as well as a further optional 5th step I came up with specifically for HE500s, called "Outer Damping Holes mod for HE500" aka "port hole mod" (I like the latter name better

There is also a brief (modded or stock) Hifiman earpad installation video I recorded for those who have no clue how to install the earpads properly.
Without further a-do...
Modulor's Jergpad v2.5 Modding Tutorial (by Modulor)
-hosted on Imgur.com
Up-to-date order updates (updated) from Modulor:
Feb 16, 2014 update from Modulor:
Modulor's Jergpads Update (Click to hide)
February 16th 2014
Greetings! The final batch of jergpads has been fully reserved as of today. If you still want to provide an inquiry and would like updates about potential cancellations, contact me via PM for more details. Otherwise, this will be it as HiFiMan will be discontinuing their current pads in the next few months and will have a new design out as their replacement. As always, I encourage everyone to consider trying the tutorial above and to contact me if you have any questions or if you're stuck in one part the process. I am planning on a final tutorial update in the upcoming weeks to provide more details on the process and to tweak some of the images/steps slightly to better explain them.
Ryan/Modulor
Earpad installation video for full Jergpads (and stock pads)
Jergpad v2.5 measurements Oct 6, 2013
Courtesy of purrin for conducting the measurements, of Modulor for providing purrin with modded pads for HE500 measurements, and of Thujone for providing purrin with HE400s+Jergpads for HE400 measurements
HE500 + full v2.5 Jergpads
Reference: HE500 + stock velours
Reference: HE500 + stock pleathers
Analysis:
- Treble region is much more cohesive with the modded pads than any of the stock pads, which will be noticed as a "smoother upper midrange / treble, and more coherent midrange~treble transition".
- Overall frequency response becomes very flat, with a slight warm tilt, non-intrusive upper midrange, and a present but again non-intrusive treble region.
- Low bass behaviour is interesting; a small sub-bass (<50Hz) bump is introduced as intended, there is some 3rd order harmonic relative to stock earpads, but still quite low in practice. My subjective interpretation (which can be disputed) is that this extra harmonic distortion at the very low frequency contributes to the rumble of the sub-bass, which otherwise is very low profile.
- CSDs (cumulative spectral decay "waterfall" plots) indicate the HE500s to decay very nicely with the modded pads, with midrange decay comparable to the velours especially around the trouble region ~600 Hz. Treble decay is also great, evenly across 3000Hz - 10kHz+. There is just the start of a more prominent decay "belly" below 400 Hz with the modded pads relative to the stock velours, which at least partly accounts for the more satisfying "meaty" lower end with pleathers. Note the 2000 Hz "wall of ringing", that is a benign CSD artifact inherent to most planar magnetic headphones and can be ignored.
HE400 + v2.5 Jergpads (without backvent openings*)
HE400 + v2.5 Jergpads (with backvents open)
Reference: HE400 + stock pleathers
Analysis
- *As noted above, this measurement is done without the backvents being open, the reason as we found out through the measurement / discussion process, is that HE400 drivers are not well-damped by themselves, and are thus very sensitive to improper damping. That is the case here where having the backvents open aka having a broken seal between the pads and the cups/drivers, causes a hump at 50 Hz and roll-off below 35 Hz or so. Of course the open backvents are done to improve the soundstage openness, so in the end it is a trade-off with HE400s.
- Like the HE500 measurements, with HE400 the modded pads bring in more cohesive midrange and treble behaviour, smoothing out most of the peaks and valleys - bringing in more coherency in the sound and better mids~treble transition (less treble disconnection). HE400's innate voicing is still retained, with the laid-back upper midrange and highly present treble, but much less extreme than the stock pleathers.
- Harmonic distortion in the midrange is improved, that correlates somewhat to the FR changes.
- Measured low bass behaviour with the modded pads are questionable; having the backvents open allows for a 50Hz hump sound great with most bassy music tracks I test, but having the backvents closed (full seal) allows for more accurate behaviour. I devised and improved upon the Jergpads on the basis of HE500 always, so this bass interaction with HE400 was largely overlooked by me. Honestly having the backvents open with HE400 is subjectively more satisfying for me despite the poorer measurement.
Note:
Tutorials/impressions/elaborations/measurements of past revisions of Jergpad will be spoilered and packed up below.
Modulor July batch Jergpad impressions
Jul 24, 2013 - Modulor Jergpads photos and impressions Link to post here:
http://www.head-fi.org/t/646812/hifiman-he500-he400-jergpad-mod-v2-0/675#post_9644743
(Contact Modulor via PM if you want to get in on his second batch of orders)
http://www.head-fi.org/t/646812/hifiman-he500-he400-jergpad-mod-v2-0/675#post_9644743
(Contact Modulor via PM if you want to get in on his second batch of orders)
Preface(s) of my progression thought process / timeline in devising the mod
[size=15.0pt]PREFACE[/size]
First off, The Preface of the Preface (this is the Preface of version 1 of Jergpad mod where I described why exactly I even bothered, the background story so to speak):
[size=9pt] [/size]
[size=9pt] [/size]
[size=9pt] [/size]
[size=9pt]Ever since I got my HE500s two months ago, I have been very bothered that no earpad worked out perfectly for me with them.[/size]
[size=9pt] [/size]
[size=9pt]The stock Hifiman velour pads (with detachable mounting rings) thin out the bass and lower midrange too much and cause the whole tonality to shift toward the upper midrange and treble, giving too much forwardness and glare, and too little body and fullness to the sound signature.[/size]
[size=9pt] [/size]
[size=9pt]The stock Hifiman pleather pads, on the other hand, are almost exactly the opposite; they give an incredibly satisfying full-bodied lower end, tame the treble and upper midrange effectively, resulting in a tonality that renders everything from voices to instruments realistically and without any fatigue or glare. However there is one major downfall with the pleathers – they have a huge amount of chamber resonance in the opening of the earpads and so the HE500 ends up sounding cupped, and have little to no “air”, losing a huge amount of upper end detail extraction, and is almost muffled but not quite.[/size]
[size=9pt] [/size]
[size=7pt]**Quick note: I never kept the foam spacers inside of the stock pleather pads because it 1) compromised the comfort and 2) muddled up the sound considerably into a wonky mess; also it won’t be compatible with this particular mod, so don’t even think about it….just throw it in the garbage right now **[/size]
[size=9pt] [/size]
[size=9pt]This led me to try 2 other pads: vintage Hifiman velour pads (with permanently attached clear brittle plastic mounting mechanism), and the J-Money (J$) Beyerdynamic lambskin earpads. In short, neither gave me exactly what I want still.[/size]
[size=9pt] [/size]
[size=9pt]The vintage velours tame the upper end much better than the new velours, but a large part of the lower end is nonexistent with these pads so the overall sound becomes too light and powerless.[/size]
[size=9pt] [/size]
[size=9pt]The J$’s were the closest to perfect from my experience, where they extracted the most amount of overall detail from the drivers, had a great balance of the full-bodied nature of pleathers and the airiness and openness of the velours, and were just superior earpads in terms of comfort. The thing that persuaded me it was still not quite right was that it retained a lot of the upper mids glare and treble sibilance similar to the new velours, which was no issue with the pleathers and to a lesser degree to the vintage velours.[/size]
[size=9pt] [/size]
[size=9pt]After playing around these four types of earpads for the past couple of weeks, I came to the realization that the unique effortless tonality of the Hifiman pleathers is intrinsic to the foam used in them (a dense foam with a memory-foam-like consistency), and the thickness (which determines how close your ears are to the drivers). This was not replicatable with any of the other pads as they use different types of foams with different thicknesses.[/size]
[size=9pt] [/size]
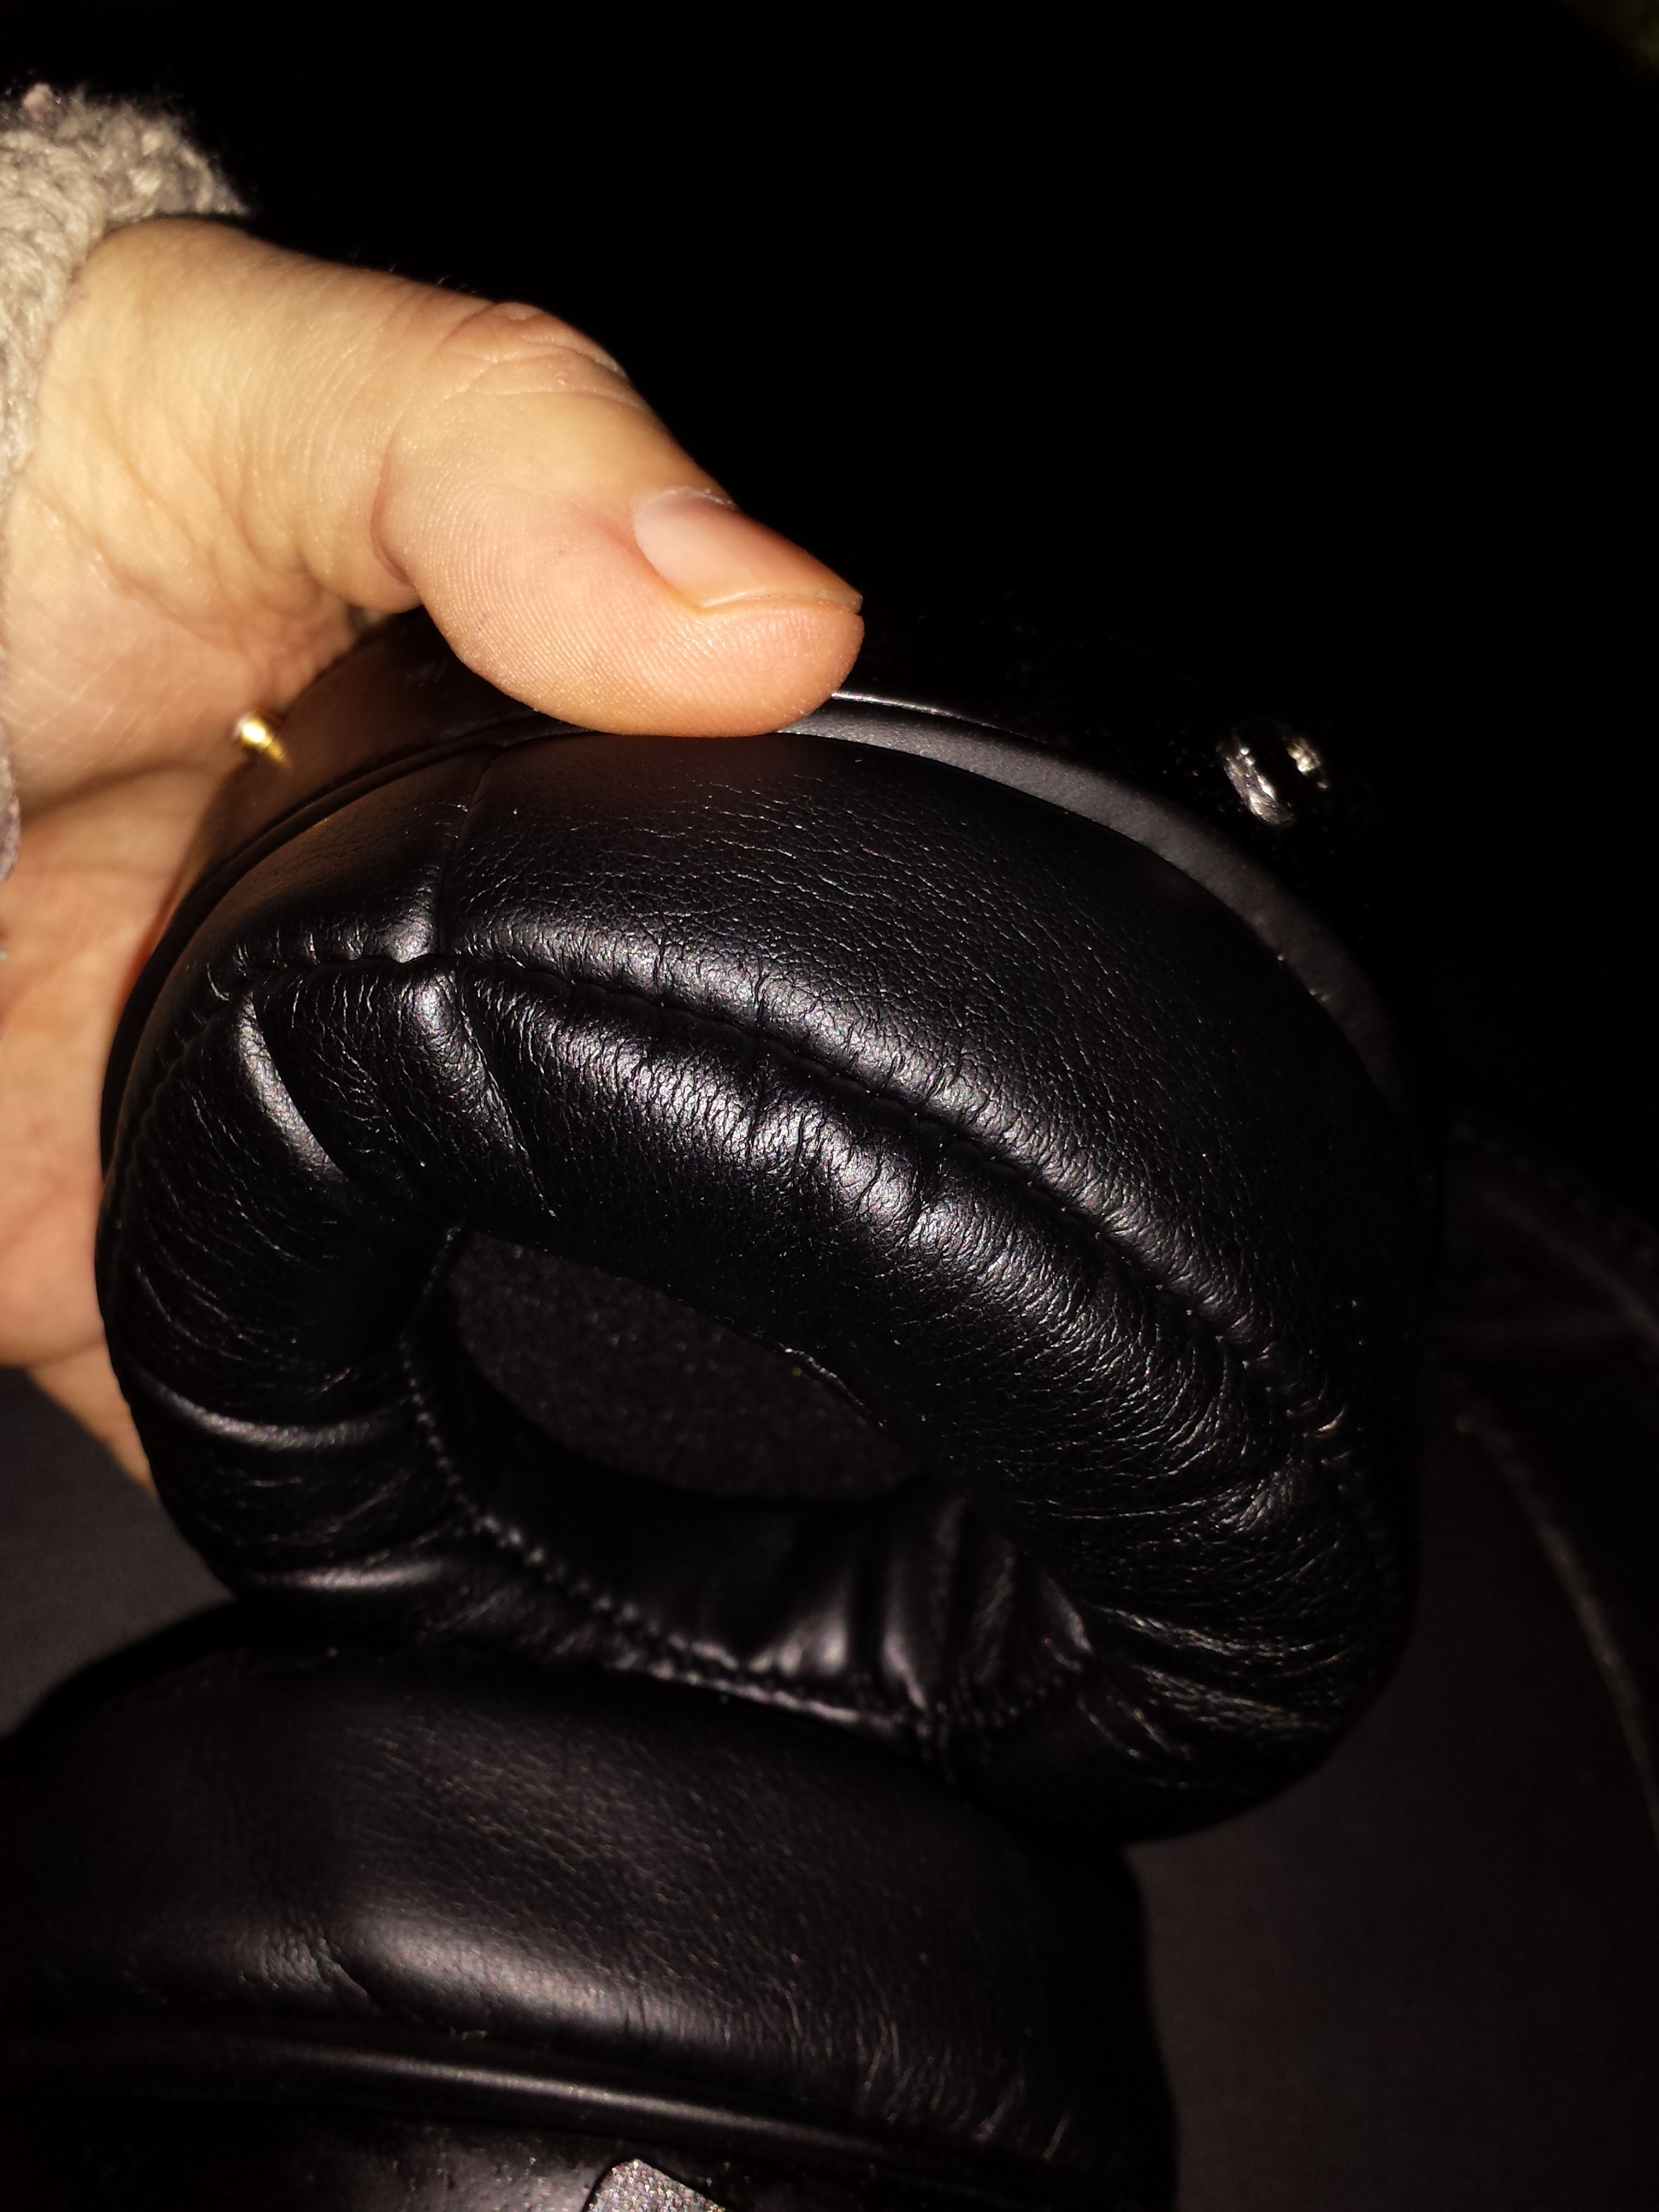
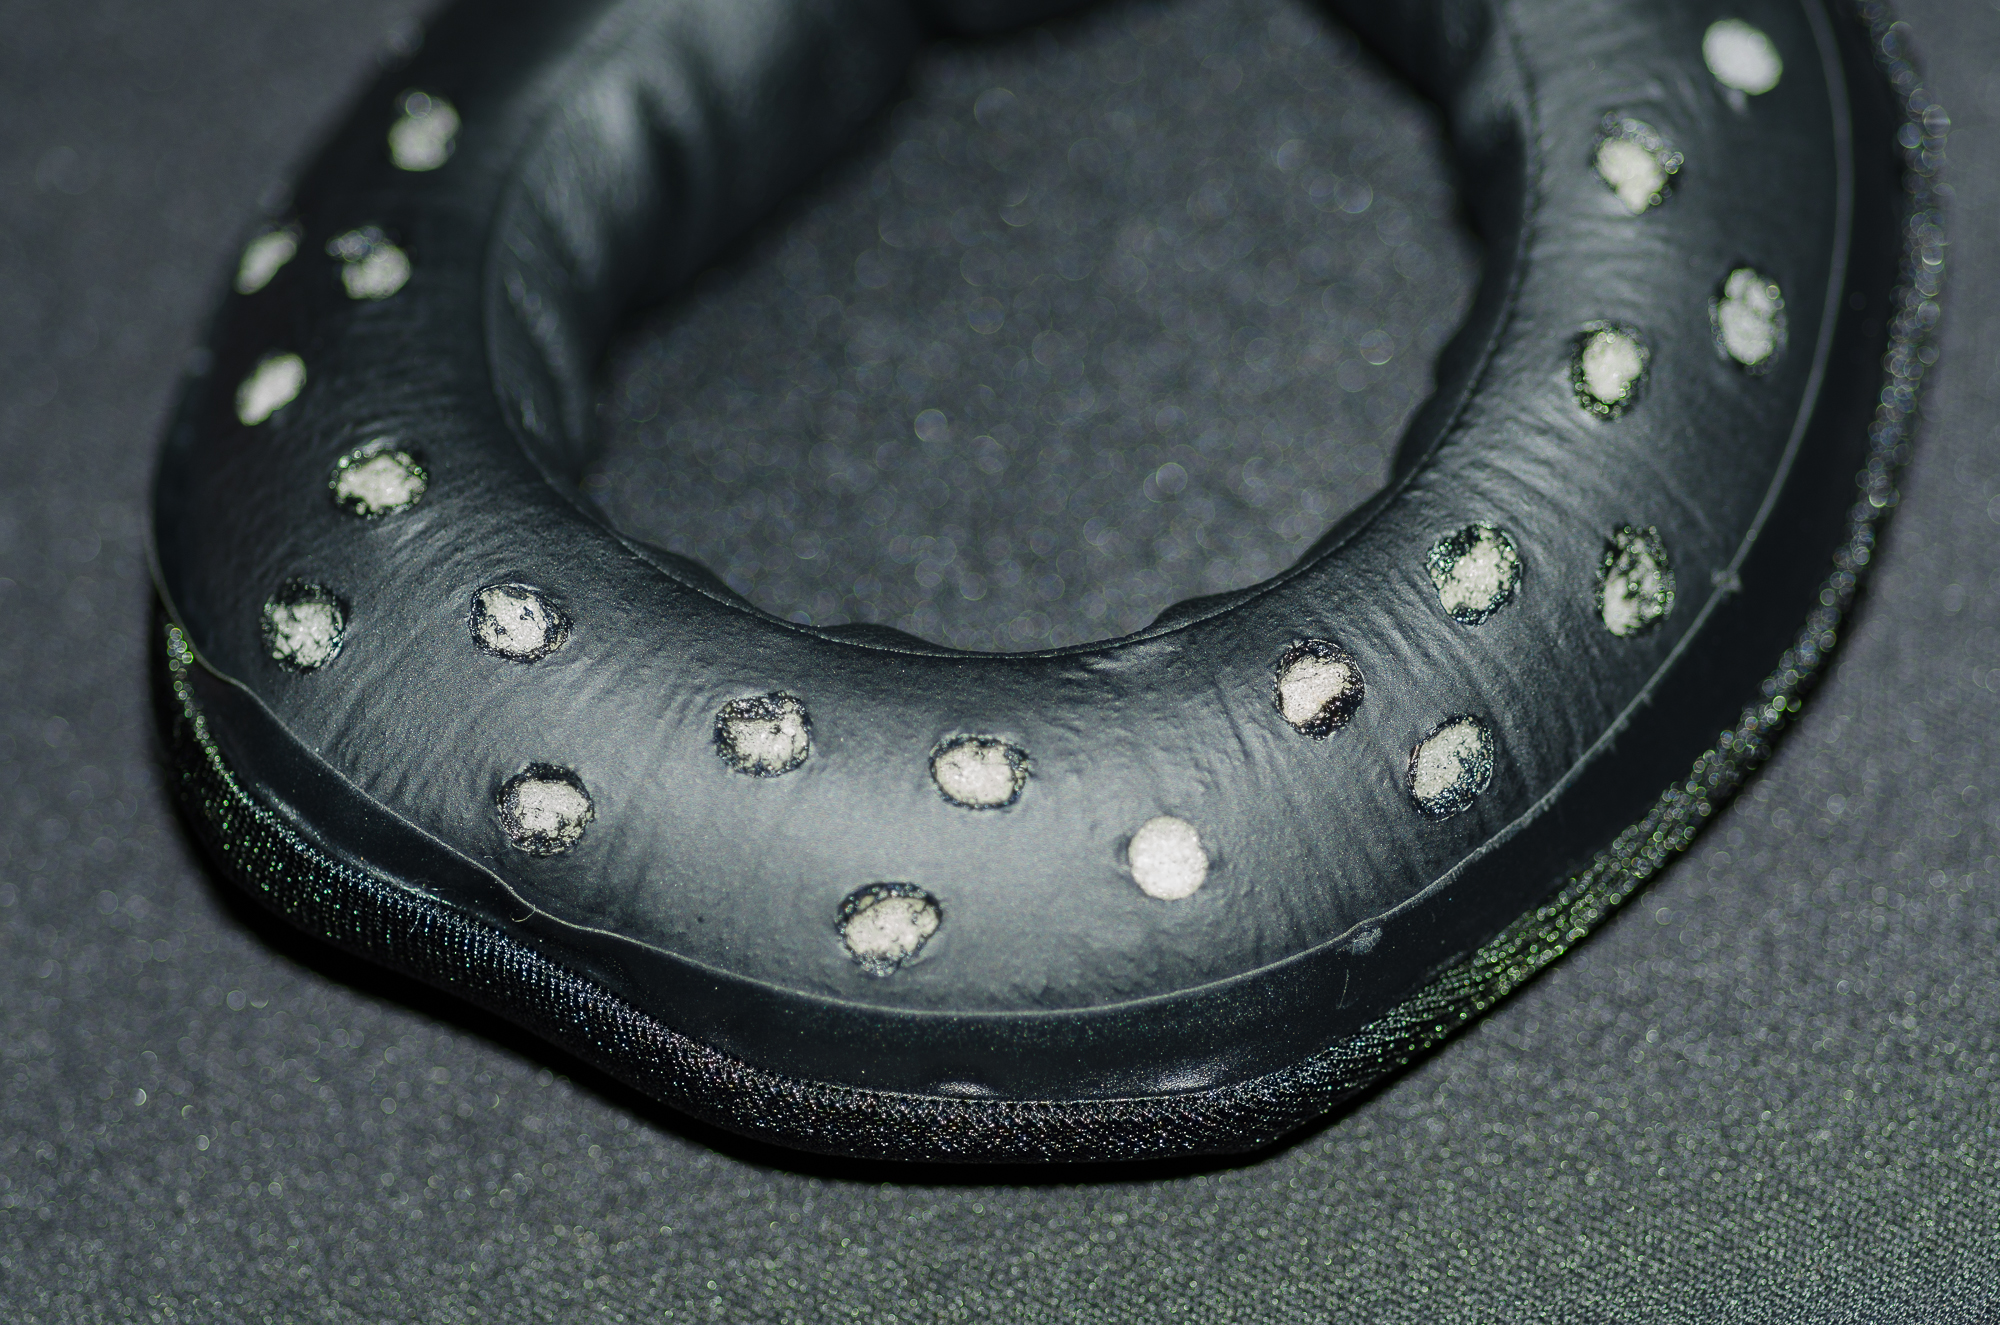
[size=9pt]Another observation I came to have was that the main reason why all the earpad types except the pleathers have great upper end detail extraction and cleanness, was because they are all properly damped to minimize chamber resonance! With both the velour pad types, sound bouncing in the inner opening of the earpads escape through the velour fabric, while in the J$ pads, the sound reflects off the leather but is ultimately absorbed by the huge number of holes bored into the underside of the pads (Fig 1), and absorbed into the earpad foam itself.[/size]
[size=9pt]Fig 1. The multi-hole scheme in the undersides of the J$ Beyer pads used to properly chamber-damp the earpads; inspiration for this mod.[/size]
[size=9pt] [/size]

[size=9pt] [/size]
[size=9pt]And so the lightbulb went up in my head. What if I mod the stock pleathers so that they are more properly damped? Thus this mod was born.[/size]
This version 2 of the Jergpad mod is an evolution upon the first version, as I collected more ideas for modifications, and consolidated old methods to optimize the protocol. The essential goal of this series of modifications is to optimize the sound conducting from the Hifiman drivers to your ears, through tweaks and changes on the Hifiman stock pleather earpads.
Instead of the scatter-brained babble with confusing instructions that was the first version of this mod, I am able to organize my thoughts and split the mod into 4 components here.
- The ‘core’ damping holes mod
- The backvents minimod
- The velour-top mod
- The sub-bass adhesion mod
The first 2 mod components are directly inherited from the first version of Jergpad, but I have refined the methods so that they are 1) less destructive on the earpads being modded, and 2) much, much simpler to understand and carry out (hopefully).
The second 2 mod components have interesting stories.
The velour-top mod came about as I was reading Mad Lust Envy’s complaints about his hate for leather/pleather earpads, and another user harked back to the special earpads that Sennheiser Orpehus used, which had a velour top on a leather base earpad; later another user Beaver316 carried out a similar mod, sewing a piece of felt cut-out onto his pleathers to great effect. Having little to no sewing skills, I had to find an alternative way, and thus this was conceived, and to great effect! This medium-difficulty mod transforms the sound by opening up the imaging and giving the overall sound signature an "out of the head" sense, via the unique ability of the velour to break the seal of the pleathers without negatively impacting the innate tonal balance.
The sub-bass adhesion mod was something I always wanted to try out even before Jergpad v1.0. I always knew that Audeze LCD2/3 earpads were installed by adhering the pads onto the cups with double-sided tape that they provided (video: http://audeze.com/padschange, scroll to the bottom for the video), and the consensus has been that it allowed for optimal bass conduction. I never did it before as it is a semi-permanent change that is a mess to clean up. Eventually trying it though, revealed that it indeed granted a dramatic boost to sub-bass conduction; my HE500s now extend comfortably down to 20Hz (it previously rolled off quite hard by 25 Hz). The fact that it is a semi-permanent mod means it is the last on the list, so that you can choose to do it, or not. I would recommend that you go the extra mile and do it though.
An infograph I made trying to present the goal of the mod:

IMHO slightly south of the "best balance" is nicer and more synergistic with the nature of the planars sound, so the mod is ideal, in that light.
P.S. Other Hifiman ortho owners (e.g. of HE5LE/HE4/HE6) are also welcome to try Jergpad mod. I could only test it on HE400 and HE500 but it would make sense that the improvements are less about synergy, and more about intrinsic improvements to the sonic qualities of the earpads.
Now let’s get to it…
First off, The Preface of the Preface (this is the Preface of version 1 of Jergpad mod where I described why exactly I even bothered, the background story so to speak):
[size=15pt]PREFACE[/size]
[size=9pt] [/size]
[size=9pt] [/size]
[size=9pt] [/size]
[size=9pt]Ever since I got my HE500s two months ago, I have been very bothered that no earpad worked out perfectly for me with them.[/size]
[size=9pt] [/size]
[size=9pt]The stock Hifiman velour pads (with detachable mounting rings) thin out the bass and lower midrange too much and cause the whole tonality to shift toward the upper midrange and treble, giving too much forwardness and glare, and too little body and fullness to the sound signature.[/size]
[size=9pt] [/size]
[size=9pt]The stock Hifiman pleather pads, on the other hand, are almost exactly the opposite; they give an incredibly satisfying full-bodied lower end, tame the treble and upper midrange effectively, resulting in a tonality that renders everything from voices to instruments realistically and without any fatigue or glare. However there is one major downfall with the pleathers – they have a huge amount of chamber resonance in the opening of the earpads and so the HE500 ends up sounding cupped, and have little to no “air”, losing a huge amount of upper end detail extraction, and is almost muffled but not quite.[/size]
[size=9pt] [/size]
[size=7pt]**Quick note: I never kept the foam spacers inside of the stock pleather pads because it 1) compromised the comfort and 2) muddled up the sound considerably into a wonky mess; also it won’t be compatible with this particular mod, so don’t even think about it….just throw it in the garbage right now **[/size]
[size=9pt] [/size]
[size=9pt]This led me to try 2 other pads: vintage Hifiman velour pads (with permanently attached clear brittle plastic mounting mechanism), and the J-Money (J$) Beyerdynamic lambskin earpads. In short, neither gave me exactly what I want still.[/size]
[size=9pt] [/size]
[size=9pt]The vintage velours tame the upper end much better than the new velours, but a large part of the lower end is nonexistent with these pads so the overall sound becomes too light and powerless.[/size]
[size=9pt] [/size]
[size=9pt]The J$’s were the closest to perfect from my experience, where they extracted the most amount of overall detail from the drivers, had a great balance of the full-bodied nature of pleathers and the airiness and openness of the velours, and were just superior earpads in terms of comfort. The thing that persuaded me it was still not quite right was that it retained a lot of the upper mids glare and treble sibilance similar to the new velours, which was no issue with the pleathers and to a lesser degree to the vintage velours.[/size]
[size=9pt] [/size]
[size=9pt]After playing around these four types of earpads for the past couple of weeks, I came to the realization that the unique effortless tonality of the Hifiman pleathers is intrinsic to the foam used in them (a dense foam with a memory-foam-like consistency), and the thickness (which determines how close your ears are to the drivers). This was not replicatable with any of the other pads as they use different types of foams with different thicknesses.[/size]
[size=9pt] [/size]
[size=9pt]Another observation I came to have was that the main reason why all the earpad types except the pleathers have great upper end detail extraction and cleanness, was because they are all properly damped to minimize chamber resonance! With both the velour pad types, sound bouncing in the inner opening of the earpads escape through the velour fabric, while in the J$ pads, the sound reflects off the leather but is ultimately absorbed by the huge number of holes bored into the underside of the pads (Fig 1), and absorbed into the earpad foam itself.[/size]
[size=9pt]Fig 1. The multi-hole scheme in the undersides of the J$ Beyer pads used to properly chamber-damp the earpads; inspiration for this mod.[/size]
[size=9pt] [/size]
[size=9pt] [/size]
[size=9pt]And so the lightbulb went up in my head. What if I mod the stock pleathers so that they are more properly damped? Thus this mod was born.[/size]
This version 2 of the Jergpad mod is an evolution upon the first version, as I collected more ideas for modifications, and consolidated old methods to optimize the protocol. The essential goal of this series of modifications is to optimize the sound conducting from the Hifiman drivers to your ears, through tweaks and changes on the Hifiman stock pleather earpads.
Instead of the scatter-brained babble with confusing instructions that was the first version of this mod, I am able to organize my thoughts and split the mod into 4 components here.
- The ‘core’ damping holes mod
- The backvents minimod
- The velour-top mod
- The sub-bass adhesion mod
The first 2 mod components are directly inherited from the first version of Jergpad, but I have refined the methods so that they are 1) less destructive on the earpads being modded, and 2) much, much simpler to understand and carry out (hopefully).
The second 2 mod components have interesting stories.
The velour-top mod came about as I was reading Mad Lust Envy’s complaints about his hate for leather/pleather earpads, and another user harked back to the special earpads that Sennheiser Orpehus used, which had a velour top on a leather base earpad; later another user Beaver316 carried out a similar mod, sewing a piece of felt cut-out onto his pleathers to great effect. Having little to no sewing skills, I had to find an alternative way, and thus this was conceived, and to great effect! This medium-difficulty mod transforms the sound by opening up the imaging and giving the overall sound signature an "out of the head" sense, via the unique ability of the velour to break the seal of the pleathers without negatively impacting the innate tonal balance.
The sub-bass adhesion mod was something I always wanted to try out even before Jergpad v1.0. I always knew that Audeze LCD2/3 earpads were installed by adhering the pads onto the cups with double-sided tape that they provided (video: http://audeze.com/padschange, scroll to the bottom for the video), and the consensus has been that it allowed for optimal bass conduction. I never did it before as it is a semi-permanent change that is a mess to clean up. Eventually trying it though, revealed that it indeed granted a dramatic boost to sub-bass conduction; my HE500s now extend comfortably down to 20Hz (it previously rolled off quite hard by 25 Hz). The fact that it is a semi-permanent mod means it is the last on the list, so that you can choose to do it, or not. I would recommend that you go the extra mile and do it though.
An infograph I made trying to present the goal of the mod:
IMHO slightly south of the "best balance" is nicer and more synergistic with the nature of the planars sound, so the mod is ideal, in that light.
P.S. Other Hifiman ortho owners (e.g. of HE5LE/HE4/HE6) are also welcome to try Jergpad mod. I could only test it on HE400 and HE500 but it would make sense that the improvements are less about synergy, and more about intrinsic improvements to the sonic qualities of the earpads.
Now let’s get to it…
Jergpad v2.0 modding tutorial
[size=15.0pt]TOOLS NEEDED[/size]

1. Pic of all the tools needed assembled together
- A pair of Hifiman stock pleather pads, with the mounting rings
- A pair of sharp scissors, or xacto knife (any precision cutting tool you are comfortable with)
- A Sharpie marker
- Electrical tape, or duct tape (any kind of thick rubbery tape really)
- (For Parts III & IV) double-sided adhesive tape (thin variety, where the adhesive tape is extremely thin)
- (For Part III) A pair of sacrificial (you will be destroying it) Hifiman stock velour pads, without the mounting rings
- Other basic stuff like pencil/pen/masking tape etc
[size=15.0pt]PROTOCOL[/size]
PART I
CORE PLEATHER DAMPING MODS
- The modifications in this segment dramatically increases the damping factor of the Hifiman pleather earpads, clearing up the midrange, which boosts clarity, imaging, and improves the timbre, taking off the nasty midrange “glare” associated with the stock pads. It is the meat of the Jergpad mod compilation. *inspired by Beyerdynamic stock / J$ earpads* -

2. Remove the mounting ring from under the pleather pads; also be sure to remove the ring of hard foam tucked inside the pleathers (and throw the foam rings away; they negatively impact the sound)

3. Flip the earpads inside out

4. How the earpads look after turning them inside out


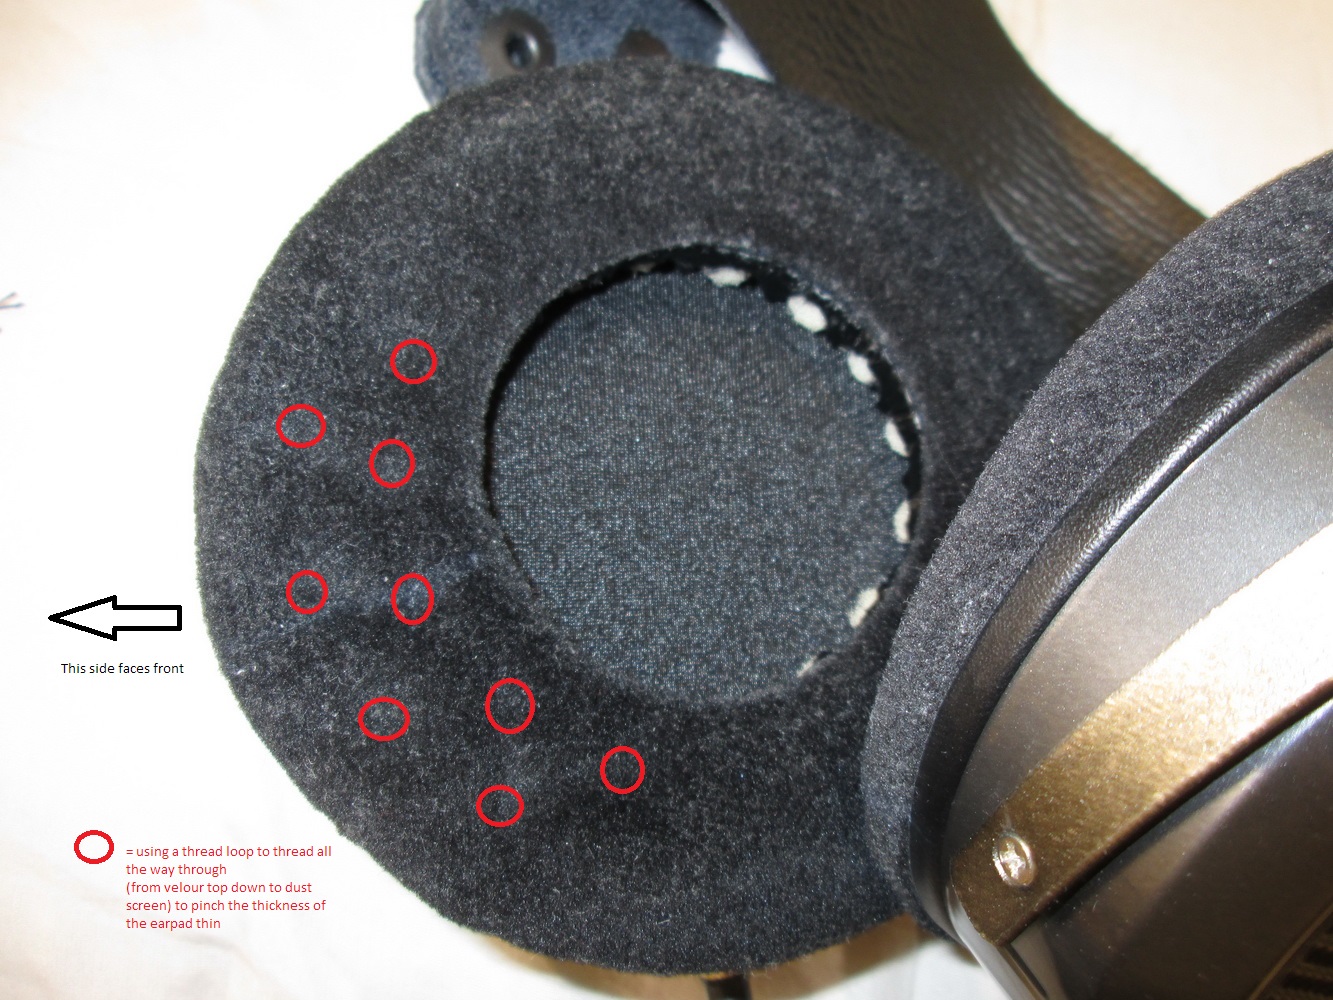
5. Mark out damping hole spots with a sharpie marker (also shown is a rough diagram of how I lay out the holes pattern)

6. Use sharp scissors or knife to cut out the holes (I try to pinch out the part where a hole is to be cut out, and use scissors); this will take a while to do for all the holes

7. Finished cutting the damping holes; trim if necessary to maximize the hole sizes without compromising the integrity of the fabric (overall took me about 15 mins; will probably take you closer 30 mins if not longer, depending on your proficiency with cutting the holes)


8. Unflip the pads so they are not inside-out anymore, and re-insert the plastic mounting rings; using a pencil or pen, mark out the circle where there is the slight indentation of the mounting ring along the outer edges; trim the rubber flap under the earpads along that guideline, so they no longer go over the mounting ring holes (credit to itshot!).
**** DO NOT GET OVERZEALOUS WITH TRIMMING THE RUBBER FLAPS, OTHERWISE THEY WILL NOT PROPERLY RETAIN THE PLASTIC MOUNTING RINGS ANY MORE.
PART II
‘BACK-VENT’ MINIMOD
- The modifications in this segment slightly angle the drivers to the ears while at the same time lifts the earpads from the drivers slightly, allowing for a more centralized focal point with music but also boosting the openness of the sound; for some it also improves comfort as it slightly distances the ears away from touching the drivers. -

9. Make the 4 tape stacks of electrical or duct tape; I do 2x stacks of 7 thick (for the center two stacks) per earpad, and 2x stacks of 5 thick (for the two flanking stacks) per earpad; totalling 48 strips of rectangles of about 1cm x 0.5cm (that’s ½’’ x ¼’’ for Americans) that need to be assembled into these 8 stacks of tape. All in all the stacks are about 1.5mm~2mm (about 1/10'') in thickness.

10. bond the tape stacks onto the mounting rings; again, the center 2 stacks are the thicker 7-layer tape stacks, and the two flanking stacks are the thinner 5-layer tape stacks

11. If you put these earpads onto the headphone now, orientate the pads so that the back vents line up with the yoke screw facing toward the back of the head if you wear the headphones (hence the name of the mod “back-vent”, haha)
Parts I and II pretty much encompass the version 1 of Jergpad mod in a more refined way, and you can stop here in the jergmod; however, I strongly recommend that you go the extra steps (below) to further improve the pads!
Part III will improve imaging and dynamics drastically, while Part IV will give Audeze-like sub-bass extension. Yeah...better do them

PART III
‘VELOUR-TOP’ MOD
- The modifications in this segment improve comfort in two ways: via the velour material, and by giving a slightly farther distance with the ears from the drivers to prevent ear irritation. More importantly, it improves the sound quality by breaking the seal of the pleather material, giving a significantly more open and “out of the head” sound, WITHOUT losing the natural tonal balance of the pleathers/jergpads. Dynamics are improved dramatically also. *inspired by Sennheiser HE90 earpads / beaver316* -
*note: steps 15-17 can be alternatively done by sewing the fabric onto the pleathers, if your sewing skills are good. In fact, it is the preferred method.

12. Score / use tape as outline on the velour pads for precision cutting; basically the inside rim cutting will be along the inner seam of the velour fabric contacting the underside rubber material, while the outer cut will be along approx the middle of the vertical portion of the velour fabric, as shown in the photo

13. Cutting into the velours


14. How the cannibalized velour cutouts look like, with a ruler showing the dimensions


15. Add double-sided tape to backsides of the velour cutouts; trim the inside and outside edges of the tape to have them in line with the edges of the velour cutouts

16. Peel away the covers for the double-sided tape


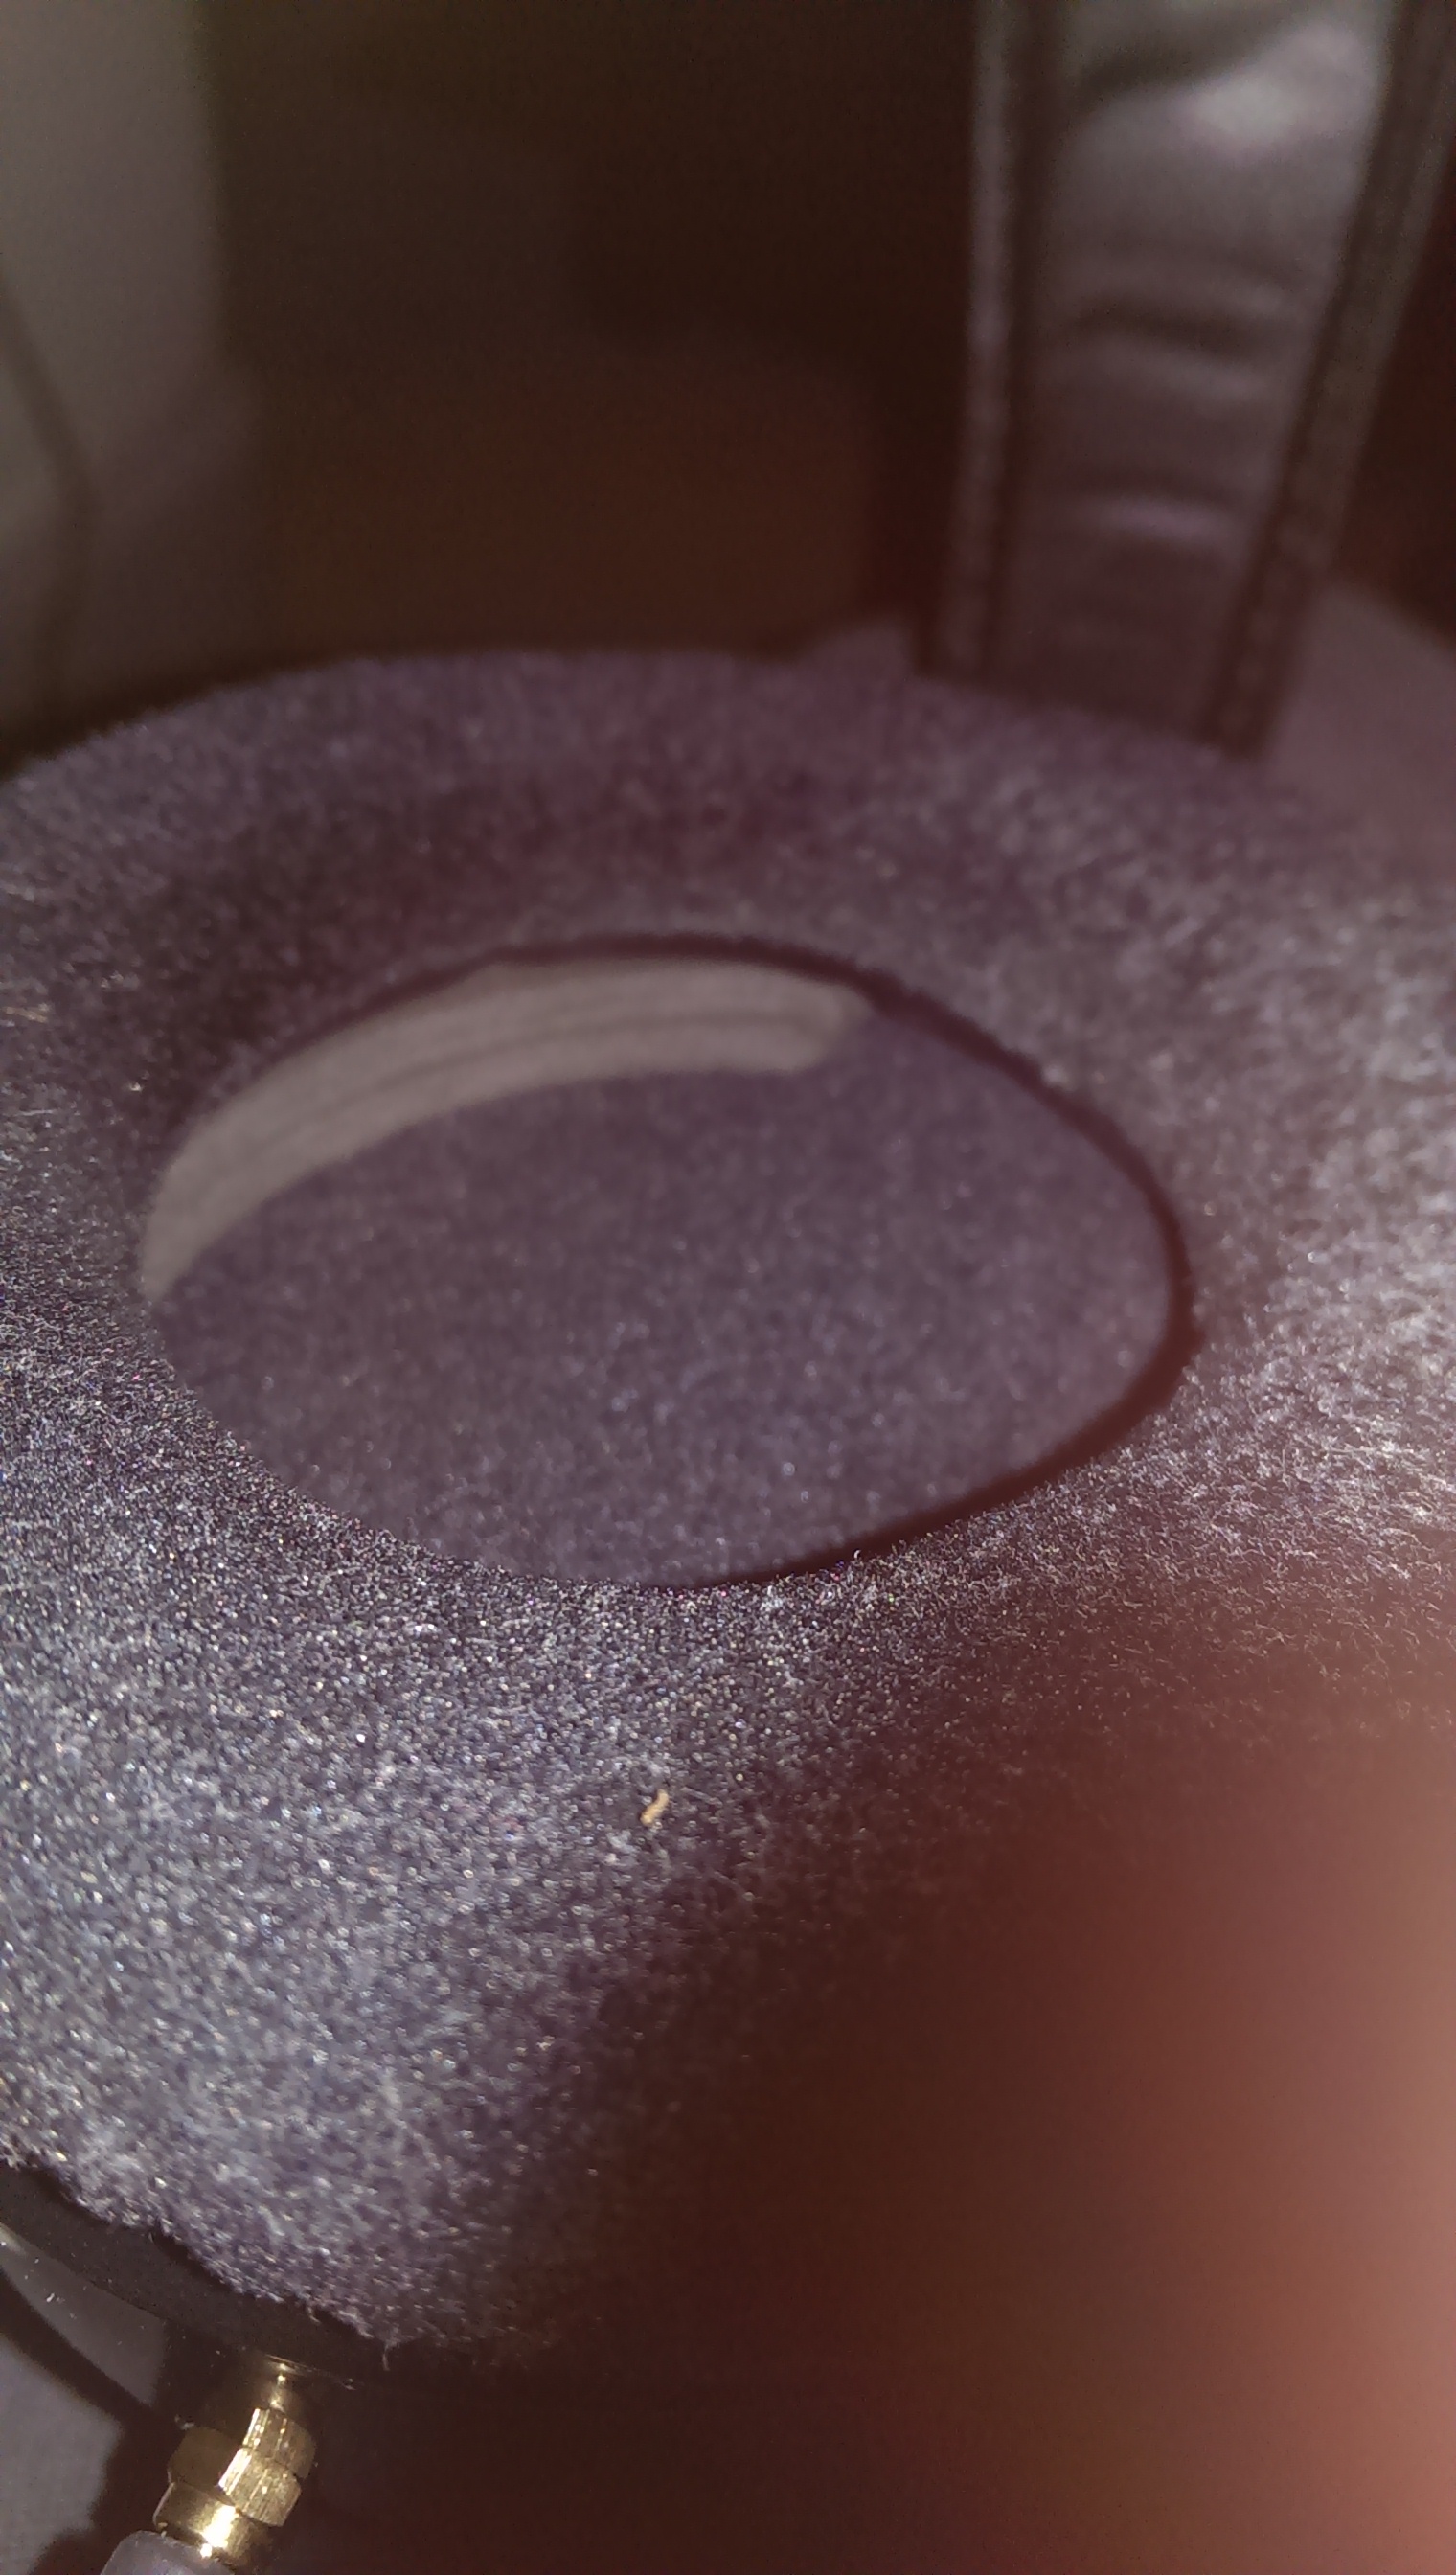
17. Adhere carefully onto the jergpads; trim the edges of the velour top where necessary
PART IV
PAD-CUP ADHESION ‘SUB-BASS’ MOD
- The modifications in this segment have one single goal: to improve sub-bass conduction from the drivers to the earpads. The adhesion of the mounting ring base to the headphone cups with this mod forces full conduction of bass in the range of 15-30 Hz, thus vastly improving sub-bass extension. It is by far the most discreet part of the Jergpad mod, and allows for very secure bond between the earpad and the headphones (some owners complain about stock pads shifting around feeling cheap). *inspired by Audez’e earpad installation methods* -

18. Trace out the double-sided tape with pen, for where they will bond to the undersides of the mounting rings; do THREE per earpad, leaving ¼ of each earpad mounting ring for the backvent mod tape stacks

19. How the double-sided tape looks like once trimmed to the trace pattern

20. Tape the tape cutouts onto the mounting rings, peel off the covers

21. Score out the holes of the mounting ring through the adhesive double-sided tape, and expand those holes with a tool

22. Install the pads onto headphone cups carefully (making sure to line up the backvent tape stacks I mentioned in Part II), and press for the undersides to bond well
[size=15.0pt]RESULT[/size]

23. Finished product with all the optional steps done.
HE500 with the full jergpad mod becomes tonally perfect, taking on a slightly romantic sound where bass, midrange, and treble are in just about the right balance with each-other. Imaging is very natural and expands out of the head, and clarity is stellar. Not much more to say really, I just can’t pick on the resulting sound at all, everything is in its right place.
HE400 with the same jergpad configuration also takes on a new life in its sound, the best way to describe its sound would be that it turns very close into how HE500 with velour pads sounds like, except with a punchier bass and slightly more aggressive treble (though nowhere near as aggressive as with velour pads). The biggest factor is that the midrange is pushed forward, and treble is pushed back, and genres like female vocals become much more enjoyable and natural-sounding with this new tonal balance.
1. Pic of all the tools needed assembled together
- A pair of Hifiman stock pleather pads, with the mounting rings
- A pair of sharp scissors, or xacto knife (any precision cutting tool you are comfortable with)
- A Sharpie marker
- Electrical tape, or duct tape (any kind of thick rubbery tape really)
- (For Parts III & IV) double-sided adhesive tape (thin variety, where the adhesive tape is extremely thin)
- (For Part III) A pair of sacrificial (you will be destroying it) Hifiman stock velour pads, without the mounting rings
- Other basic stuff like pencil/pen/masking tape etc
[size=15.0pt]PROTOCOL[/size]
PART I
CORE PLEATHER DAMPING MODS
- The modifications in this segment dramatically increases the damping factor of the Hifiman pleather earpads, clearing up the midrange, which boosts clarity, imaging, and improves the timbre, taking off the nasty midrange “glare” associated with the stock pads. It is the meat of the Jergpad mod compilation. *inspired by Beyerdynamic stock / J$ earpads* -
2. Remove the mounting ring from under the pleather pads; also be sure to remove the ring of hard foam tucked inside the pleathers (and throw the foam rings away; they negatively impact the sound)
3. Flip the earpads inside out
4. How the earpads look after turning them inside out
5. Mark out damping hole spots with a sharpie marker (also shown is a rough diagram of how I lay out the holes pattern)
6. Use sharp scissors or knife to cut out the holes (I try to pinch out the part where a hole is to be cut out, and use scissors); this will take a while to do for all the holes
7. Finished cutting the damping holes; trim if necessary to maximize the hole sizes without compromising the integrity of the fabric (overall took me about 15 mins; will probably take you closer 30 mins if not longer, depending on your proficiency with cutting the holes)
8. Unflip the pads so they are not inside-out anymore, and re-insert the plastic mounting rings; using a pencil or pen, mark out the circle where there is the slight indentation of the mounting ring along the outer edges; trim the rubber flap under the earpads along that guideline, so they no longer go over the mounting ring holes (credit to itshot!).
**** DO NOT GET OVERZEALOUS WITH TRIMMING THE RUBBER FLAPS, OTHERWISE THEY WILL NOT PROPERLY RETAIN THE PLASTIC MOUNTING RINGS ANY MORE.
PART II
‘BACK-VENT’ MINIMOD
- The modifications in this segment slightly angle the drivers to the ears while at the same time lifts the earpads from the drivers slightly, allowing for a more centralized focal point with music but also boosting the openness of the sound; for some it also improves comfort as it slightly distances the ears away from touching the drivers. -
9. Make the 4 tape stacks of electrical or duct tape; I do 2x stacks of 7 thick (for the center two stacks) per earpad, and 2x stacks of 5 thick (for the two flanking stacks) per earpad; totalling 48 strips of rectangles of about 1cm x 0.5cm (that’s ½’’ x ¼’’ for Americans) that need to be assembled into these 8 stacks of tape. All in all the stacks are about 1.5mm~2mm (about 1/10'') in thickness.
10. bond the tape stacks onto the mounting rings; again, the center 2 stacks are the thicker 7-layer tape stacks, and the two flanking stacks are the thinner 5-layer tape stacks
11. If you put these earpads onto the headphone now, orientate the pads so that the back vents line up with the yoke screw facing toward the back of the head if you wear the headphones (hence the name of the mod “back-vent”, haha)
Parts I and II pretty much encompass the version 1 of Jergpad mod in a more refined way, and you can stop here in the jergmod; however, I strongly recommend that you go the extra steps (below) to further improve the pads!
Part III will improve imaging and dynamics drastically, while Part IV will give Audeze-like sub-bass extension. Yeah...better do them
PART III
‘VELOUR-TOP’ MOD
- The modifications in this segment improve comfort in two ways: via the velour material, and by giving a slightly farther distance with the ears from the drivers to prevent ear irritation. More importantly, it improves the sound quality by breaking the seal of the pleather material, giving a significantly more open and “out of the head” sound, WITHOUT losing the natural tonal balance of the pleathers/jergpads. Dynamics are improved dramatically also. *inspired by Sennheiser HE90 earpads / beaver316* -
*note: steps 15-17 can be alternatively done by sewing the fabric onto the pleathers, if your sewing skills are good. In fact, it is the preferred method.
12. Score / use tape as outline on the velour pads for precision cutting; basically the inside rim cutting will be along the inner seam of the velour fabric contacting the underside rubber material, while the outer cut will be along approx the middle of the vertical portion of the velour fabric, as shown in the photo
13. Cutting into the velours
14. How the cannibalized velour cutouts look like, with a ruler showing the dimensions
15. Add double-sided tape to backsides of the velour cutouts; trim the inside and outside edges of the tape to have them in line with the edges of the velour cutouts
16. Peel away the covers for the double-sided tape
17. Adhere carefully onto the jergpads; trim the edges of the velour top where necessary
PART IV
PAD-CUP ADHESION ‘SUB-BASS’ MOD
- The modifications in this segment have one single goal: to improve sub-bass conduction from the drivers to the earpads. The adhesion of the mounting ring base to the headphone cups with this mod forces full conduction of bass in the range of 15-30 Hz, thus vastly improving sub-bass extension. It is by far the most discreet part of the Jergpad mod, and allows for very secure bond between the earpad and the headphones (some owners complain about stock pads shifting around feeling cheap). *inspired by Audez’e earpad installation methods* -
18. Trace out the double-sided tape with pen, for where they will bond to the undersides of the mounting rings; do THREE per earpad, leaving ¼ of each earpad mounting ring for the backvent mod tape stacks
19. How the double-sided tape looks like once trimmed to the trace pattern
20. Tape the tape cutouts onto the mounting rings, peel off the covers
21. Score out the holes of the mounting ring through the adhesive double-sided tape, and expand those holes with a tool
22. Install the pads onto headphone cups carefully (making sure to line up the backvent tape stacks I mentioned in Part II), and press for the undersides to bond well
[size=15.0pt]RESULT[/size]
23. Finished product with all the optional steps done.
HE500 with the full jergpad mod becomes tonally perfect, taking on a slightly romantic sound where bass, midrange, and treble are in just about the right balance with each-other. Imaging is very natural and expands out of the head, and clarity is stellar. Not much more to say really, I just can’t pick on the resulting sound at all, everything is in its right place.
HE400 with the same jergpad configuration also takes on a new life in its sound, the best way to describe its sound would be that it turns very close into how HE500 with velour pads sounds like, except with a punchier bass and slightly more aggressive treble (though nowhere near as aggressive as with velour pads). The biggest factor is that the midrange is pushed forward, and treble is pushed back, and genres like female vocals become much more enjoyable and natural-sounding with this new tonal balance.
Jergpad v1.0 measurements (courtesy of Purrin)
Measurements; much thanks to Purrin
1. FR; green = jergpads, blue = velour

2. CSD of jergpads v1.0

3. CSD of velours

(Note that these measurements are with v1 of jergpad!!!!! It does NOT include the changes from Parts III and VI of the current mod version)
Overall much more even and full upper end, less peaks / dips, sibilants would thus be tamed as reflected by my subjective impressions.
Things that are not readily shown by the measurements are that the midrange is much thicker and more satisfying with the jergpads, without the glare/ringing of stock pleathers.
Have fun modding!

1. FR; green = jergpads, blue = velour
2. CSD of jergpads v1.0
3. CSD of velours
(Note that these measurements are with v1 of jergpad!!!!! It does NOT include the changes from Parts III and VI of the current mod version)
Overall much more even and full upper end, less peaks / dips, sibilants would thus be tamed as reflected by my subjective impressions.
Things that are not readily shown by the measurements are that the midrange is much thicker and more satisfying with the jergpads, without the glare/ringing of stock pleathers.
Have fun modding!
") . I am all thumbs when it comes to this and I just ordered a pair of HE-400s. Oh well.
. I am all thumbs when it comes to this and I just ordered a pair of HE-400s. Oh well.

