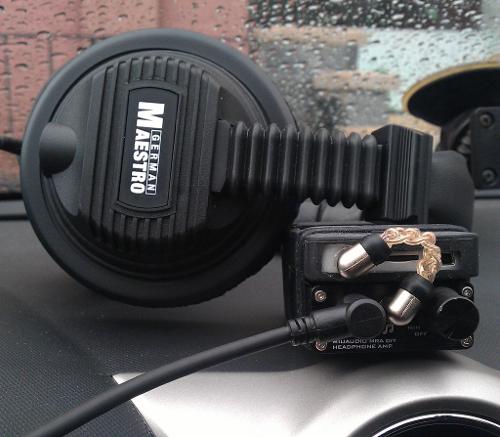
miuaudio MRA DIY Amplifier
Review and Build Log by TrollDragon
Back in February I contacted Ivan Lai of Miu-Tech in Hong Kong to review a few of their products. I was generously sent a pair of amplifiers for review, a nice little Do It Yourself portable and a Vacuum Tube Hybrid desktop. This review is for the MRA DIY amplifier kit, it is an M47 style amplifier with the second opamp on each channel configured as a voltage follower providing more current for a low impedance output.
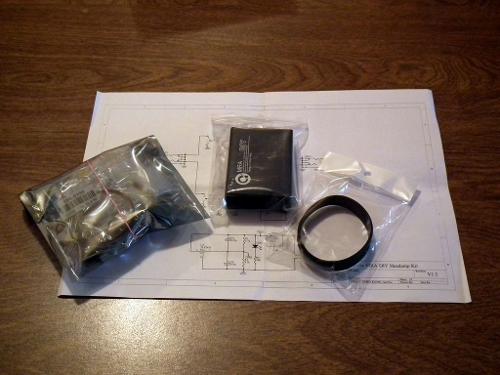
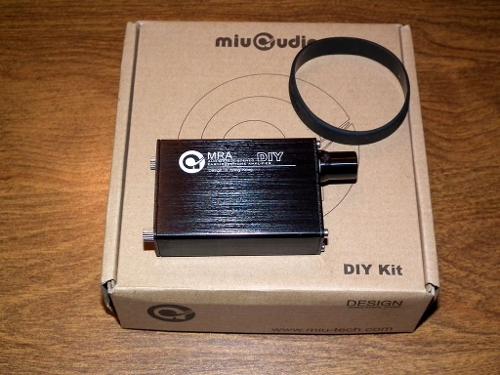
Upon opening the box you are presented with a schematic of the amplifier, a static bag full of components, the case parts and a silicon band to attach the amplifier to you source.
The amplifier comes with absolutely no instructions other than the schematic, the parts are well labelled and separated into small zip lock type bags. This is very helpful as it allows you to easily sort and retrieve the required components quickly throughout the build process.The printed circuit board is a quality made board with excellent traces and a great silk screening providing component layout and polarity. This is the board with the gain switch and all the resistors soldered in place.
*Note R1 & R2 were removed from the board after the picture was taken.
I recommend putting all the resistors on the board first, they are a small component that requires one leg bent over 180° to accommodate vertical mounting. The resistors are the most time consuming part of the build and install much easier when there is nothing else on the board. The board was very easy to populate and solder, those with previous kit building experience could quickly put this amplifier together in a half an hour. Those without kit experience or basic electronics knowledge need to be aware of the correct orientation of the electrolytic capacitors, opamps, rail splitter and LED.There are a few issues that should be addressed before the board is fully populated.
- The Rail Splitter circuit. The opamps in this audio amplifier require a positive and negative voltage to operate. This can be achieved with the included TLE2426 Rail Splitter or the pair of 4.7K resistor's as voltage dividers.

The schematic of amplifier shows both options in effect at the same time which is strange, in every schematic I have seen of a TLE2426 virtual ground, the resistors R1 & R2 are not installed. So I did not bother installing them on the board. If anyone knows a reason why the resistors should be there then please let me know.
- The Potentiometer. There is a little tang on the bottom of the potentiometer to stop rotation when it is chassis mounted. If this tang is left intact, the front cover will not install flush with the case.

Grab this tang straight on with a pair of pliers and just bend down and away from the shaft; it will snap off cleanly.
- The Case LED When you mount the case LED on the bottom of the board, bend the pins of the LED through the mounting holes so that it sits flush on the edge of the board with no overhang. If it sticks out past the board the front panel will not mount flush with the case properly. Also install the LED before you install the input jack, trim the legs that come up through the board as flush as you can. The edge of the input jack mounts directly overtop of one of the leads and if you leave that lead long the input jack will not mount flush or line up with the hole in the front panel mount.
After the board is fully assembled it is time to test the amplifier for functionality before you put it into the case. It's easier to repair any mistakes if something is wrong.
The easiest way to mount the board in the case is to push the front panel onto the volume control and audio jacks, then slide the board into the case making sure it lines up with the little channel on the sides of the case. If you try to install the board after the front panel is screwed on, it is just about impossible to get the two audio sockets lined up and pushed through the holes.
Operation & Results.
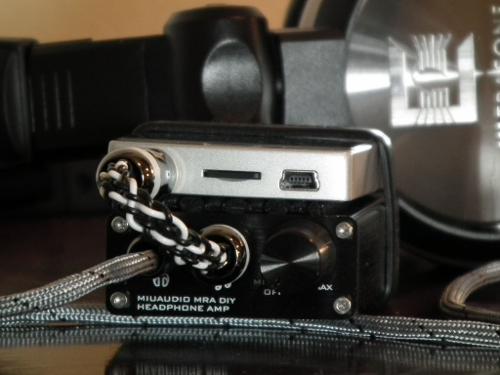
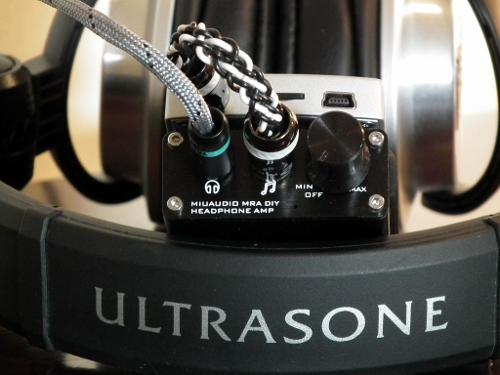
I removed the two thumb screws on the back of the case to install a brand new Energizer 9V battery. Turning the unit on, I measured an average 12mA of drain on low gain with a normal listening level of about half way on the volume control, this should give you a good bit of life out of a standard 9V battery. The audio sockets click nicely and hold tightly onto any TRS jack you plug into them. It is good to see quality audio sockets included with the kit, the sockets on my FiiO E11 are starting to get quite sloppy from use. The volume control is very smooth and free from any wiper static, the on off switch attached has a positive click and a solid feel to it.Using the Ultrasone HFI-780's with low gain on the MRA and the Colorfly C3 as a source.
Sound & Impressions
Headphones tested:- German Maestro GMP 8.300 D Professional (300Ω)
- beyerdynamic DT880 Pro (250Ω)
- Ultrasone HFI-780 (35Ω)
- JVC HA-S500z (32Ω)
Sources used:
- Colorfly C3 (Headphone Out)
- FiiO X3 (Line Out)
The MRA DIY amplifier has a very nice clean sound and black background with the KIA 4559P Bipolar Dual opamps supplied in the kit. You can change out the stock opamps with many other popular opamps. The LME49860, LME49880, LME49720, LM4562, OPA2107 and the ever so popular AD8620 were all tried in place of the stock 4559P's with very similar results. The AD8620 was the only one provided a nice crisp sound to the amplifier over the stock opamps, the others all sounded very similar to the 4559P's except for the LME49880 which distorted because of too low of a supply voltage.
Some of the above opamps are not utilized or run within proper design specifications for this amplifier and were tried on a whim.
The stock opamps were put back at the end of the test as they do sound very good.
Comparison to the FiiO E11 amplifier gave very good results. I connected the FiiO X3's Line Out to both the E11 and MRA inputs with a DIY splitter, hooked up a headphone switch to both outputs and played quite a few test tracks. Using the headphone switch I could easily and quickly jump between both amplifiers for a sound comparison. Matching the volume as best as you are able to by ear with the DT880's, I found it very surprising that both amplifiers actually sound identical at a moderate listening level. Once the MRA got up to about 80% of maximum volume I started to notice distortion that was not there in the E11, I figure that the MRA could not provide enough voltage swing for the DT880's and both amplifiers were on high gain. I didn't try any other opamps in this configuration as the DT880's were tried just to see if they would work and they did. This was not an optimal setup as the DT880's are not a portable headphone and really shine when driven from an OTL tube amplifier.
A different story for the HFI-780's though, switching the amplifiers back to low gain I tested out some EDM tracks, again the amplifiers sounded identical and this time I could not get the MRA to distort without going deaf first. Now if the MRA just had a bass boost is would have been nice to compare that with the E11's as well.
My time using the MRA DIY amplifier out and about were with the GMP 8.300 D's and the low output Colorfly C3, even though the GMP's are 300Ω, they are very easy to drive and the amplifier didn't struggle with them at all or distort. I find the 8.300 D's to be a nice, neutral, closed headphone very similar to the sound of the DT880's.
Conclusion and Recommendation
This is a DIY amplifier kit for someone who wants an easy project that has excellent results in the end. Pair it with a $10 soldering iron and it makes a perfect gift for that budding Audiophile who has an interest in electronics and audio, the enjoyment they will receive from using an amplifier that they built themselves is a great thing.I highly recommend this amplifier to anyone who wants a kit that looks nice, has a great sound and is very easy to build. I really enjoyed working with and building this amplifier. The miuaudio MRA DIY kit is available for a very reasonable $42USD from the Miu-Tech Store.
I would like to thank Ivan Lai for the review sample and to thank you for taking the time to read this review.
Constructive criticism is always welcome.
TrollDragon


