Xiansheng 708B headphone tube amp
Jan 18, 2007 at 9:41 AM Post #287 of 415
Quote:

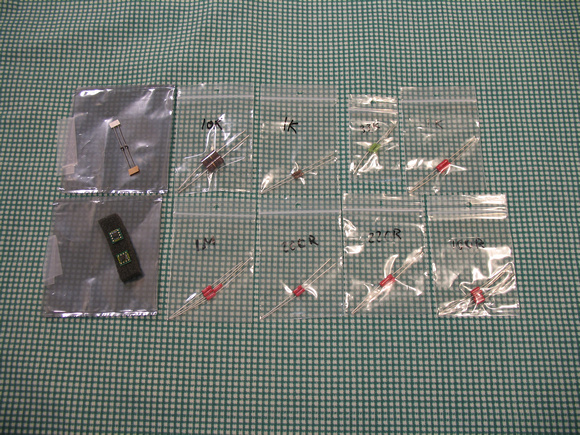
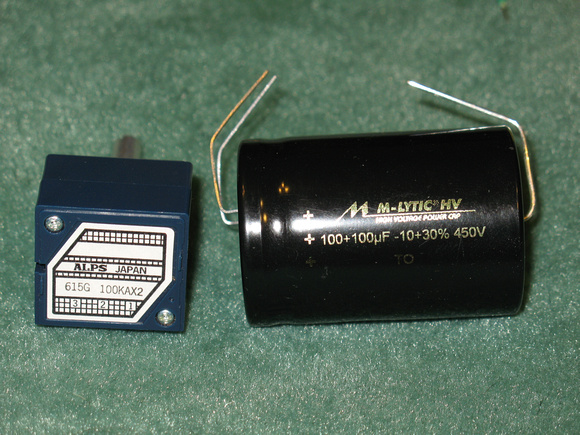
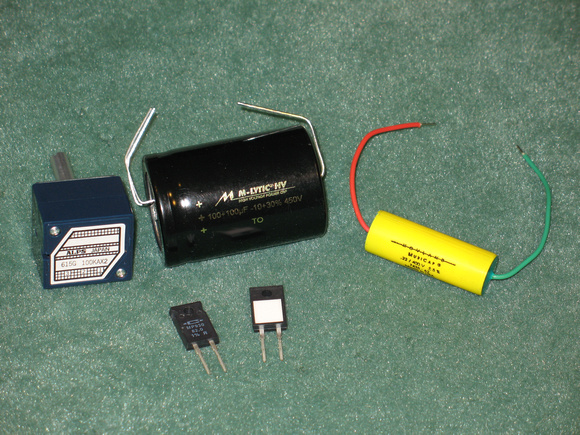
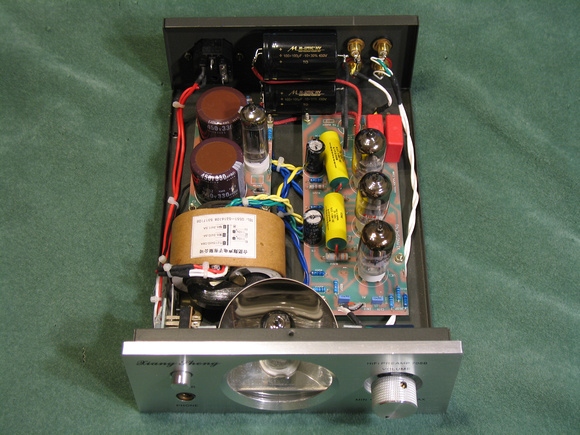
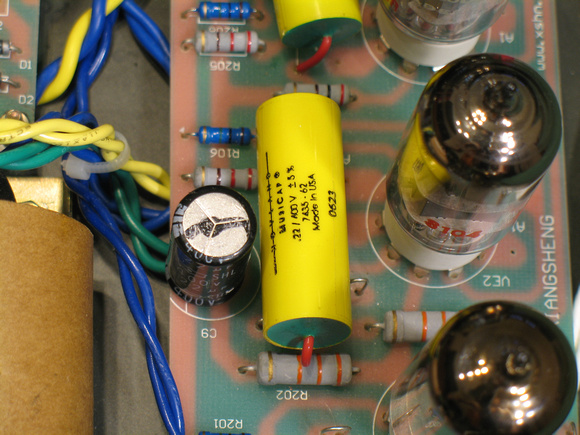
Originally Posted by dcheming /img/forum/go_quote.gif
Thanks for getting this for us zer061zer0!

Well there's definitely a few differences from my amp. Many of the component numbers are different. This 220V version uses 0.47uF signal caps instead of the 0.22uF ones that the 120V version uses, as zer061zer0 already verified for us. The HP output caps are bigger in this schematic and they are also shown being bypassed.

The most interesting difference is that the two resistors that set the operating points of the output stage (G2a,b) are significantly different. I downloaded the trial version of PSPICE last night with the intention of trying to simulate this amp. The Headwize article on optimizing the very similar Morgan Jones Amp using PSPICE is fascinating and I wanted to follow the same path for the 708B to see if it could benefit from some fine tuning as well. Unfortunately the 708 is too big for the trial version to allow.
frown.gif
There's a slight chance that I can get access to the full version of PSPICE through my school so there's still a possibility.

zer061zer0, could you verify the values of R7 and R8 in your amp for me please? Thanks again for obtaining this for us to use.


No problem on th schematics..
I cannot really understand the symbols anyway, i will check out the resistors value at R7 and R8, i suspect its the ones that i reaplce wrongly the last time.

I will check out and let u guys know asap..
 
Jan 19, 2007 at 12:25 AM Post #290 of 415
Here's the same schematic cleaned up, but with the part numbers and values for the 120V version.

xs708bschematic120vaudilq8.jpg


The values in red are where they differ between the two versions. However, zer061zer0 has the 220V version, but has the same parts numbers as the 120V version. Maybe that schematic they emailed you is old or from the 708A version?

Marcus, due to the different part numbers in the original schematic, the two resistors that I was asking you to please check for me on your amp would be R104 and R105 instead of R7 and R8. Thanks.
 
Jan 19, 2007 at 2:09 AM Post #291 of 415
I got my parts in today. I made a stupid mistake though and ordered the wrong darn resistors. Not only were they the wrong ones for being rated at 30 watts, but I also misread the value and order the 82 ohm ones instead of 82k ohms.
blink.gif


Also, those Mundorf caps are HUGE! They're even larger than the power supply's 330uF-400V caps!!!
eek.gif


I think I'm going to have to pull the 0.22uF preamp output caps out to position one of the Mundorf's there, then position the other one towards the rear of the chassis, next to the RCA jacks. I'm never going to use this amp as a preamp, and I already have plans to make the "pre-out" jacks into another pair of inputs, so no great loss there.

The 0.22uF Hovlands and ALPS shouldn't be much of a problem, however.

Man, haven't I gotten myself into a heap of trouble this time! LOL
rolleyes.gif


p930795246-3.jpg


p421458979-3.jpg


p513813135-3.jpg


And the stupid mistake (2 mistakes in one, actually!)...
p336516344-3.jpg
 
Jan 19, 2007 at 2:33 AM Post #292 of 415
"I made a stupid mistake though and ordered the wrong darn resistors."

In the mean-time while you're going to be working in your amp just use something around 25KΩ or so with some jumper wires to drain the big filter caps.


"those Mundorf caps are HUGE!"

Dam, they are a lot bigger than what I had visualized!
blink.gif
Well, do you plan on taking out the front tube/reflector assembly? If so then you could mount the Mundorfs side by side in that area easily and just run the wire from the audio board to them and then on to the nearby jack. I'm not sure if this is an ideal way to hook up output caps, but you're going to have to use some wire either way and at least mounting them up front would make it equal lengths of wire as well as being laid out cleaner. Just think, you could show off your nice pair of Mundorfs in that window! You could use some blue LEDs to light up the front of them.
biggrin.gif


"Man, haven't I gotten myself into a heap of trouble this time!"

Nah, just take your time. If you can hold yourself back, I would suggest doing this in steps to see how each individual part affects the sound. It's great that your parts came in just in time for the weekend!
cool.gif
I'll be home this whole weekend so if you got any questions are could use a reference photo just ask. Have fun!
 
Jan 19, 2007 at 5:12 AM Post #293 of 415
Yeah, I'm not sure how I'm going to approach this yet.

Hate to say it, but I kinda like that tube up front in the window. I guess it's the cheesiness in me, I don't know. BUT I also don't like it due to the fact that it's taking up valuable room and power, and producing unwanted heat.

Maybe I'll take it out, put the Mundorfs up there like you suggested, and leave the orange LEDs along them to light them up.

With all the radios my father has to work on right now, it's going to be tough getting my amp in for him to work on. If he's willing and able to get to it this weekend (and I really hope he is), then I'm just going to have him do everything at once. There's no telling the next time he'll be able to work on it, so I better not push my luck.

And thanks for your offer. If I've got any questions, I'll be sure to shoot you a message this weekend.

Thanks again!
wink.gif
 
Jan 21, 2007 at 10:07 PM Post #294 of 415
Well, she's out of the shop and back up and running!

My father noticed that those 82k resistors that you (Derek) used were wired in parallel, so the total coming to 41k for both caps. He decided to put a single 68k-2W resistor in there instead (since the Caddocks I got are useless, thanks to me), tucked back behing the PS.

The Hovlands went in without any problems, as did the ALPS pot, minus the small enlargement of the "shaft" hole and new small hole for that little tab thingie to keep the pot from rotating.

The huge Mundorfs actually were fairly easy to install as well. My father decided to stack them up against the rear of the chassis, and use some cloth covered, solid core wire for the connections, and industrial strength double-sided tape.

As for changes in sound, the soundstage is much more vivid and wide. The top end is still extended, but the quality of it is much better, smoother and cleaner. The midrange seems a bit fuller and warmer, with a bit more depth. The bass is still on the thin-ish side, but is getting better and deeper the more I listen. In fact, just in the past 40 minutes of playing, the bass is getting a little more pronounced. It's still very tight and controlled.

One kind of weird thing that I've noticed is that I now have to turn the volume control up to around the 11:30 position to get to the same output level as the original amp set at about 9 o'clock. I don't know if that has to solely do with the ALPS, or because of the new caps, or all three.

The B+ is measured at 247v. With that 68k resistor in place, the voltage drops from 247v to 50v in about 20 seconds or so after shut down, then drops from 50v to 0v in about another minute or so. The resistor barely gets warm to the touch, which is a good thing. It's an oldie, but goodie!

And now, for some juicy pictures! LOL I'll take some better pics once the camera batteries are charged back up.

p828184833-3.jpg


p544632106-3.jpg


p647735925-3.jpg


p658182283-3.jpg


p683945256-3.jpg
 
Jan 22, 2007 at 1:15 AM Post #295 of 415
"Well, she's out of the shop and back up and running!"

Nice! The way you guys mounted the Mundorf ecaps seems like the way to go. They fit perfect in that spot and the double-sided tape will provide a little bit of vibration isolation.


"My father noticed that those 82k resistors that you (Derek) used were wired in parallel, so the total coming to 41k for both caps."

Yeah, he's right with the bleeder resistors being in parallel and thus equaling 41K. At 250V they will dissipate ~0.76W each so I will still be okay.


"The Hovlands went in without any problems, as did the ALPS pot, minus the small enlargement of the "shaft" hole and new small hole for that little tab thingie to keep the pot from rotating."

Enlarging the shaft hole and drilling that little hole for the tab is probably the hardest single mod to do in this amp. As long as you have the right tools it shouldn't be too bad though.


"As for changes in sound, the soundstage is much more vivid and wide. The top end is still extended, but the quality of it is much better, smoother and cleaner. The midrange seems a bit fuller and warmer, with a bit more depth. The bass is still on the thin-ish side, but is getting better and deeper the more I listen. In fact, just in the past 40 minutes of playing, the bass is getting a little more pronounced. It's still very tight and controlled."

Glad to hear that the soundstage has improved. Since you mention that the top end is still extended and cleaner you probably won't have to worry about bypassing the Mundorfs. As you said, give 'em time to burn in before judging the bass.


"One kind of weird thing that I've noticed is that I now have to turn the volume control up to around the 11:30 position to get to the same output level as the original amp set at about 9 o'clock."

That is weird. There was no difference in the volume when I swapped in the ALPS. It was the same volume at the same rotation compared to the stock pot, but of course much better channel balance. The caps wouldn't cause this either. I had to run a ground to the case to stop the hum when I put in the ALPS. Do you have any hum now?

Do you have any of the lead wire left from cutting the leads shorter on the Hovland or Mundorf caps? If so this would make a nice little jumper to replace that stock steel one.

Nice pics BTW.
 
Jan 22, 2007 at 5:19 PM Post #296 of 415
Hey Derek,

Yeah, I like the way he decided to mount the Mundorfs, too. At least that way the leads aren't strung all the way to the front, and the caps are sort of out of the way.

Funny how you said that about drilling the volume pot hole larger. My father said it was going to be a PITA and would take a little while. I went in the kitchen to get a drink for the both of us, and when I came back out, he had already drilled both holes and had the ALPS mounted! It couldn't had taken him any more than a minute or two tops! LOL

The bass does seem to be getting a little louder and deeper, since I've had it running non-stop since yesterday around 5pm. I've tried both my Sony DVD/SACD player with the Signal Cable Analog Two's and an older Sony CDP-397 CD player through Cardas Crosslink 1's. The bass output and quality is the same, so at least I know it's not getting limited by the source.

Yeah, I'm not sure what the deal is with the lower volume output, but it does sound better none the less, and I'm still getting ZERO hum or hiss.

And thanks for the "pics" complement!
wink.gif
 
Jan 23, 2007 at 1:40 AM Post #297 of 415
And now for some fun...

I have my brother's Little Dot II++ amp connected for a straight comparison between it and my modded 708B. My Sony DVD/SACD player has dual 2-channel analog outputs, so I have both amps connected via a total of 4 Cardas Crosslink 1 interconnects. Also in the plans, I have my Little Dot Micro+ charging at the moment and will connect it to the front L and R outputs of the 5.1 analog outputs, which I have set for 2-channel output only. This will give me the ability to conduct an A/B/C comparison between all three amps!

I can say this much for right now, when I first got the 708B, I compared it to my brother's LD II++. The LD was a lot more open with a real wide soundstage, and the bass was fairly deep and powerfull.

NOW the tables have turned! With the modded 708B, the LD II++ seems to be a little bit on the congested, soft side. It's soundstage isn't as wide as the 708's now, and the bass isn't as pronounced, punchy and defined as the 708's. In fact, the overall sound of the 708B is more open, lively, detailed and extended in both directions.

Anyway, that's enough for now. I'll go into further detail sometime tomorrow after more listening. But for now, here's a pic of the dual amp rig. I moved the 708B up on top of the player and put the LD II++ on the side by itself. I just don't like the idea of having that little space heater sitting on top of the gear!
cool.gif


p497412617-3.jpg
 
Jan 23, 2007 at 2:27 AM Post #298 of 415
"At least that way the leads aren't strung all the way to the front"

If the caps were mounted up front the output wire from their negative terminal would have been run directly to the HP jack, not back to the audio board. So basically it's the same amount of wire either way.

Later on when you upgrade the Hp jack and the signal wire I'd run the new wire directly from the negative terminal of the Mundorf to the HP jack. This will eliminate one solder joint and a trace from the signal path of each channel. Looking back, I should have done this with the ELNAs, but I'll do it when I upgrade these caps.


Man, those "up close and personal" pics are super close! You can see every little spec of dust! I can't wait to get the macro lens for my camera. Yeah that is a beautiful solder job on the Mundorfs.
cool.gif
What kind of wire is inside that cloth BTW?


"NOW the tables have turned! With the modded 708B, the LD II++ seems to be a little bit on the congested, soft side."

That is very interesting! Even though I've never heard what the LD is capable of, I would not have expected just those three mods to make that much of an improvement. Now I'm very curious to see how things will progress as your amp breaks in and as you do more mods later.

AFAIK, this puts you in a unique position since you are the only person with both a modded 708B and a LD2++. Since these are both fairly popular amps here I'm sure there will be quite a few people interested in your comparison of them. Might even be worth starting a new thread later on just for the "Modded 708B".
 
Jan 23, 2007 at 3:46 AM Post #299 of 415
"If the caps were mounted up front the output wire from their negative terminal would have been run directly to the HP jack, not back to the audio board. So basically it's the same amount of wire either way.

Later on when you upgrade the Hp jack and the signal wire I'd run the new wire directly from the negative terminal of the Mundorf to the HP jack. This will eliminate one solder joint and a trace from the signal path of each channel. Looking back, I should have done this with the ELNAs, but I'll do it when I upgrade these caps."


Yeah, I was getting this little mod mixed up with the coupling caps. I don't know why, but I was sure you were referring to running the coupling caps directly to the volume pot for some odd reason. My father kept saying that I must be nuts and not thinking right because it wasn't making any sense to him, since he could clearly see where the coupling caps were in the schematic, and by just looking at the pcb. He's definately no dummie! LOL


"Yeah that is a beautiful solder job on the Mundorfs. What kind of wire is inside that cloth BTW?"

That's what nearly 60 years of electronics will get you right there! The cloth wire is 20awg tinned coper. He gets all of his cloth wire from Radio Daze. It's nothing overlly special, but I'm sure it's every bit as good if not better than the Cat6 wire you used. plus it comes in 8 different colors, 25, 50 or 250' spools for cheap, and in either 18 or 20awg, solid or stranded. Go check them out!


"AFAIK, this puts you in a unique position since you are the only person with both a modded 708B and a LD2++. Since these are both fairly popular amps here I'm sure there will be quite a few people interested in your comparison of them. Might even be worth starting a new thread later on just for the "Modded 708B."

Good point. I was actually planning on starting a new thread when I do a little review tomorrow on both of these amps and the LDM+. I already have one other member interested in the results and wants me to keep him up to date on my findings.
biggrin.gif
 
Jan 23, 2007 at 4:21 AM Post #300 of 415
"I was sure you were referring to running the coupling caps directly to the volume pot for some odd reason."

I was talking about doing this with the input caps going directly from the vol pot to the PCB.
biggrin.gif


"The cloth wire is 20awg tinned copper."

This would be nice to use for the rest of the wiring as well and it would give you that authentic tube amp look! Since it's solid core it will stay nicely where you mold it.


"I was actually planning on starting a new thread when I do a little review tomorrow on both of these amps and the LDM+."

Nice. When I receive the 708B that I'm soon going to be doing extensive mods to I'll be posting impressions of bone stock 708B vs my modded 708B. Later on I'll also compare both fully modded amps since they will be using a few different parts, which should be interesting.
 

Users who are viewing this thread

Back
Top