L0rdGwyn's DIY Audio
Oct 10, 2020 at 10:45 AM Post #796 of 6,831
Here we go again...

IMAG2633-2.jpg

Several lessons were learned the first time around, so this should go much more smoothly. For one, I took several things out of my garage and covered the rest with tarps LOL trying to minimize the inevitable black dusting.

Two parts down. I probably went a little heavy on this one and overcompensated and went a little light on the second. But I am doing the parts in ascending order of aesthetic importance, so starting with the rear panels, no biggie. Top and front plates will be the last parts coated in this process.

IMAG2634-2.jpg
 
Oct 10, 2020 at 1:26 PM Post #798 of 6,831
Looks like a scene from Dexter :)

I resent that remark! I am a very normal, non-serial killer person...but yeah it totally does :)

Almost done...
 
Oct 10, 2020 at 1:59 PM Post #799 of 6,831
Several lessons were learned the first time around, so this should go much more smoothly. For one, I took several things out of my garage and covered the rest with tarps LOL trying to minimize the inevitable black dusting.

One thing that I read you could do is to use a big thin sheet of grounded metal a little ways away from your part to collect the overspray. I believe online they suggest even just glueing some aluminum foil onto big cardboard sheets (could use trifold presentation cardboard boards), then just run a ground wire from those sheets to earth ground. You could also potentially try adding some resistance in line with the ground to the aluminum sheets to make it less attractive than your part, so that you can tweak how much of the powder gets attracted to the part and how much wants to go to the aluminum foil.
 
Oct 10, 2020 at 2:00 PM Post #800 of 6,831
Oct 10, 2020 at 2:01 PM Post #801 of 6,831
I resent that remark! I am a very normal, non-serial killer person...but yeah it totally does :)

Almost done...
Dexter looked very normal non-serial killer, too! Just saying... :wink:
 
Oct 10, 2020 at 3:02 PM Post #802 of 6,831
Okay, done, took about...7 hours, that was a lot of parts. DIY is...fun!

Far from perfect, but they will do. This powder seems more prone to clumping that the last I used, so there is some speckling on parts of the finish, but undetectable from even a foot away. I was bothered by it as I was coating, but when viewing the chassis as a whole, I think they look nice. I am actively trying to be less of a psychopathic perfectionist lol.

DSCF5996.jpg

They will likely go side-by-side, but can stack if there is room on the rack. Perforated aluminum sheet metal on the bottom of both chassis.

DSCF6003.jpg DSCF6006.jpg

I might start mounting some parts later tonight, but nothing else major today, I am beat!

One thing that I read you could do is to use a big thin sheet of grounded metal a little ways away from your part to collect the overspray. I believe online they suggest even just glueing some aluminum foil onto big cardboard sheets (could use trifold presentation cardboard boards), then just run a ground wire from those sheets to earth ground. You could also potentially try adding some resistance in line with the ground to the aluminum sheets to make it less attractive than your part, so that you can tweak how much of the powder gets attracted to the part and how much wants to go to the aluminum foil.

Thanks for the idea, maybe I will throw something together. I might even seek out a better powder coating gun, I am starting to think it is the weak link in the setup and the reason I am getting some speckling, the powder flow and shape of the cloud is pretty inconsistent. If I am going to keep doing this craziness, I think we can do better.
 
Oct 10, 2020 at 9:48 PM Post #804 of 6,831
@L0rdGwyn - why did you decide to place the RCAs on top, instead of the back? Curious about your design choice (which I am 100% sure makes sense)...
 
Oct 10, 2020 at 9:59 PM Post #805 of 6,831
@Zachik mostly for aesthetic reasons :) when this phono was being designed, it was originally going to be single-ended input for MM cartridges. So that meant RCA inputs with a ground post. For the sake of minimizing the signal path / ground connections, I was planning to place the RCA inputs on the top plate at the front near the input tubes, it made sense then to place the output RCAs on top as well at the back of the top plate near the output tubes. When I changed the design for MC cartridges and balanced input, it made more sense to place the XLR inputs on the front of the chassis rather than the top, I decided to leave the output RCAs as they were. No fancy reason, I just like how they look!
 
Last edited:
Oct 11, 2020 at 5:04 PM Post #806 of 6,831
Been moving pretty slow today on phono progress, had to run some errands, but worked out the umbilical wiring.

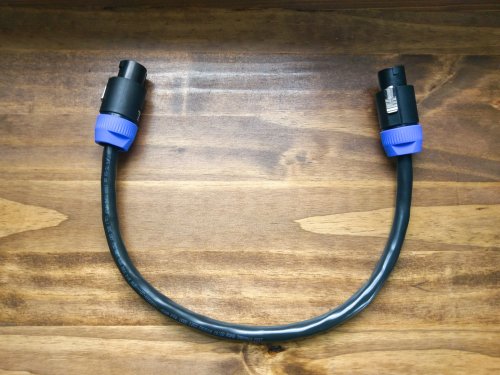
Here is the Belden 1039A I am using, four individually shielded 16AWG twisted pairs, with another overall shield. Two pairs for the DC heater regulators, one pair for the B+ / PS ground, one pair for redundant chassis ground which the shields are tied to at one end. This cable is no joke, need superhuman strength just to remove the jacket.

IMAG2640.jpg

Here is the finished umbilical with Neutrik NL8FC connectors.

IMAG2641.jpg IMAG2644.jpg

Wire is pretty rigid but it can be worked to lay the way you want it. After some (American) football, I will put together the power supply :)
 
Last edited:
Oct 11, 2020 at 5:29 PM Post #807 of 6,831
Been moving pretty slow today on phono progress, had to run some errands, but worked out the umbilical wiring.

Here is the Belden 1039A I am using, four individually shielded 16AWG twisted pairs, with another overall shield. Two pairs for the DC heater regulators, one pair for the B+ / PS ground, one pair for redundant chassis ground which the shields are tied to at one end. This cable is no joke, need superhuman strength just to remove the jacket.

IMAG2640.jpg

Here is the finished umbilical with Neutrik NL8FC connectors.

IMAG2641.jpg IMAG2644.jpg

Wire is pretty rigid but it can be worked to lay the way you want it. After some (American) football, I will put together the power supply :)

1602451191038.png
1602451715342.png


:stuck_out_tongue_winking_eye:
 
Oct 11, 2020 at 5:50 PM Post #809 of 6,831

ROFL!! That reminds me of a Kimber speaker cable I saw at CES many moons ago. Black Pearl, I think? One 8' piece (one channel) weighed in at around 50 lbs, and the retail price on the pair was around $15k (USD). I'm not one of those "a cable is a cable" kind of people, but even I have limits. :grinning: :grinning:
 
Oct 11, 2020 at 6:26 PM Post #810 of 6,831
Been moving pretty slow today on phono progress, had to run some errands, but worked out the umbilical wiring.

Here is the Belden 1039A I am using, four individually shielded 16AWG twisted pairs, with another overall shield. Two pairs for the DC heater regulators, one pair for the B+ / PS ground, one pair for redundant chassis ground which the shields are tied to at one end. This cable is no joke, need superhuman strength just to remove the jacket.


Here is the finished umbilical with Neutrik NL8FC connectors.


Wire is pretty rigid but it can be worked to lay the way you want it. After some (American) football, I will put together the power supply :)

Tuff wire to work with I use it at work to feed power and signals to sensors. High power frequency drives with a 480 volt 50amp square wave to a motor puts out plenty of noise.
No noise pickup with 1039A double shielded cable.
 
Last edited:

Users who are viewing this thread

  • Back
    Top