


markkr
1000+ Head-Fier
I looked everywhere for a guide on removing the annoying "Y" in the factory Grado cable, I couldn't find one so I made my own.
This is a guide that uses a Grado cable from my 225i. Its the newer 8 conductor cable.
Tools required: 1 sharp Xacto knife, strong fingers, patience...
Here we go
Begin by SCORING the plastic cover for the cable above the "Y". Do NOT cut all the way through the cover.

After scoring the cover, carefully start the cut by placing your Xacto knife inside the cover. Be cautious no to cut the internal conductors.

It should be easy to hold the conductors with one hand, and the cover with the other and pull them apart from each other. (the score line should take care if this easily)

Once you reach the "Y", cut the cover away. Again be CAREFUL not to cut the conductors.... obviously repeat for the other side

Removing the "Y"
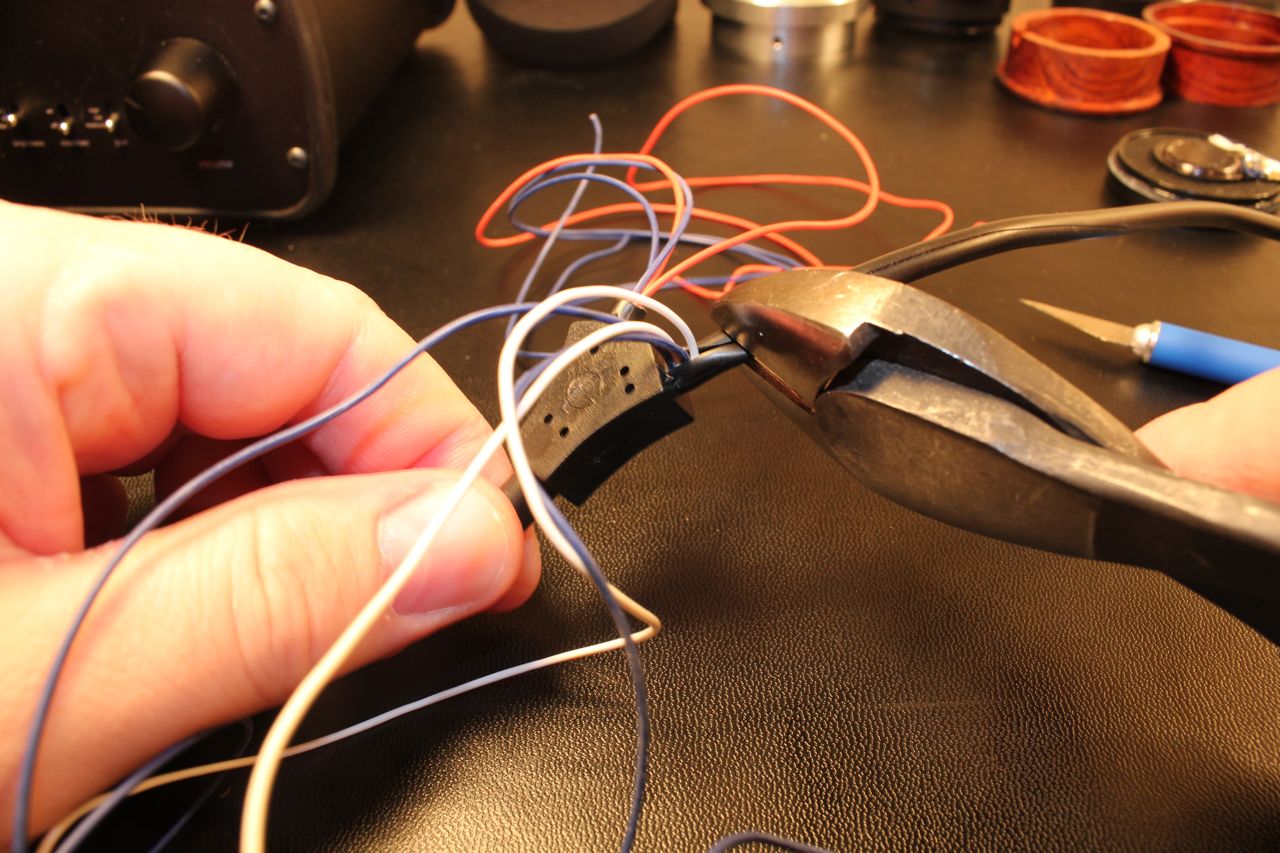
Using your Xacto, begin cutting slowly (over and over) as pictured. You are only going to cut until you just barely make it through (by looking at the end of the "Y" and NOT cutting the cable sheath)

Cut through the center of the "Y" about the depth of the tip of your Xacto knife. This is so you will be able to "filet" the "Y"

Using your fingers only, you should be able to pull the "Y" apart, not that you should NEVER cut deep enough to damage any cable sheath. At this point the lower cable should be loose in the "Y" and you should be able to pull it down out of the "Y"

Carefully, pull the 2 sets of 4-conductor channels through the "Y"

Tie the channels together, to keep the exact configuration as the factory assembled (not entirely necessary, but I'm OCD)

You have now liberate the "Y". I suggest cutting another 2"-3" back from the cable to compensate for braiding.

choose your favorite 4 wire braid, and braid the channels together

Add a nice piece of 3-1 heatshrink between the braid and the original cable sheath and enjoy...

This is a guide that uses a Grado cable from my 225i. Its the newer 8 conductor cable.
Tools required: 1 sharp Xacto knife, strong fingers, patience...
Here we go
Begin by SCORING the plastic cover for the cable above the "Y". Do NOT cut all the way through the cover.
After scoring the cover, carefully start the cut by placing your Xacto knife inside the cover. Be cautious no to cut the internal conductors.
It should be easy to hold the conductors with one hand, and the cover with the other and pull them apart from each other. (the score line should take care if this easily)
Once you reach the "Y", cut the cover away. Again be CAREFUL not to cut the conductors.... obviously repeat for the other side
Removing the "Y"
Using your Xacto, begin cutting slowly (over and over) as pictured. You are only going to cut until you just barely make it through (by looking at the end of the "Y" and NOT cutting the cable sheath)
Cut through the center of the "Y" about the depth of the tip of your Xacto knife. This is so you will be able to "filet" the "Y"
Using your fingers only, you should be able to pull the "Y" apart, not that you should NEVER cut deep enough to damage any cable sheath. At this point the lower cable should be loose in the "Y" and you should be able to pull it down out of the "Y"
Carefully, pull the 2 sets of 4-conductor channels through the "Y"
Tie the channels together, to keep the exact configuration as the factory assembled (not entirely necessary, but I'm OCD)
You have now liberate the "Y". I suggest cutting another 2"-3" back from the cable to compensate for braiding.
choose your favorite 4 wire braid, and braid the channels together
Add a nice piece of 3-1 heatshrink between the braid and the original cable sheath and enjoy...
