


arjubx
New Head-Fier
Do you know what went wrong with the right side reassembly? Would you say it was an easy job, little chance of breakage?
The plastic black and silver assembly would be analogous to a submarine sandwich with rubber bands on each end holding it together. The two pieces of black plastic would be the top and bottom bread and the silver end pieces being the rubber bands on each end of this hypothetical sandwich.
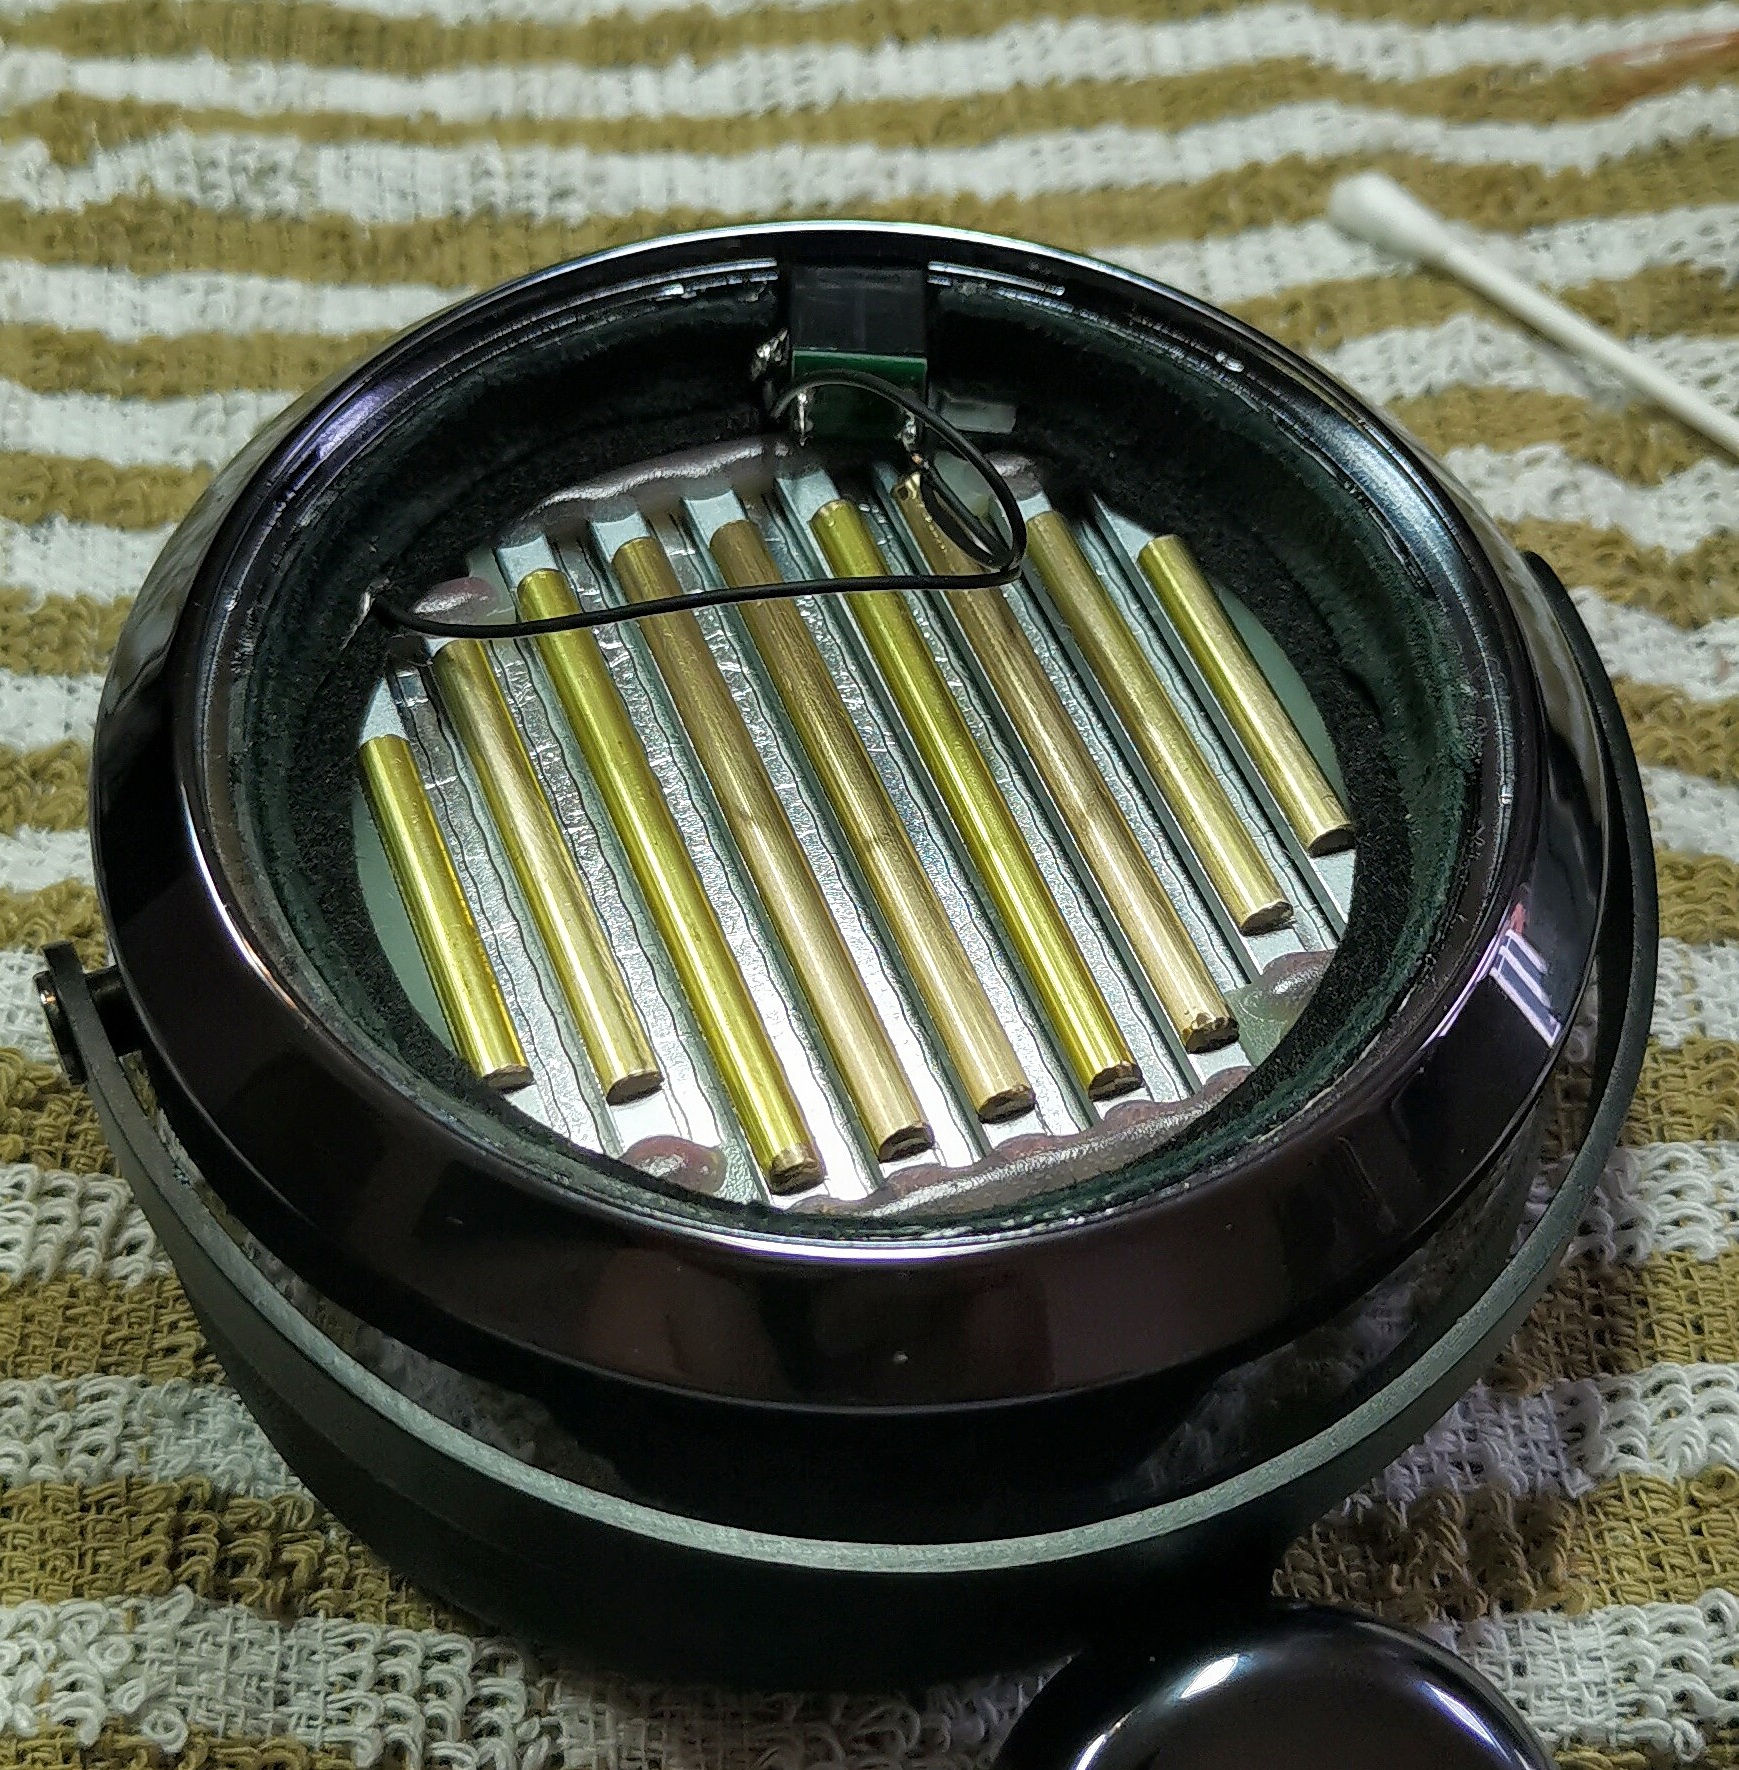
There is a small metal leaf spring like piece inside the plastic part near the bottom silver sleeve that slipped slightly off position when I went to snap the black plastic back together.
I would rate the mod process as moderate skill level if you have done mods/electronic repairs before because it requires more than just unscrewing things and there is risk of breaking during 1 step. Part count is very low so overall complexity is not high. I used an iFixIt toolkit for phones/electronics for my process. For reference, I have personally repaired game console controllers and done cosmetic mods such as replacing the shells of Nintendo Switch Joy Cons. Similar processes here with far less parts involved.
Disclaimer: I cannot take responsibility if something goes wrong using the below info if you attempt to mimic my modification.
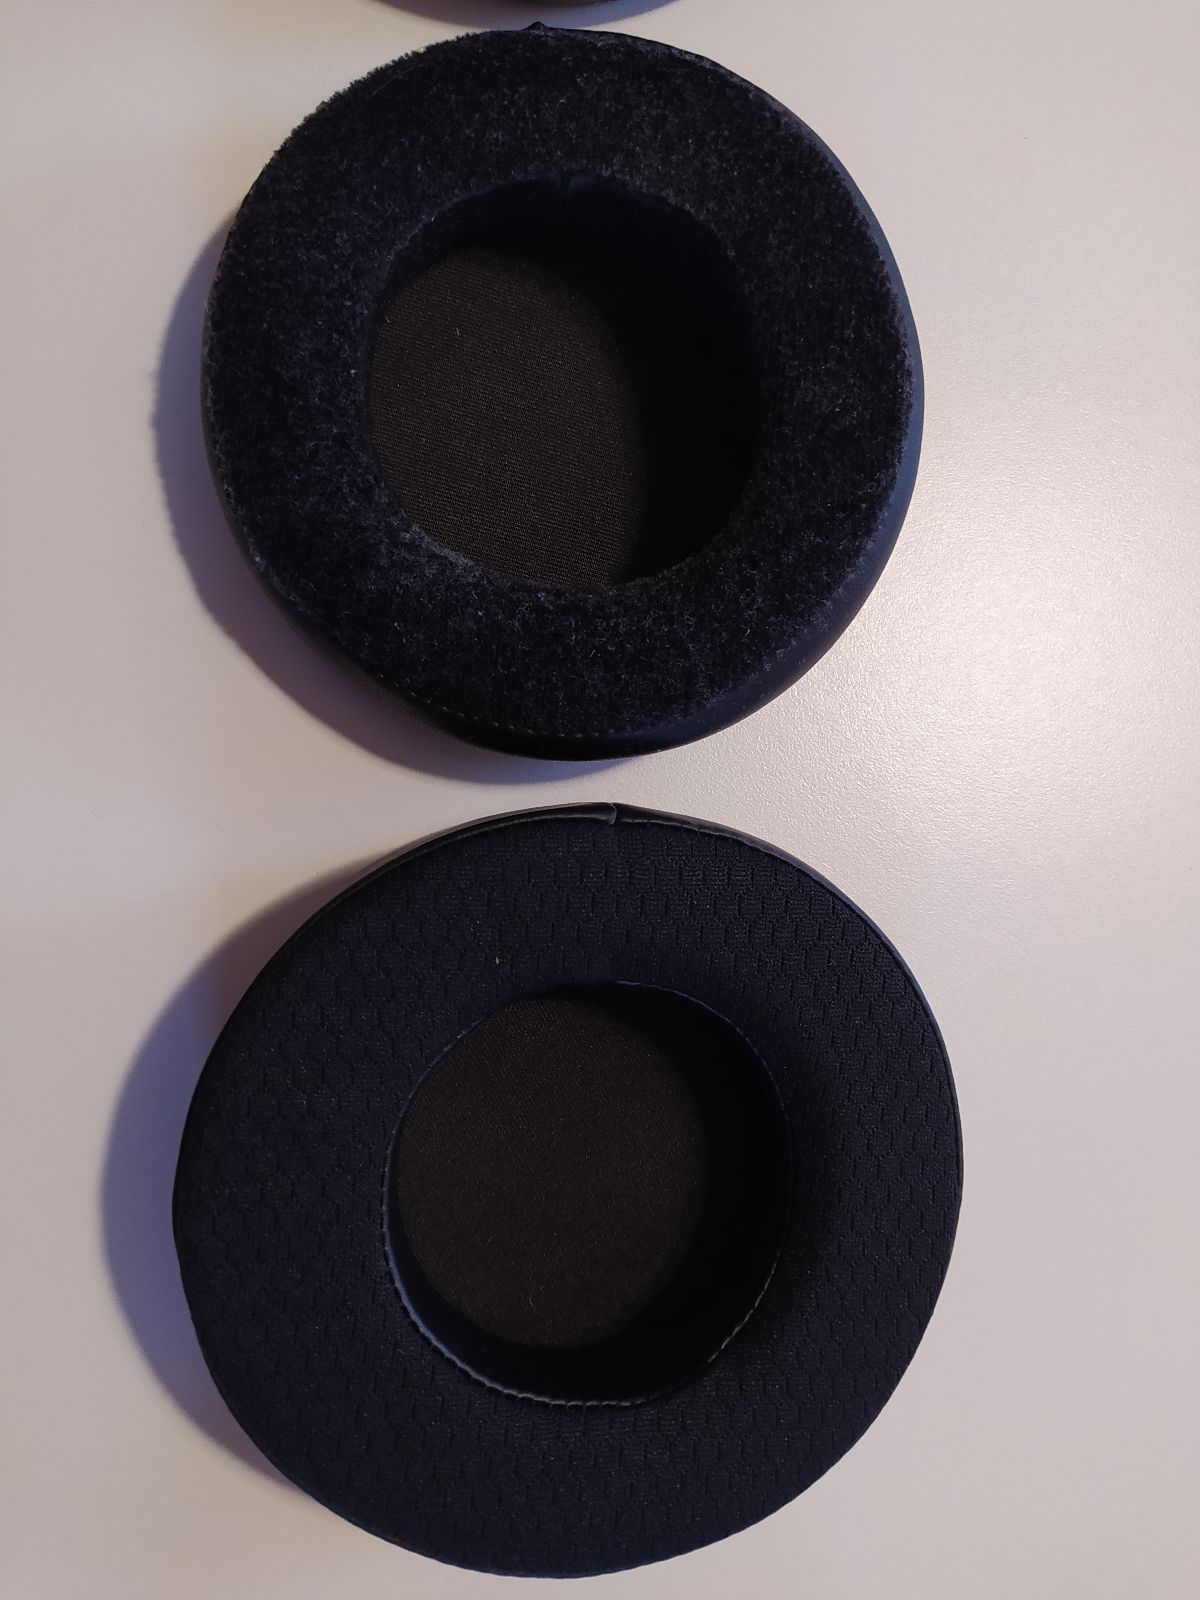
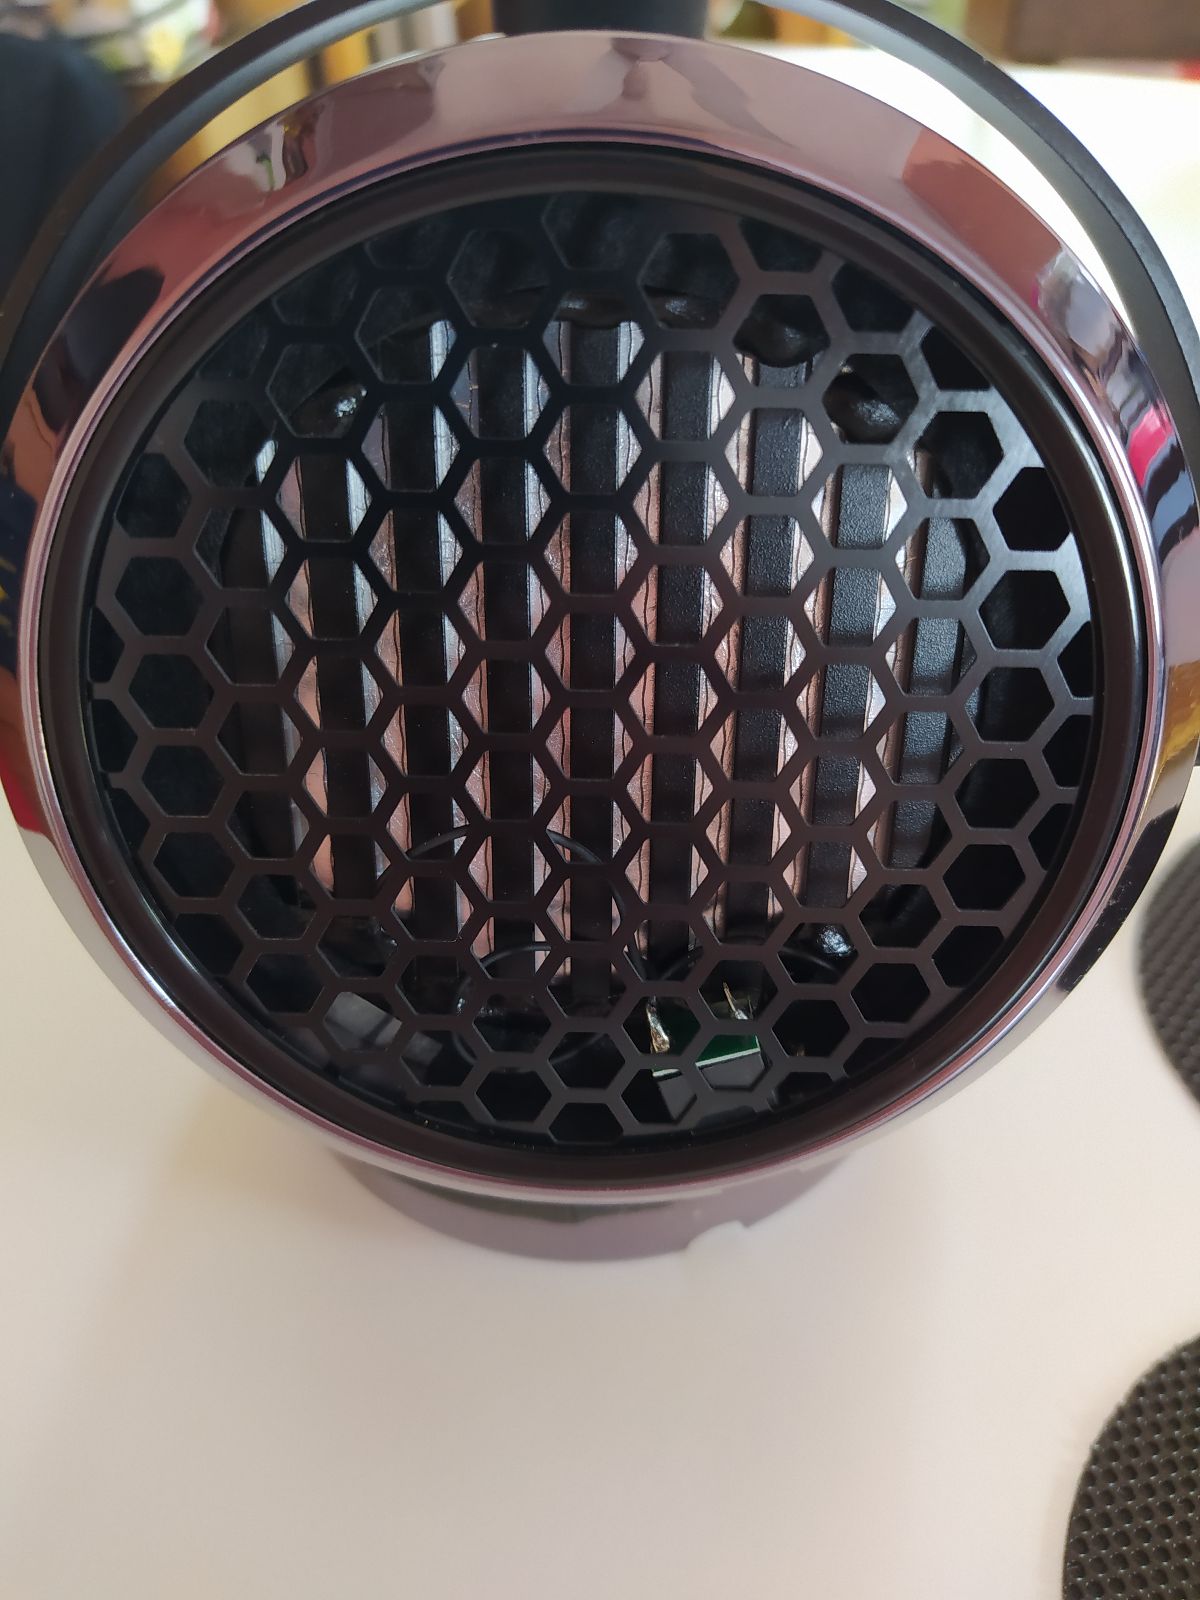
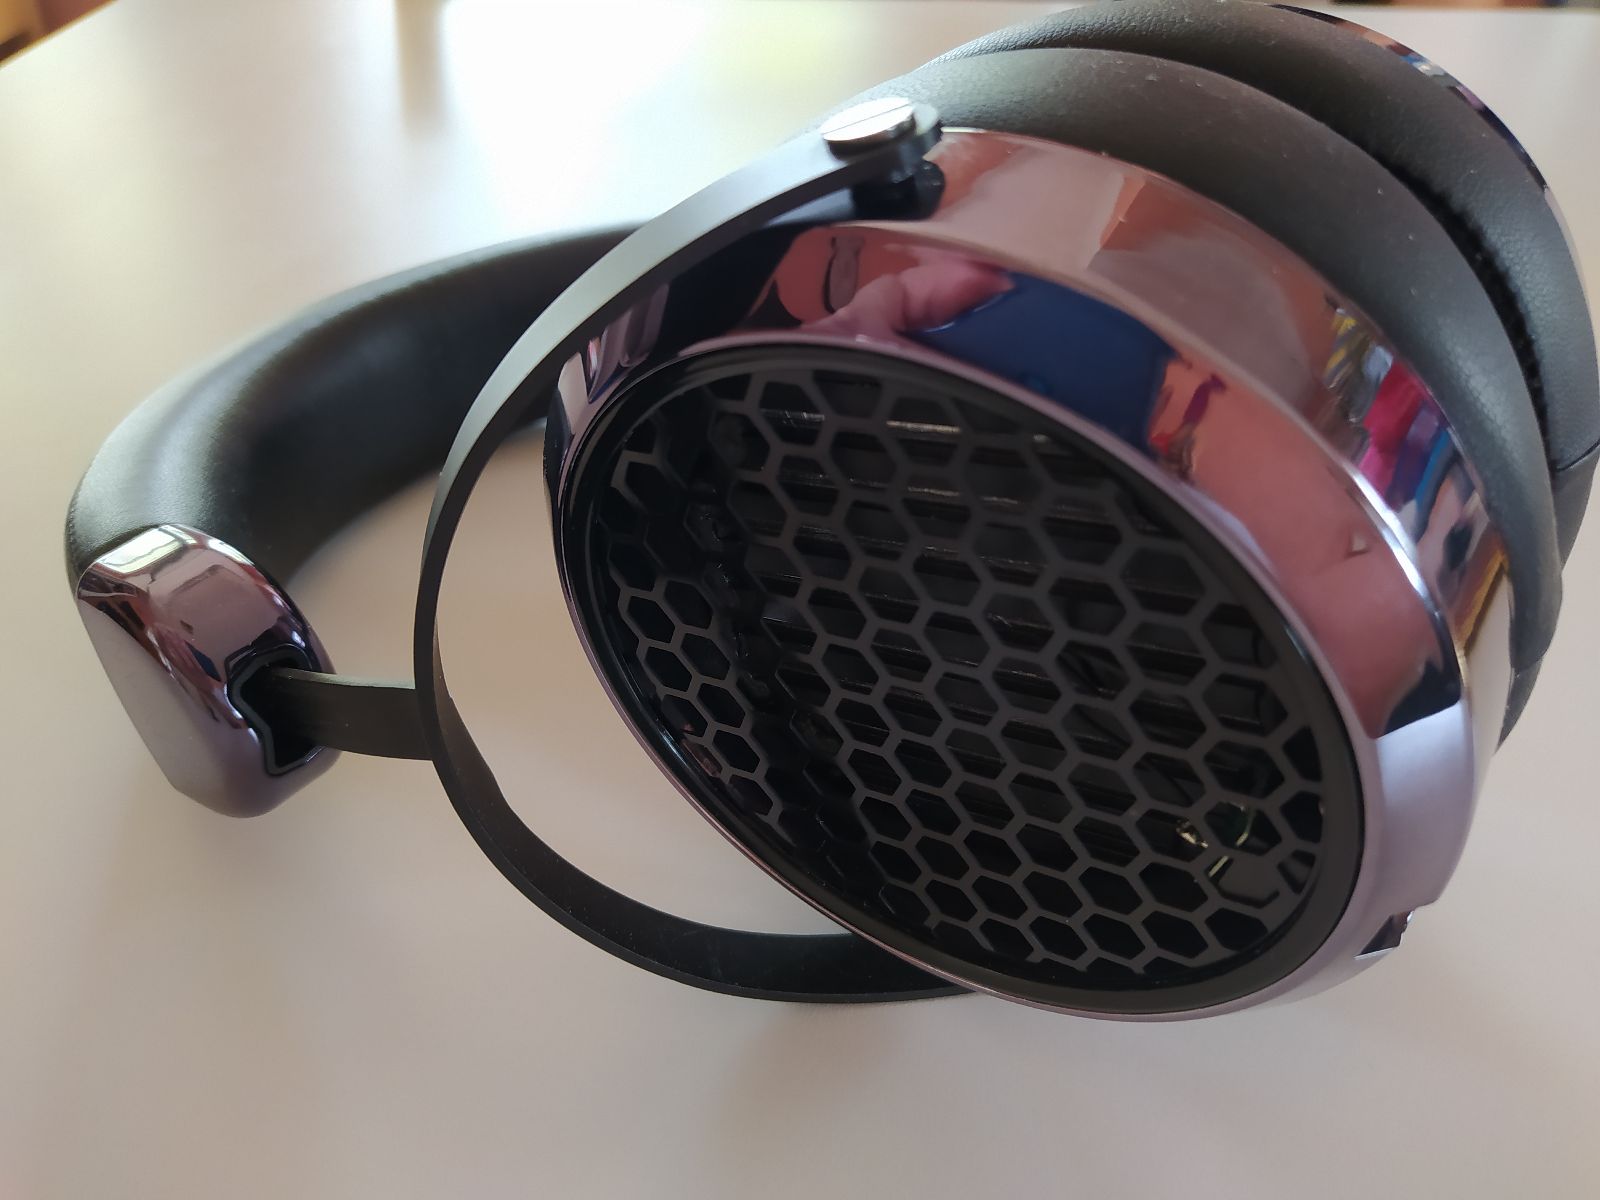
Start with removing the drivers from the yokes (Hifiman has a video of this on YouTube). The silver sleeve at the bottom can be pushed off the black plastic down the yoke by inserting something between the seam and working your way around and down. Use plastic tools for this as a metal tool would deform the plastic. There is a small amount of rubber cement like glue holding this up.
Once this is down, the yoke becomes your leverage to work the inside side of the black plastic towards the leather. There are only 2 friction based points right behind where the leather goes into the plastic holding this onto the outside facing plastic part and the top is inserted inside the other silver sleeve. Slowly use the yoke to open the two plastic parts into a V shape. This requires a bit of wiggling inward towards the leather with the yoke partially extended so it still has lots of contact with the inside of the black plastic. This is the highest risk part as applying the wrong leverage here could break one of the 3 pieces involved if done too hard or fast.
Once open, the little leaf spring thing will be loose as nothing holds it in place except being sandwiched between the two halves of the black plastic. During reassembly, this goes back on the inside plastic piece at the bottom with the little bump facing the yoke (I probably could have used some small amount of weak glue on the edges to hold it in place to prevent it from slipping).
From here, remove leather, reassemble and repeat for other side. Whole process took me 60 minutes including the figuring out how part. If I had to do a new one now, it would probably 30 mins end to end.
I suppose if you wanted to avoid all this disassembly, you could try to cleanly cut the leather off right up against the plastic and end up with the same functional result.
