DX90. 2X Sabre,1st page: Downloads, info&inst. . ! Lurker0 FW Mod link 1st page !!. .NEW FW! 2.3.0 . . . . .
Feb 18, 2015 at 3:14 PM Post #10,756 of 14,084
Yes tagging classical is a pain. I normally go with the composer as artist, the name of the piece as album and the names of the movements (or numbers in operaes) as track titles but this is clearly a compromise and there are many recordings that dont lend themself to this style

 
Truth.
 
And again, I can't believe it's that difficult a FW fix to accommodate long song 'titles'. (To bring the subject back to the DX90) 
wink.gif

 
Feb 18, 2015 at 3:35 PM Post #10,757 of 14,084
It might not be the display of the names that have the limit, it could be the library data structure
 
Feb 18, 2015 at 5:14 PM Post #10,758 of 14,084
Update regarding my Samsung battery : I noticed that it went to full charge pretty darn fast, faster than I remember anyway. The bars on the battery were dropping way too fast as well during usage.
 
Earlier today I completely drained the battery till the device kept rebooting itself and finally shut off. I then charged it to full and it took a much longer time than I remember recently (around 7-8 hours). I am noticing now that for a over solid hour of playing and I am still at the 5th bar.
 
Not sure what happened but I feel like I had to trick the DX90 or the battery and completely drain it for it to return to normal function 
confused.gif
 
 
Reupdate : Nope. The sucker just went down 3 bars in the last hour. I guess a new battery must be ordered.
 
Feb 19, 2015 at 12:18 AM Post #10,760 of 14,084
   
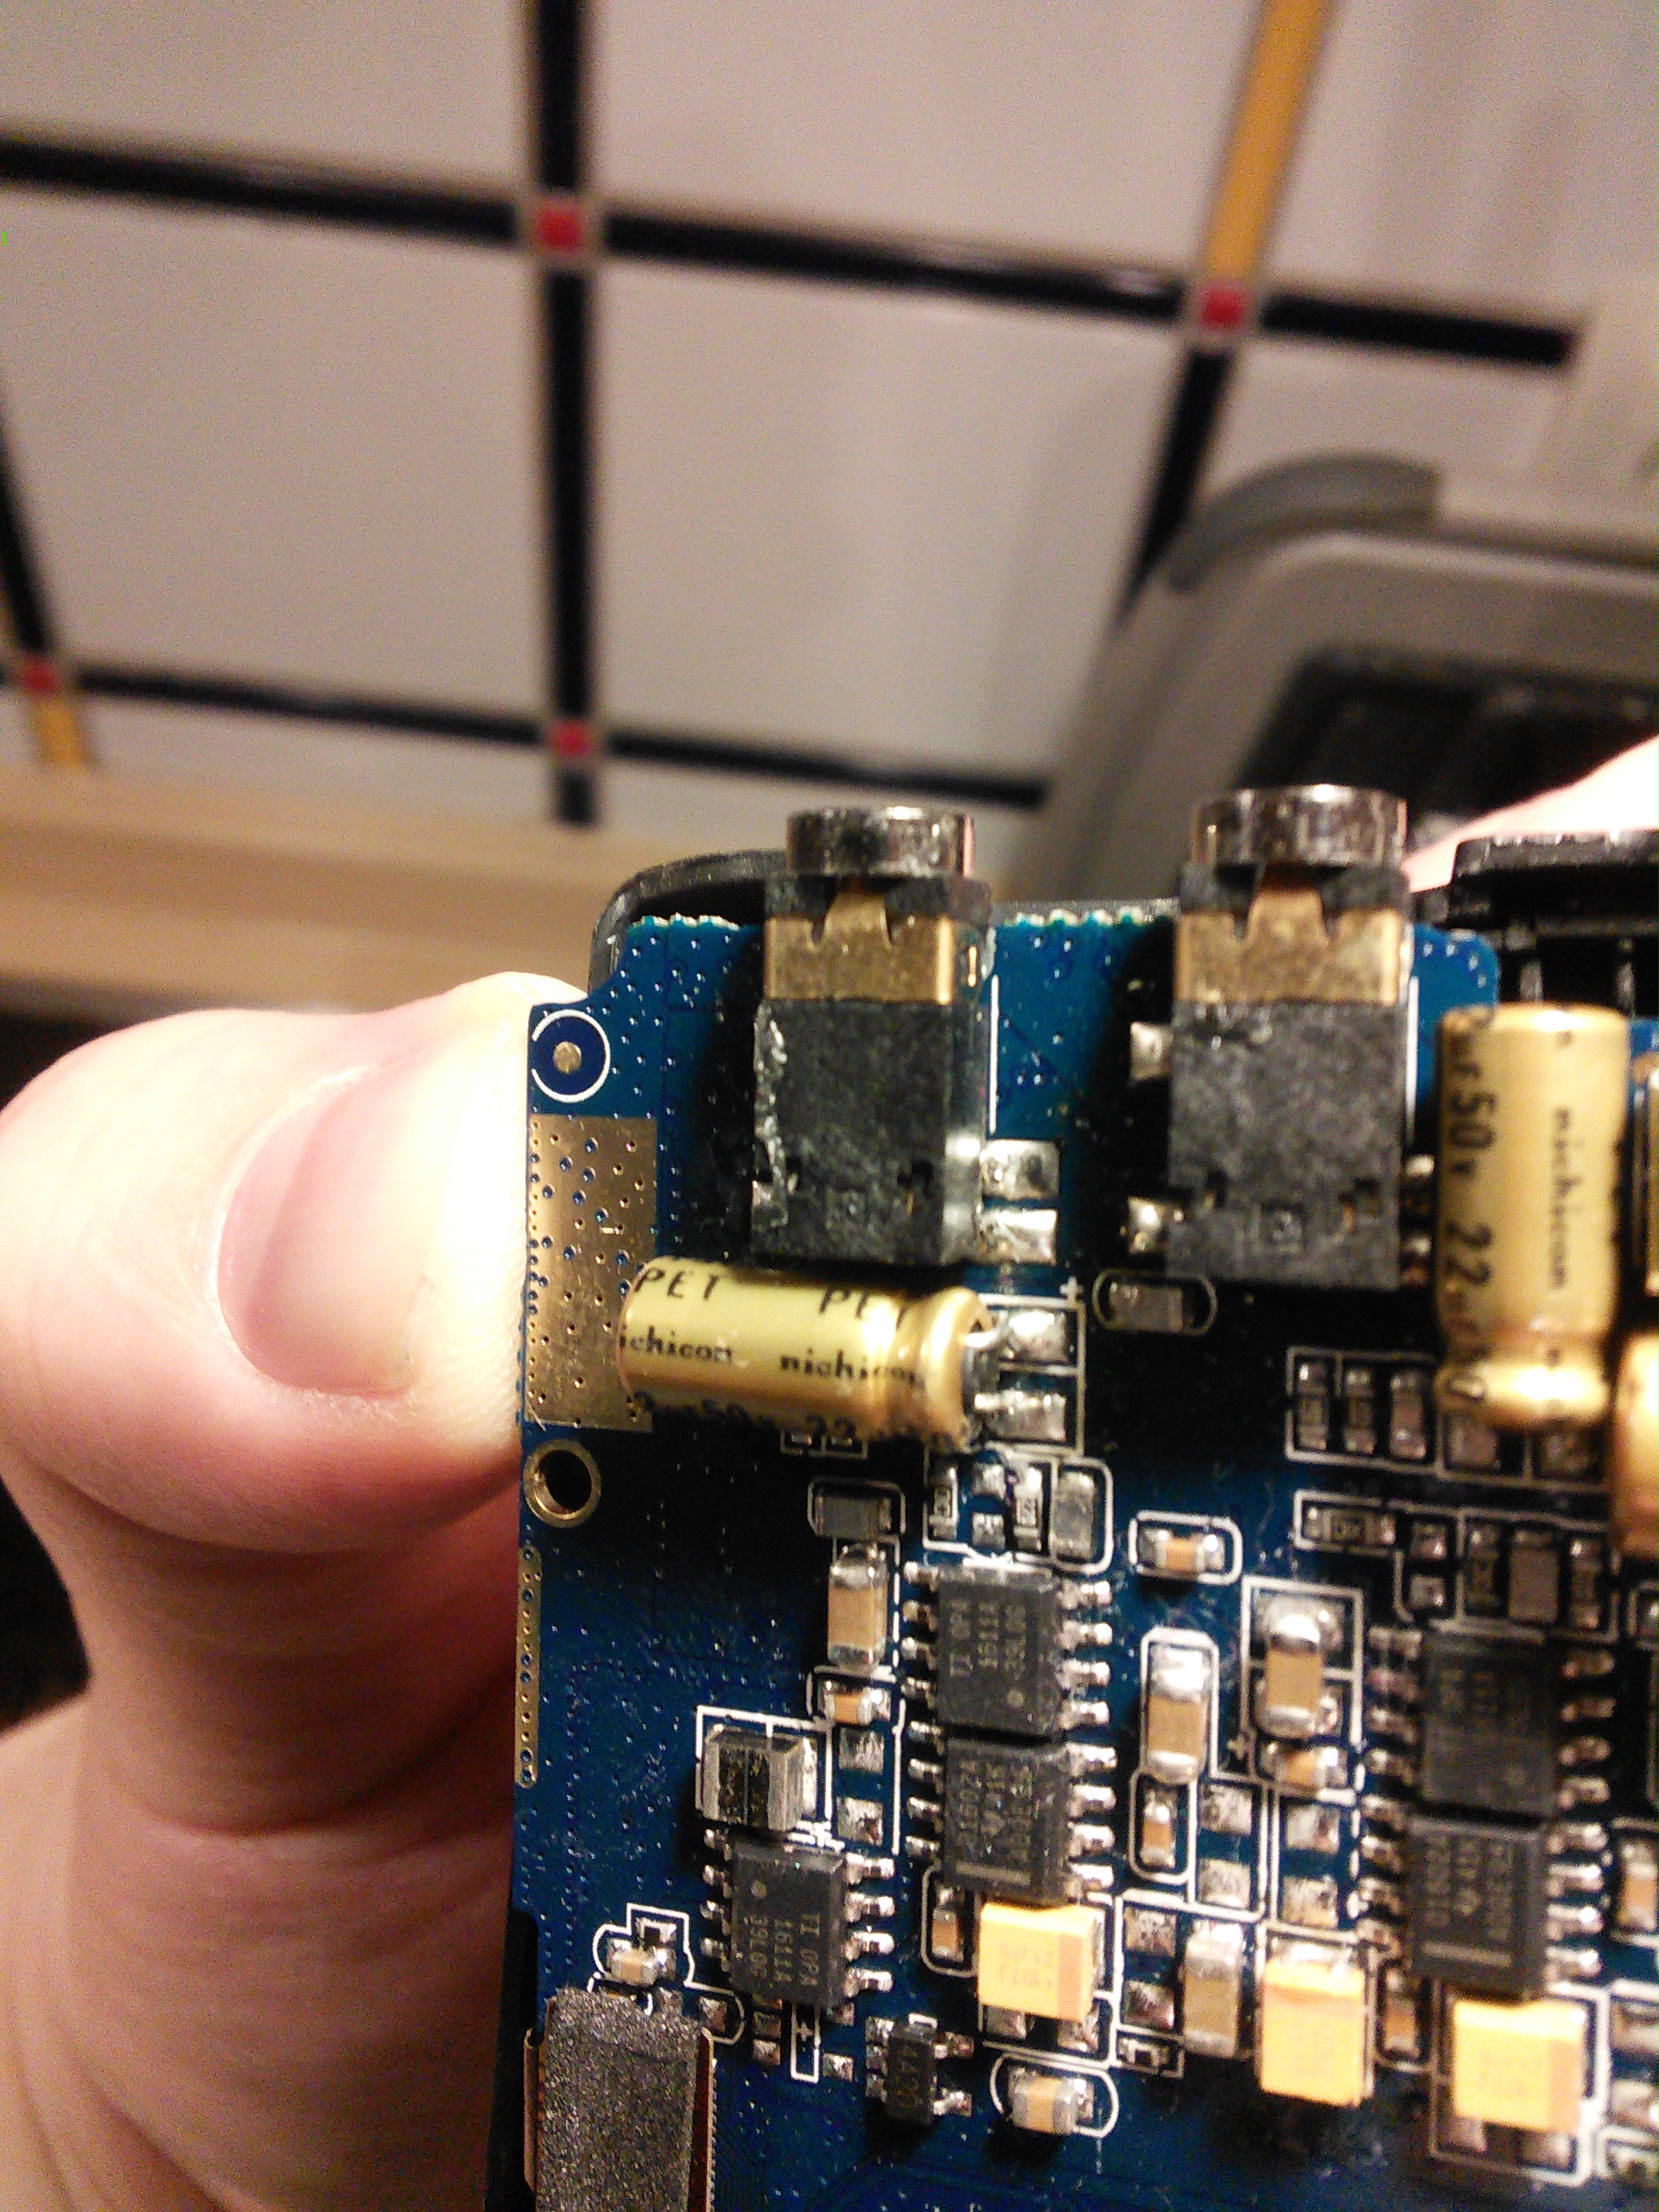
I bought my DX90 in early May, in H.K.  The pin is covered by tape.  After I cut the tape, and used a sharp pin to expose the golden pin, I see that it is spring loaded.  i.e. I can push on it, and it will pop back out again.  Thinking about this, I assume that iBasso engineers had a good reason to ground the back cover.  I believe this is to create a Faraday cage/shield, to ground the EMI that is present in the player.  I saw another reader's comment about the digital  circuits in other players having metal shields covering them, but noting that this was not present in the DX90.  This golden ground pin may be an essential part of the design, to absorb the EMI by sending it to ground.  Without this, the EMI may bounce around, and build up, and have a major impact on the electronics. 
 
Another finding is that there is a notch in the back cover, so that the edge of the cover will not catch on the pin, but the notch allows the cover to slide over the golden pin.  There is another common defect here, that the back plate is anodized, so there can be no electrical connection between the pin and the back cover.  This is a common failing in the manufacturing process, that this small detail is overlooked, making the grounding scheme ineffective.  All that is needed is to tape the spot where the pin needs to make connection, before anodizing the metal.  Then peel the tape off afterwards, to expose the bare metal.
 
I used a push pin to scrape the anodization off the area where the pin should ground the back cover, and this I believe is what the engineers meant to do, to ground the metal back cover plate, to reduce EMI.
 
I believe the above is essential to do, to implement the original engineering design.
 
I did the above, and also put new silicone earbuds on my IE800, to create a better seal. (Audio Technica ER-CKM55L works well, I find, for many earphones.  For the IE800, they are fitted onto a IE800 small earbud shaft, with the original earbud removed.)  I did this without thinking that there would be any changes in the SQ, from these very minor changes.  Better bass extension with the better earbud seal, I expected.
 
What I experienced was a major SQ change.  Bass extension that I had not heard before, with impact and speed, and "slam", and more micro details and textures, with major improvements in "stage".  Repetetive bass lines which I had though boring, became mesmerizing.  In short, a lot of music was more involving, and had that "toe tapping" urge.
 
The only reason I can think of for these major changes is that the proper grounding is "sinking" the EMI that was previously polluting the processing, and the overall SQ.  Getting rid of it allowed the circuitry to work without handling the noise.  Kind of like cleaning up the AC with a regenerator, or filtering out the noise.  These kind of changes have a major impact on everything.  Deeper background, micro details are not masked, more power available for the Bass, etc.
 
So, for such a minor, no cost change, which just needs a little work, I think this is a must do.  If you get some or all of the improvements which I'm seeing, great.  Even if you get much less, you will still be doing the right thing, to ground the back cover properly.  And maybe you'll get some good SQ improvement.......Anyways, what do you have to lose?  And I would be very curious to see if anybody else observes improvements.


Mine came also with the pin covered I did the mod and I Think the SQ improved
 
Feb 19, 2015 at 1:41 AM Post #10,761 of 14,084

   
Please don't add that feature. But well, if you do, let us decide whether or not in the system settings.
Auto Resume really bothers me on the FiiO DAPs.
 
I only like this feature for sports and I neither use the iBasso nor the FiiO for that purpose as they're too big and heavy.


Agree with you.
We should have the choice, of course, in the system settings, like on a cowon.
If that's the case, please add that feature...
 
Feb 20, 2015 at 6:28 AM Post #10,765 of 14,084
Colleague from mp3store forum noticed something what might be relevant. And it could exclude manufacture failure.

This part of the back is not covered with paint. You can feel this even with finger.


This black metal, lets call it net, between two holes is touching silver back place.


So if the pin touch the net in the 3rd hole and the two nets are connected (the one from 3rd hole and the black one from the 2nd picture) it should be grounded with back cover.

Question is if the pin touch the net in the small hole.

And if connecting the pin directly to the back gives better performance with skipping both nets.

On the other hanf why there is an incision in the back cover perfectly in the place where the pin shoul touch the back cover when closed?
 
Feb 20, 2015 at 7:17 AM Post #10,766 of 14,084
it' s the same thing I.said in one of my previous post. But once unscrewed and flipped the plastic back cover, you find the golden pin touches the net on the inside part ,that is black and is supposed to be not conductive, so not grounded.
 
Feb 20, 2015 at 10:48 AM Post #10,767 of 14,084
On my DX90, after removing the 7 screws, and removing the back plate, you can see that there is clear plastic tape over the conductive tape.  So the grd pin cannot touch the conductive tape.  
The back cover (inner side, facing the battery) has a large patch at the center bottom, about 1" x 1/4" which is bare metal and not anodized.  This allows the back cover to contact the conductive tape on the back plate., just below the battery.  Unfortunately, the only grd available is the gold grd pin from the motherboard, which is insulated by the clear tape that is over the conductive tape.  I've checked for continuity from the grd pin to the conductive tape, and there is none, as I have cut a hole in the tape to let it go through the tape and plastic slot, and contact the back cover directly.  And the area of the back cover that contacts the pin is anodized, so I have scraped the anodization off.
 
Options:
1. Cut the tape and allow the pin through the tape. Scrape the anodization off the area of the back cover that the pin will contact.  This is an area about 1/16" above the notch on the back cover  that allows the back cover to slide over the grd pin when pushing the  back cover closed.   This is the best method, as there is a strong/direct mechanical connection between the grd pin and the back cover.
    a. widen the slot on the back plate if the pin looks too close to the edge of the slot, and could bind,  This is easy to do, and will not affect anything, as the back plate is made of plastic.  I used a drill bit on an electric screwdriver to widen the slot so that there is a clear space around the pin. Just use a drill bit that will fit into the slot, and turn it on, and push sideways on the drill bit to shave a bit of the plastic off.   Other people have used a knife.  The metal back cover covers everything, so there is no worry about cosmetics.  This is a no risk and simple operation.
    b. Some people have bent the ground pin just a little, to get it to clear the plastic edge.  This sounds much more dangerous to me, as too much force could affect the connection to the motherboard, and bending the pin may cause the sliding spring loaded part to bind.  I would judge this to be much more "iffy" than just widening the plastic slot.  I would advise to widen the plastic slot as the first choice, as it is a much simpler option.
 
2. Removing the back plate, and removing the clear tape that is insulating the grd pin from the conductive tape.  This would then allow the grd pin to contact the conductive tape, which would then contact the bare area on the back cover.  This would work, but my opinion is that this is not a good option, due to:
    a. The tape is over the slot, so there is no mechanical pressure forcing the tape to the pin.  The tape will be pushed into the open plastic slot, and will quickly lose connectivity. 
    b.  If there was a metal plate that the pin could contact, and the metal plate was contacting the conductive tape, this could work.
 
Summary:
It looks like there were 2 grounding schemes for the back plate, and both of them are not working, due to the grd pin from the motherboard being insulated by the clear plastic tape.  Method 2, using the grd pin to contact the conductive tape, is not a proper method, as there is no mechanical pressure to make a good connection between the grd pin and the conductive tape.
 
Method 1, to have the grd pin contact the back cover directly, ON BARE METAL, is the only workable method.
 
Please note that the above sounds a lot more complex that it really is.  Removing the 7 screws and sliding the back plate off (push the plate downwards) is easy to do, and it will slide down, and away from the earphone and line sockets.  Then follow the directions above.
 
Feb 20, 2015 at 12:39 PM Post #10,768 of 14,084
I am looking into the question of the pin. I know that some listening tests were done and no differences were heard. We do listen to your concerns and I will find out.
 
iBasso Stay updated on iBasso at their sponsor profile on Head-Fi.
 
http://www.ibasso.com/ paul@ibasso.com

Users who are viewing this thread

Back
Top