3D printed closed headphones with HD800 driver
Feb 3, 2015 at 11:54 PM Post #16 of 166
To put to perspective, my first prototype in rosewood cost more than the 3d printer. The cost for a desktop cnc is comparable to a printer, but exotic wood cost significantly more than 3d printed plastic. Plus since it is additive manufacturing, you need less material than traditional machining.
Diy wise both requires lots of experience, cutting with wood might result in wood burn, you have to play with the speed and feed rate. For 3d printing, you have to play with many setting for different material and you have to damp afterward. Ideally wood is acoustically better , therefore I'm interested to learn methods for creating liquid wood like the audioquest nighthawk. I can make the mould out of the 3d printer.i also have carbon fiber laying around but given the resonance, I have to add mass damping material anyway. It will not be light, therefore the only purpose for carbon fiber is aesthetic.
Anyone know how to mold wood/plastic or epoxy composite?

Just do a search on google "3d print wood filament" there are many types. Barnacules has a youtube video on one type of wood filament.
 
Feb 4, 2015 at 1:00 AM Post #17 of 166
I have triedwood filament from colorfabb, but it turned out too soft for a headphones cup or baffle. A 5 mm thick baffle from this material can be bended by hand. Plus it does not look as nice as the audioquest nighthawk. The nighthawk is made from aborform, but this company only supply pellets that seemsto be ordered in large number.any recommendation for other cheap source of diy molded wood composite?
 
Feb 4, 2015 at 1:25 AM Post #18 of 166
Assume you are talking about industrial plastic pellets? Even if they sold average consumer the pellets, it be useless. One would need plastic injection molding machine, also custom made injection mods for the plastic to be injected into...
 
Another idea is you can use wooden fibers in thin shavings, mix it with Epoxy resins stuff you have to mold carbon fiber will work. Print 2 opposite negatives with 3D printer... example print first cup 110% (1.1:1) and the other cup 90% (0.9:1). Take the wood shaving mixed with resins squeeze it in between the 110% cup and 90% cup. Let it cure and you should have 100% (1:1) right sized wood/epoxy cup.
 
Or easier might be try a stronger wood filament, as ^ would takes a lot load of work


"wooden fibers in thin shavings" as in...


Feb 6, 2015 at 4:48 PM Post #19 of 166
Awesome work!!! Could you please post more pics of the final result (for example showing inside the pads) and more in depth analysis of the sound? Somebody should measure them!
 I think that the cup should be shaped so that the center hole of the driver is actually left vented to the outside (horn shaped cup kinda) to keep good bass extension, while the rest of the driver is enclosed and properly damped. Also I think part of the front of the driver should be damped. The HD 600/650 drivers have part of the driver (the cone)  directly eposed and part (half or more I'd say) front damped. Result? No peaks.

As you can see only a small part of the circumference of the transducer is left exposed.
Take HD700s instead, there's no front dampening and you have a weird peak.

Something like that mesh used in HD600 would be perfect.
 
Feb 6, 2015 at 5:07 PM Post #20 of 166
This is truly amazing... A custom closed-back HD800? If only you could mass produce the final model somehow... I would buy one in a heartbeat. I can't wait to see more! 
o2smile.gif

 
P.S. - How do they fair with amping? I'm assuming since it is the same driver it is still as picky as the stock HD800?
 
Feb 6, 2015 at 6:08 PM Post #21 of 166
Oh my god. Tyll. You have to measure this.
 
Feb 6, 2015 at 9:46 PM Post #24 of 166
  Awesome work!!! Could you please post more pics of the final result (for example showing inside the pads) and more in depth analysis of the sound? Somebody should measure them!
 I think that the cup should be shaped so that the center hole of the driver is actually left vented to the outside (horn shaped cup kinda) to keep good bass extension, while the rest of the driver is enclosed and properly damped. Also I think part of the front of the driver should be damped. The HD 600/650 drivers have part of the driver (the cone)  directly eposed and part (half or more I'd say) front damped. Result? No peaks.

As you can see only a small part of the circumference of the transducer is left exposed.
Take HD700s instead, there's no front dampening and you have a weird peak.

Something like that mesh used in HD600 would be perfect.

The HD800 driver is a ring design, so the back of the driver has no holes. I made the cup with quite a large internal volume and lots of vents/bass port for tuning. Similarly on the ear side of the driver, the center of the driver is a hole, so if you cover the circumference, all the sound is blocked. I think Sennheiser designed the driver with this issue in mind, so the ring design would solve the problem of peaks. However the peak comes when they made the headphones extremely open and use extensively the steel mesh. I have no experience with the material but I suspect its the source of treble peaks.
 
Feb 6, 2015 at 10:06 PM Post #25 of 166
Once Frank considers his work done and his final iteration complete, he should definitely send them to Tyll for measurement. :O

I'm a bit hesitating to send him a headphones full of blutack :) But definitely it's on my next do to list  
 
  Hey, frank2908, nice project!
 
I'll be in Vietnam in June (2015), so if you have time, we can meet up and compare notes on modding. Will most likely bring my modded Sony Z7 and Audeze LCD-2, so you can check them out.

Sure. How did you mode your sony z7? I'm interested in any headphones mod, there are new ideas that I haven't try yet.
 
Feb 6, 2015 at 11:22 PM Post #27 of 166
  Funny how the admin quoted this page as "DIY Modified HD800's," when in fact all they are, are headphones with HD800 drivers. 

who cares
 
Feb 6, 2015 at 11:32 PM Post #28 of 166
Sure. How did you mode your sony z7? I'm interested in any headphones mod, there are new ideas that I haven't try yet.


I added reflections to bring back some high frequencies, and then applied some reflection dampening to reduce low mid warmth. But the greatest change comes from mass loading. Essentially increasing baffle rigidity using more than just dynamat. This helps dampen excess vibration in the whole structure at low frequencies, and it also helps offset the strength of the magnetic field for more precise control of the diaphragm at these frequencies. As a result, there is more transparency across the board.

My Z7 will most likely get measured against the stock pair soon. Will work on it even more when I get it back, as the current version is still just a test bed for this new mass loading mod. Originally, I used blu-tack and dynamat for this task, but I have since resorted to more... extreme materials.

I was hesitant to state anything, since theory may not always become reality, but impressions from other Head-fi'ers who have heard the first few prototypes gave me more confidence in the applicability of this mod. Purk currently has my pair, and he thinks it is very obviously different from stock where transparency and soundstaging are concerned. If we meet in the summer, I can give you a full breakdown, and you can also listen for the effect.
 
Feb 6, 2015 at 11:42 PM Post #29 of 166
Any chance we could see the insides of the 3D printed ear cups? I'm interested to see the dampening and internal design of the cups. I've honestly never seen the insides of a Sony R10 or other TOTL woodie cans like TH600/TH900, D2k/D5k/D7k, or W1k/W3k/W5k. That would be really really cool.
 
Feb 7, 2015 at 12:18 AM Post #30 of 166
I added reflections to bring back some high frequencies, and then applied some reflection dampening to reduce low mid warmth. But the greatest change comes from mass loading. Essentially increasing baffle rigidity using more than just dynamat. This helps dampen excess vibration in the whole structure at low frequencies, and it also helps offset the strength of the magnetic field for more precise control of the diaphragm at these frequencies. As a result, there is more transparency across the board.

My Z7 will most likely get measured against the stock pair soon. Will work on it even more when I get it back, as the current version is still just a test bed for this new mass loading mod. Originally, I used blu-tack and dynamat for this task, but I have since resorted to more... extreme materials.

I was hesitant to state anything, since theory may not always become reality, but impressions from other Head-fi'ers who have heard the first few prototypes gave me more confidence in the applicability of this mod. Purk currently has my pair, and he thinks it is very obviously different from stock where transparency and soundstaging are concerned. If we meet in the summer, I can give you a full breakdown, and you can also listen for the effect.

I agree with you, mass damping is the most important thing to do for me if you use plastic or aluminium as a material for cup and baffle. Wood on the other hand need little or none mass damping because the resonance of wood cause coloration that is frequently desirable. I would love to hear more from you about the "extreme material"
Now time for some more pics:

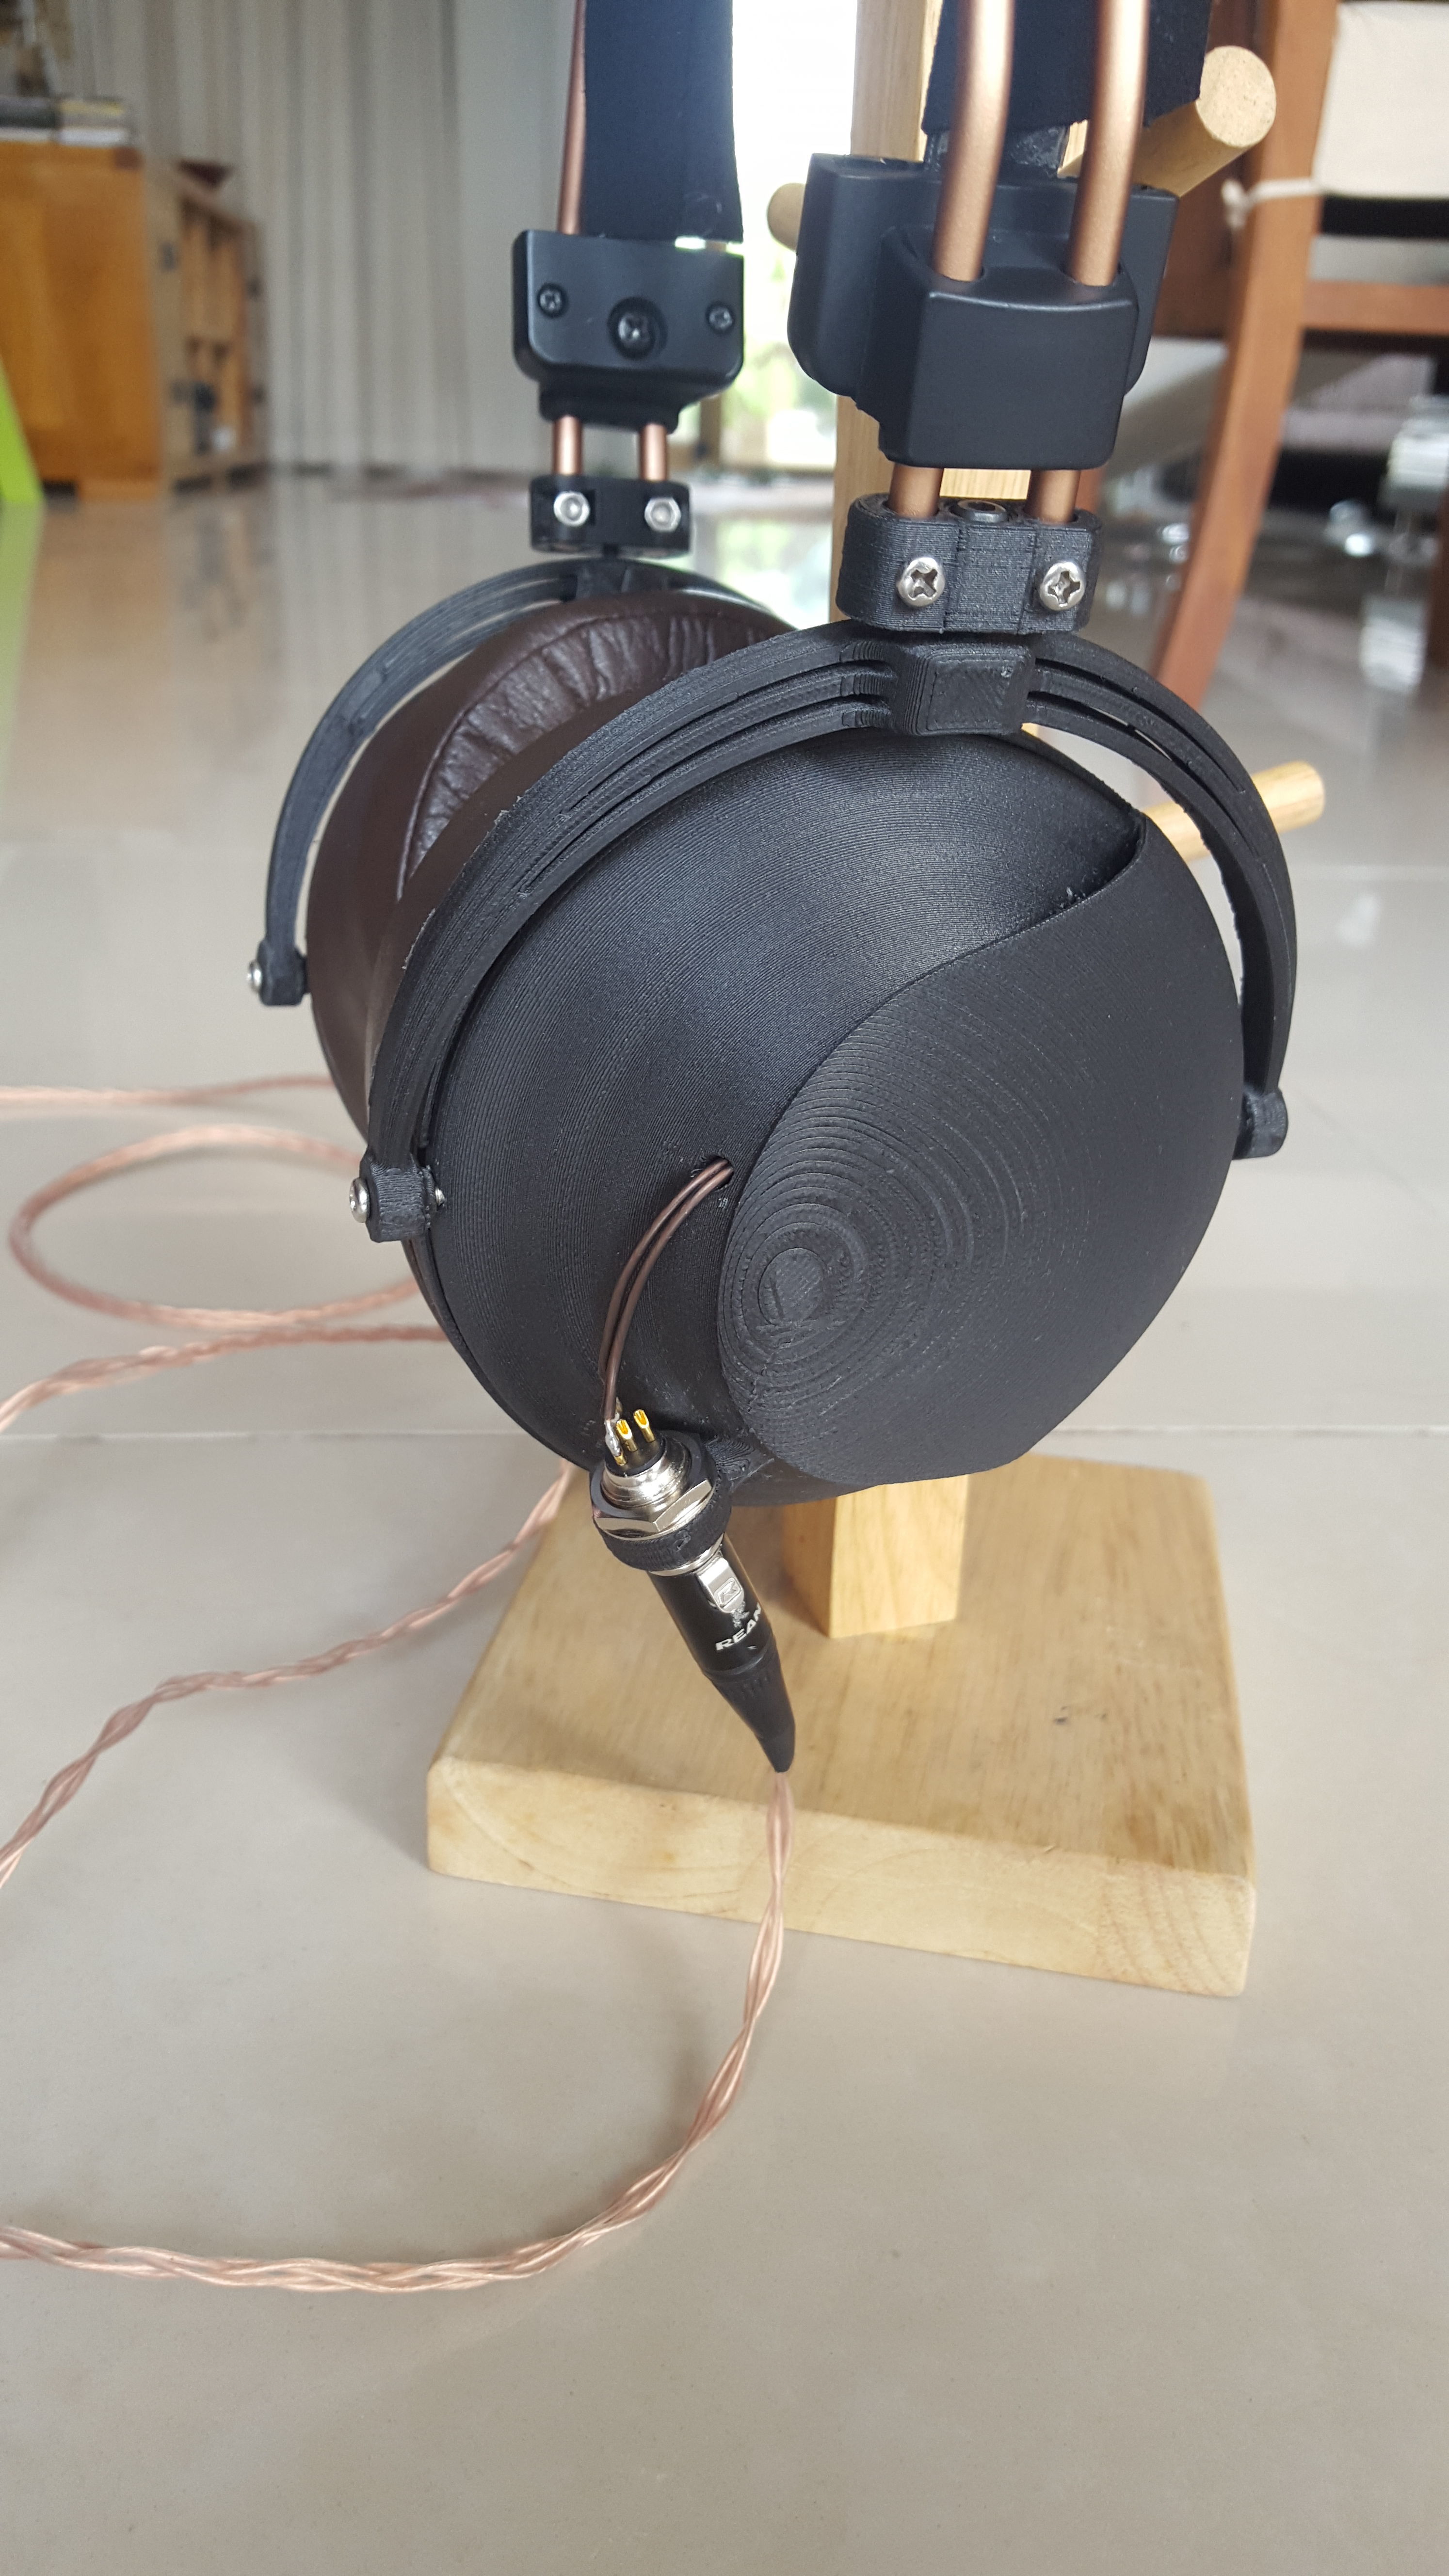
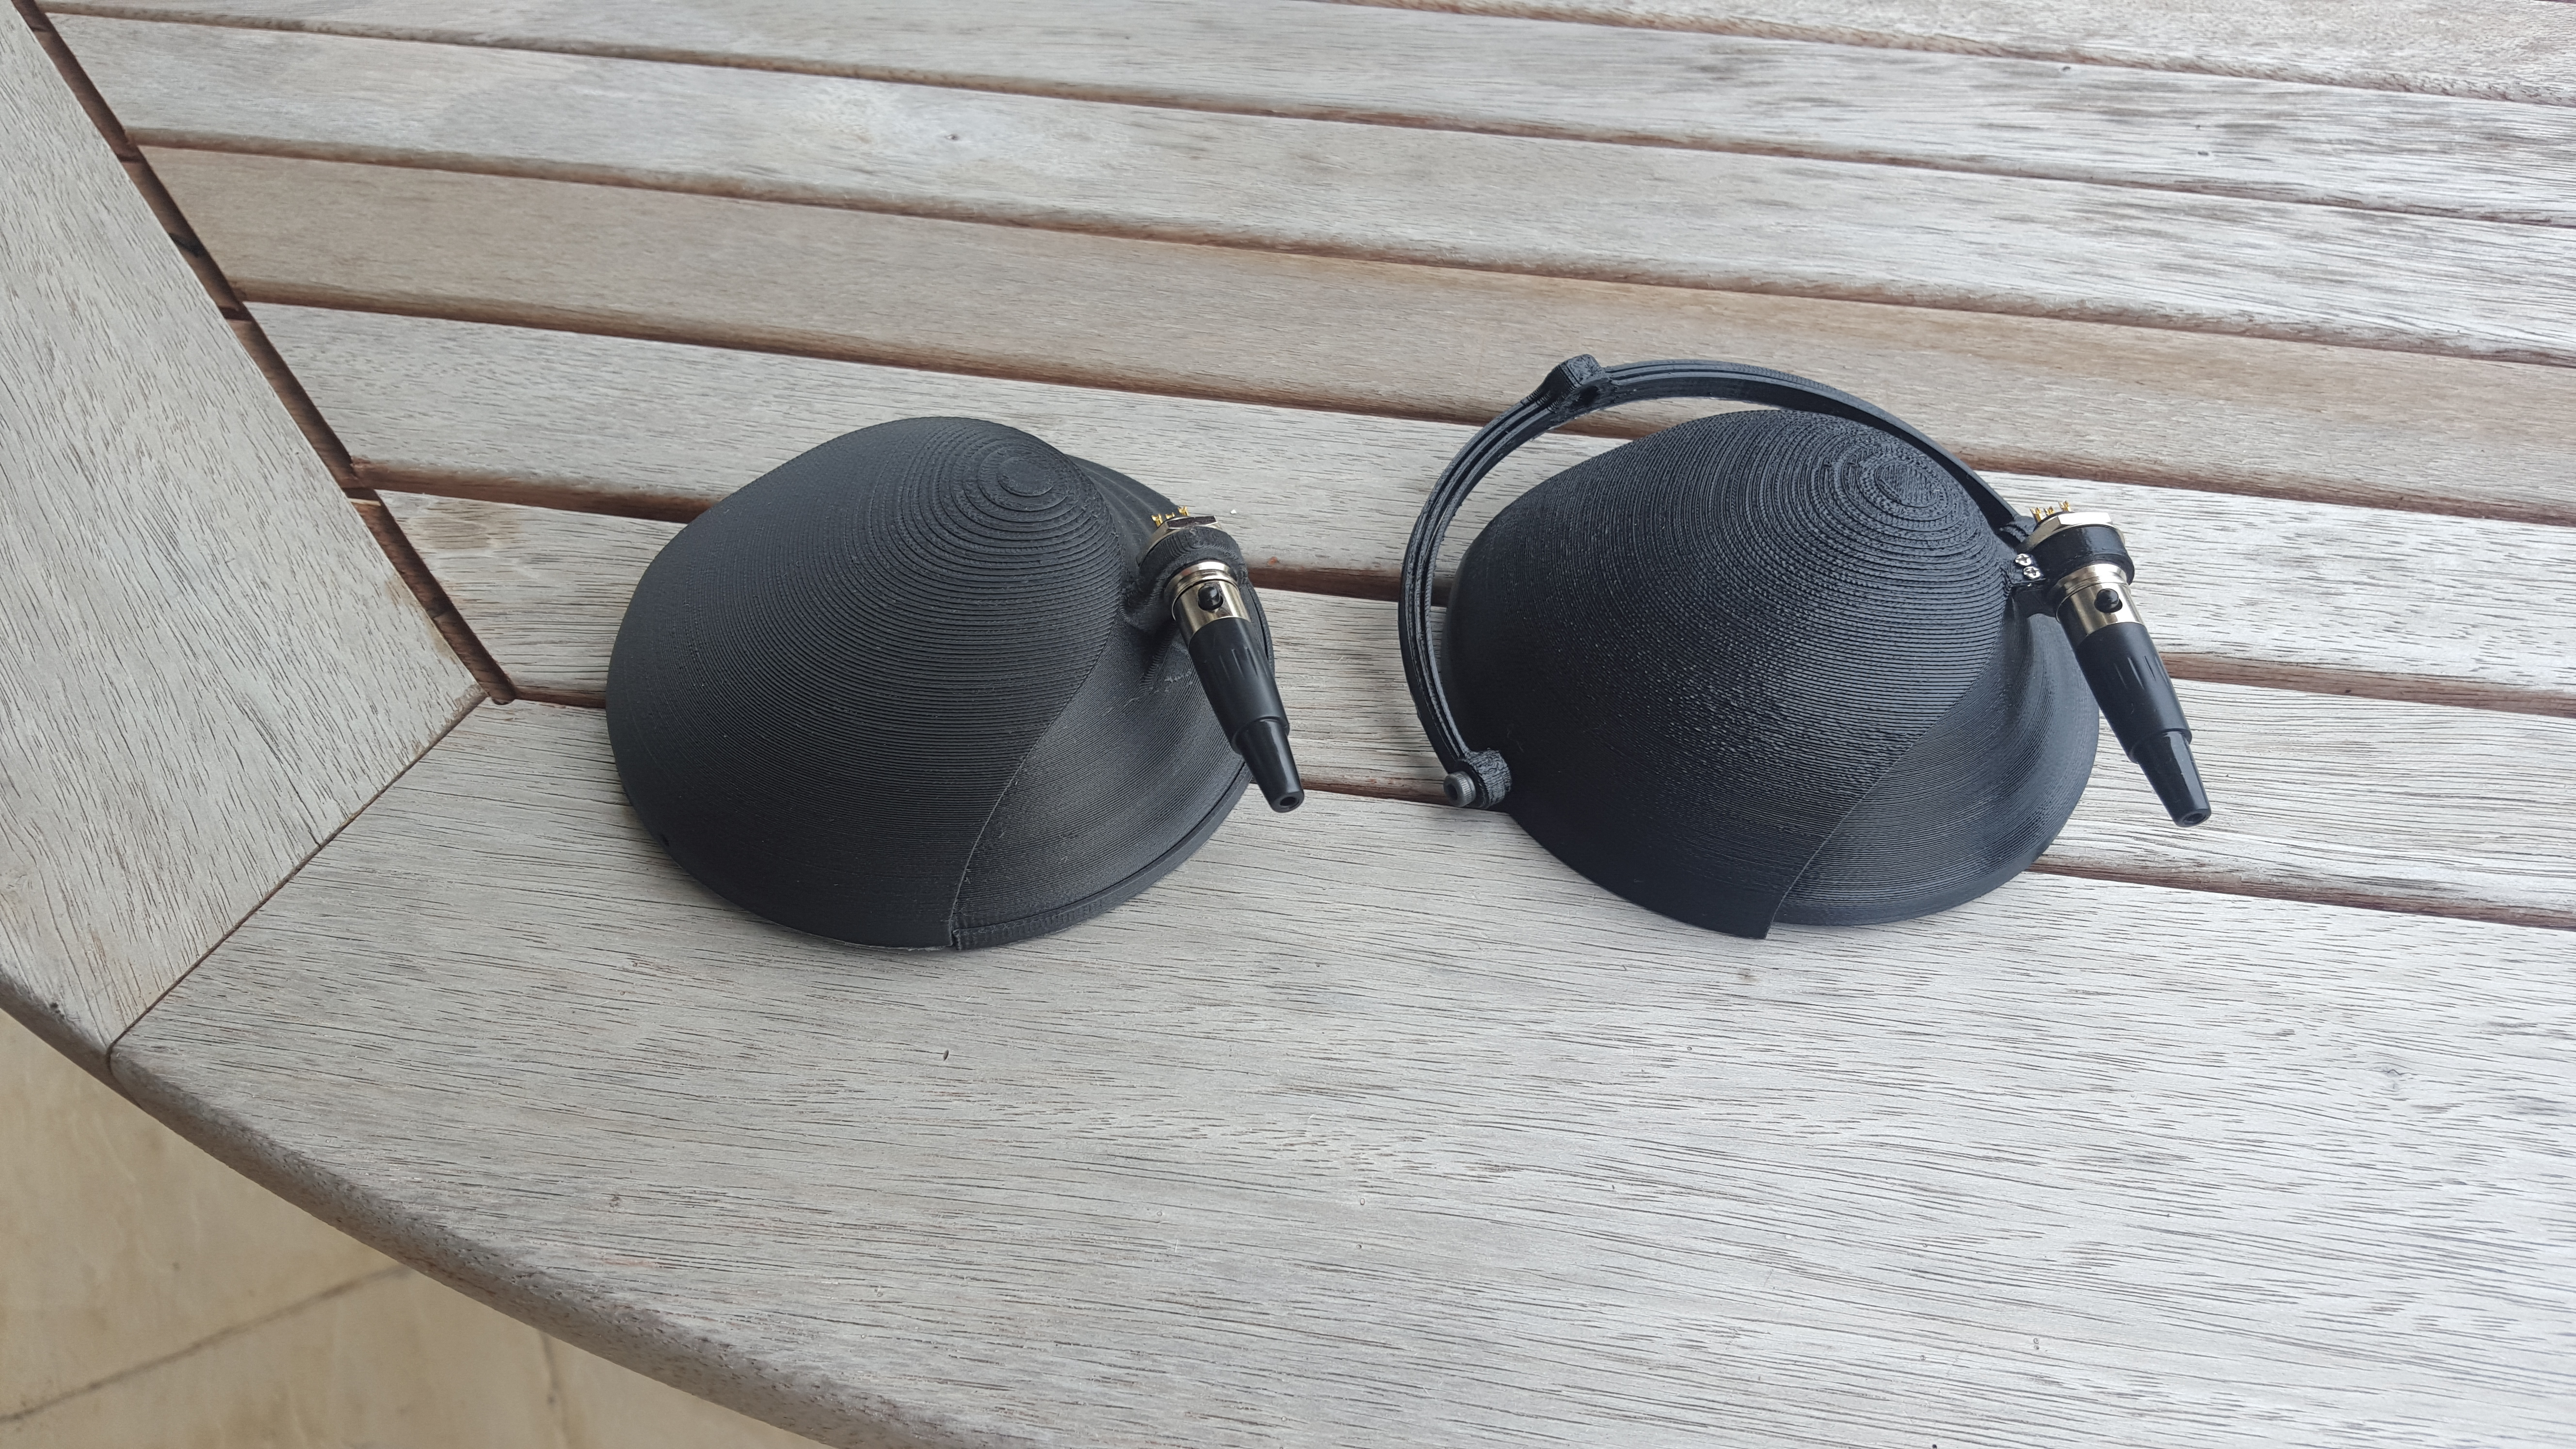
I made the cable from Double Helix Cable Nucleotide, Switchcraft 3.5mm jack (so I can use with my dx90 conveniently) and rean tiny XLR. For mini XLR, I think Rean is a good choice for it's aesthetic and affordability. The terminals are easy to solder. I use a plastic sleeving for speaker cable, similar to Techflex, but more coarse, you can see the braiding through the sleeves.

A clear shot oy the yokes assembly. The stock yoke from the Superlux HD660 is too small (the same size as Beyerdynamics), so I made a new yoke from stainless steel.I cut the shape from 2mm steel plate, then grinded and polished by dremel.
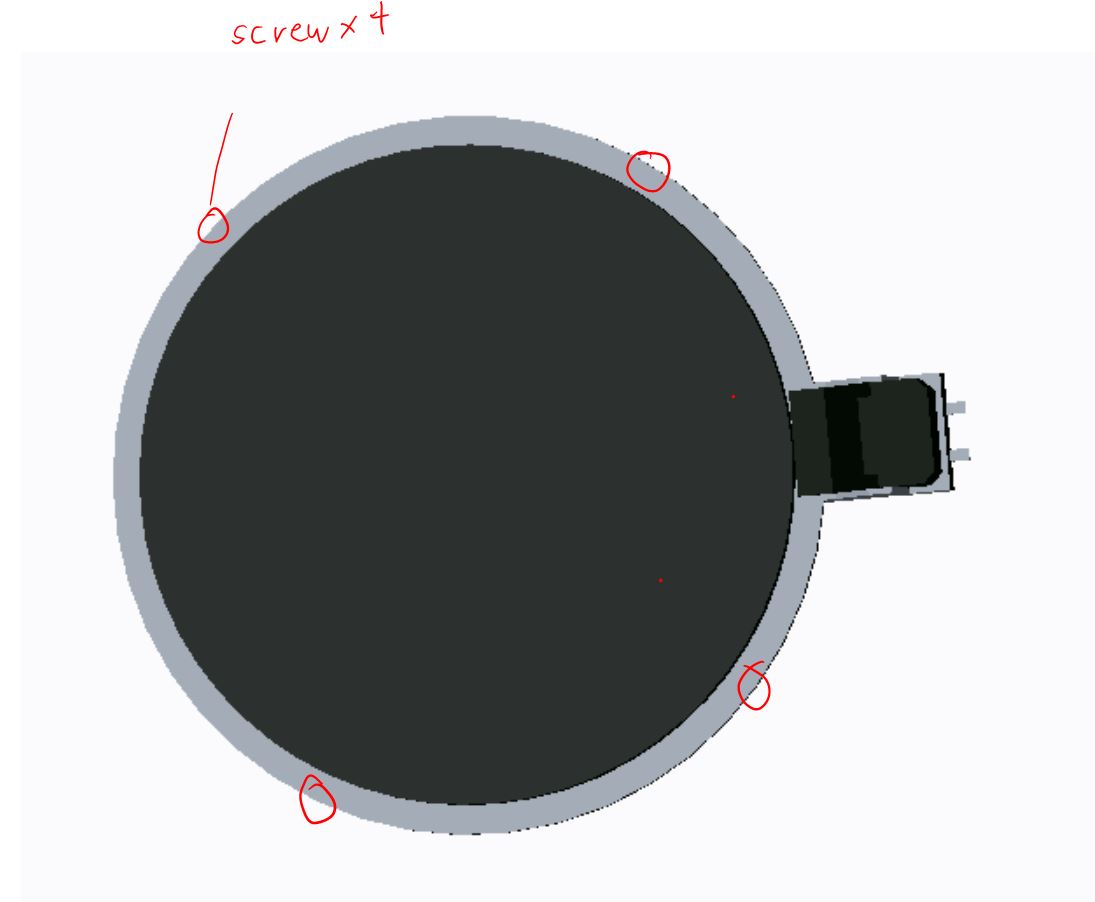
The hinge of the yoke (small rectangular plastic thing) is 3d printed from carbon fiber abs, glued on to the yoke. Then I use M3 socket head screw to attach the yoke to the cup.

There are 3 holes near the mini xlr connector. I designed the cups with vents at the front, but I need to drill extra 3 holes for tunning.

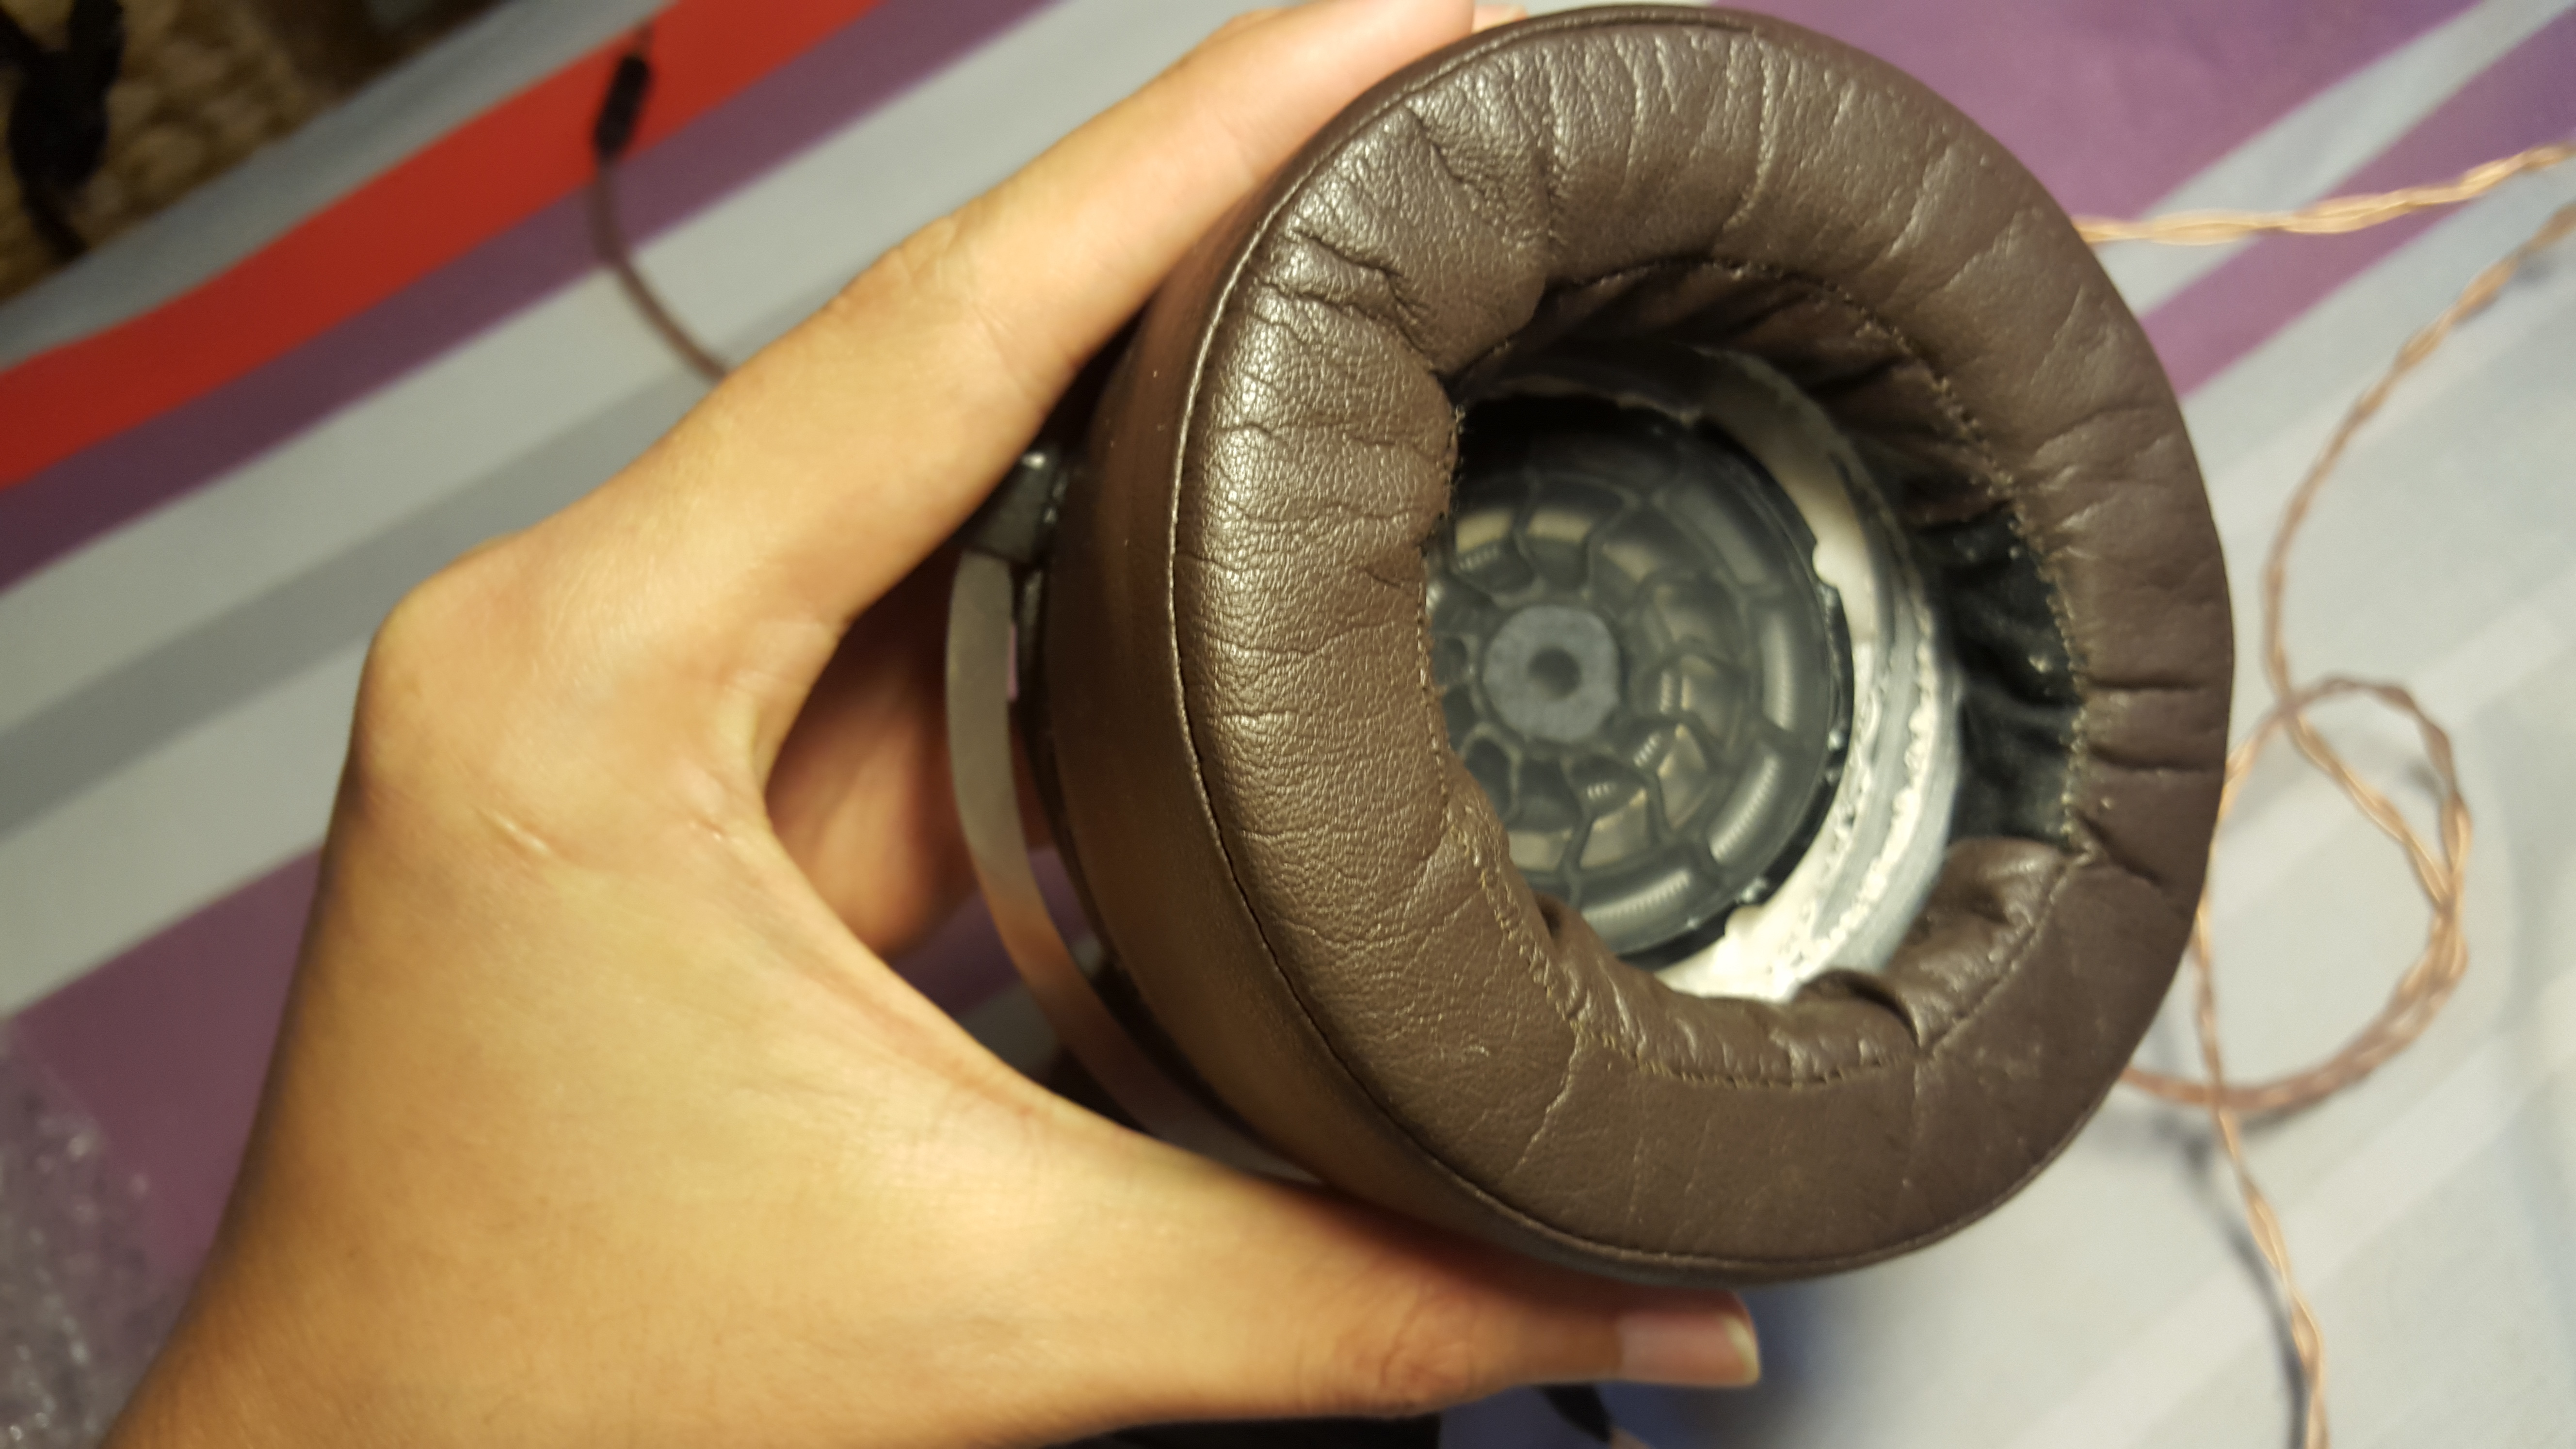
I used similar method to the Denon Markl mod, adding foam to the thicker side of the pads and cotton to the thinner side. It just sound good to my ears in this config. Also note the 2 holes I punched out of the earpads, helps thinning the mid.

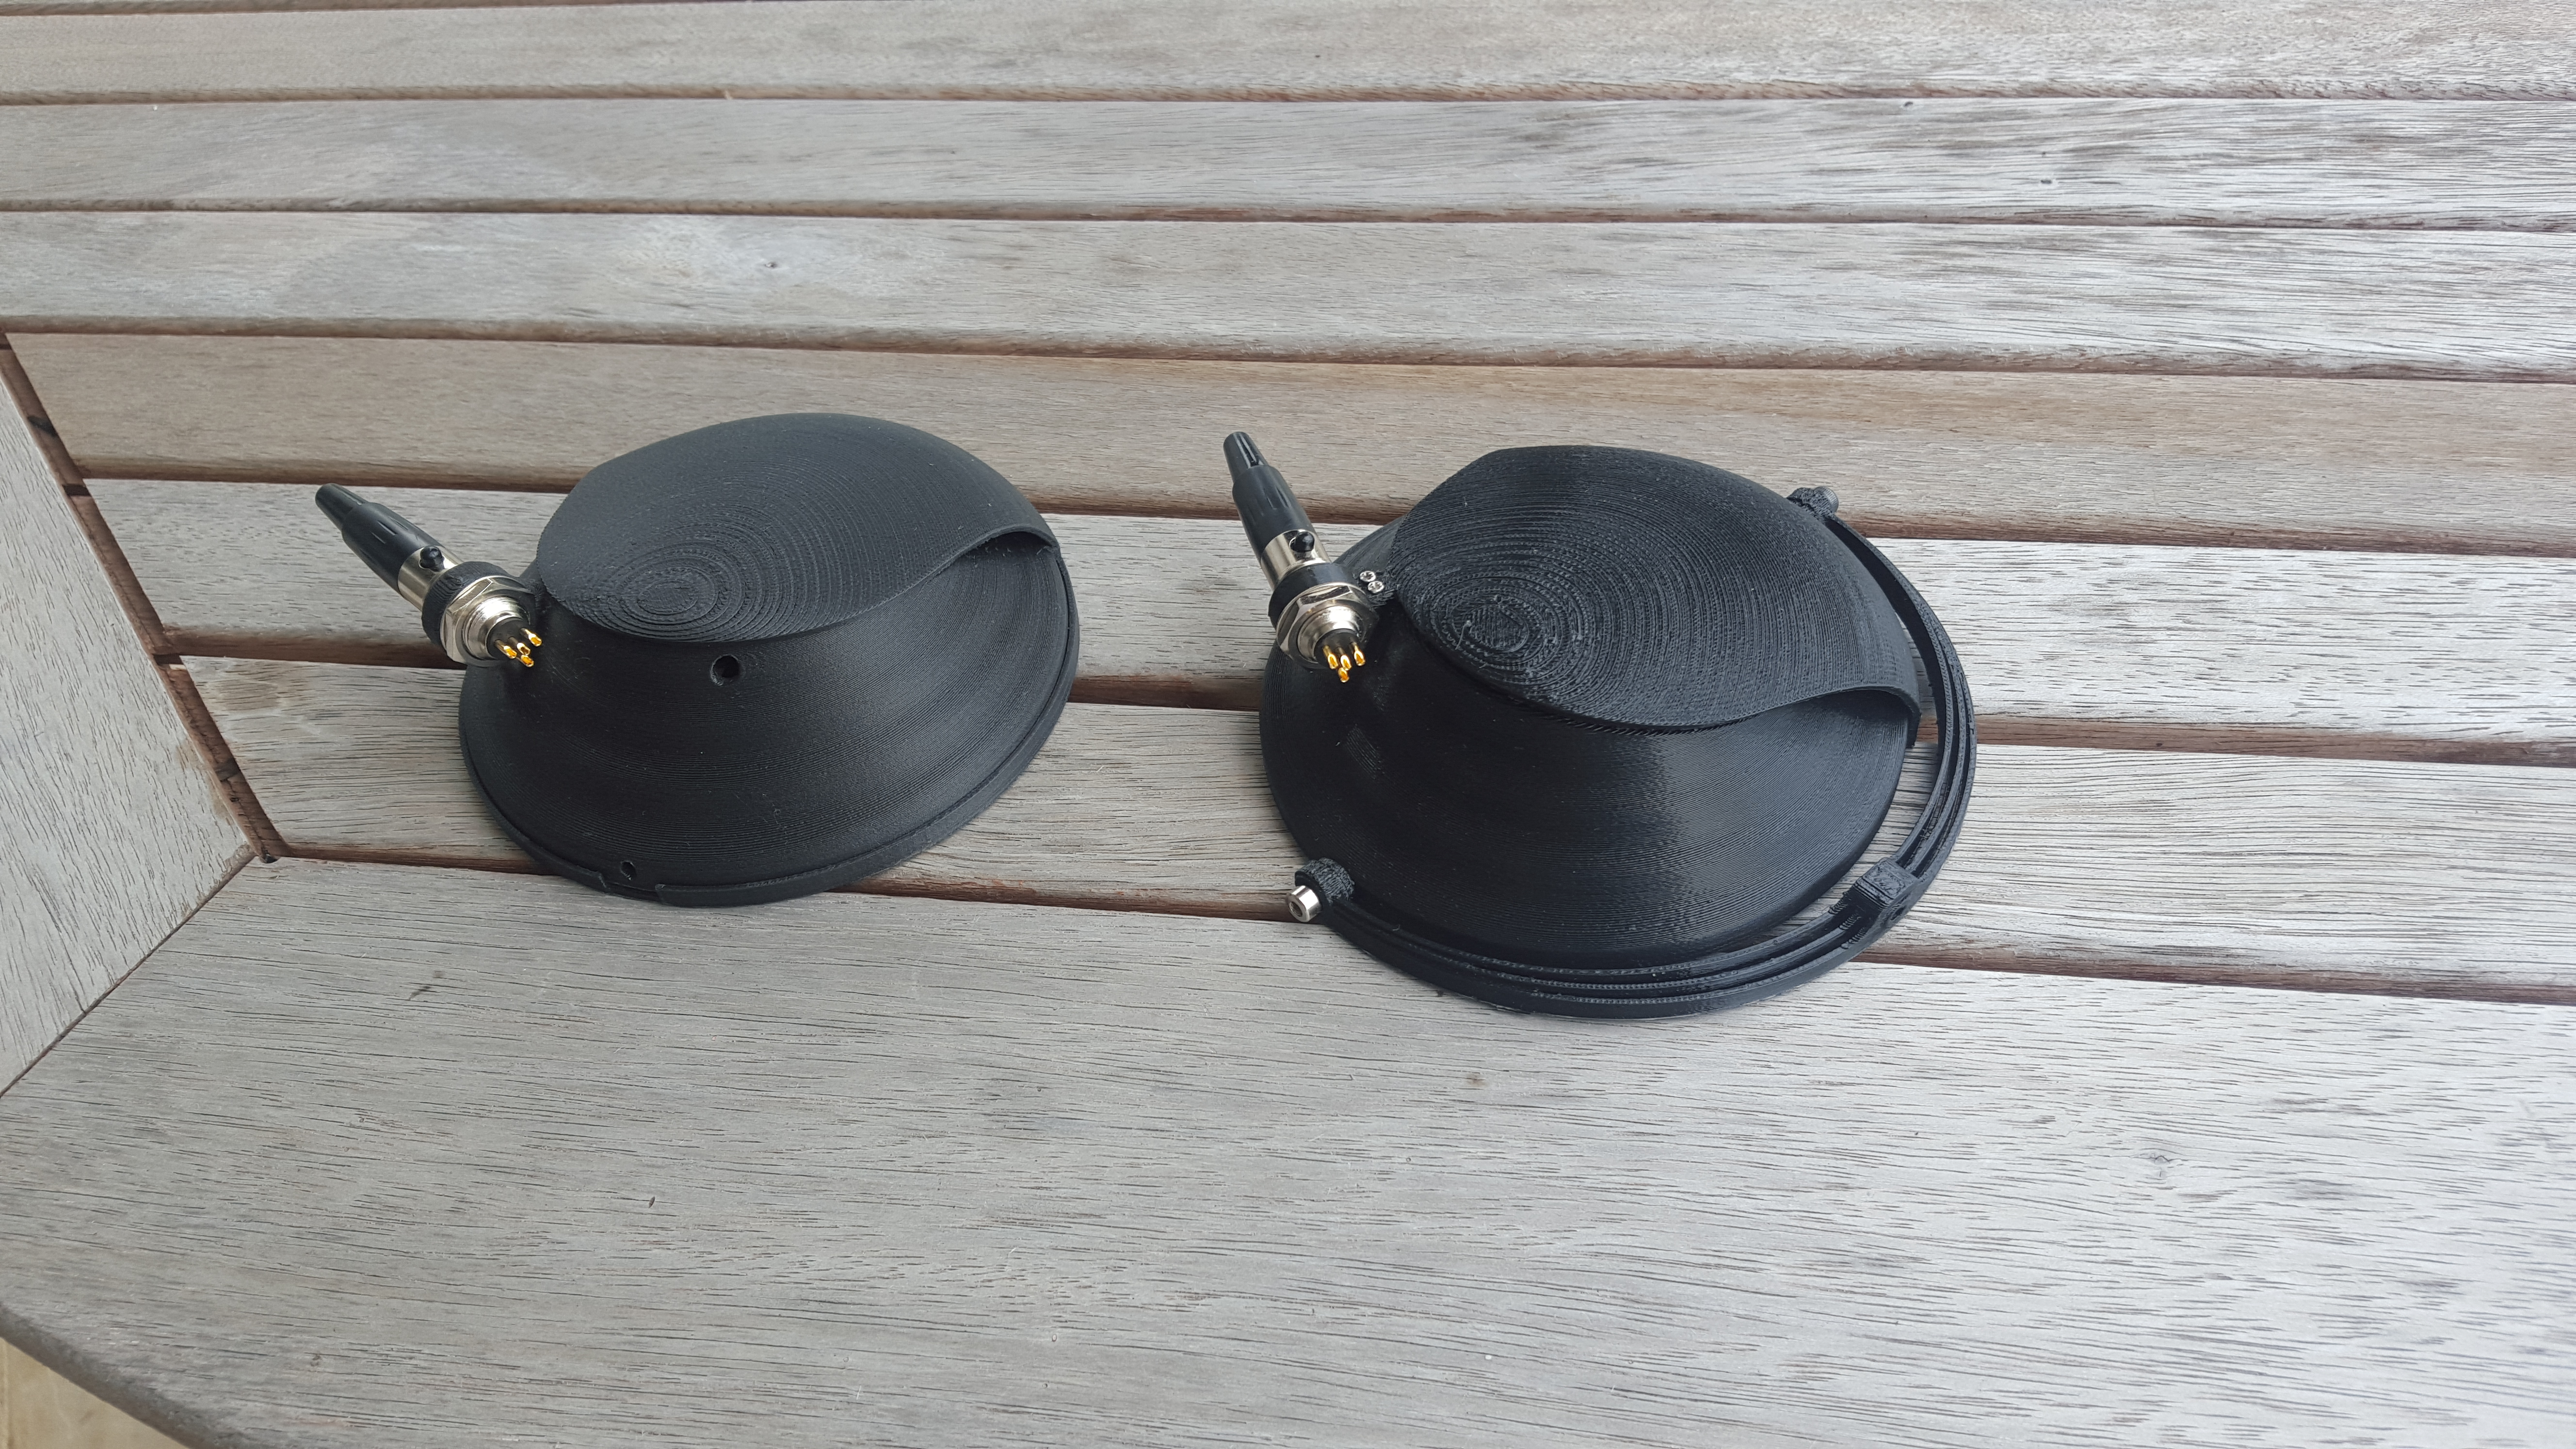
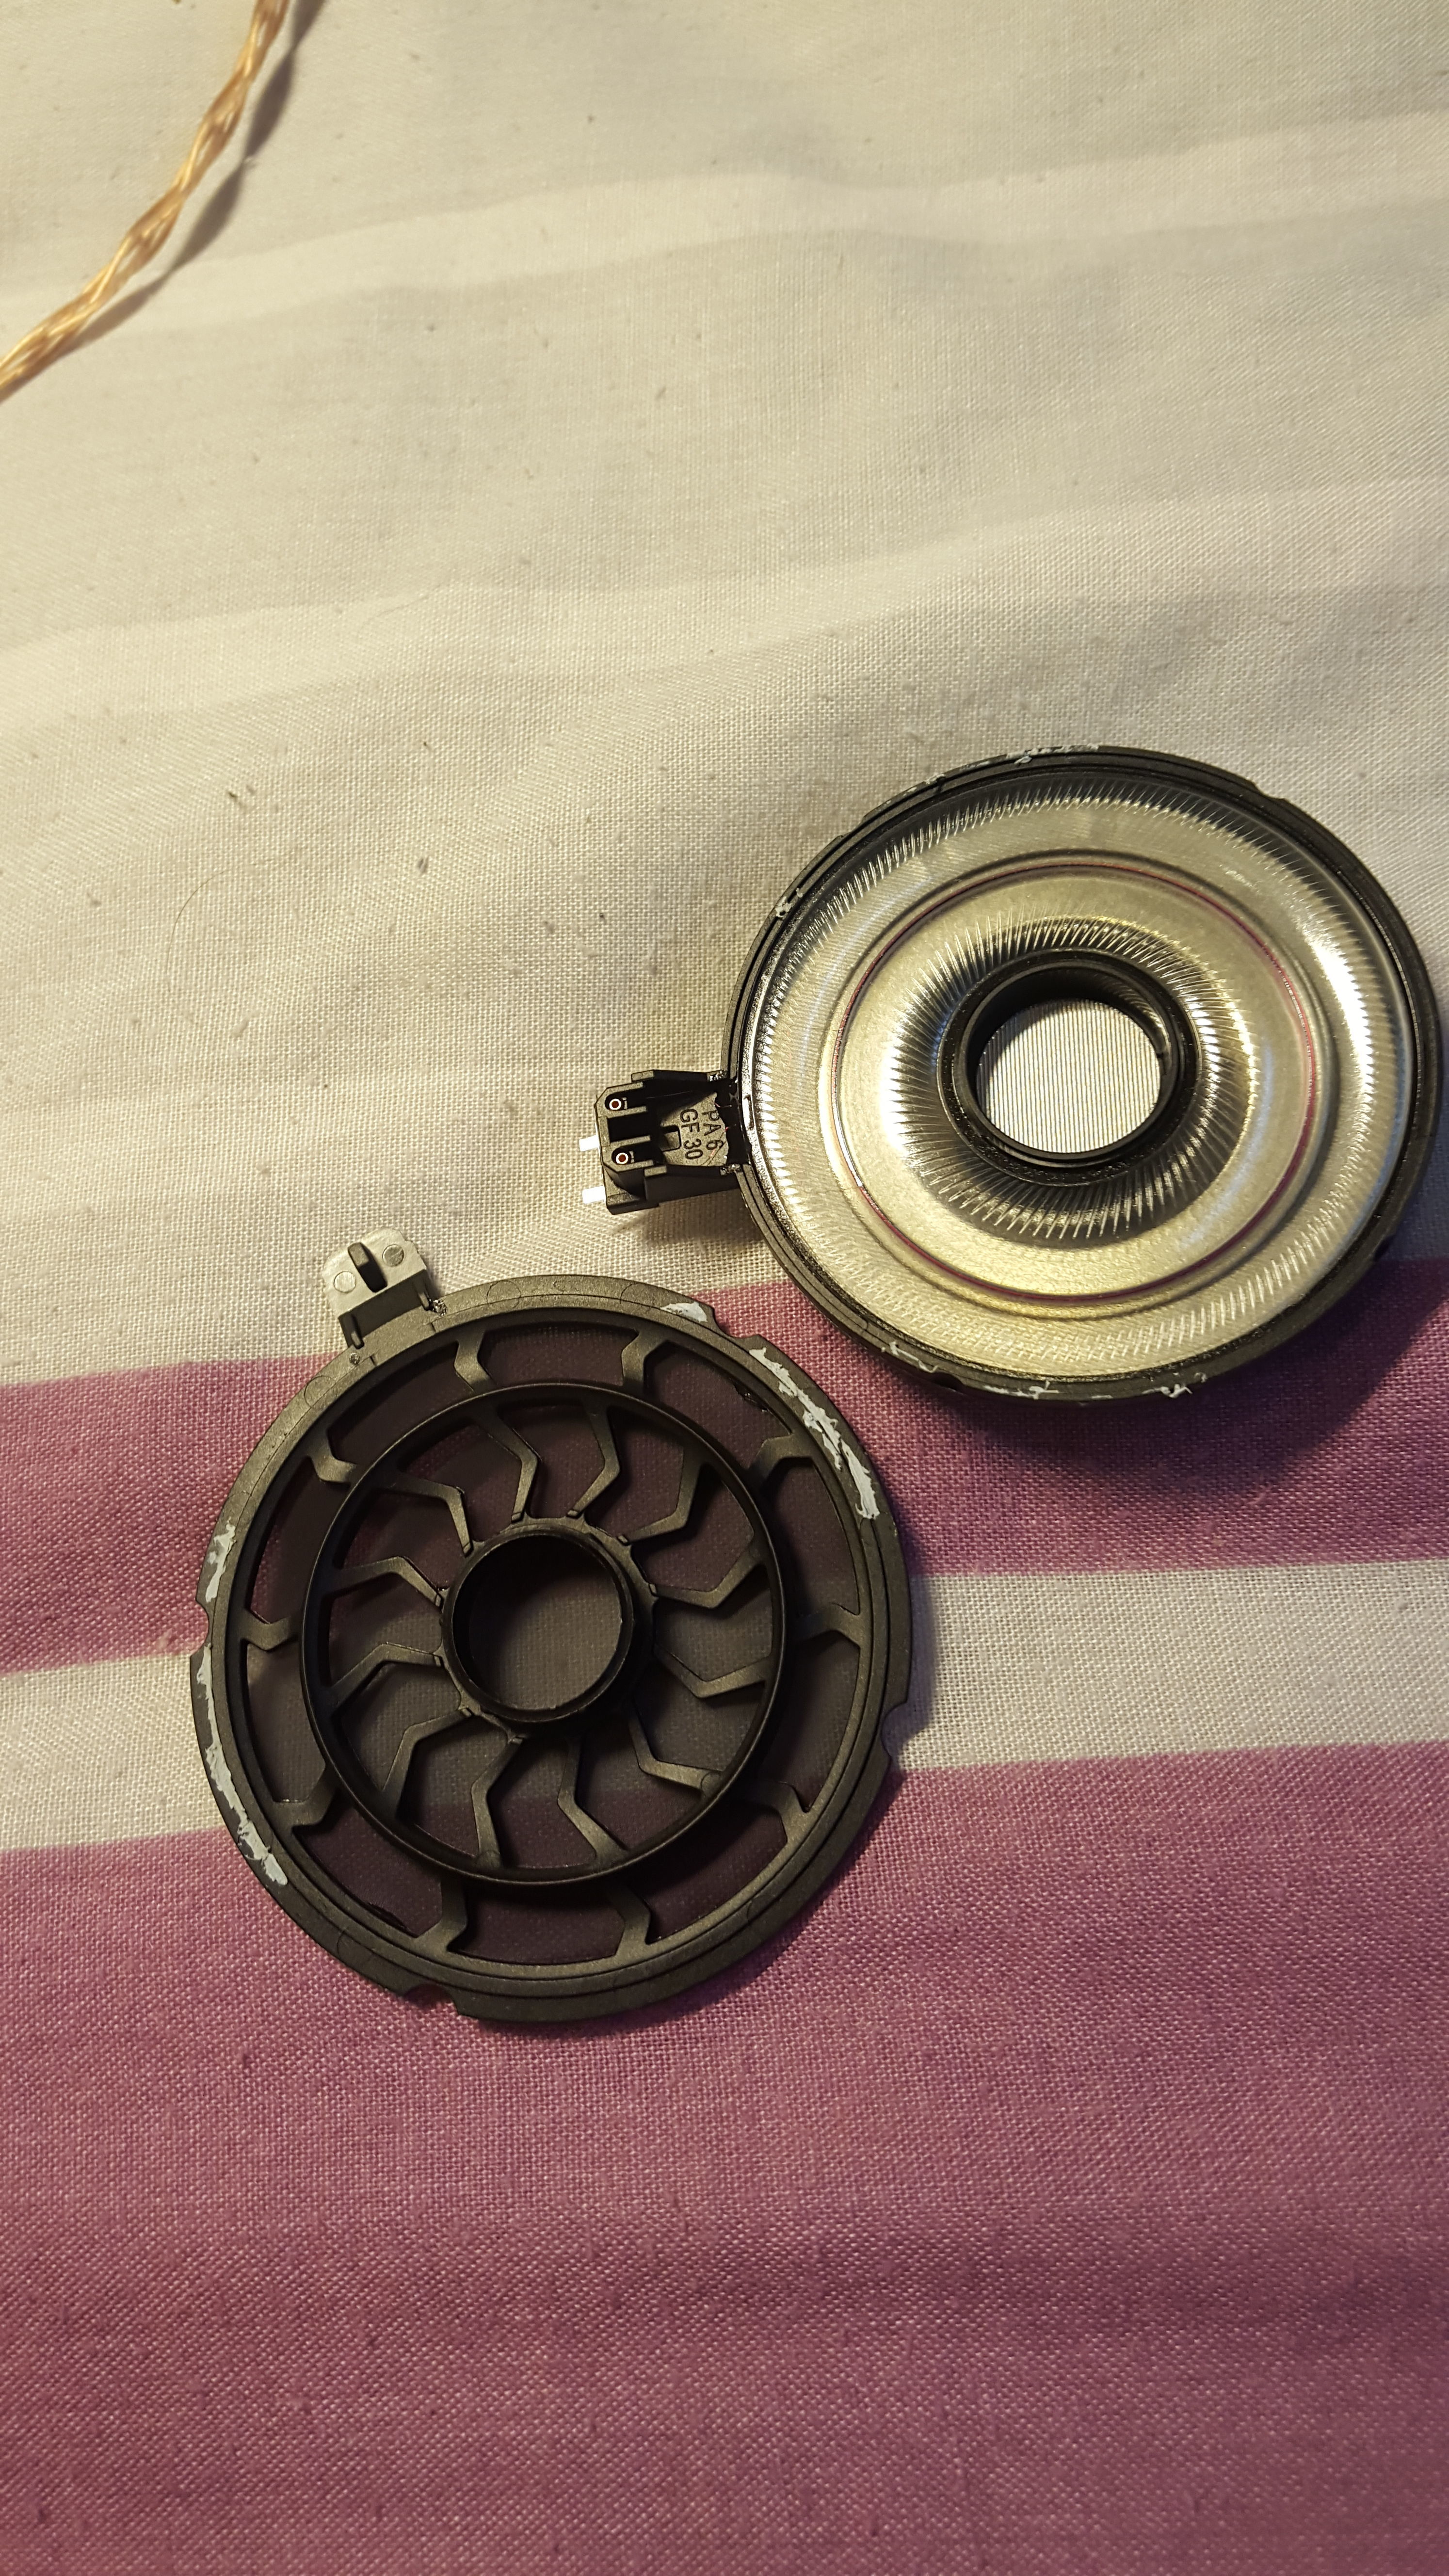
The naked shot: the baffle is 3d printed from 3 parts, saving me from printing in 1 go and spend days removing the supporting materials. THe white blutack is there to mass damp the baffle and reduce reflection from the driver. There are small vents connecting to the main cup chamber. this reduces the pressure and again helping the soundstage, but too many open vents and the sound becomes thin with peaky treble.
There is also a lip for mounting the Audeze earpads.

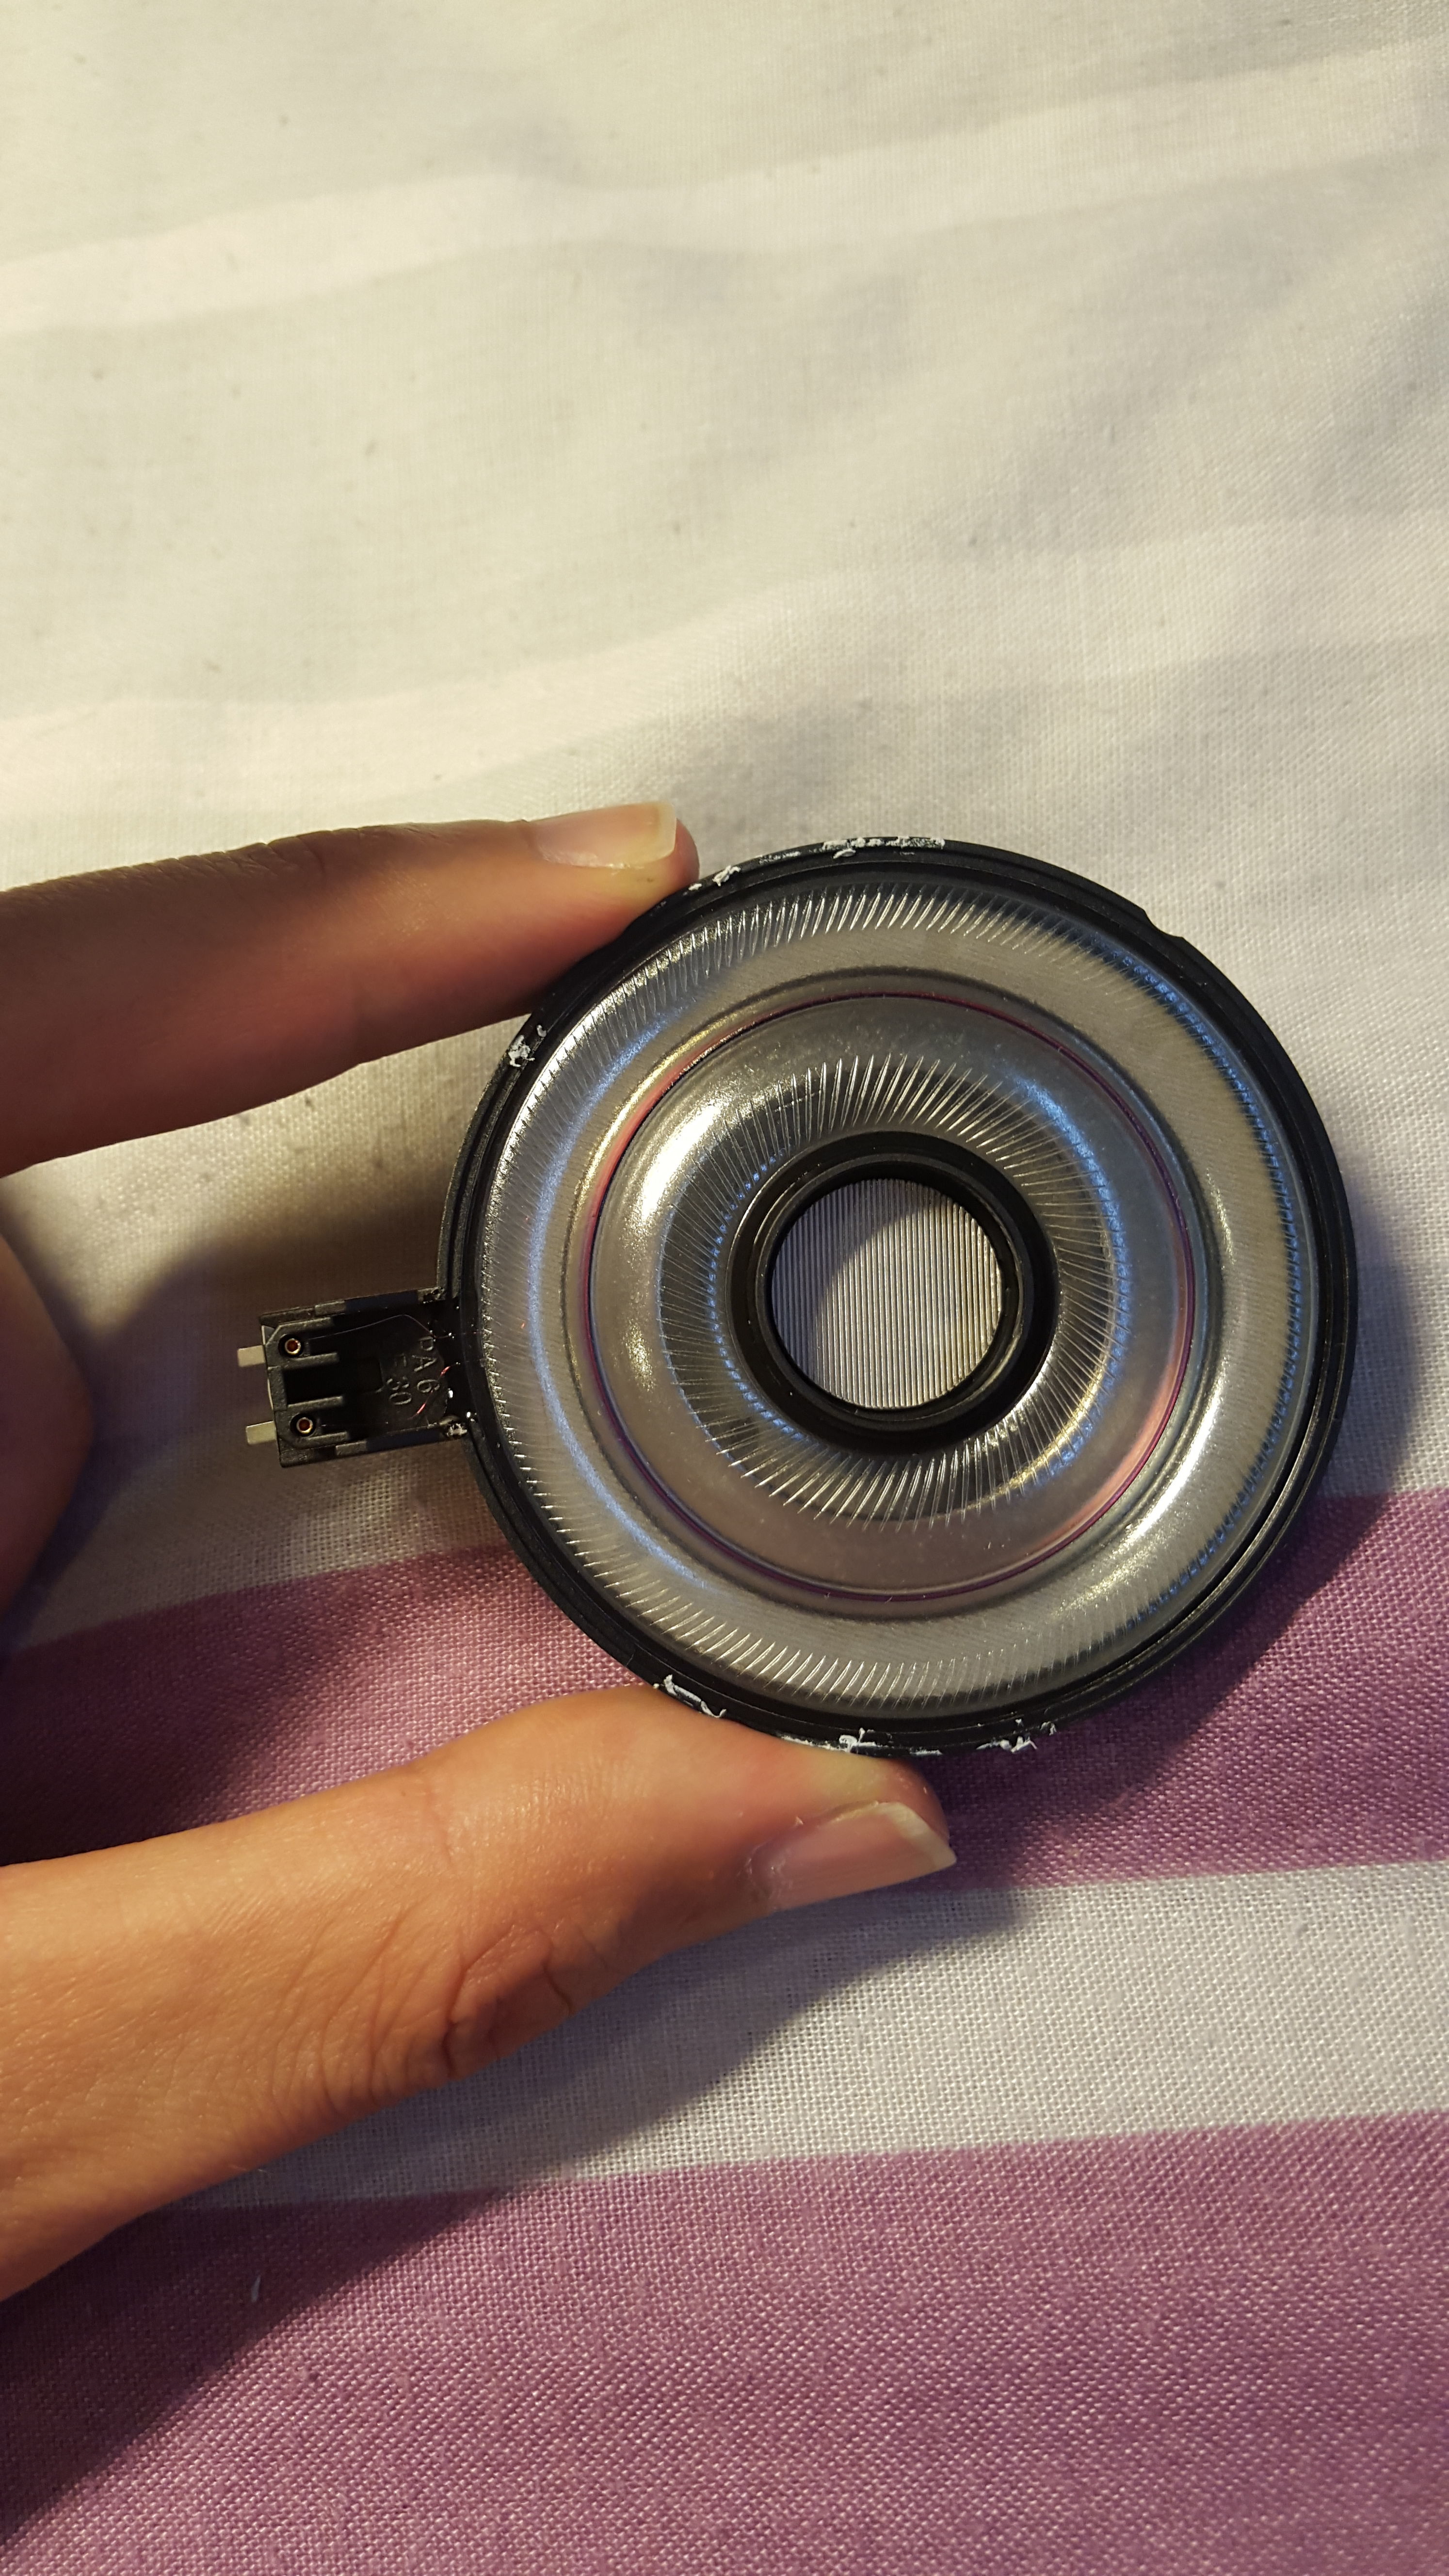
Final pics showing the beautifull hd800 driver and my crappy craftsmanship with lots of blu-tack
 

Users who are viewing this thread

Back
Top