


pulchritudejim
New Head-Fier
- Joined
- Jan 27, 2014
- Posts
- 27
- Likes
- 21
Hello all, I was having issues with picking up EMI with the stock cable of my Hd 598s, so I decided to replace it with something heavily shielded. Unfortunately, no one seems to make shielded headphone cables without them being incredibly expensive. So I decided to make my own. This isn't straight forward, seeing as the Hd598 has a proprietary connector on the headphone side. I couldn't find any wiring diagrams of the stock cable or any tutorials on how to make your own HD598 cable. So I tore apart my stock cable and used a continuity tester to reverse engineer it. These are my results:
Here is the wiring table for the Stock HD598 connector for those who do not wish to follow this tutorial.
Black and Blue are both Ground, Bottom Conductors. Fuse them together
Red is Ring, Second to top conductor, Right driver
White is Top Conductor, Tip, left driver
I would double check this with a continuity tester just in case Sennheiser changed the wire colors on you. I explain this process at the end of this post.
Materials used:
-Heat Shrink Tubing
-super glue
-solder
-RadioShack 1/4 inch to 1/4 inch Instrument cable http://www.radioshack.com/product/index.jsp?productId=32714586- You do not have to use this cable. There is also a purple variant that is the same thing.( The purple variant might have different colored wires on the inside.) You can use a 1/8 to 1/8 if you wish. The process should be similar. However, you will be on your own for figuring out which wire is what on the inside.
-HD598 Stock Cable
-Foil tape
Tools:
-X-acto knife
-Wire Stripper
-Soldering iron] - Soldering experience is required here. If you do not have soldering experience, practice a lot on something else before you attempt this
-wire cutters
-Heat Gun - A lighter is a crude substitute for this. Not nearly as clean, safe, or effective as a proper heat gun.
-Multimeter with continuity tester - You might need this
WARNING: If you intend to do this yourself, please be careful. If you do not carefully isolate the cables, you WILL FRY YOUR AMP. Please only do this if you are comfortable. ATTEMPT THIS AT YOUR RISK.
1)Cut off special end of stock HD598 cable. I cut it off about 3-5 inches from the bottom of the strain relief. Cut off more if you would like more room for error.
2) Use X-acto knife to carefully cut back outer sheathing from the cable you just cut off about 1-2 inches.

3) Cut out strands of anything that's not copper or wire. There is a large bundle wrapped with the four conductors, as well as small ones in each wire. You do not have to be perfect. You will see what I mean.
4)Strip sheathing off of all 4 wires inside. If your stripper can't strip wires that small, use the x-acto knife to strip them. (cut very gently into sheathing until you feel grittiness, repeat a few times all around the wire, and it should come off quite easily.)
5)Cut off one end of the RadioShack instrument cable with the wire cutters. The aluminum grips unscrew. Cut closest to the clear part underneath.
6) Repeat process of cutting back sheathing as you did on the Stock cable. 1-2 inches should do it this time as well. Be careful not to cut too deep, as the woven copper strands on the outermost section of the meat of the cable is your Ground, and is important.
7)Pull back the woven copper ground and push it all the side. LEAVE IT INTACT. Remove the foil shielding around the 2 conductors inside. Strip those 2 conductors as you did in Step 4.
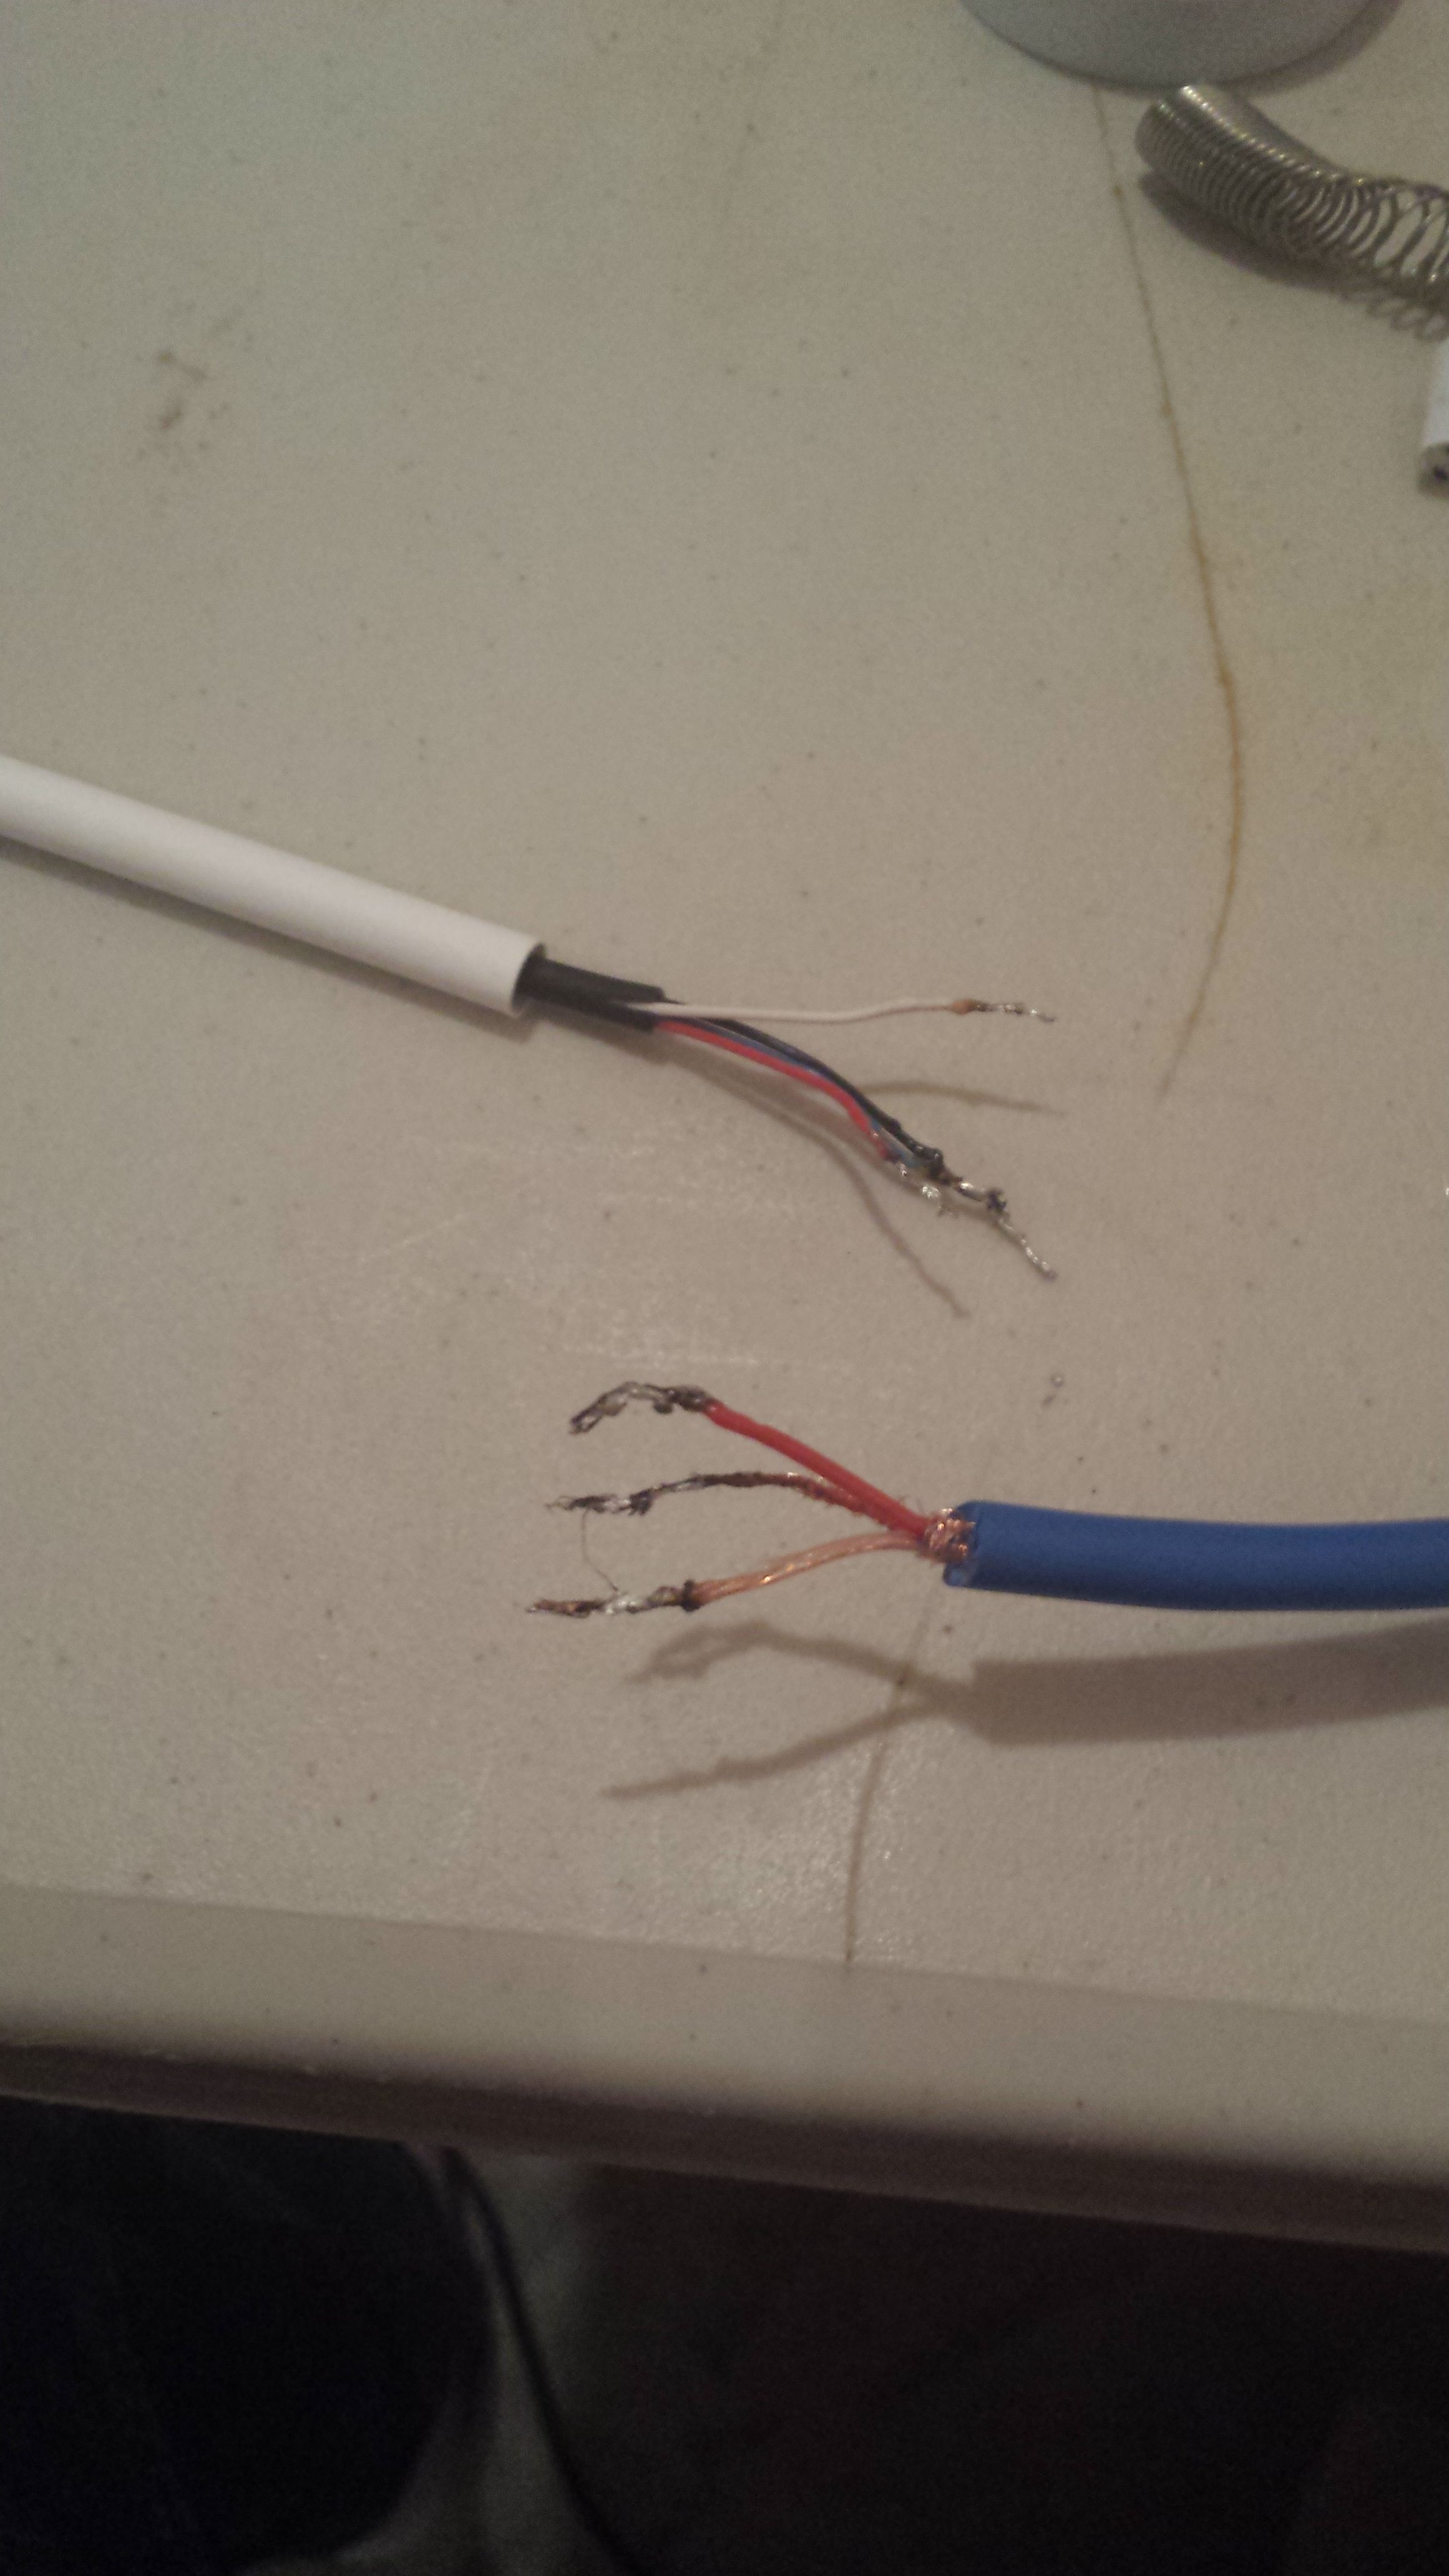
8) Twist the outer copper strands into a single wire. RadioShack should now look something like the blue cable here. (Without the solder of course)

9)Cut the heat shrink tubing so that it will COMPLETELY cover (and then some) any copper showing after you solder the wires together. Be sure to use the correct diameter tubing. Heat shrink should be no bigger than double the diameter of the wire it is covering at max. Yet it should be big enough that you can easily slide it on the wire and have some wiggle room.
10)Slide the heat shrink that will cover everything (your new outer jacketing) over on of your cables just like on the black HD598 cable in the picture from step 8. Getting the diameter right in order to fit both cables will be tricky. I ended using a diameter that was too small and I really had to work it to get it in the right position to finish up on when I was done.
11) Slide heat shrink onto the Red and Clear wires on the RadioShack. Same diameter and length rules as in Steps 9 and 8. Do not worry about the heat Shrinking the Blue, Black, or Bare wires.
12)Twist the wires and solder (This video shows you how to solder wires together: https://www.youtube.com/watch?v=Q9G9gaokqvM) together following this table: -Those who use a different cable will be different than this. Use a continuity tester to find where your own wires go. I will tell you how I did this near the end.
Red on the RadioShack goes to White on Stock
Clear on RadioShack goes to Red on Stock
Bare/Outer on RadioShack goes to Blue AND Black on Stock. Solder all 3 together.
Your cables should look something like this:

13) Postition heat shrink over exposed copper and shrink with heat gun or lighter (heat gun is better) Optional: Put a small dab of super glue into each end of heat shrink before shrinking to ensure it does not move over time. Be careful with this, excess super glue oozing around might cause a short circuit. HEED my WARNING at beginning of tutorial. As I said before, do not worry about heat shrinking the Blue/Black/Bare wires.
14) Wrap some foil tape around the wires to help shield them.

15)Slide outer Heat Shrink onto foil and shrink it down. I highly recommend putting a bit of super glue into each end before shrinking.


Voila! you are done! It may not be the prettiest cable ever, but it is very high quality. If you have issues with EMI noise being picked up by your old cable, this might be your solution. I'm happy to report that this cable completely stopped any interference I was having. Before I was picking up some AM radio station that was constantly preaching, as well squeals and pops.
How to use continuity tester (most multimeters have this function) to determine which wires to connect:
1) cut both cables like in Step 1 and 5
2)Strip internal wires like in Step 4
3)place test lead (polarity does not matter on these tests) on one care wire and move the other between the conductors on the plug end. When the tester beeps, that is the wire that corresponds to that conductor.
4) Repeat on both cables to fully map which wire goes to what. Write down your results. (Like I did with the wiring table for this tutorial)
5)Match up wires based on what conductor the wire matches to. (middle, top, and bottom is how I think of it)
That's pretty much it. In this case I completely tore apart the Stock cable in order to see where the 4th wire went. It ended up being soldering at the same point as the other Ground. (Bottom to me) (Blue and Black in this case)

That's everything! Thanks for reading, and I hope this helps.
If anyone sees any mistakes, let me know, I will fix it.
Here is the wiring table for the Stock HD598 connector for those who do not wish to follow this tutorial.
Black and Blue are both Ground, Bottom Conductors. Fuse them together
Red is Ring, Second to top conductor, Right driver
White is Top Conductor, Tip, left driver
I would double check this with a continuity tester just in case Sennheiser changed the wire colors on you. I explain this process at the end of this post.
Materials used:
-Heat Shrink Tubing
-super glue
-solder
-RadioShack 1/4 inch to 1/4 inch Instrument cable http://www.radioshack.com/product/index.jsp?productId=32714586- You do not have to use this cable. There is also a purple variant that is the same thing.( The purple variant might have different colored wires on the inside.) You can use a 1/8 to 1/8 if you wish. The process should be similar. However, you will be on your own for figuring out which wire is what on the inside.
-HD598 Stock Cable
-Foil tape
Tools:
-X-acto knife
-Wire Stripper
-Soldering iron] - Soldering experience is required here. If you do not have soldering experience, practice a lot on something else before you attempt this
-wire cutters
-Heat Gun - A lighter is a crude substitute for this. Not nearly as clean, safe, or effective as a proper heat gun.
-Multimeter with continuity tester - You might need this
WARNING: If you intend to do this yourself, please be careful. If you do not carefully isolate the cables, you WILL FRY YOUR AMP. Please only do this if you are comfortable. ATTEMPT THIS AT YOUR RISK.
1)Cut off special end of stock HD598 cable. I cut it off about 3-5 inches from the bottom of the strain relief. Cut off more if you would like more room for error.
2) Use X-acto knife to carefully cut back outer sheathing from the cable you just cut off about 1-2 inches.
3) Cut out strands of anything that's not copper or wire. There is a large bundle wrapped with the four conductors, as well as small ones in each wire. You do not have to be perfect. You will see what I mean.
4)Strip sheathing off of all 4 wires inside. If your stripper can't strip wires that small, use the x-acto knife to strip them. (cut very gently into sheathing until you feel grittiness, repeat a few times all around the wire, and it should come off quite easily.)
5)Cut off one end of the RadioShack instrument cable with the wire cutters. The aluminum grips unscrew. Cut closest to the clear part underneath.
6) Repeat process of cutting back sheathing as you did on the Stock cable. 1-2 inches should do it this time as well. Be careful not to cut too deep, as the woven copper strands on the outermost section of the meat of the cable is your Ground, and is important.
7)Pull back the woven copper ground and push it all the side. LEAVE IT INTACT. Remove the foil shielding around the 2 conductors inside. Strip those 2 conductors as you did in Step 4.
8) Twist the outer copper strands into a single wire. RadioShack should now look something like the blue cable here. (Without the solder of course)
9)Cut the heat shrink tubing so that it will COMPLETELY cover (and then some) any copper showing after you solder the wires together. Be sure to use the correct diameter tubing. Heat shrink should be no bigger than double the diameter of the wire it is covering at max. Yet it should be big enough that you can easily slide it on the wire and have some wiggle room.
10)Slide the heat shrink that will cover everything (your new outer jacketing) over on of your cables just like on the black HD598 cable in the picture from step 8. Getting the diameter right in order to fit both cables will be tricky. I ended using a diameter that was too small and I really had to work it to get it in the right position to finish up on when I was done.
11) Slide heat shrink onto the Red and Clear wires on the RadioShack. Same diameter and length rules as in Steps 9 and 8. Do not worry about the heat Shrinking the Blue, Black, or Bare wires.
12)Twist the wires and solder (This video shows you how to solder wires together: https://www.youtube.com/watch?v=Q9G9gaokqvM) together following this table: -Those who use a different cable will be different than this. Use a continuity tester to find where your own wires go. I will tell you how I did this near the end.
Red on the RadioShack goes to White on Stock
Clear on RadioShack goes to Red on Stock
Bare/Outer on RadioShack goes to Blue AND Black on Stock. Solder all 3 together.
Your cables should look something like this:
13) Postition heat shrink over exposed copper and shrink with heat gun or lighter (heat gun is better) Optional: Put a small dab of super glue into each end of heat shrink before shrinking to ensure it does not move over time. Be careful with this, excess super glue oozing around might cause a short circuit. HEED my WARNING at beginning of tutorial. As I said before, do not worry about heat shrinking the Blue/Black/Bare wires.
14) Wrap some foil tape around the wires to help shield them.
15)Slide outer Heat Shrink onto foil and shrink it down. I highly recommend putting a bit of super glue into each end before shrinking.
Voila! you are done! It may not be the prettiest cable ever, but it is very high quality. If you have issues with EMI noise being picked up by your old cable, this might be your solution. I'm happy to report that this cable completely stopped any interference I was having. Before I was picking up some AM radio station that was constantly preaching, as well squeals and pops.
How to use continuity tester (most multimeters have this function) to determine which wires to connect:
1) cut both cables like in Step 1 and 5
2)Strip internal wires like in Step 4
3)place test lead (polarity does not matter on these tests) on one care wire and move the other between the conductors on the plug end. When the tester beeps, that is the wire that corresponds to that conductor.
4) Repeat on both cables to fully map which wire goes to what. Write down your results. (Like I did with the wiring table for this tutorial)
5)Match up wires based on what conductor the wire matches to. (middle, top, and bottom is how I think of it)
That's pretty much it. In this case I completely tore apart the Stock cable in order to see where the 4th wire went. It ended up being soldering at the same point as the other Ground. (Bottom to me) (Blue and Black in this case)
That's everything! Thanks for reading, and I hope this helps.
If anyone sees any mistakes, let me know, I will fix it.
