DIY Woody Grado/Symphones Magnums - A build diary
Sep 5, 2012 at 1:38 PM Thread Starter Post #1 of 128

Rav

1000+ Head-Fier
Joined
Oct 12, 2005
Posts
1,143
Likes
33
Preamble
 
When the HF1 came out way back when i was planning to do a full woody job on them, even going so far as to source some wood for the job, but never got started.  As it turned out i picked up some RS1s not all that long afterwards, so it seemed a little pointless by then.  Fast forward five or so years and i decide to have a look at Head-Fi for old times sake, after a long absence ... BIG mistake.  I had known about Symphones' Magnum upgrade service for some time, but it wasn't until a couple of months ago did i discover that Rhydon will sell a set of drivers on their own.  So barely a month after coming back to Head-Fi i have a set of v4 Magnum drivers and a burning desire to turn some wood.
 
The Wish List
 
When i was planning to woody my HF1s i'd always intended to make the cables detatchable, so that's a given.
Custom gimbals.
Custom rod blocks.
I'll probably get an off the shelf custom headband from headphone lounge, unless i score a sewing machine that will do leather...
 
The Wood
 
Getting on to the wood, i acquired a small blank of mahogany that the chippie claimed came from the pier (being one of Brighton's Piers, i don't know which one.  It looks like it could have been a deck board).  Anyway, when it was cut it got burned slightly and turned a very cool colour in my opinion.  The only thing against it is that it's not wide enough to turn with the grain end on which i would have preferred, so they'll have a cross grain pattern.
 
End grain:


With my RS1s for scale:


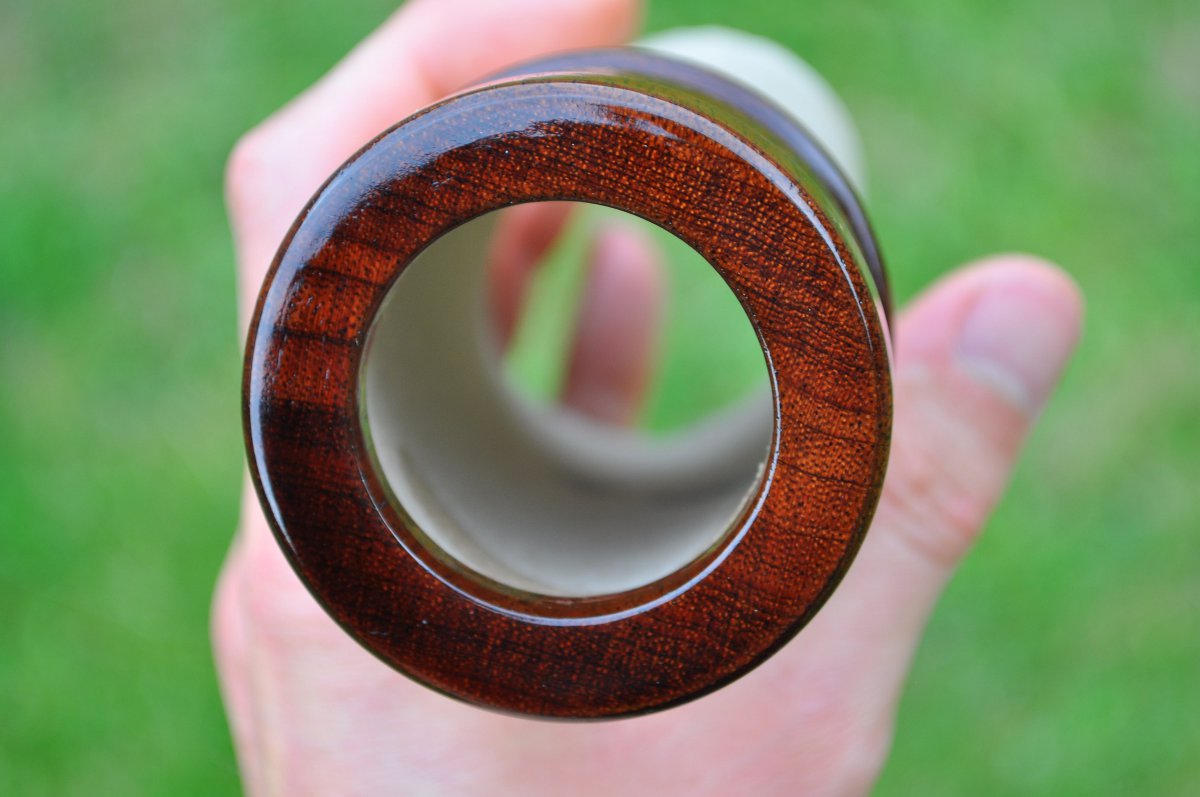
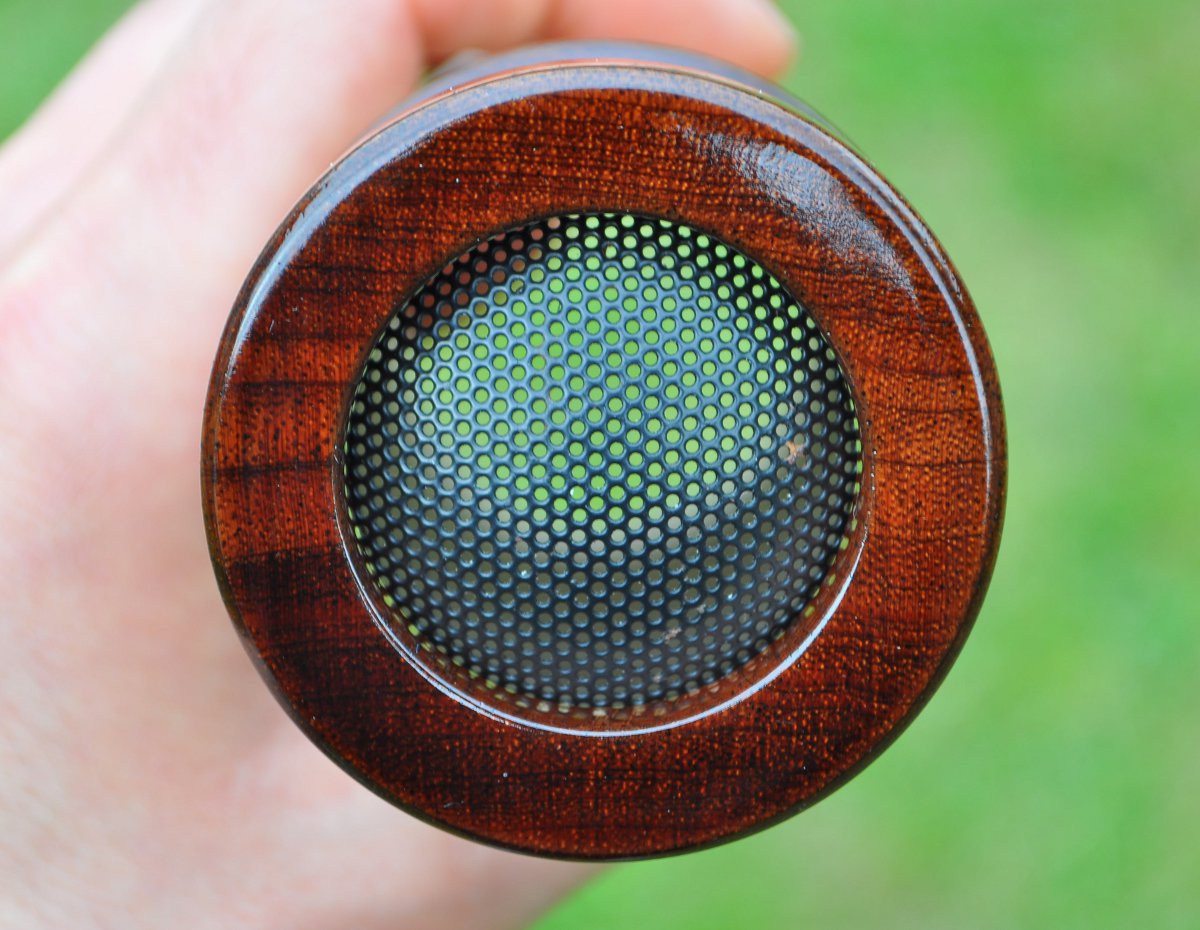
 Now, how to turn one oblong of wood into two small, hollow cylinders? Well, i started with a hole saw mounted in a drill press, a little time and a fair amount of patience i ended up with this:


Second cut:


To be continued...
 
Sep 5, 2012 at 2:25 PM Post #2 of 128
The magnum drivers arrived in individual plastic zip lock bags inside another zip lock inside a jiffy bag.  The drivers themselves are very nicely finished, it's hard to resist the temptation to wire them into an existing set of cups to have a listen.


Moving on to the connectors, i wanted something that would be a more positive fit than a 3.5mm jack plug, but less bulky than an RCA connector (I've seen photos of an RS2 with factory fitted RCA's for cable rolling) as i'd be worried about the bulk on the end of the cable.
 
The SMC (Sub Miniature, version C) connectors found on the HifiMan series seemed like the perfect bet.  I guess in hindsight that the 'miniature' part of the name should have given me a clue, because these things are tiny:


You see that teeny tiny little gold pin in the expanded connector?  That's what the signal wire is soldered onto, or rather inside.  This could be fun. 
 
I see that Doube Helix Cables makes and sells their own spec version of this connector, with a much more sensible soldering arrangement which i might try with my next cable, when i've given my wallet a little rest.
 
The male connector that i bought is fitted from the rear, so in this instance from inside the headphone cups, so i can solder it up to the driver outside of the wooden enclosures and then hopefully bolt it in.  As a bonus i should be able to take the drivers and connector out quite easily should i ever want to try them in different cups.


End on shot showing the pins:


The mated pair, everything to the right of the nut on the right should be inside the ear cup:


 Next time i'll break out the lathe.  Same magnum time, same magnum channel...
 
Sep 5, 2012 at 5:32 PM Post #5 of 128
Quote:
Very nice, I can't wait to see your progress with those cups. I'd like to make some myself.
 
 
How much did you pay for the Sub Miniature  connectors?


I think it cost me more in shipping to be honest, i couldn't get the male and female connectors from the same place (although if i'd have gone for crimped females i could have) so it added up.  I think they were between £3 and £4 per connector, and the shipping for the two came to around £14.
 
--


The hole saw i used wasn't exacltly a the best, so the wood that i was left with was rather rough and not particularly parallel, so it needed some attention to ge it to a workable state.  Fortunately i have access to a lathe, although it's really designed for metal, with a little ingenuity it seems to work for wood as well.  To be honest I think i'd be all over the place holding a chisel on a wood lathe, so the precision of the geared bed is a big plus for me.
 
As you can see it's a bit small, so to mount the blanks i had to put a bolt through the centre and then mount that in the chuck.


Whittling the sides down gradually, note the use of a modified allen key (or allen/hex wrench if you like) for the chisel.  I had to do this as the moving bed of that part of the lathe would hit the wood with the regular cutter.


After a fair bit of time slowly taking off a few thou at a time i'm left with two of these:


Partly by design, and partly by luck the diameter is almost exactly equal to an RS1, so one end won't get any smaller at this point, i'll just start to take away material from the rest of the sides.
 
Marking out the ridge, and the line on the left will be the other end, everything to the left of that will be taken away.


In certain places the cutter was chattering on the wood, i think where the grain goes across it's not uniform in hardness, plus it was getting pretty warm so i decided to try putting a little water on to cool things down, and it seemed to make the going a lot easier...


This is where i'm at as of now, part way through the cut out where the foam earpads will eventually go.  Still need to take 3 or 4mm of wood off i think, but the rest of that cup (on the outside) is more or less as it needs to be. 


This is a lousy photo, but the lathe was still and the wood wet, so it gives a good idea of the colour i might end up with...


Until next time...
 
Sep 5, 2012 at 8:36 PM Post #6 of 128
I love cutting cups on my old atlas mini lathe. Really fun piece of equipment. Looks like you're doing a great job there.
 
My only piece of advice is that if you can make your cutter much more narrow, you'll have a really excellent cutting tool. Think of it like a parting tool for a wood lathe.
 
http://www.youtube.com/watch?v=z_43nB2zTX8
 
Sep 6, 2012 at 9:55 AM Post #7 of 128
Sorry, why the connectors?
hardwired cable is the best solution.
 
Sep 6, 2012 at 5:05 PM Post #10 of 128
Quote:
Sorry, why the connectors?
hardwired cable is the best solution.

 
Because i want to be able to try different cables at a later date without having to de-solder every time, the solder pads aren't amazingly robst looking.
 
Quote:
I love cutting cups on my old atlas mini lathe. Really fun piece of equipment. Looks like you're doing a great job there.
 
My only piece of advice is that if you can make your cutter much more narrow, you'll have a really excellent cutting tool. Think of it like a parting tool for a wood lathe.
 
http://www.youtube.com/watch?v=z_43nB2zTX8

 
Thanks, i'm learning this as i go.  I ground the tool down some and fashioned a rest and worked it freehand for a bit, which was easier in the cut out for sure.  I think though that the allen keys aren't as hard as they could be, as they need sharpening quite often.  Either that or the wood is exceptionally hard.


Starting to look like a Grado now, just need to take that end off and i might be able to start hollowing out the inside.
 
Sep 6, 2012 at 8:04 PM Post #12 of 128
Yeah, that doesn't look like any mahogany I've ever seen. It's gorgeous. I wonder if it's partially petrified from being in use as a pier for so long?
 
Sep 7, 2012 at 12:22 AM Post #13 of 128
petrifying doesnt take millions of years as commonly believed, more like hundreds, but  can apparently be done in a few days with the right chemicals. however a pier is certainly not the right conditions and it would be somewhat harder to turn =)
 
you chose the HE connector for price? mini XLR, lemo, hd800 type are all superior IMO. they allow larger gauge and also allow a proper balanced impedance connection. the HE connectors are OK for coax cables, being coax connectors, but it wouldnt be a connector I would choose willingly.
 
looking good though, wish I had some woodworking skills, i'm making some speaker cabinets at the moment...I do not....
 
Sep 7, 2012 at 6:11 PM Post #14 of 128
Quote:
man, that stuff looks like purpleheart

 
Quote:
Yeah, that doesn't look like any mahogany I've ever seen. It's gorgeous. I wonder if it's partially petrified from being in use as a pier for so long?

 
Beats the hell out of me, I'll go with mahogany until conclusively proven otherwise.  I took a plane to the blank to clean off some of the weathered outer layer, dunno if it will make things any clearer:


...taken in evening sunlight, fwiw.
 
 
Quote:
 
you chose the HE connector for price? mini XLR, lemo, hd800 type are all superior IMO. they allow larger gauge and also allow a proper balanced impedance connection. the HE connectors are OK for coax cables, being coax connectors, but it wouldnt be a connector I would choose willingly.


Not really, mostly for their size, and as the plugs that will sit on the cable ends won't be too heavy and bulky (which is why i discounted RCA connectors).  If i don't like them i'll try something different.
 
---
 
Small update:
 
Finished turning the second cup, and trimmed it down to make sure that the dimension are ok to allow for Grado pads to fit.


Had to cut it by hand since my lathe/chisel wasn't up to the task, still need to sand it down a bit, although most of that will be bored away in the end.


Sep 7, 2012 at 6:23 PM Post #15 of 128
Took these with my tablet immediately after finishing with the second one, it was noticably browner to start with and has faded (if that's the right word) to that reddish purple since.


Users who are viewing this thread

Back
Top