The "Lovely Cube" Headphone Amp (Lehmann Black Cube Linear Clone)
Jul 11, 2010 at 3:17 AM Post #17 of 1,624
this might be a very stupid question, but does the seller provide the on/off button near power in thing? or will i have to source it from elsewhere? Im talking about the one in the picture below


Jul 11, 2010 at 9:06 AM Post #18 of 1,624
 
No, but I believe that comes with the case which I did not order. The board itself came with a pair of really nice quality RCA jacks.
 
That thing is called and "IEC power jack", this particular one has a fuse and a power button built in. You can order them online or just rip them out of some old piece of electronics equipment.
 
New pictures, I've decided the case I was using was too big and heavy. re-cased it in a $5 project box from Radio Shack. Now I have shorter cable runs with silver teflon cables.


The brass knob is from Head Fi'er Vilts.
 
Jul 16, 2010 at 12:30 PM Post #19 of 1,624
Stumbled on more technical info for the Lovely Cube.


BOM:
 
 
The Kit Parts List :
[size=medium]
Parts Parts no. on PCB (not on Schematic) Qty
     
Resistor VISHAY DALE  
100R 1/4W R305、307、314 8
10K 1/4W R101、201 5
15K 1/4W R313 3
1K1 1/4W R306、308 6
1K5 1/4W R106、108、206、208 10
2K2 1/4W R103、204 5
3R3 1/4W R301-304 10
47R 1/4W R105、107、109、205、207、209 15
4K7 1/4W R102、202、311、312 10
680R 1/4W R104、203 5
10R 1W R110、111、210、211 (Panasonic / Taiwan Resistor) * note 1 10
47R 1W R309、310、315、316 (R309 & 310 : 3W OHMITE -USA / DRALORIC) * note 1 10
     
Capacitor    
250V/1.5u C101、201 (Simens) * note 1 2
63V/0.022 C102、202、315、316 (SPRAGUE 223 / ERO 223) * note 1 4
250V/0.1u C301-304 (BC / ERO) * note 1 4
63V/0.15u/154 C307-312 (Simens / ERO) * note 1 6
63V/100P C317、318 (Philips Tin Foil) * note 1 2
63V/102/1n/1000P  C319 1
35V/470uf  C103、104、203、204、313、314 (Philips BC / ELNA RE3 25V) * note 1 6
50V/4700uf C305、306 (ELNA) * note 1 2
  * note 1 : Brand /Model depends on stock availability , or same grade  
     
Transistor / Diode    
BC560(TO-92) Q101、201 2
BC550(TO-92) Q102、202 2
BD140(TO126) Q103、203 2
BD139(TO126) Q104、204 2
LM317(TO-220) Q301 1
LM337(TO-220) Q302 1
BYV27-200 (Diode) D301-304 4
LED L301、302 3mm 2
LED L303 (Blue) 3mm 1
     
IC / OPAMP    
OPA2134UA  SOIC to DIP8 1
     
Others    
2 Way dB Switch/Selector SW101、201 2
Fuse (PPTC) 72V 0.9A F201、202 2
PCB Gold Plate 1
Heat Sink TO-220  Large for Rectifier /Small for BD139/140 6
TO-220 Silica Set Sheet+Plastic Ring+Screw 6
6.35mm Headphone Jack  NEUTRIK 2
5.0mm Connection Block 3PIN for AC Input 1
VR 50K*2  ALPS-27 (Half Round Shaft) 1
DIP-8P Socket Nextron 1
RCA Socket One Red, One Black 2
Transformer ( Optional) Input : 220V (Red - Red)   Output : 2x15V 30VA (Blue - Blue , Black - Black) Optional
     
 
[/size]  
 
Aug 9, 2010 at 4:35 PM Post #21 of 1,624
francisdemarte: Have you direct-coupled the inputs yet (removed caps)? Also do you think you will replace the diodes D301-D304 with HEXFREDs or other soft-recovery diodes?
 
Aug 9, 2010 at 6:47 PM Post #22 of 1,624

 
Quote:
francisdemarte: Have you direct-coupled the inputs yet (removed caps)? Also do you think you will replace the diodes D301-D304 with HEXFREDs or other soft-recovery diodes?


Nope haven't done it yet. I'm leaving for vacation and my wedding Thursday and I'll get to it when I get back.
 
I've always been dissuaded from using high speed soft recovery diodes/FREDs/Schottkys as I've been told they make very little to no audible difference over a traditional one. Do you have any experiences to the contrary?
 
The next major mod I think I'll make is to replace the RK27 with a DACT or the Twisted Pear Joshua Tree  attenuator and a nicer wood case :) over the $7 Rat Shack one I'm using now.


Aug 9, 2010 at 11:42 PM Post #23 of 1,624
After much consideration, I've finally placed an order over the weekend.
 
I have no DIY experience at all so I'm hoping it wouldn't be too tough.
 
Should I be looking for RCA jacks, some jumpers (if so, what types?) and a power cord now?
 
I got the whole package with a nice-looking Talema transformer by the way.
 
Aug 10, 2010 at 1:07 AM Post #24 of 1,624
You'll do fine, just take your time.
 
I recommend you start a thread on the DIY forum. If you get stuck you can ask for help there or in this thread.
 
Post lots of pictures!
 
Aug 11, 2010 at 10:00 AM Post #26 of 1,624
Alright. I'll make a thread if I do need more help with the DIY.
 
I'm getting fidgety already (it's still not here!) and had forgotten that it's supposed to come with the jacks. While waiting, I did realise that the old iron is busted, the only solder I could find at home is too thick and a lot of equipment that I thought I had are missing. Going to have to do more shopping.
 
Hmm, I'll be sure to post pics alright. Heh. What with nobody else doing so. We need more pics and feedback!
 
And oh, congratulations on your wedding Francis!
 
Aug 11, 2010 at 10:37 AM Post #27 of 1,624
They send by regular post so it took a week and a half for mine to arrive and clear US customs.
 
You'll need:
 
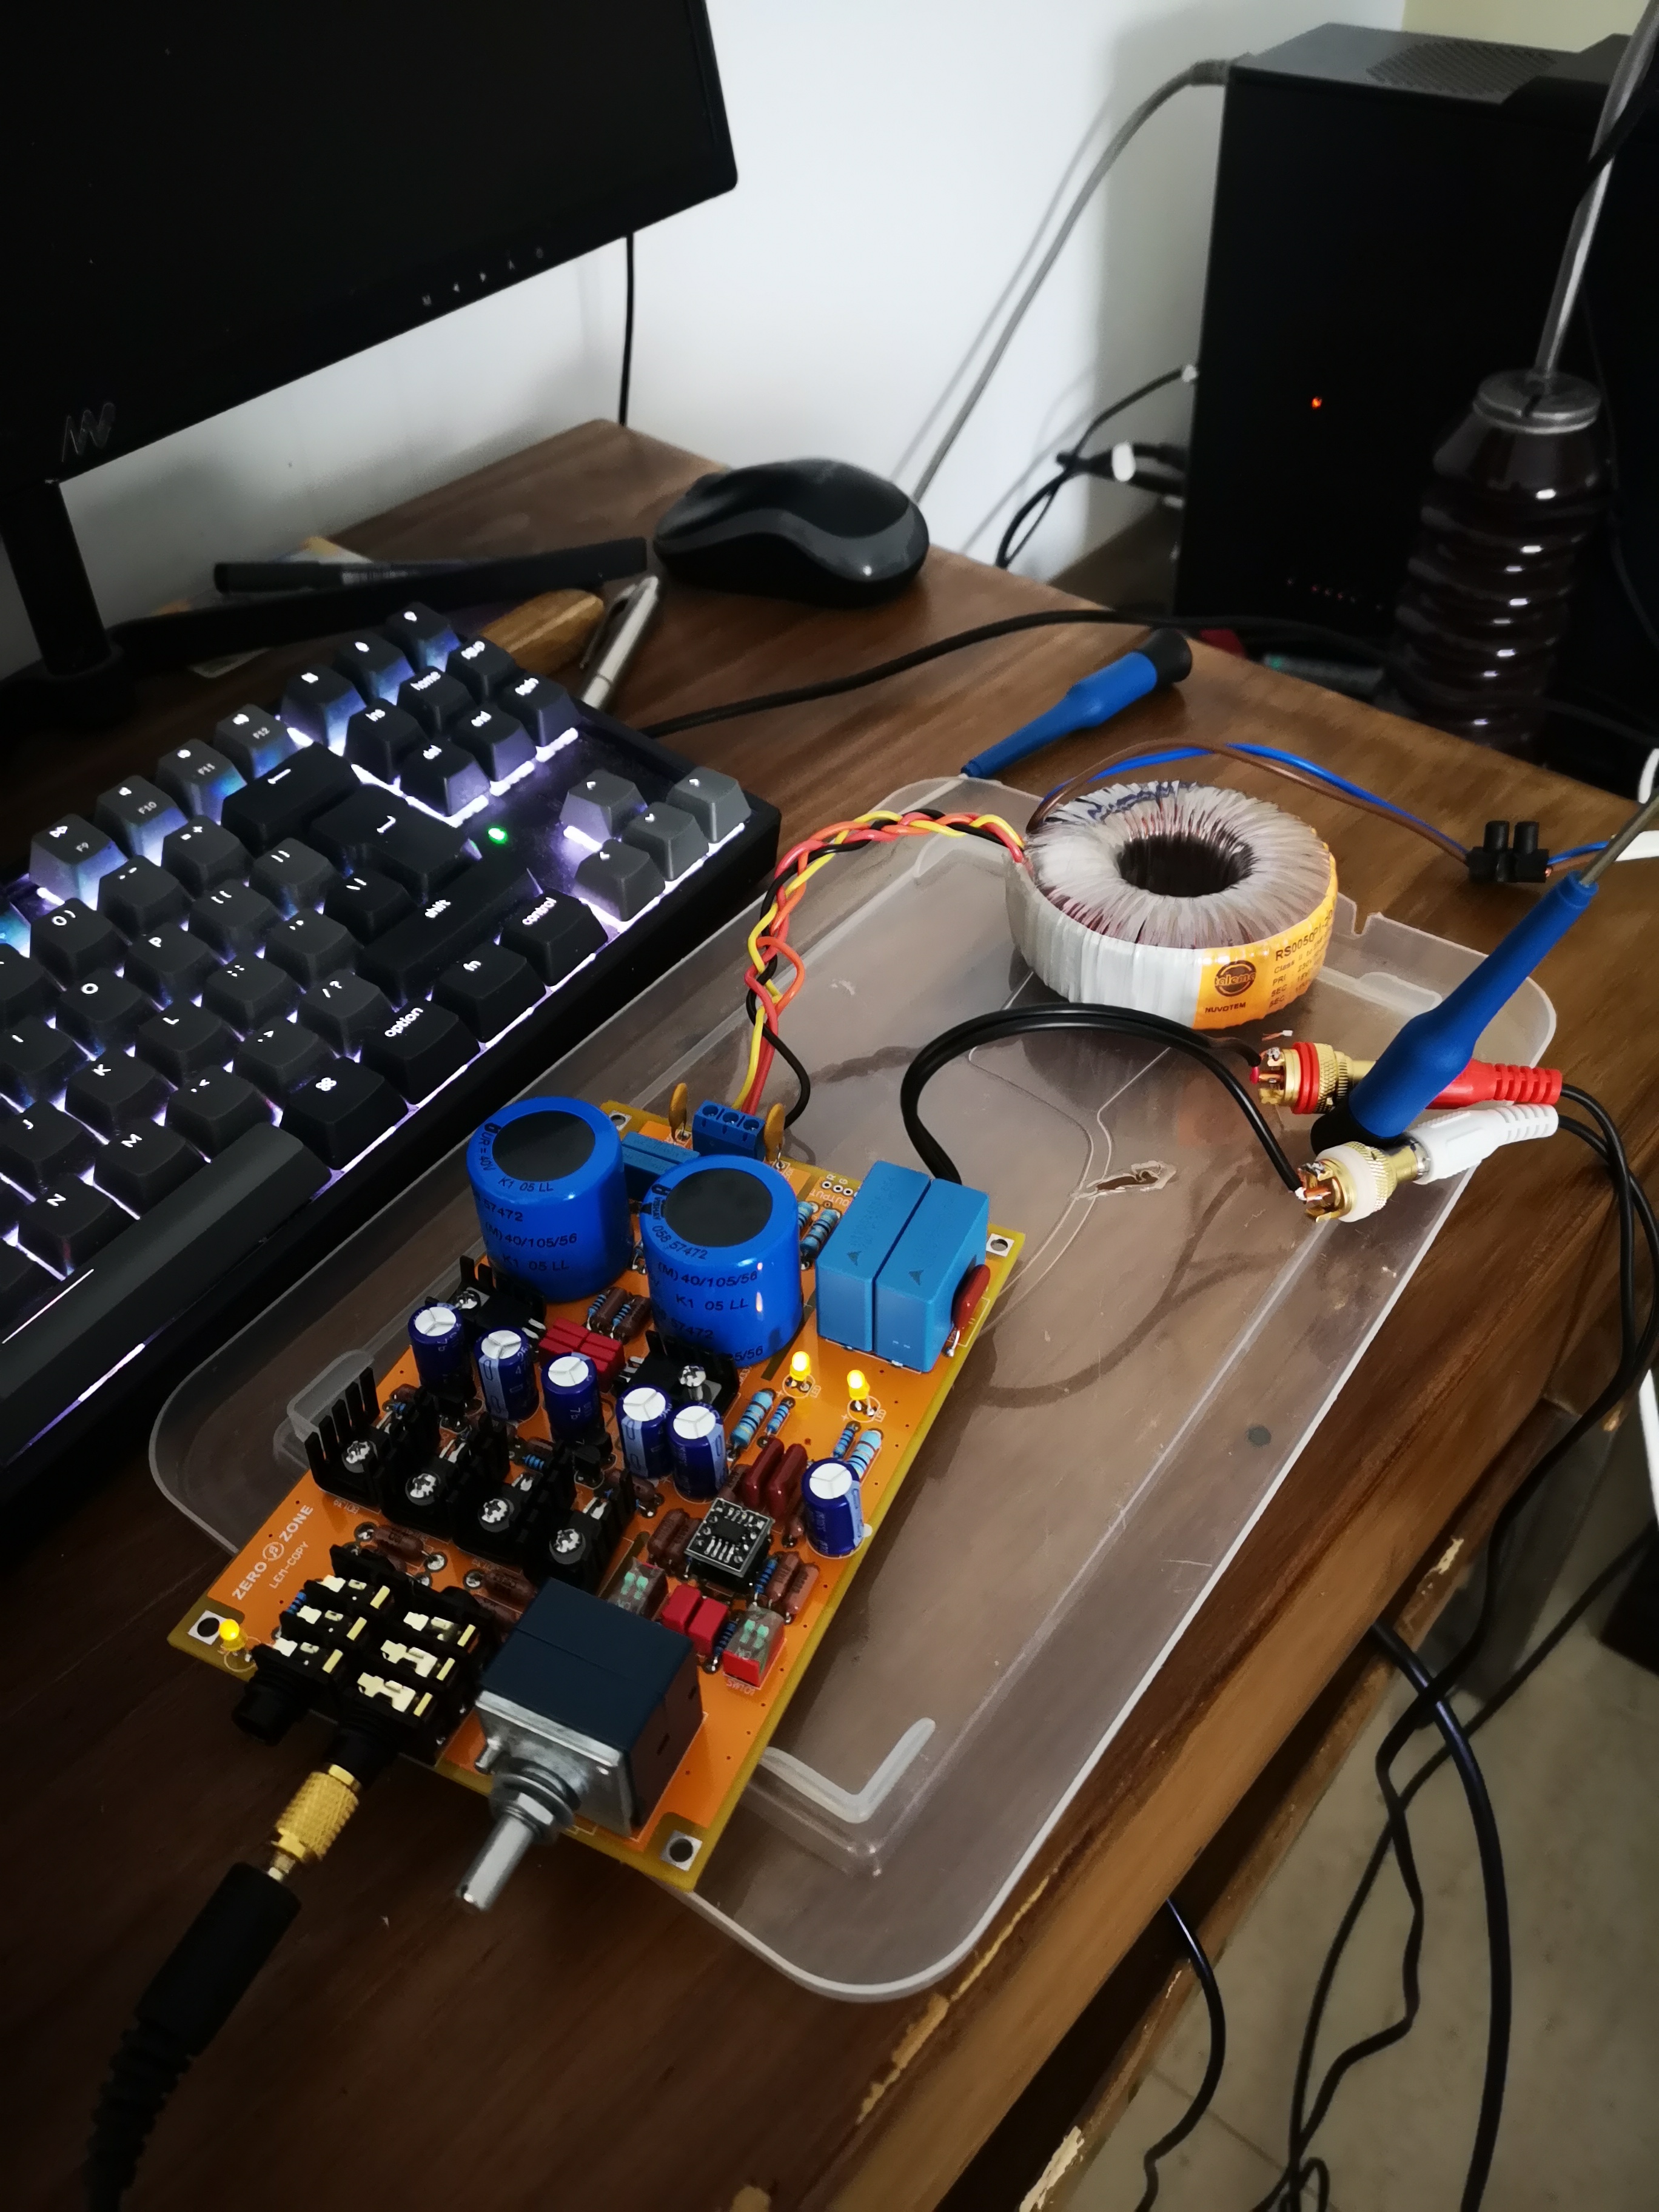
* basic soldering iron and if you feel like it accessories like a stand and a sponge (I like Weller)
* Electrical grade solder
* Flux (I like the paste type that comes in a tube or jar, and a toothpick to spread it)
* 22-26 gauge wires of your choice 
* A nice pair of wire strippers that can handle small 22-26 gauge wire
* small screwdrivers 
* heat shrink tubing (They provide a couple of pieces in your order but its nice to have extra of various sizes)
* lighter to small torch for the heat shrink tubes
 
Not necessary for this project but nice to have is a digital multimeter if you want to do more DIY projects in the future. 
 
Tanget has some nice video tutorials on soldering: http://www.tangentsoft.com/elec/movies/
 
PS: Thanks for the wedding wishes :) I take off for Costa Rica tomorrow! 
PPS: Really nice to see all the Audio Technica woodie fans.
 
Aug 11, 2010 at 1:44 PM Post #28 of 1,624
Stephen, the seller, says it should take 4-6 days to reach me (Singapore) after he mails it later today.
biggrin.gif

 
Thanks for the comprehensive list! Do you think I should get wires too while I'm at it? How about a "3rd helping hand"? I came across tangent's site after following a link on the STEPS regulator here and I've been glued to it ever since (the "luxury" of unemployment). Great material and I'm already thinking of assembling the YJPS out of curiousity. haha
 
Have a great wedding and come back to enjoy your AT woodies soon!
 
Aug 19, 2010 at 6:41 AM Post #29 of 1,624
Okay. It arrived on Monday. Very nicely packaged and bubble wrapped.
 
After practising my soldering first, blowing a fuse (a spare one was provided! phew) and fumbling around, I managed to get it up and running with the seller's patient assistance through email.
 
I read that the BCL sounds best at the highest gain setting, so I'm using that with W1000X. The headamp is basically noise-free for my listening and pretty transparent in my opinion. I'm actually sad that my source (Musiland Monitor 02 USD) is not that fabulous. Regardless, soundstage and bass are noticeably much better.
 
It really brought a old CD player that I dug up back to life though. And here it is, the full package with the top removed:


I noticed that there isn't a clear image of the opamp used in the output stage so...

 
It's a BBOPA 2134UA. Burr Brown?
 
Anyways, it was a great first experience with DIY. Seller provided basically everything to complete the amp. Very good workmanship, parts and service for the price point, in my newbie opinion.
 

Users who are viewing this thread

Back
Top