Feb 19, 2012 at 3:46 PM Post #6,526 of 11,346
Quote:

 
My Helmholtz resonator, look stupid but it work!


Looks great! Could you provide some more details on this Helmholtz resonator? I am not 100% sure what exactly you did here with the cardboard or where you got your information.
 
Feb 19, 2012 at 3:55 PM Post #6,527 of 11,346
Yes, a music signal is precisely a "mathematical calculation" - a summation of sine waves, varying over time...

Yes, there's more than voltage and current output to an amp, of course.  Output impedance, coupling of loads, various forms of distortion, noise caused by power supply quality, potentiometer quality, circuit layout, etc., etc., etc.  Thing is, for well designed amps none of those are a problem (or are minimal at best) in terms of audibility.  That includes the Clip+'s amp section, whose primary problem is finite voltage and current capabilities.

Look, you don't have to build amps for a living to understand this premise.  As far as an end user is concerned, the results are what is important - and that's what I'm going after.  I don't mean to belittle amp designers at all - I know it is a very difficult task to do and to do well.


It's already been said that dampening the T50RP lowers its sensitivity, oftentimes significantly. Before my mods I only needed to set my amp to about 9 o'clock, after I needed almost 12. That's quite a change.
 
Feb 19, 2012 at 4:08 PM Post #6,528 of 11,346


Quote:
It's already been said that dampening the T50RP lowers its sensitivity, oftentimes significantly. Before my mods I only needed to set my amp to about 9 o'clock, after I needed almost 12. That's quite a change.


the stock Fostex are speced at 98dB sensitivity but after modding require more voltage gain than my K702/93dB to reach the same loudness.
 
 
Feb 19, 2012 at 4:08 PM Post #6,529 of 11,346
Time to change directions .... let's keep the thread on track and discuss modifications.  The picture below is one where I used the Permatex rear window defogger repair kit - actually, just the conductive paint to rebuild a solder connection dot on a driver that went south on me.  I used many variations to try and resolve this.  I used a paste / flux / silver solder combination and it wouldn't work correctly.  Also, I used another method of cleaning the connection real well with rubbing alcohol and tried to get some solder to stick where I had applied a light layer of flux.  Again, no go.  However, I was reading about electrically conductive paints and came across this idea using good ol' Google.
 
The blue arrows reflect where I used epoxy to secure the wires to the outer edge of the driver.  I didn't want the wires tugging on the film / solder dots causing any additional damage.  Once the epoxy cured, I started work on creating the new dot with the paint.  Please note, after the old contact was cleaned up, no more heat and solder was involved as part of this fix.  Strictly the conductive paint was used.  I was quite liberal with it by first creating 3 layers on the film itself before I tried to bond the wire.  After the "new" dot was built, I then pushed the wire down onto the dot and started to apply coats of the conductive paint to coat the wire and mate it to the solder dot.  The work of building this new "dot" appears a bit messy -- which is essentially the result of using some heavy applications of paint. If one were to take their time, they could apply smaller amounts of paint to control it a bit more and keep it a bit cleaner.  The paint dries with the odd brown color as it's designed to match the brown lines that people have on their rear window defrosters on their vehicles.  I have the headphones fully assembled at this point and I can't tell any difference in the sound between the two channels.  The cost of this repair was $12.00 for the Permatex kit plus some spare epoxy that I had in my garage.


Feb 19, 2012 at 4:16 PM Post #6,530 of 11,346
I have an additional photo to share.  This picture is of the recable job that I have applied to my Fostex 'phones.  This pair is using Mogami 2534 cable.  The red arrow points to the black plastic plug that I found at my local home renovation store to close off the old cable insertion point.  I'll have to use a bit of acetone to wipe around the cap a bit to neaten things up a little where the super glue squeezed out upon insertion into the cup.  The blue arrows reflect the points at the bottom of the cups that I chose as the new entry point to feed the Mogami cable into them.  The cables are held snugly inside with cable ties so the wires do not pull out of the cups.
 
Finally, the picture also includes the Shure 840 ear pads.  For a few weeks, I had been so focused on the other mods of the cups, that I kept using the standard Fostex ear pads.  However, the Shure pads arrived on Friday and since I just finished the assembly after repairing the solder spot and then recabling this pair, I put the new ear pads on.  I can say, without a doubt, if anyone is on the fence about investing $15.00 (B&H Photo) into these new ear pads, please order a pair ASAP.  It really makes a remarkable difference in the fit and the sound with these headphones.


Feb 19, 2012 at 8:58 PM Post #6,532 of 11,346


Quote:
I'd suggest that you listen long and hard to a pair of wooden Fostex before dropping the coin.  Sure, they look better - wood looks better in most cases.  However, the variations of modifications applied to just the plastic cups alone have made some tremendous strides.  In the end, if you're opting for the wooden version, keep in mind that you're paying all the extra money for just the wood.  Keeping it in perspective, the headphones are just $85.00 headphones with some of the right modifications performed.  There has also been some debate and discussion between the T20RP and the T50RP.  It is believed that the T50RP sounds better, even though they use the same drivers - yet, the limiting factor of the T20RP is because of the cup volume of the T20RP, which is smaller.  If you look at the wooden versions, the wood shell has to be constructed properly.  If there's not enough volume available, they may not sound as good as the plastic cup variations.
 

Are you sure T20RPs have different cups? From the photos, I don't see any difference..

 
Quote:
After many mods, although my T50RP sounds very good, i still find bass is the most annoying to fix because i like tight, deep, hard hitting bass and my pairs sound a little boomby. With the suggestion of RexAterna and LFF, i read a lot in the orthodynamic thread and find out that the most important thing is to absorb backwave in the cup which will go through the diagraph and cancel the specific frequency.


Uh, how many things there are to read!
Re-read this thread, Ortho thread, Thunderpants thread, books and articles on speakers, headphones and room treatments. 
Thanks for your idea, it's a new wave in the modding, I think.
 
 
Feb 19, 2012 at 9:09 PM Post #6,533 of 11,346


Quote:
Quote:

Looks great! Could you provide some more details on this Helmholtz resonator? I am not 100% sure what exactly you did here with the cardboard or where you got your information.


This is a very nice article about acoustic Treatment: http://www.ethanwiner.com/acoustics.html
 
"Yet another type of bass trap is the Helmholtz resonator. Unlike foam, fiberglass, and tubes fitted with fiberglass, a Helmholtz resonator can be designed to absorb very low frequencies. This type of trap works on the principle of a tuned cavity and is often very efficient over a narrow range of frequencies. Think of a glass soda bottle that resonates when you blow across its opening, and you have the general idea. Although a Helmholtz design can be very efficient, the downside is that it works over a fairly narrow range and needs to be rather large to absorb very low frequencies. The range can be widened by filling the cavity with fiberglass, or by creating several openings having different sizes. One common design uses a box filled with fiberglass with its front opening partially covered by a series of thin wood boards separated by air spaces. This is called a slat resonator. Another also uses a box filled with fiberglass but has a cover made of pegboard containing many small holes. Although there is no denying that a Helmholtz trap can be very effective, the fact that it works over a narrow range of frequencies limits its usefulness. While it can be sized to absorb the dominant resonant frequencies in a particular room, it cannot absorb all the other low frequencies. And broadband absorption is needed to prevent acoustic interference that skews the frequency response throughout the entire bass range." 
 
This is how a real Helmholtz resonator look:


And cardboard is very easy to find, it has empty cavity so i use a knife to slit very small opening then use tape to seal both end, make sure the cavity is airtight.


Feb 19, 2012 at 9:23 PM Post #6,534 of 11,346


Quote:
Are you sure T20RPs have different cups? From the photos, I don't see any difference..


I'm quite sure I've read it here before.  Also, it was noted that Fostex used the same model # for most of their headphone shots on their site.  Plus, it is well known that the T20RP has the same drivers.  I'll find out more on Tuesday when my pair of T20RPs arrive.  I'll be sure to post any comparisons regarding size, etc.
 
Feb 19, 2012 at 9:41 PM Post #6,535 of 11,346


Quote:
 
I'm quite sure I've read it here before.  Also, it was noted that Fostex used the same model # for most of their headphone shots on their site.  Plus, it is well known that the T20RP has the same drivers.  I'll find out more on Tuesday when my pair of T20RPs arrive.  I'll be sure to post any comparisons regarding size, etc.


The cups on my T20RP mk II are exactly the same size as those on my T50RP.  I haven't opened mine up yet but I briefly did another - if I remember correctly, I believe they are the exact same part.
 
Feb 19, 2012 at 10:00 PM Post #6,536 of 11,346
After many mods, although my T50RP sounds very good, i still find bass is the most annoying to fix because i like tight, deep, hard hitting bass and my pairs sound a little boomby. With the suggestion of RexAterna and LFF, i read a lot in the orthodynamic thread and find out that the most important thing is to absorb backwave in the cup which will go through the diagraph and cancel the specific frequency. This often make "bass canceling" so to get deep bass, i must find something to absorb low frequency in the cup. I continue to search about acoustic treatment in speaker and found a lot solution: fiber glass, bass trap, etc ... I tried to stuff fiber glass in the cup and it just work like cotton. Fiber glass is very good to absorb mid and high but to absorb low, you need to make it thicker and with bass trap, to get perfect low absorb, you need to place bass trap a distance from the wall that equal to 1000feet/[(the frequency you want to absorb).4], that's 12.5 feet if you want to absorb 20hz, just impossible to work in the small space. And then, i found the Helmholtz resonator, which is the most effective way to absorb low frequency, and i saw some one mention about cardboard to absorb behind the driver. Then i just tried and have no idea that it will work but guys, it work great!!! Before the mod, bass is a little boomby and mellow, it extend well to 30hz but i only can barely hear 25hz. After the mod, bass is tight, fast, attack is much better, now it extend to 25hz easily. Great, great great !!!! Here are some pictures:


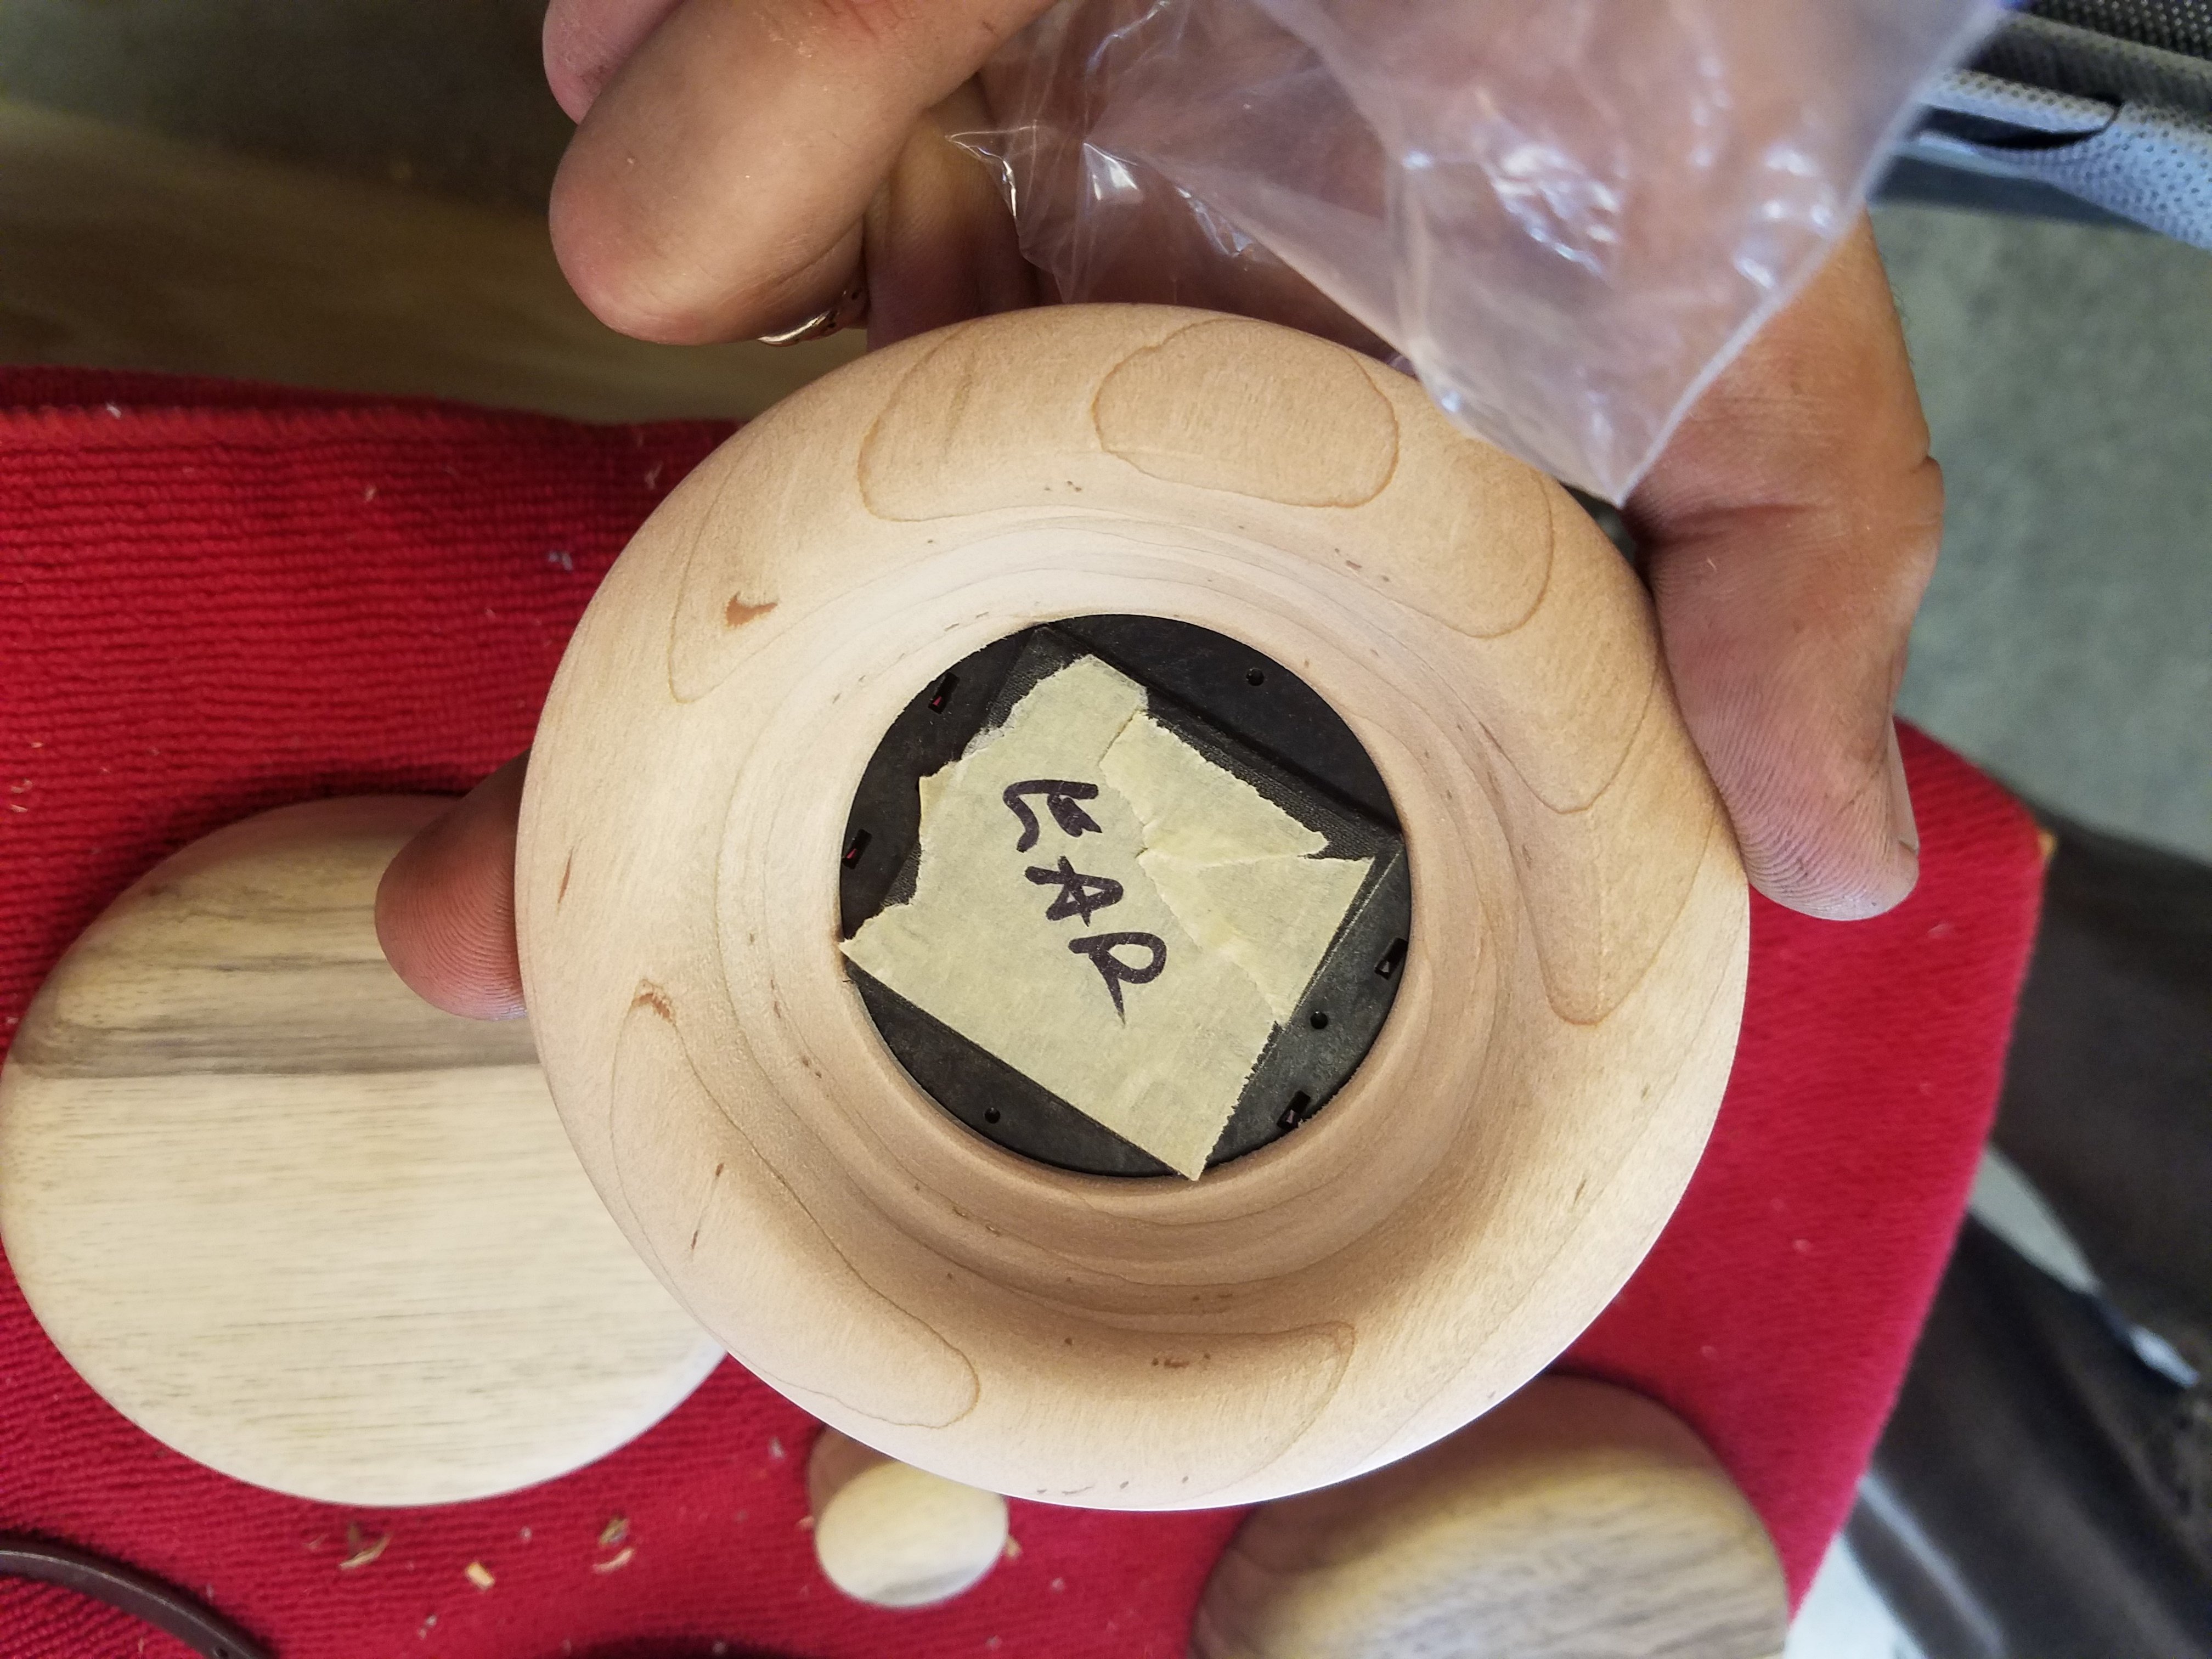
I use 4 layers of dryer sheet at the back of the driver


1 layer of fiberglass and 1 layer of filter wool work best for me


My Helmholtz resonator, look stupid but it work!


I just got enough space to use 2 sheet of cardboard or cup won't close.


Dryer sheet -> filter wool -> fiberglass


Have a listen :L3000:
I will try with better material and place larger Helmholtz resonator in the cup if i could but right now, it sound so gooood!!
P/s: Sorry, my english suck :tongue_smile:


great work! i like the idea of the helmholtz resonator. i never thought of doing that but way i did it seem to work out for me so far. also my fiberglass is prettier. it's pink. i know your jelly of my prettified fiberglass.
 
Feb 19, 2012 at 10:01 PM Post #6,537 of 11,346


I'm quite sure I've read it here before.  Also, it was noted that Fostex used the same model # for most of their headphone shots on their site.  Plus, it is well known that the T20RP has the same drivers.  I'll find out more on Tuesday when my pair of T20RPs arrive.  I'll be sure to post any comparisons regarding size, etc.


I just recall that T40RP's are said to have cups that are a little shallower and don't have bass ports.


Quote:
And cardboard is very easy to find, it has empty cavity so i use a knife to slit very small opening then use tape to seal both end, make sure the cavity is airtight.


Now I'm a bit confused. Do you just use the cavities in the cardboard itself and not behind it?
From your first pic, I got the impression that you use three separate stripes of a cardboard joint together by tape, and placed above a cavity that is then sealed. Won't it be more efficient that way? Also you could try to stuff it loosely with something, though that may defeat the purpose of the resonator at all.
 
 
Feb 19, 2012 at 10:03 PM Post #6,538 of 11,346


Quote:
The cups on my T20RP mk II are exactly the same size as those on my T50RP.  I haven't opened mine up yet but I briefly did another - if I remember correctly, I believe they are the exact same part.


I thought I read where the T20RP MK II cups were smaller and there were not any bass vents?  If so, I guess people will start hunting down the T20RP MK II to mod for about $40 less.
 
 
Feb 19, 2012 at 10:13 PM Post #6,539 of 11,346


Quote:


I just recall that T40RP's are said to have cups that are a little shallower and don't have bass ports.


Now I'm a bit confused. Do you just use the cavities in the cardboard itself and not behind it?
From your first pic, I got the impression that you use three separate stripes of a cardboard joint together by tape, and placed above a cavity that is then sealed. Won't it be more efficient that way? Also you could try to stuff it loosely with something, though that may defeat the purpose of the resonator at all.
 

I only use the cavites in the cardboard, just to try if it work and it did wonder!!! Yes, the way you though is what i want to do next, i think that even be much more efficient, the hardest part is to get a good seal, make the cavities airtight or it won't absorb.


Feb 19, 2012 at 10:57 PM Post #6,540 of 11,346


Quote:
I only use the cavites in the cardboard, just to try if it work and it did wonder!!! Yes, the way you though is what i want to do next, i think that even be much more efficient, the hardest part is to get a good seal, make the cavities airtight or it won't absorb.


And that also doesn't stop you from having cavities in the cardboard itself, double win! There's also a menton of a tapered cavity in that article, should be even better as it would work for a range of frequencies.


Users who are viewing this thread

Back
Top