


biggbenn74
500+ Head-Fier
So, I recently spotted a pair of broken Sony XB500's on eBay for $15 and snagged them for cannibalization. The pads were in good condition, which was a huge plus. On the downside, they came from a heavy smokers home, so they do smell a bit. Anyway, here is a picture of them half taken apart:

Tools you will need: Small Philips Head Screwdriver, Patience, Steady Hands
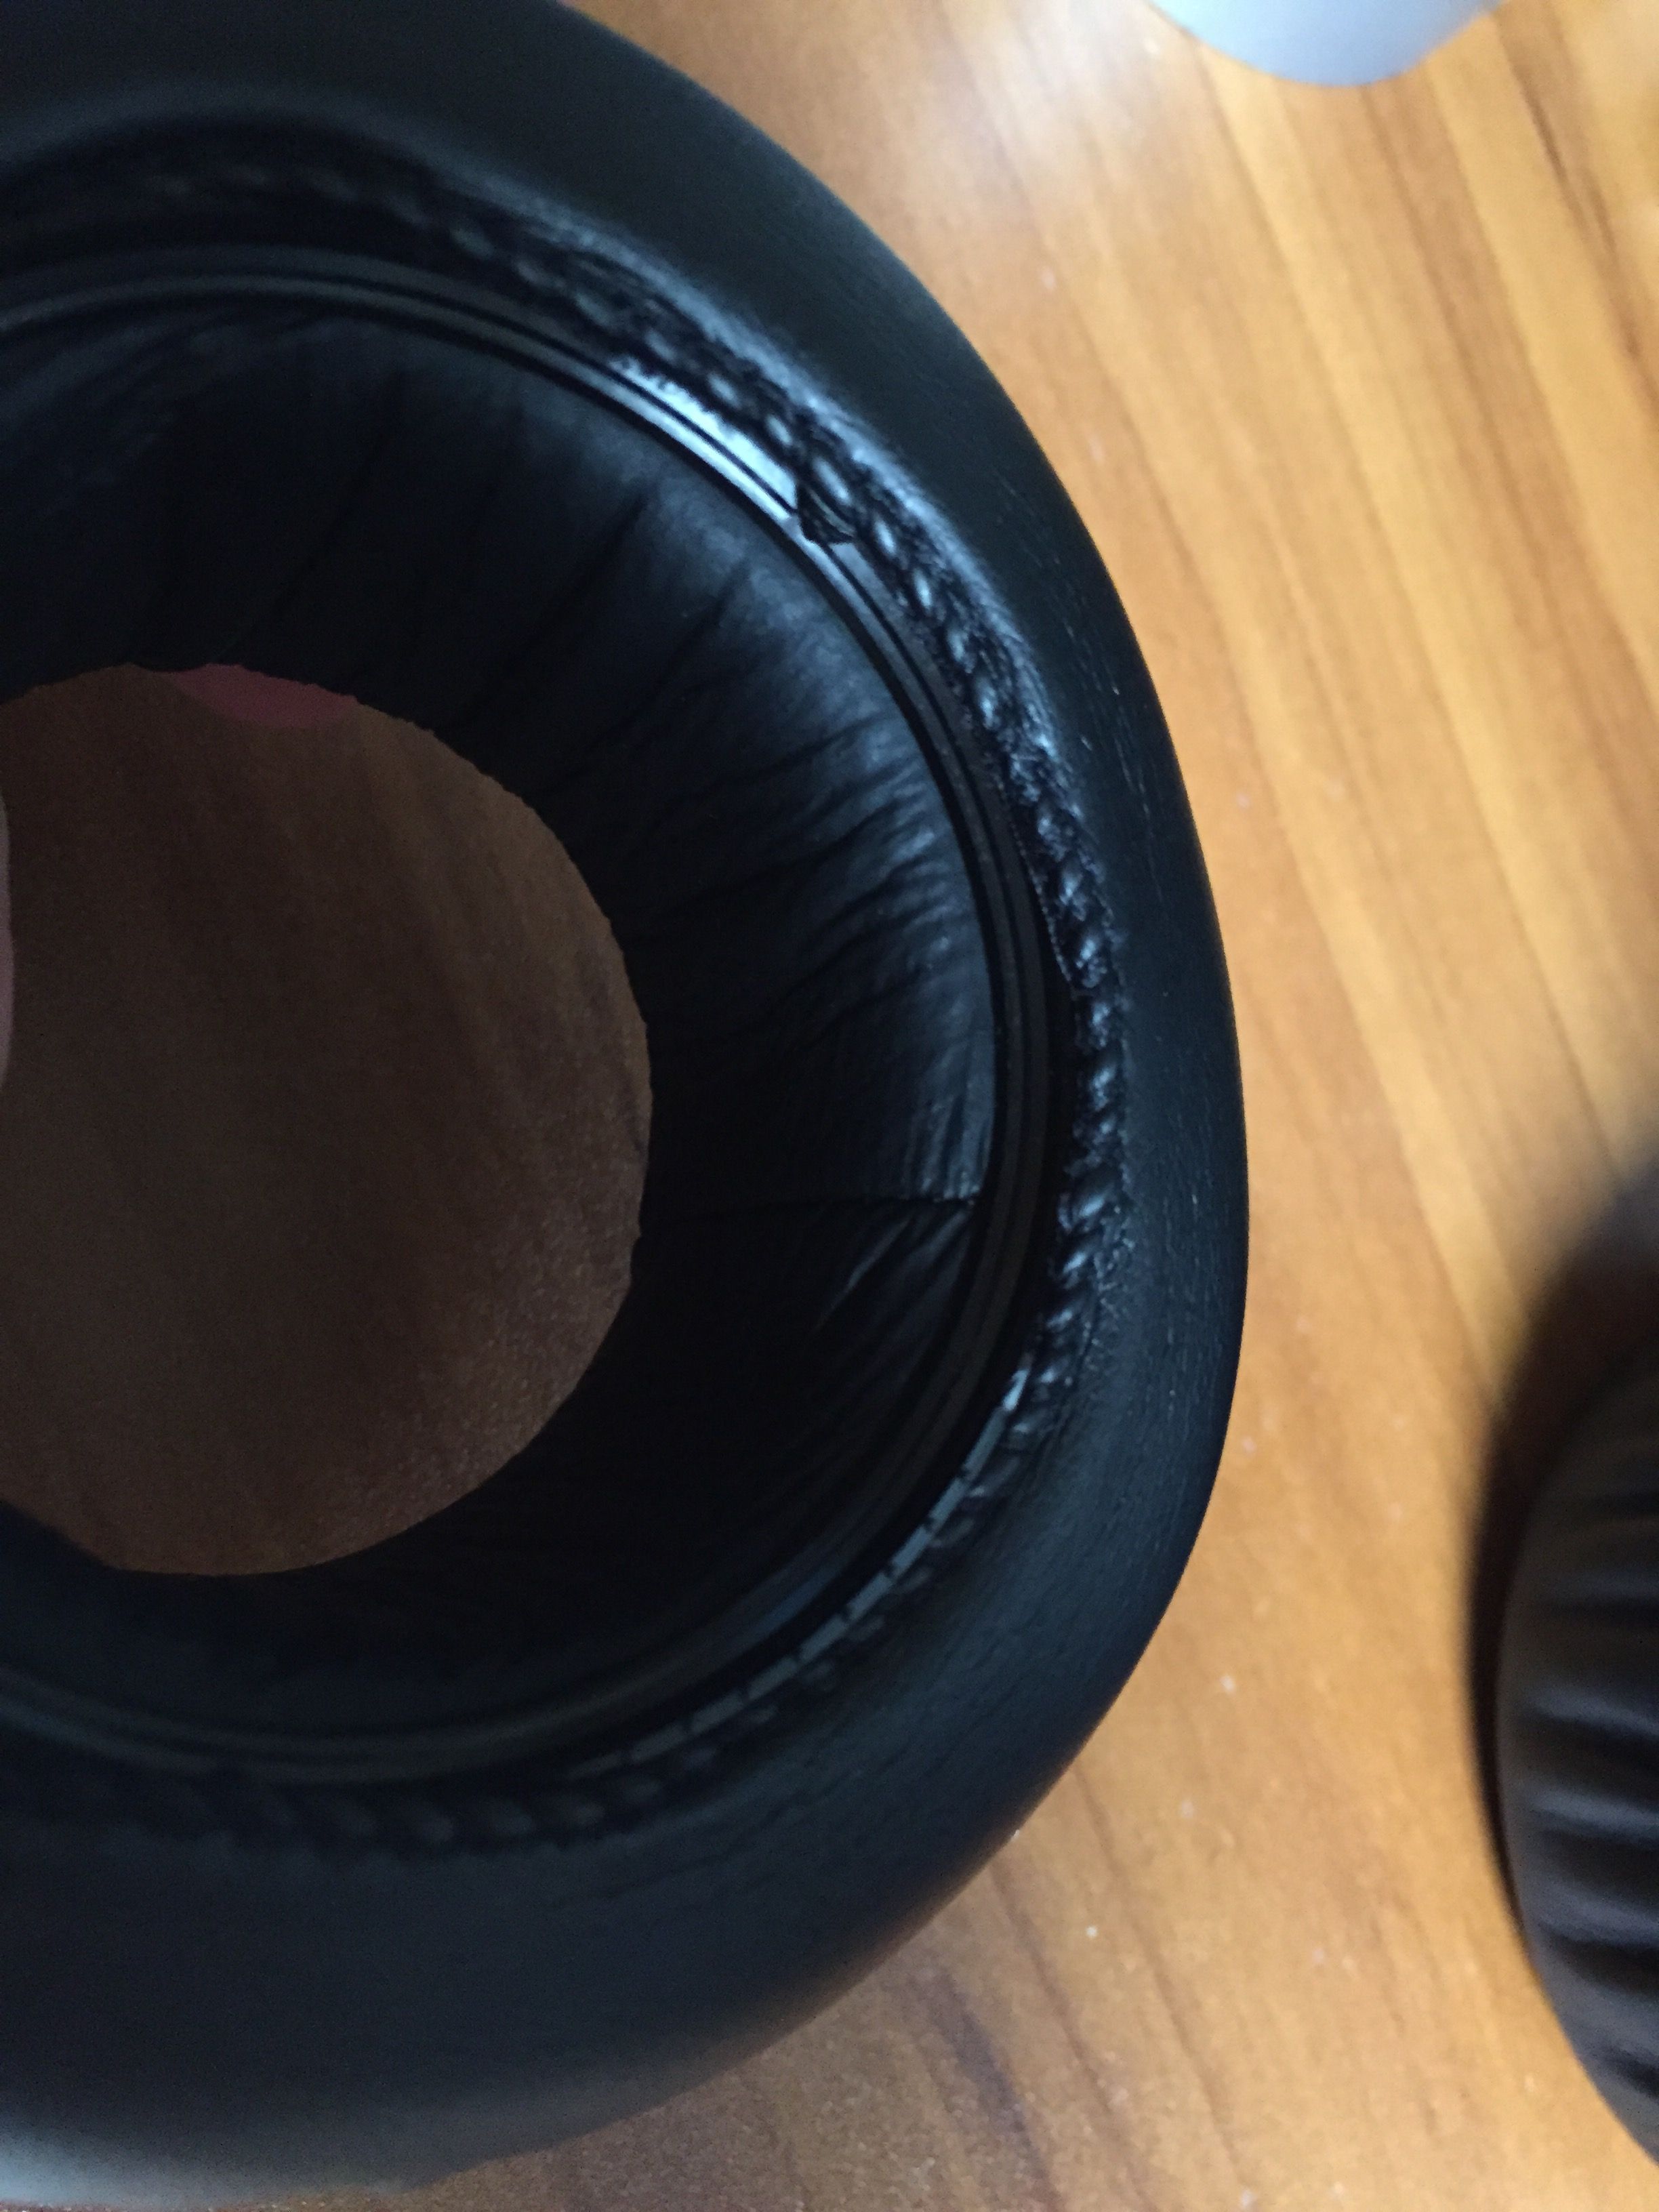
To take the pads off, go inside the earpads and you'll see 3 screws holding the earpad assembly in place. Unscrew them and the pads should come straight off. Look in the left of the picture and you'll see one of the screws.

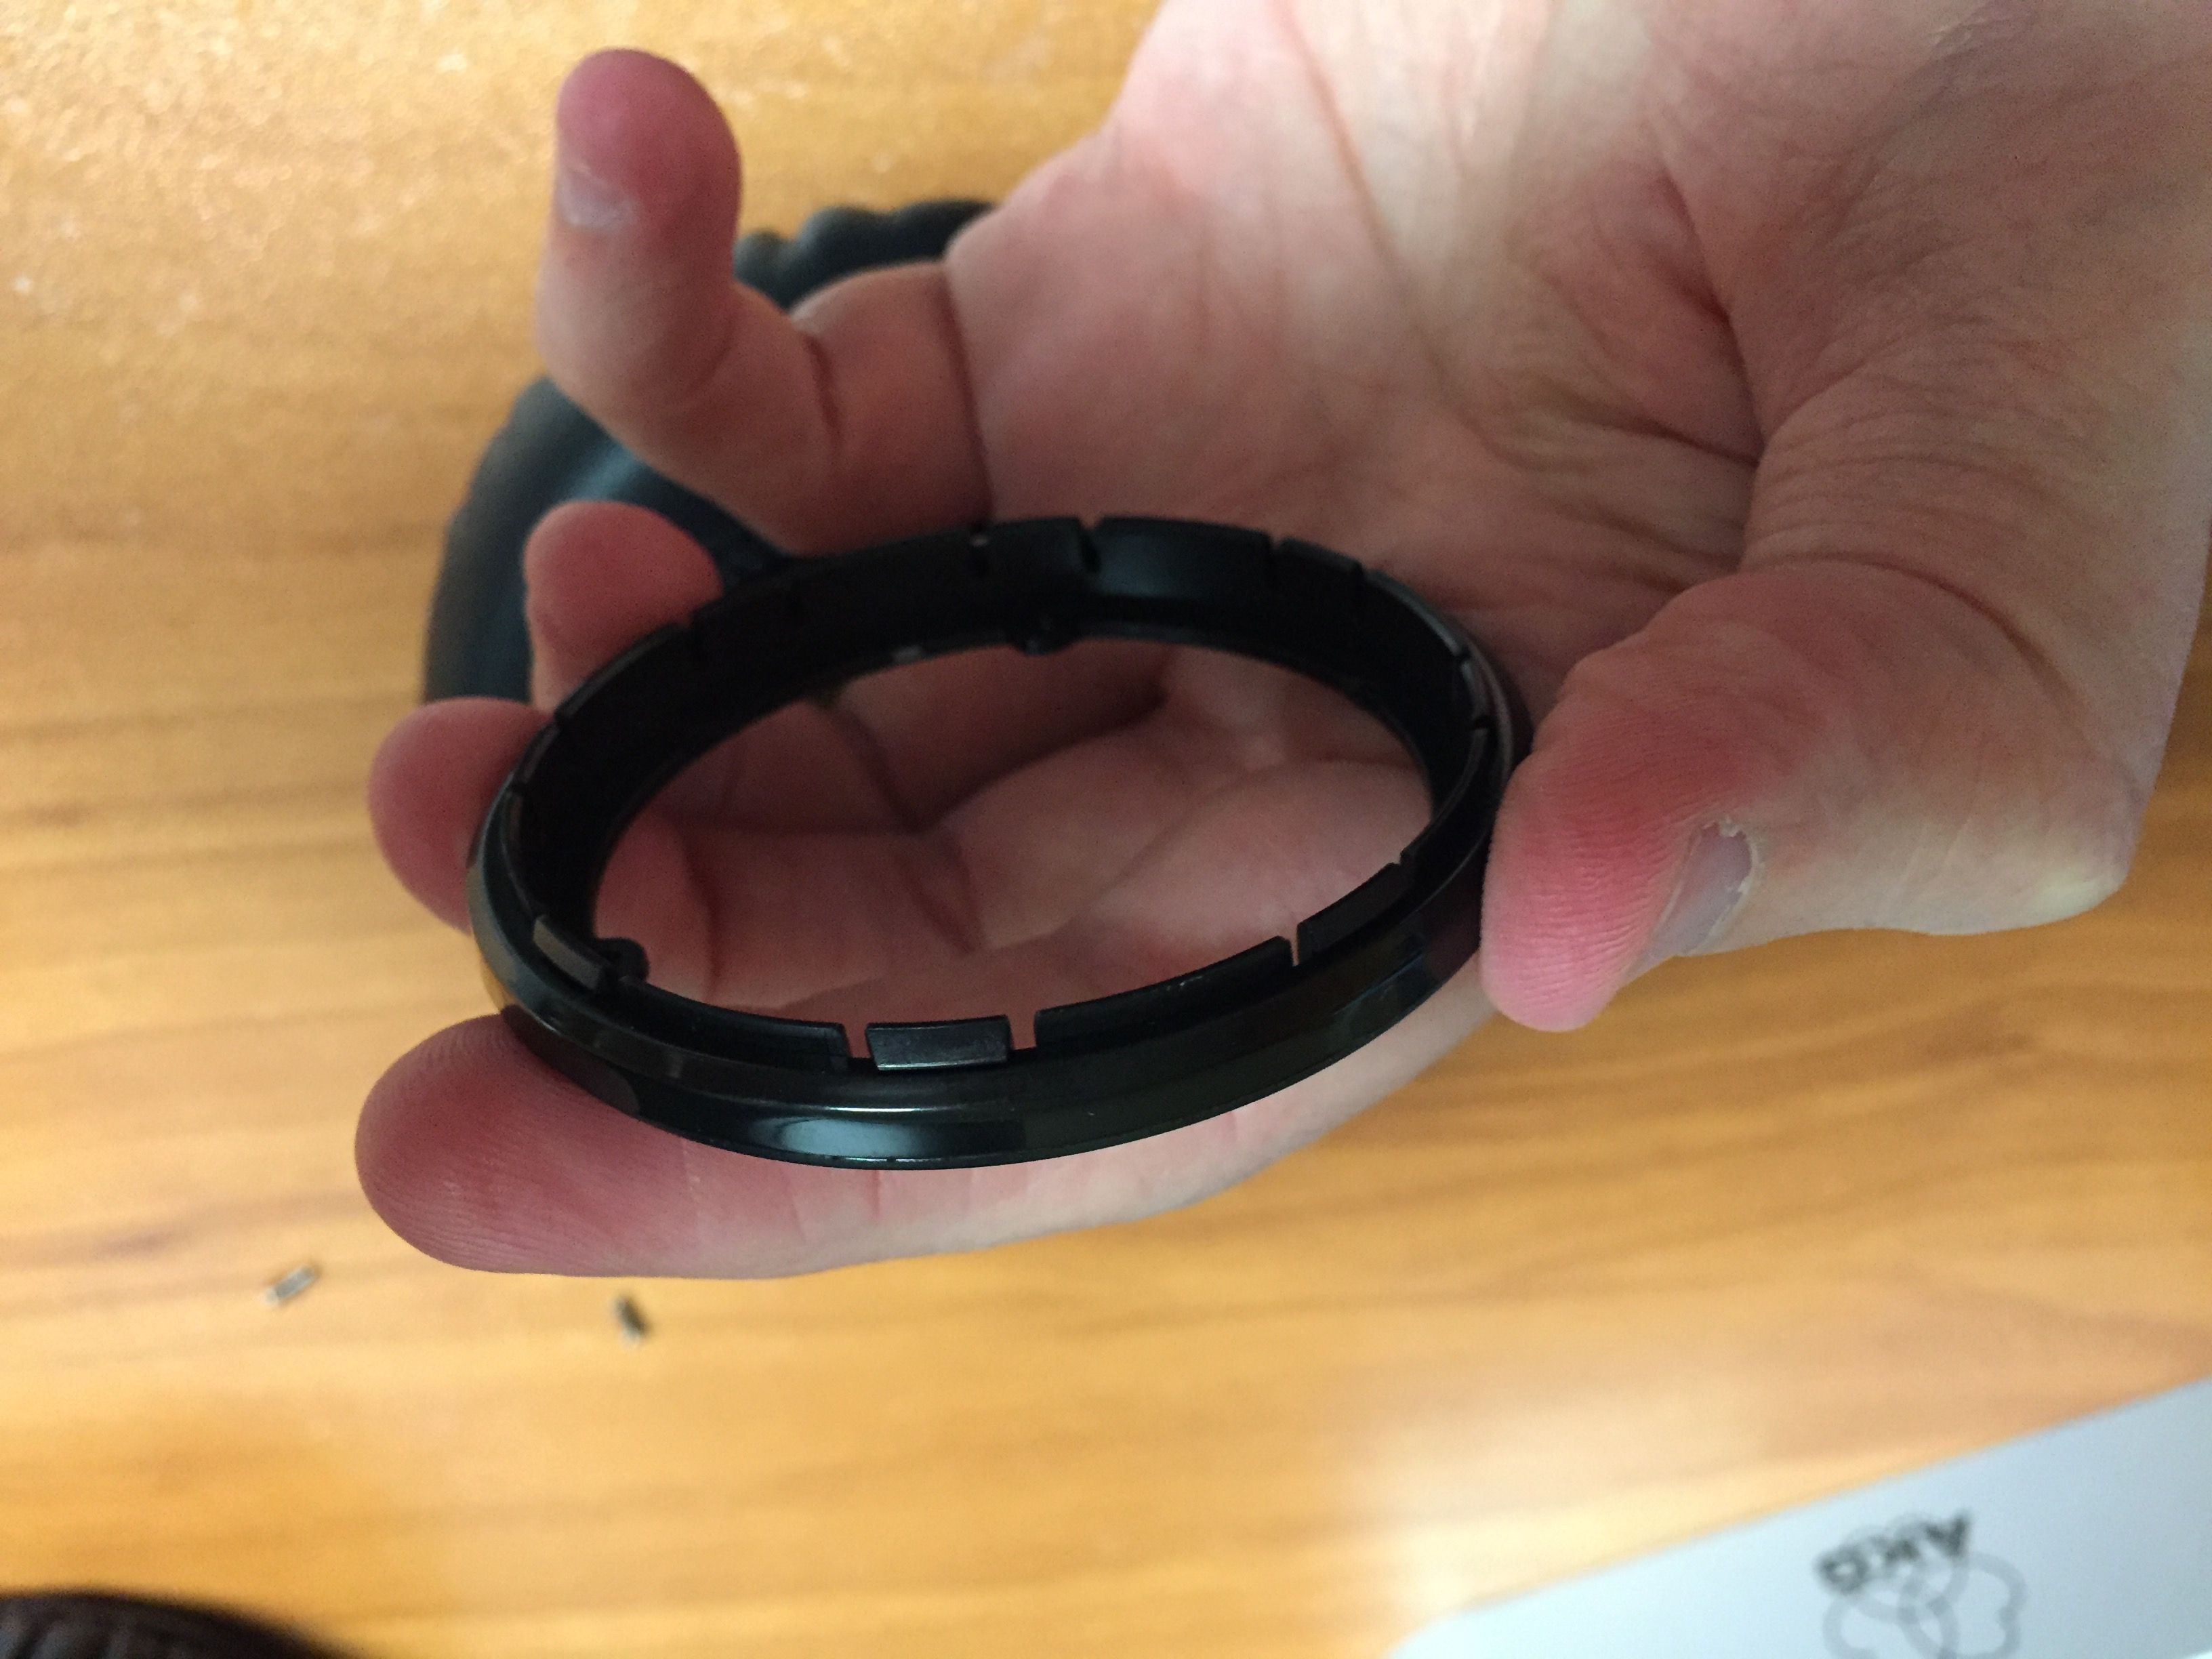
WARNING: If you are modding headphones with these pads, there is no lip. You WILL have to do further modding. I'll explain in a minute.When you get the pads off, there is the black ring still attached to the pads. Gently coax the pads out of the ring by sliding your fingernail in between the inner part of the ring and the pad. Tug at the earpads until they come off completely. Here is a picture of what they should look like with the ring successfully removed (ring in background):

As you can see, no lip on the pads. So... You'll have to make one! Fun... Anyway, here are my step by step instructions on how to successfully create a lip:
Step 1. Take a pair of small scissors and start cutting through the outside padding carefully, without penetrating the foam inside. You'll want to make the cut on the bottom of the pads (see pic above) and make sure to stay close to the INSIDE lip. If you cut closer to the outside, the lip won't be as effective.
Step 2. Cut all the way around the pads. They should look near (or better) than this:

Step 3 (optional). Glue the inner padding back onto the foam for less irritation while wearing headphones.
Step 4. Fit pads onto headphones...

Aaaaaand, you're done! The lip should stretch anywhere from about 75mm, to 100mm. They will stretch quite a bit. The headphones I put them on are the Numark Red Waves. Perfect fit (about 95mm). The insides of the pads shrink a bit, so they become very claustrophobic when worn, but still, they are comfortable and they fit well.
Sound changes: Added bass, all around bass (sub, mid, top), good isolation (about to or better than stock).
All in all, pretty cool little project for $15, and I still have the drivers to put in another pair of headphones.

Thanks for reading. I hope I have satisfied your curiosity. If you have any questions, feel free to comment, or send me a PM, I'll be happy to answer them for you!")
-BiggBenn
Tools you will need: Small Philips Head Screwdriver, Patience, Steady Hands
To take the pads off, go inside the earpads and you'll see 3 screws holding the earpad assembly in place. Unscrew them and the pads should come straight off. Look in the left of the picture and you'll see one of the screws.
WARNING: If you are modding headphones with these pads, there is no lip. You WILL have to do further modding. I'll explain in a minute.When you get the pads off, there is the black ring still attached to the pads. Gently coax the pads out of the ring by sliding your fingernail in between the inner part of the ring and the pad. Tug at the earpads until they come off completely. Here is a picture of what they should look like with the ring successfully removed (ring in background):
As you can see, no lip on the pads. So... You'll have to make one! Fun... Anyway, here are my step by step instructions on how to successfully create a lip:
Step 1. Take a pair of small scissors and start cutting through the outside padding carefully, without penetrating the foam inside. You'll want to make the cut on the bottom of the pads (see pic above) and make sure to stay close to the INSIDE lip. If you cut closer to the outside, the lip won't be as effective.
Step 2. Cut all the way around the pads. They should look near (or better) than this:
Step 3 (optional). Glue the inner padding back onto the foam for less irritation while wearing headphones.
Step 4. Fit pads onto headphones...
Aaaaaand, you're done! The lip should stretch anywhere from about 75mm, to 100mm. They will stretch quite a bit. The headphones I put them on are the Numark Red Waves. Perfect fit (about 95mm). The insides of the pads shrink a bit, so they become very claustrophobic when worn, but still, they are comfortable and they fit well.
Sound changes: Added bass, all around bass (sub, mid, top), good isolation (about to or better than stock).
All in all, pretty cool little project for $15, and I still have the drivers to put in another pair of headphones.
Thanks for reading. I hope I have satisfied your curiosity. If you have any questions, feel free to comment, or send me a PM, I'll be happy to answer them for you!
-BiggBenn


