Tuitorial: How to make a "wood case friendly" stax socket with silver plated Neutrik contacts.
May 26, 2010 at 8:39 PM Thread Starter Post #1 of 23

AudioCats

Headphoneus Supremus
Joined
Feb 25, 2007
Posts
3,726
Likes
262
Location
CO, USA
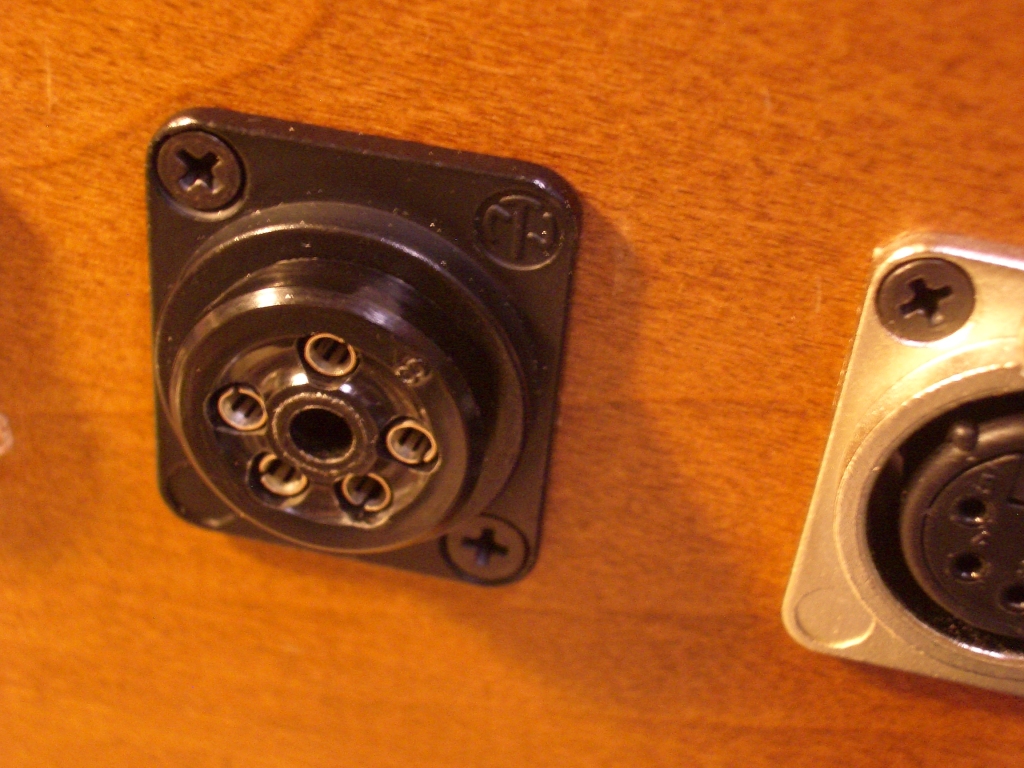
The most common 5/6 pin socket for Stax phones are the black WPI and Amphenol jacks. They work, but the tin-plated contact material is less than "audiophile-grade" and it is very difficult to mount such jack into a thick wall wood case.
 
Below are the steps to put together a jack that can be mounted into a wood enclosure. It also have silver-plated Netrik contact pins (as an upgrade from the tin-plated stuff). 


All components are available from Mouser, except the 5/6-pin WPI Amphenol sockets.  
 
May 26, 2010 at 8:47 PM Post #2 of 23
Step 1: housing.
 
The metal housing comes from a Neutrik NC3MD male jack, see photo for mouser #.


peel off the shiny sheet metal ring on the back of the jack, the guts will fall out. You will only need the housing, put the guts (male pins) aside.


Open up the back end of the metal jack so it is the same diameter as the front. I use a stepped bit, and a round file. 
 
 
May 26, 2010 at 9:02 PM Post #3 of 23
Step-2: pins
 
The silver plated socket pins come from a Neutrik NC3FPP female jack. Again see photo for Mouser part #.   You will need two Neutrik jacks to get 6 pins. These jacks are made of plastic and are very in-expensive (less than $2 each), perfect as pin donors.


Use a small screwdriver to push in the locking tab, and pull the pin out of the plastic housing.


Once the pin is out, push the tab all the way in ( as a preparation for the epoxy step below).


May 26, 2010 at 9:15 PM Post #4 of 23
Step-3: Socket.
 
Take out the contacts from 5/6 pin WPI or Amphenol socket, and drill open the back end ( use very light pressure).


Add Neutrik pins into the holes. I also added teflon sleeves for extra insulation just to be safe (wanted to make sure there is enough dielectric strength between the pin and the metal housing. Not sure how strong the epoxy is. The teflon can handle at least 600v by itself). Note the teflon sleeve doesn't go all the way around, this way the epoxy will be able to hold the pin instead of just the teflon sleeve.
(green = bias pin)


May 26, 2010 at 9:19 PM Post #5 of 23
Step-4: epoxy.
 
well, it is easy, add epoxy, let it cure...... ( I know, grey epoxy probably looks better, but I only have the clear stuff ... it works the same)


Then you have it, a 5/6 pin socket that is fancier than the usual WPI / Amphenol, with better contact material and can be mounted into a thick wall enclosure.


May 27, 2010 at 9:46 AM Post #7 of 23
great tute mate!! i'm sure those who dont wish to spring for the superb teflon jacks available at the other forum will be delighted to see this 
 
Jun 11, 2010 at 2:10 AM Post #9 of 23
Add a light-pipe to the center hole and shine a indicator light toward it inside the case (doesn't have to be next to the pipe, it works from up to 4" away) and you get some kind of cool indicator.
 
Mostly a gimmic, I know, you can't see the light once the plug is in place.
 
 
Aug 9, 2010 at 9:35 PM Post #15 of 23
Brilliant!  Thanks for writing this up with the great pictures. 
beerchug.gif


Users who are viewing this thread

Back
Top