


mrscotchguy
1000+ Head-Fier
- Joined
- Sep 21, 2010
- Posts
- 1,450
- Likes
- 265
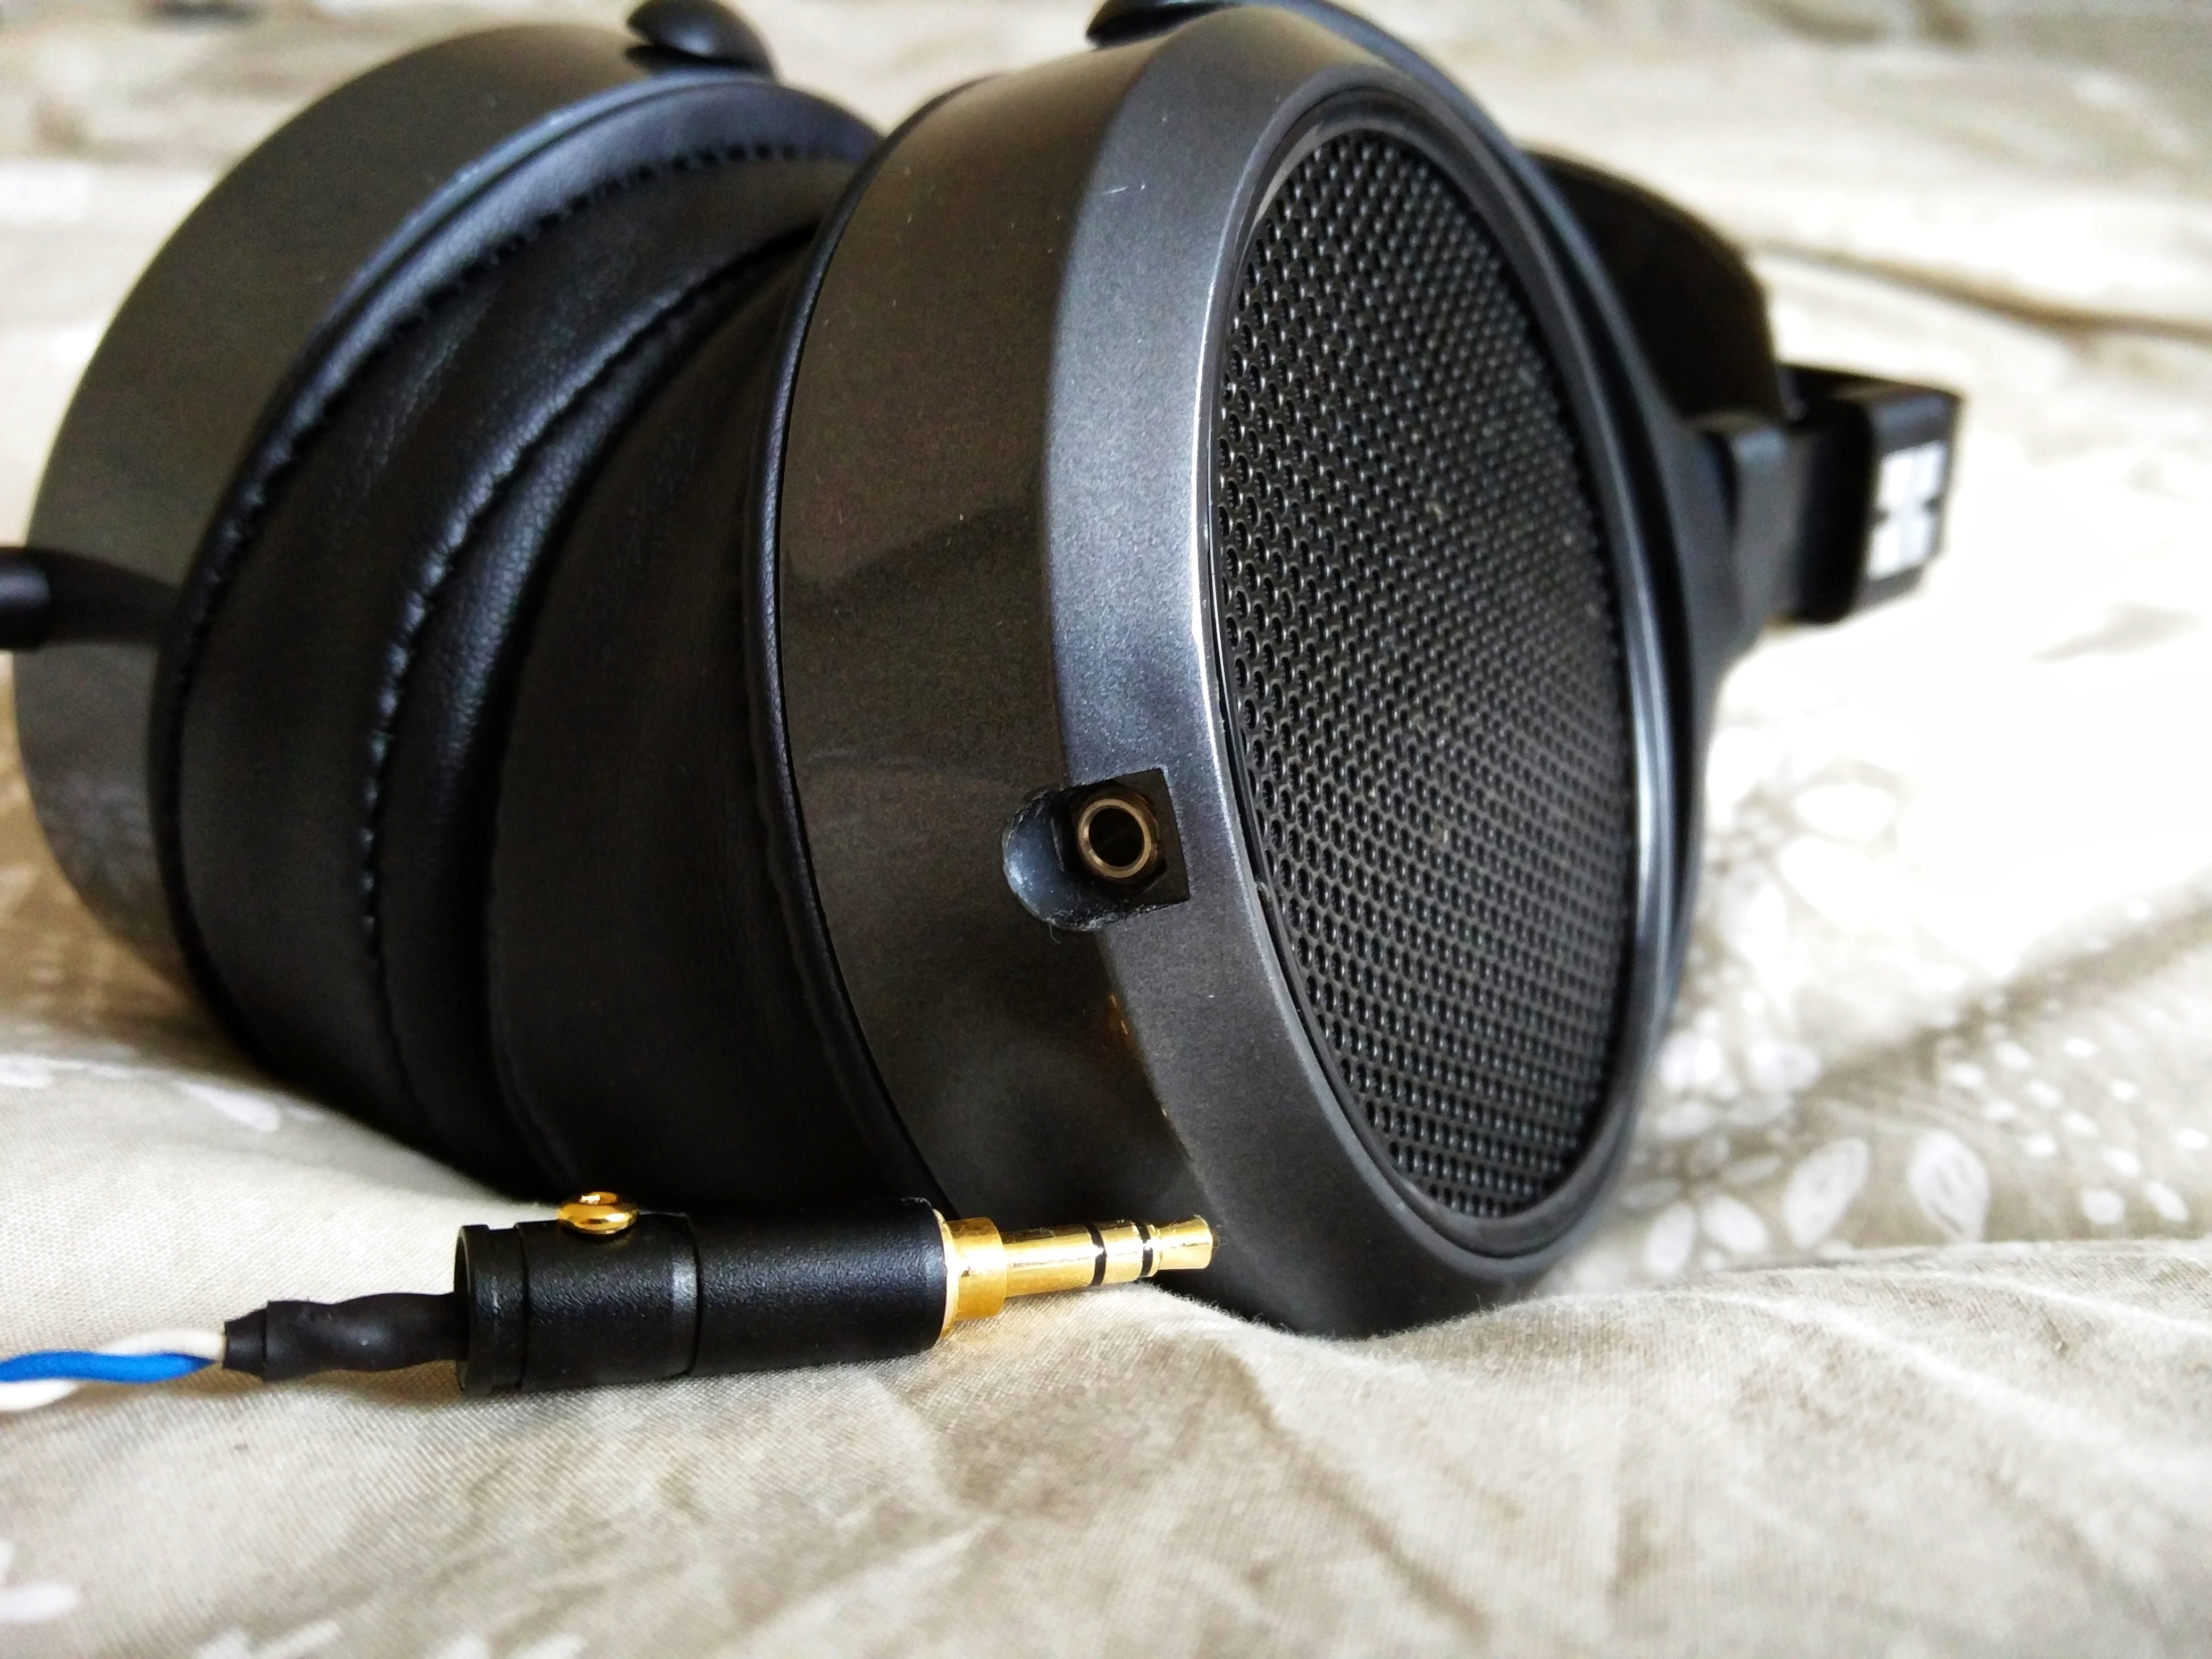
Have you every asked yourself, "What if my HE-500 had the wonderfully goofy looks of a HE-560?" At any point, did you see your reflection in shiny monitor and get headband suspension envy?!"
Well my friends, no longer will you go WITHOUT weird looks from strangers...


You too can go from looking like this................................. Too looking like THIS!
With a little elbow grease, and some help from your friend, MrScotchGuy... you too can look like an alien-beetle-monster or your money back! (*please note, no actual money is required; you are probably already wearing full-sized headphones, and will probably look like an alien even if you don't own any Hifiman products... just sayin')
Sooo without any further disclaimers... proceed with caution and at your own risk, you have been warned!
---------------------------------------------------------------------------------------------
Difficulty: Average
Time: 45-60 minutes (without plasti-dip spray... give yourself a weekend)
Tools Needed: Quality Phillips screwdriver, small wrench, files, drill
---------------------------------------------------------------------------------------------
Step 1:
Buy yourself some beat up, old Hifimans off the eBays.


I will be demonstrating on a much abused HE-5LE. As you can see, The Hulk or similarly angry owner decided to use this particular Hifiman as a projectile, stress calming device, or as a weapon. Self defense?!
Step 1.5:
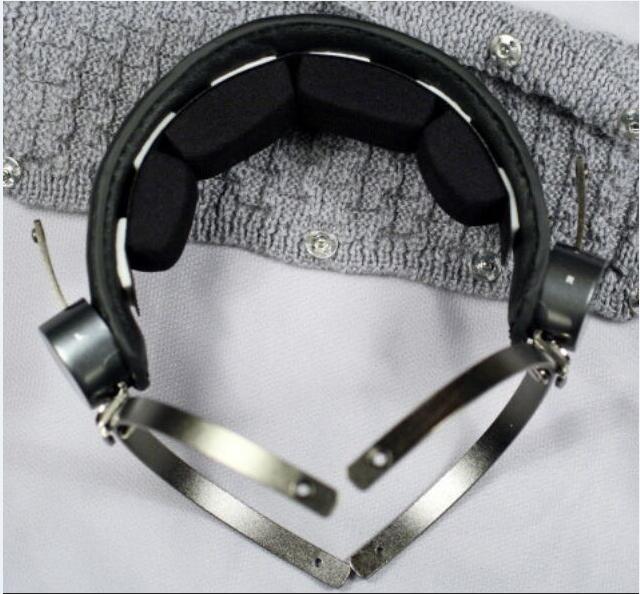
Contact Hifiman, and discretely purchase the headband assembly for the HE-400i. If they ask you... you did not hear this from me. Seriously, "SHHHHHHHHUSH!"


(If you're Hifiman and you're reading this... well stop right here. DO NOT CONTINUE READING!!!)
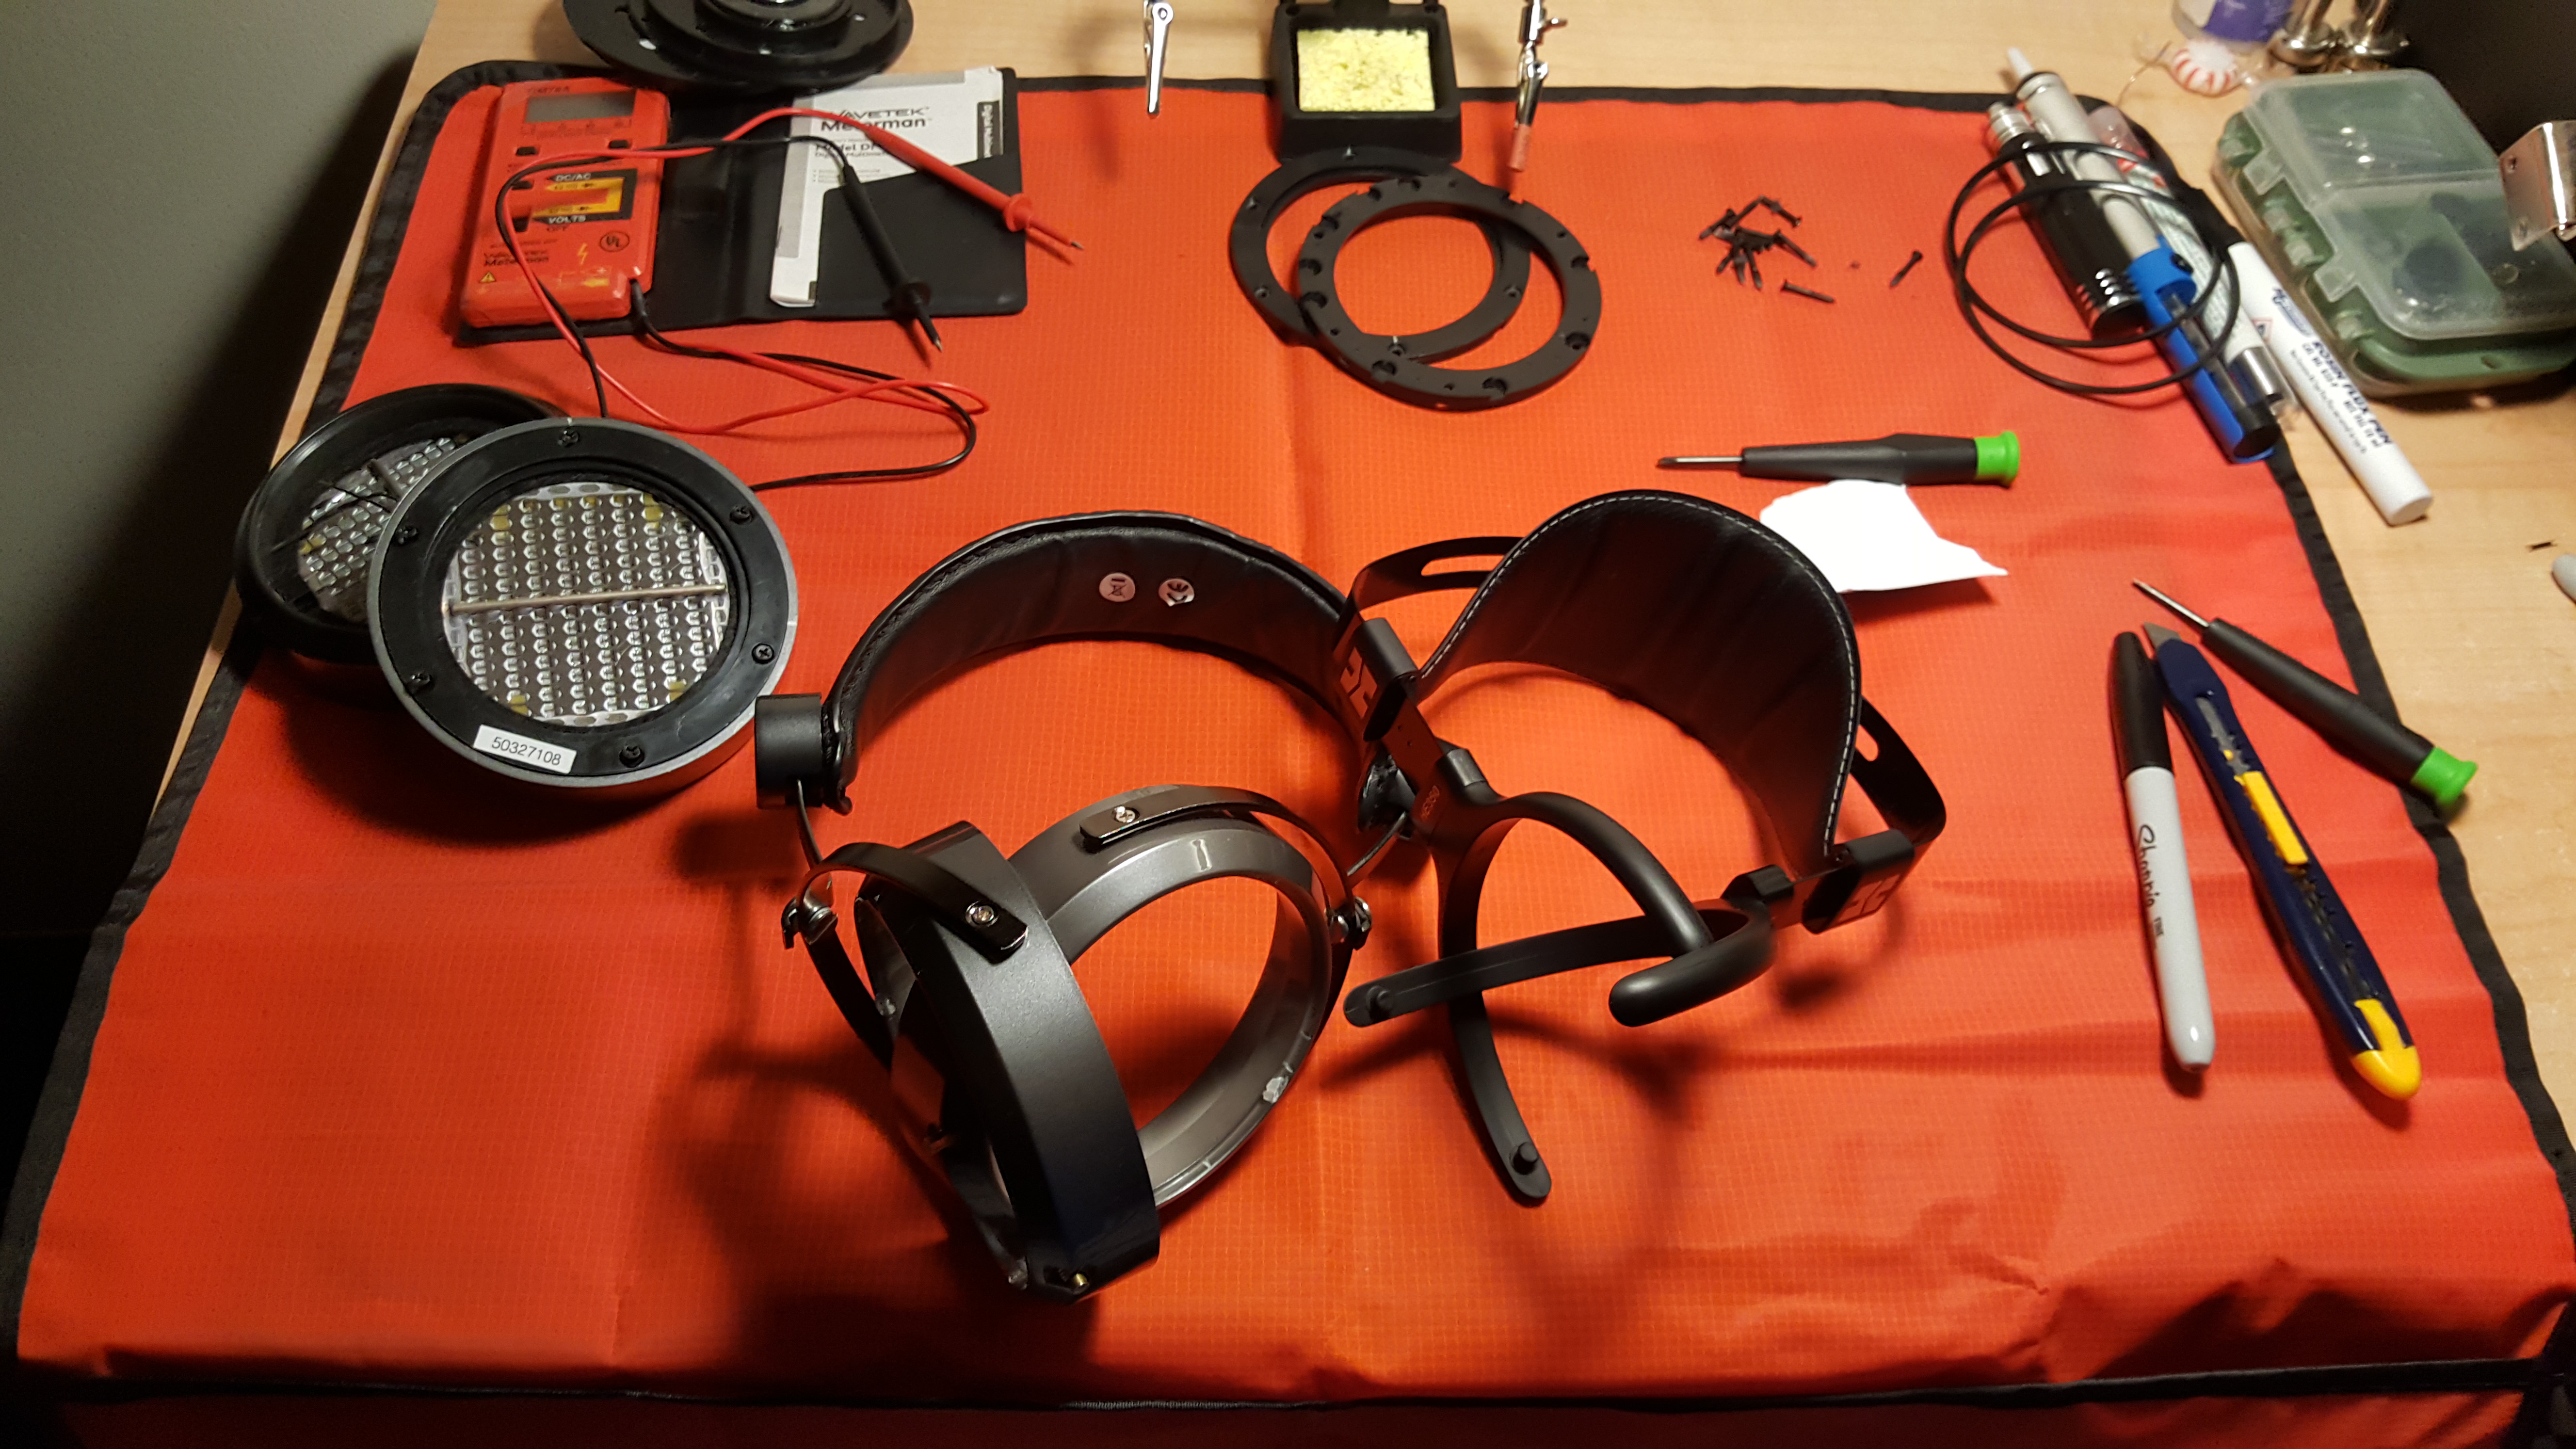
Step 2:
Mentally prepare yourself... and maybe clear off a work space. It helps, trust me! For me, a table, towel and some good light did the trick.
Step 3:
Pick a cup, you've got a 50/50 chance at picking the right one... don't even think of messing this up. Remove the earpad and gently loosen the screws holding all the good bits in place.


TIP: After fully removing the screws, I find it easiest to just to ziplock the screws and mark the baggie "L" or "R" to make life that much easier when putting it all back together.

Step 4:
After completely removing the screws (don't lose them, seriously, don't), attempt to remove the good bits of the Hifiman driver from the housing. Some convincing may be required.
Whispering soft words may have no effect. With any luck, your good bits will be loose and slide right out without a struggle. If your bits happen to be larger than average, the stuggle will be real.
Attempt 1
Hifiman provided an exceptional guide to grill removal. Follow this:
http://www.head-fi.org/t/491831/a-simple-way-of-adding-airiness-to-hifiman-he-5le-remove-grill-cloth
With the grill out of the way, push from the outer side and hope nothing breaks... with luck, your bits might just fall out on their own. Aim for your padded workspace!
Attempt 2
Properly liberated drivers should look like this.

Step 5.1:
The most difficult step. If you're only careful once this is the time for it (well twice, we've got two cups...)...
If you're a real Headfier, you know how to solder... if you're like me, it's time to get your ghetto-mod on!
We need to use an appropriate wrench to loosen the nut holding Hifiman's mini-BNC to the cup. My smallest wrench was massive, so this was comical at best.


Once the glue breaks free, your nut should spin freely. It's best to use some sort of plastic wrap (or in my case a ziplock...) to prevent debris getting flung into the driver... that's bad from what I hear. I mean, our warranty is pretty much dead at this point, and it's only about to get worse.
Step 5.2:
Gently spin the cable connector by the nut to free the driver from the cup. Your hands will require yoga-like poses to spin the driver without twisting the cables too much.


TIP: As you can see, the solder point isn't the most stable in current form. I used a touch of hot glue to secure the solder joints and prevent large pains in the arse.
Alternatively, you could desolder like the good DIYer you are.. or Baller-Level DIYers would take this opportunity to swap for a non-rubbish connector

When free, you should have somthing that looks like this (...well minus the missing half):

Step 6 (THERE'S NO GOING BACK FROM HERE OUT!):
Please learn from my mistakes... PLEASE.
Hifiman's screws strip far too easily. I mean, just grab your screwdriver from the other room and by the time you return, they are guaranteed to already be stripped. No lie.

So, do your best remove one of the two screws. There's no going back at this point, so you need to commit to the mod. Don't hesitate. Just go slow.
If you can get one screw out, then the other one (and likely stripped one) can just be bent back and forth and snapped right off! Yes, it happened to me on both cups! If you're careful, you can do this without scratching your cup.
For those of you who want a more in-depth breakdown of the screw mechanism:

This brass fitting is glued into the cup. There is a small rubber spacer, and a screw holds it all together. We will be removing the brass fitting in the next step!
Step 7:
Time to remove the brass fittings. I am sure there's an easier way to do this... really there's got to be. But what worked best for me was this:


Grab a philips screwdriver and a wood clothespin. Line up the fitting with the hole in the clothes pin... Knock the fitting through with a screwdriver!


Now you're left with a stripped fitting... And a messy, dirty hole

Step 8:
We'll fix that hole right up!
Let's make that sloppy little hole into a nice big clean one. The HE-400i yolk has prongs instead of screws to keep everything together. Once the holes are shaped, we'll have easy access for future modding!
Get yourself some cheap prison files from Habor Frieght...


You can do this part by hand... But it's soooo much faster with a drill! Final touches may require some hand-dee-work


All cleaned up... What a looker... Make sure it fits before proceeding!
Step 9:
Repeat all that on the second cup!
Step 10:
Reverse it all and put everything back together.... OR
This is the perfect time to Plasti-dip your cups! (Pictures and possibly guide to follow)
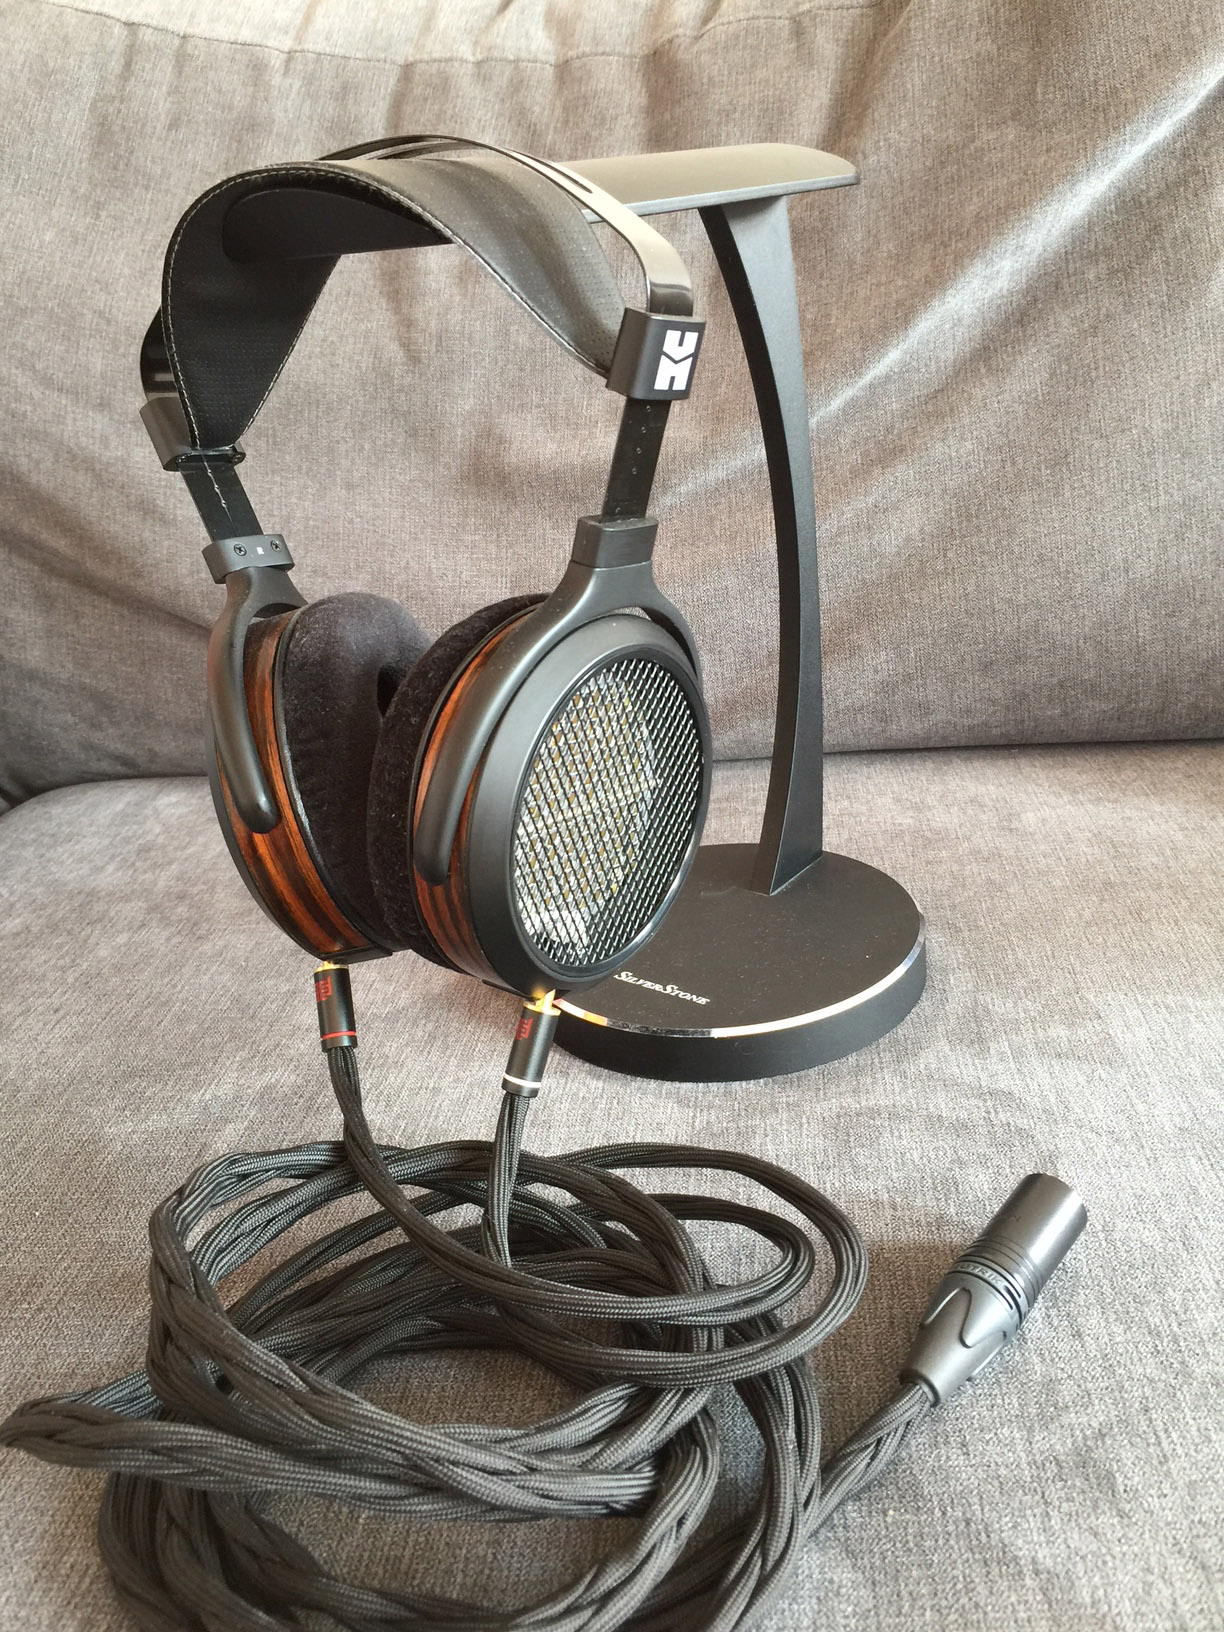
Step11:
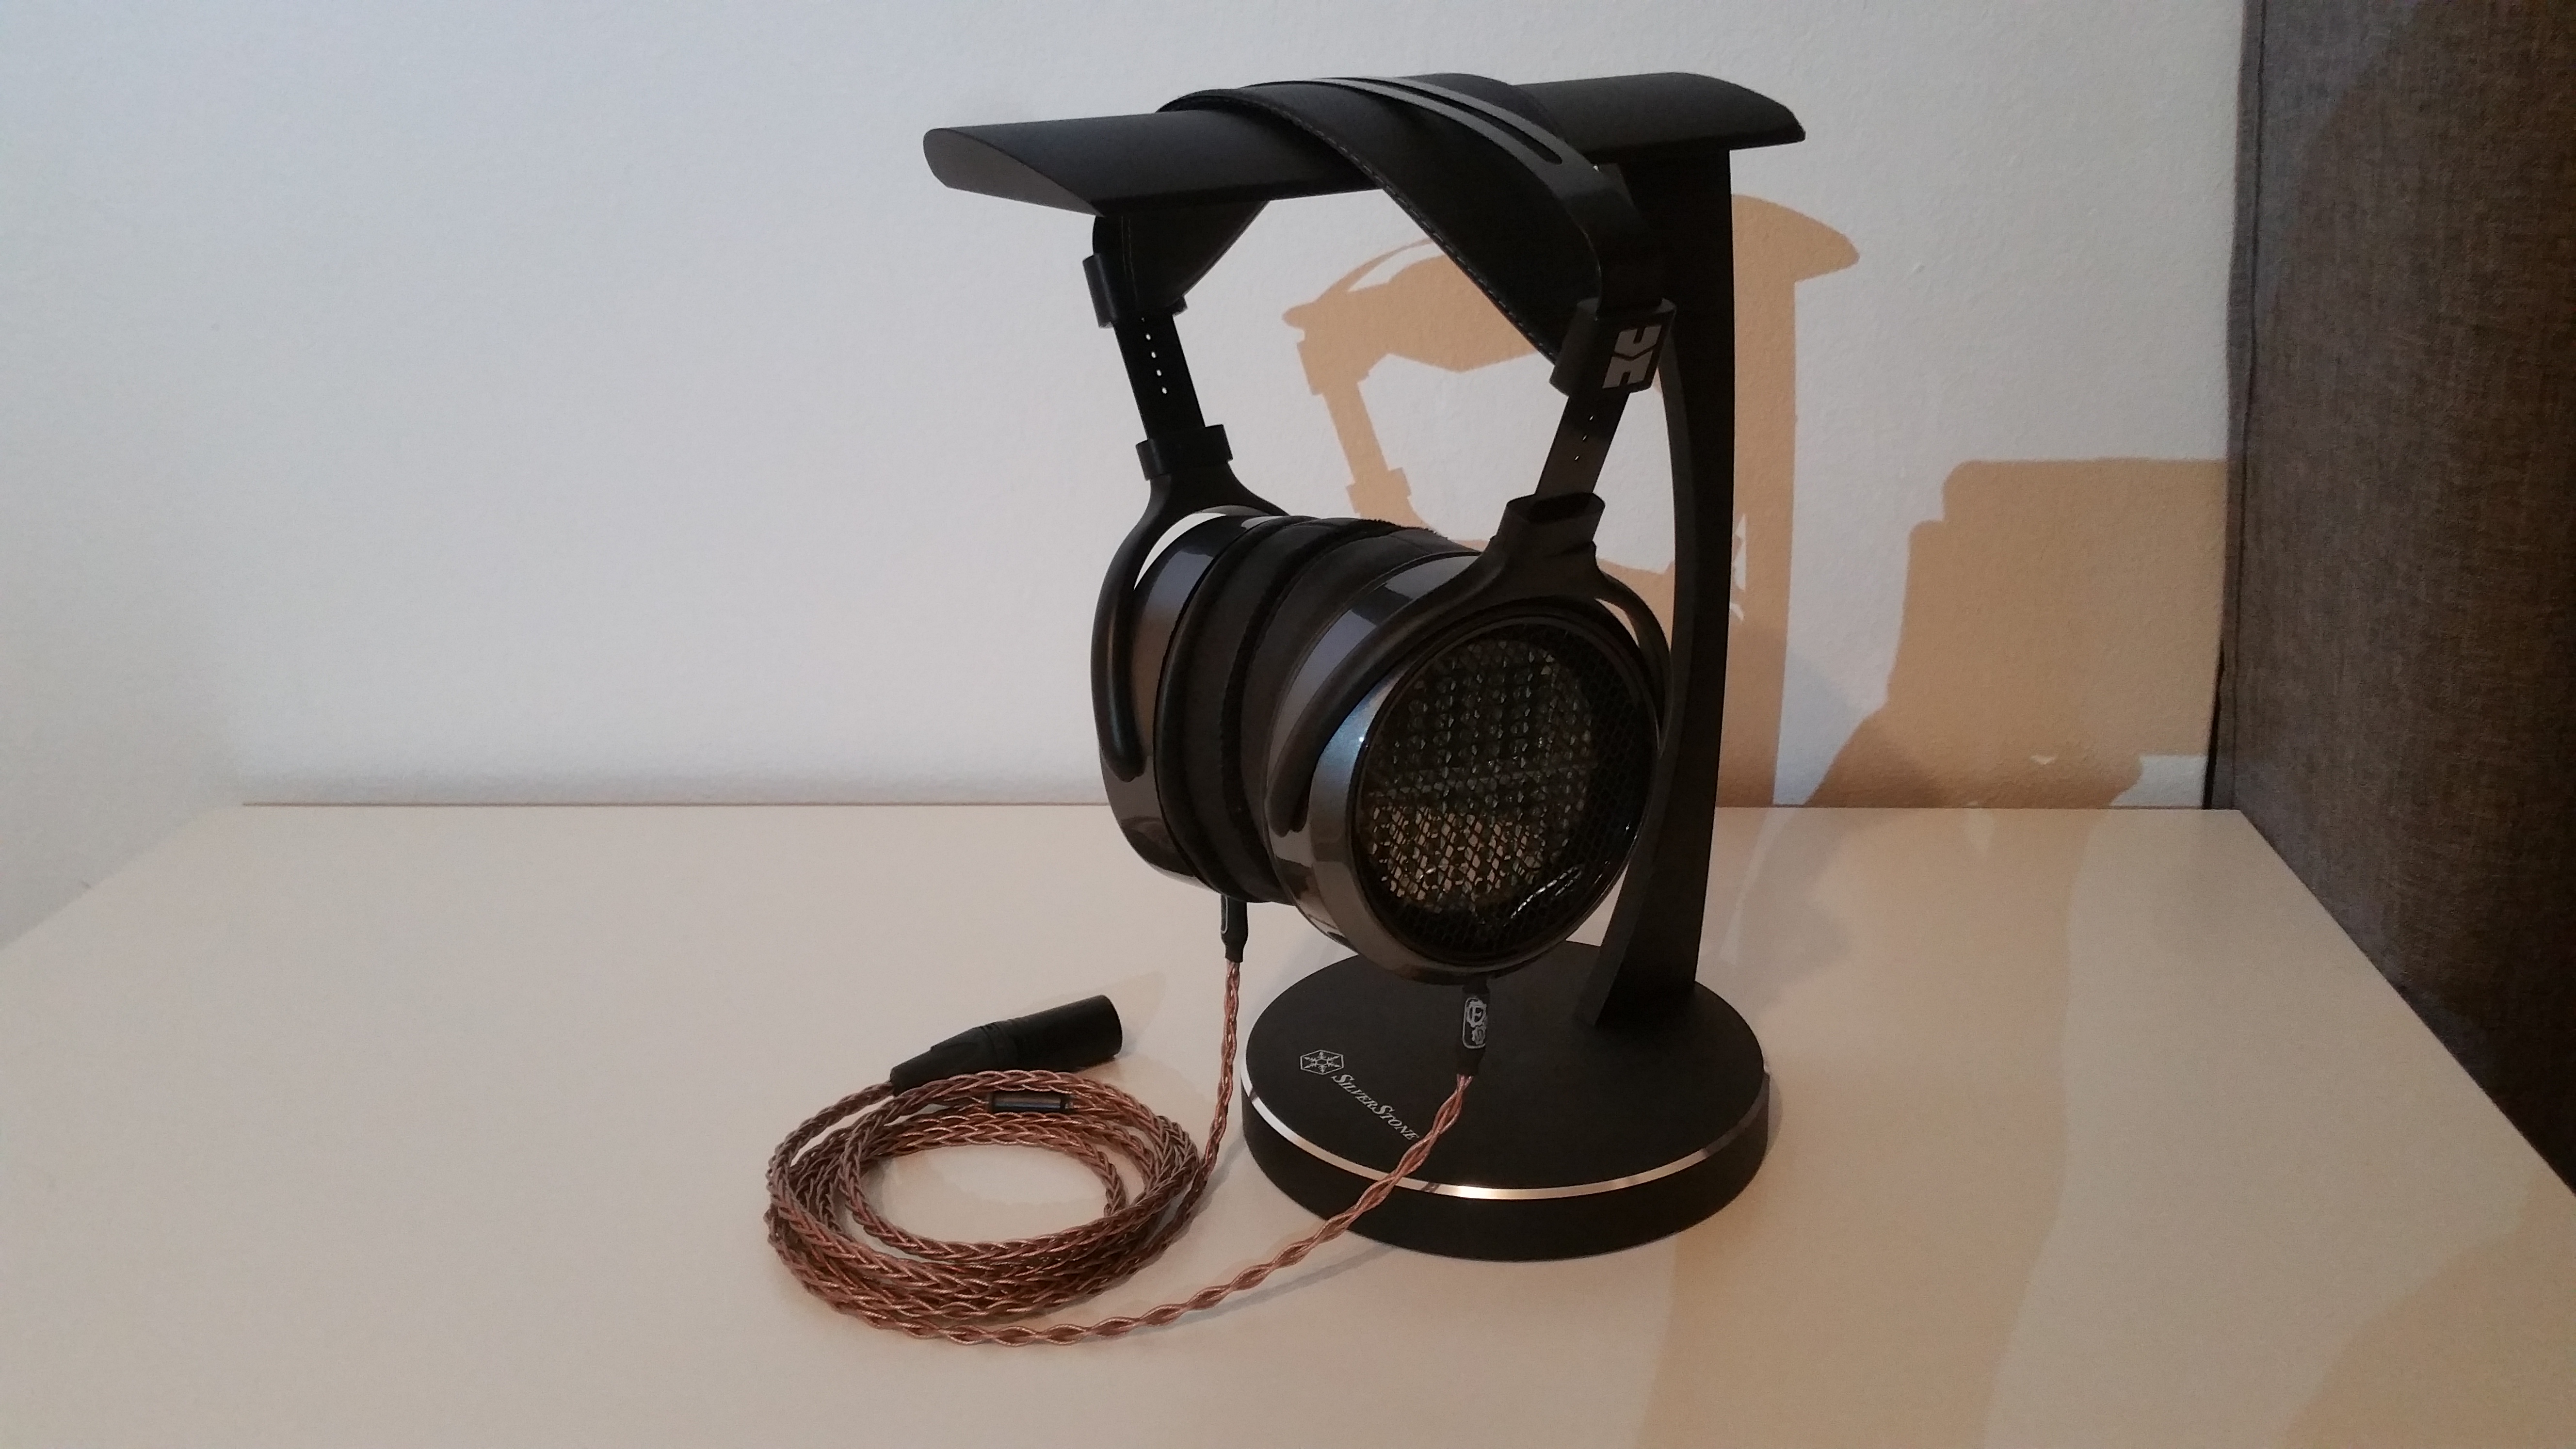
Enjoy your very own alien-head!


Well my friends, no longer will you go WITHOUT weird looks from strangers...
You too can go from looking like this................................. Too looking like THIS!
With a little elbow grease, and some help from your friend, MrScotchGuy... you too can look like an alien-beetle-monster or your money back! (*please note, no actual money is required; you are probably already wearing full-sized headphones, and will probably look like an alien even if you don't own any Hifiman products... just sayin')
Sooo without any further disclaimers... proceed with caution and at your own risk, you have been warned!
---------------------------------------------------------------------------------------------
Difficulty: Average
Time: 45-60 minutes (without plasti-dip spray... give yourself a weekend)
Tools Needed: Quality Phillips screwdriver, small wrench, files, drill
---------------------------------------------------------------------------------------------
Step 1:
Buy yourself some beat up, old Hifimans off the eBays.
I will be demonstrating on a much abused HE-5LE. As you can see, The Hulk or similarly angry owner decided to use this particular Hifiman as a projectile, stress calming device, or as a weapon. Self defense?!
Step 1.5:
Contact Hifiman, and discretely purchase the headband assembly for the HE-400i. If they ask you... you did not hear this from me. Seriously, "SHHHHHHHHUSH!"
(If you're Hifiman and you're reading this... well stop right here. DO NOT CONTINUE READING!!!)
Step 2:
Mentally prepare yourself... and maybe clear off a work space. It helps, trust me! For me, a table, towel and some good light did the trick.
Step 3:
Pick a cup, you've got a 50/50 chance at picking the right one... don't even think of messing this up. Remove the earpad and gently loosen the screws holding all the good bits in place.
TIP: After fully removing the screws, I find it easiest to just to ziplock the screws and mark the baggie "L" or "R" to make life that much easier when putting it all back together.
Step 4:
After completely removing the screws (don't lose them, seriously, don't), attempt to remove the good bits of the Hifiman driver from the housing. Some convincing may be required.
Whispering soft words may have no effect. With any luck, your good bits will be loose and slide right out without a struggle. If your bits happen to be larger than average, the stuggle will be real.
Attempt 1
Hifiman provided an exceptional guide to grill removal. Follow this:
http://www.head-fi.org/t/491831/a-simple-way-of-adding-airiness-to-hifiman-he-5le-remove-grill-cloth
With the grill out of the way, push from the outer side and hope nothing breaks... with luck, your bits might just fall out on their own. Aim for your padded workspace!
Attempt 2
Excessive glue from assembly could prevent you from freeing your bits into the world. There's no easy way to break the "seal" without scratching the crap out of the inner cup with fancy tools. The HE-5LE is painted, so there's no coming back from this.
Ultimately, I had to get super sophisticated and wedge my thumbnail in the gap and run it full circle to "break" the glue. Use crappy picture as reference:

Ultimately, I had to get super sophisticated and wedge my thumbnail in the gap and run it full circle to "break" the glue. Use crappy picture as reference:
Properly liberated drivers should look like this.
Step 5.1:
The most difficult step. If you're only careful once this is the time for it (well twice, we've got two cups...)...
If you're a real Headfier, you know how to solder... if you're like me, it's time to get your ghetto-mod on!
We need to use an appropriate wrench to loosen the nut holding Hifiman's mini-BNC to the cup. My smallest wrench was massive, so this was comical at best.
Once the glue breaks free, your nut should spin freely. It's best to use some sort of plastic wrap (or in my case a ziplock...) to prevent debris getting flung into the driver... that's bad from what I hear. I mean, our warranty is pretty much dead at this point, and it's only about to get worse.
Step 5.2:
Gently spin the cable connector by the nut to free the driver from the cup. Your hands will require yoga-like poses to spin the driver without twisting the cables too much.
TIP: As you can see, the solder point isn't the most stable in current form. I used a touch of hot glue to secure the solder joints and prevent large pains in the arse.
Alternatively, you could desolder like the good DIYer you are.. or Baller-Level DIYers would take this opportunity to swap for a non-rubbish connector
When free, you should have somthing that looks like this (...well minus the missing half):
Step 6 (THERE'S NO GOING BACK FROM HERE OUT!):
Please learn from my mistakes... PLEASE.
Hifiman's screws strip far too easily. I mean, just grab your screwdriver from the other room and by the time you return, they are guaranteed to already be stripped. No lie.
So, do your best remove one of the two screws. There's no going back at this point, so you need to commit to the mod. Don't hesitate. Just go slow.
If you can get one screw out, then the other one (and likely stripped one) can just be bent back and forth and snapped right off! Yes, it happened to me on both cups! If you're careful, you can do this without scratching your cup.
For those of you who want a more in-depth breakdown of the screw mechanism:
This brass fitting is glued into the cup. There is a small rubber spacer, and a screw holds it all together. We will be removing the brass fitting in the next step!
Step 7:
Time to remove the brass fittings. I am sure there's an easier way to do this... really there's got to be. But what worked best for me was this:
Grab a philips screwdriver and a wood clothespin. Line up the fitting with the hole in the clothes pin... Knock the fitting through with a screwdriver!
Now you're left with a stripped fitting... And a messy, dirty hole
Step 8:
We'll fix that hole right up!
Let's make that sloppy little hole into a nice big clean one. The HE-400i yolk has prongs instead of screws to keep everything together. Once the holes are shaped, we'll have easy access for future modding!
Get yourself some cheap prison files from Habor Frieght...
You can do this part by hand... But it's soooo much faster with a drill! Final touches may require some hand-dee-work
All cleaned up... What a looker... Make sure it fits before proceeding!
Step 9:
Repeat all that on the second cup!
Step 10:
Reverse it all and put everything back together.... OR
This is the perfect time to Plasti-dip your cups! (Pictures and possibly guide to follow)
Step11:
Enjoy your very own alien-head!


 still kickin strong though! If I'm smart I'll upgrade to a HE 6 an pray to gawd my NFB10ES2 can drive it [chances are it can :3 it's a nice beefy amp] or maybe try to find something better. I'm thinking an HE 560, but too many mods for that imo