SR60-Mod part II
Jul 24, 2011 at 8:46 PM Post #751 of 3,353
Guys, sorry for the OT here, but I could use a bit of help on this issue:
I'm planning on experimenting with this ART Headtap gizmo to connect my speaker amp with this device. Apparently, I'd need two pairs of speaker cable into a 1/4" TRS. The thing is... I cannot seem to find a vendor for such a cable arrangement. I thought I knew how to Google stuff lol.

The annoying thing is that I've emailed ART a week ago asking if the cables are included with the package but no response - they say they reply in 24 hours
eek.gif

 
This quite a cheap product so I don't care if it sucks. However, my Stax rig is coming out of the Jadis and it sounds so much better when I connect the same rig with more mid tier amps that I just have to find out how much of the Jadis I can bring to the table for my dynamics
biggrin.gif

 
Jul 24, 2011 at 9:51 PM Post #752 of 3,353
xaval,
 
What kind of connectors do you need at the other end of the cable?  I think I understand what you need and might be able to whip something up - be it the instructions on how to carry this out, or to build the actual cable.  Let me know about the connectors that need to go at the other end of the cable that the 1/4" TRS connector goes to.
 
Thanks,
 
Jul 24, 2011 at 9:58 PM Post #754 of 3,353


Quote:
I knew it. Old JamesMcProgger did it to his sr80i awhile back. Seemed to work for him.

Kojaku


Thanks for remembering the picture from the past and pulling it up.  A picture is worth a thousand words.  


Quote:
OH GOD THAT JOINT IS AWFUL. TAKE IT AWAY!


I do quite agree.  I suspect that joint will result in a "cold" solder joint at some point in the future.  The new wire that was "glopped" onto the old connection with more solder doesn't look all that secure.  If one just "tins" the new wire leads and slightly heats up the existing solder on the joint, their new wire should "get into the mix" quite easily and make a solid joint that will hold for many years.


Quote:
I've been using this method from day one, a little heat shrink covers the solder joint and nobodies the wiser!
cool.gif


Bill, Why are you holding such great ideas back?  When you think of them, come to the forum and share them with us. 
wink.gif


Jul 24, 2011 at 10:00 PM Post #755 of 3,353


Quote:
Oh no I seem to have partially killed one of my drivers.  I only have bass coming out of one driver!


Oh no, don't blow it.  It would be all to easy to get back in there with a soldering iron and try to make things right - but, you might make them worse.  Can you take a picture??  It might allow us to see where the issue might reside so proper instructions can be passed onto you.
 
 
Jul 24, 2011 at 10:21 PM Post #756 of 3,353
Oh no I seem to have partially killed one of my drivers.  I only have bass coming out of one driver!


Do you have sr225(i or original)?

I think that the 4-conducting wire may have something to do with this. Maybe the two wires split the signal regions. What that means is that it could be way harder to resolder 225's...cuz you might have to get each wire to the exact correct region.

Also, did you do wje's new method? Or did you unsolder the whole thing?

Kojaku
 
Jul 24, 2011 at 10:23 PM Post #758 of 3,353


Quote:
Do you have sr225(i or original)?

I think that the 4-conducting wire may have something to do with this. Maybe the two wires split the signal regions. What that means is that it could be way harder to resolder 225's...cuz you might have to get each wire to the exact correct region.

Also, did you do wje's new method? Or did you unsolder the whole thing?

Kojaku


I have a sr80i and de-soldered.
 
 
Jul 24, 2011 at 10:30 PM Post #759 of 3,353


Quote:
Those were the best photos I was capable of taking.  Notice that some of the solder from the blue wire leeched up towards the white "goo."  The tip of the blue wire also isn't covered in solder.


Thanks for the good photos.  I think your blue connection (ground or negative) is a good one.  I wouldn't worry about it getting that close to the white substance.  However, that left connector (red, positive) does look like there might be a slight gap in the solder from the point of where your wire is held in place and the next drop of solder closer to the white area.
 
Do you have a small piece of wire?  If so, clean the insulation off of each end.  Plug your headphones back in and start playing some tunes.  Using the little "jumper" wire, hold it across the two soldered spots where the positive connection is made.  If you hear sound, then you need to bridge those solder points.  I'd try the jumper wire before going in with the hot soldering gun - because if there's some damage, the gun will make it worse.  If the jumper wire works, I'd just tin the ends of the wire and span it between the two pieces of solder and lightly touch it with your iron to get the wires to hold into place.
 
Jul 24, 2011 at 10:37 PM Post #760 of 3,353


Quote:
Thanks for the good photos.  I think your blue connection (ground or negative) is a good one.  I wouldn't worry about it getting that close to the white substance.  However, that left connector (red, positive) does look like there might be a slight gap in the solder from the point of where your wire is held in place and the next drop of solder closer to the white area.
 
Do you have a small piece of wire?  If so, clean the insulation off of each end.  Plug your headphones back in and start playing some tunes.  Using the little "jumper" wire, hold it across the two soldered spots where the positive connection is made.  If you hear sound, then you need to bridge those solder points.  I'd try the jumper wire before going in with the hot soldering gun - because if there's some damage, the gun will make it worse.  If the jumper wire works, I'd just tin the ends of the wire and span it between the two pieces of solder and lightly touch it with your iron to get the wires to hold into place.


I used my 63/37 soldering wire to test but it made no difference to the sound.
 
 
Jul 24, 2011 at 11:06 PM Post #761 of 3,353
New thought: could I possibly have soldered the positive and negative wires to the wrong sides of the pad?  I wouldn't be surprised if I did as I was not as methodical as I could have been.  If it makes a difference I wouldn't feel too uneasy switching them around to double-check, the soldering process wasn't so hard (or so I thought).
 
Jul 24, 2011 at 11:08 PM Post #762 of 3,353
Agh. So many driver deaths. Hey Wayne, do you think the exact positioning of each conducting wire matters that much or would your new method be much much safer and more accurate?

Kojaku
 
Jul 24, 2011 at 11:25 PM Post #763 of 3,353


Quote:
 

Mine were delivered at 9:30 a.m. this morning and are waiting at home for me. 
tongue.gif


I got mine super fast and no smoke smell. Nothing but good stuff from avhifi.com


Quote:
Brian, let us know what you think of that Fostex. I'm seriously considering getting one of those as well, but Amazon is out at the moment. Plus, I'm not sure how much I like the idea of another thread/project consuming a couple more months of my life. It's fun stuff, but it can be draining to stay up late every night reading through comments. 


B & H Photo is a good place to grab em.


Quote:
I've also tried the MSPros, and those are a totally different beast. The illusion of space they gave me was just astounding. And the reproduction of music is nearly as organic as the LCD-2, so it doesn't really lose out very much there. If you do get to try the LCD2s try get your hands on a set of MSPros as well. You may just like what you hear
redface.gif


Welp, I might get killed for this, but i got my 225i's in and I much prefer the tone they have over the ms pros that I have at the moment. I just don't care for the smooth highs and boomy lows, and I feel the 225i presents as much, if not almost as much detail. I can't wait to get them in some wooden housings, I think I'm going to be blown away. 


Quote:
When you listen to them, dont put on your grados for a few days.
 

It takes me a few songs to get burnt into an individual pair of headphones. I can definitely get lost in the t50rps unmodded. they are a good pair of headphones when given a bit of juice. However, I still prefer my grados.. We shall see after I have the time to really devote to modding the t50rp. They definitely have a good sound to them. 


Quote:
 I noticed that when I hold my cups up to light, I can see all the way through...all the way around. Like there's no vents, closed or open...I'll post a pic later.

Kojaku


hmmm. I don't know what you mean by that, but it doesn't seem right.. 


Quote:
yay, just ordered cabbilas cups yesterday! took me quite a while to decide to change to wooden cups


congratz! I think you will really enjoy them. Going from plastic to wood is great. 


Quote:
in the case of liberating the drivers, i guess they are held on by superglue no? ...has anyone tried using acetone (present in nail polish remover) to remove the bonds.... wonder if dripping it in the cracks will liberate the driver..... but i would also be worried on the reaction of acetone if it actually touches the driver


Bad idea. I'd much rather take a knife to them. That is how I plan to liberate my 225i


Quote:
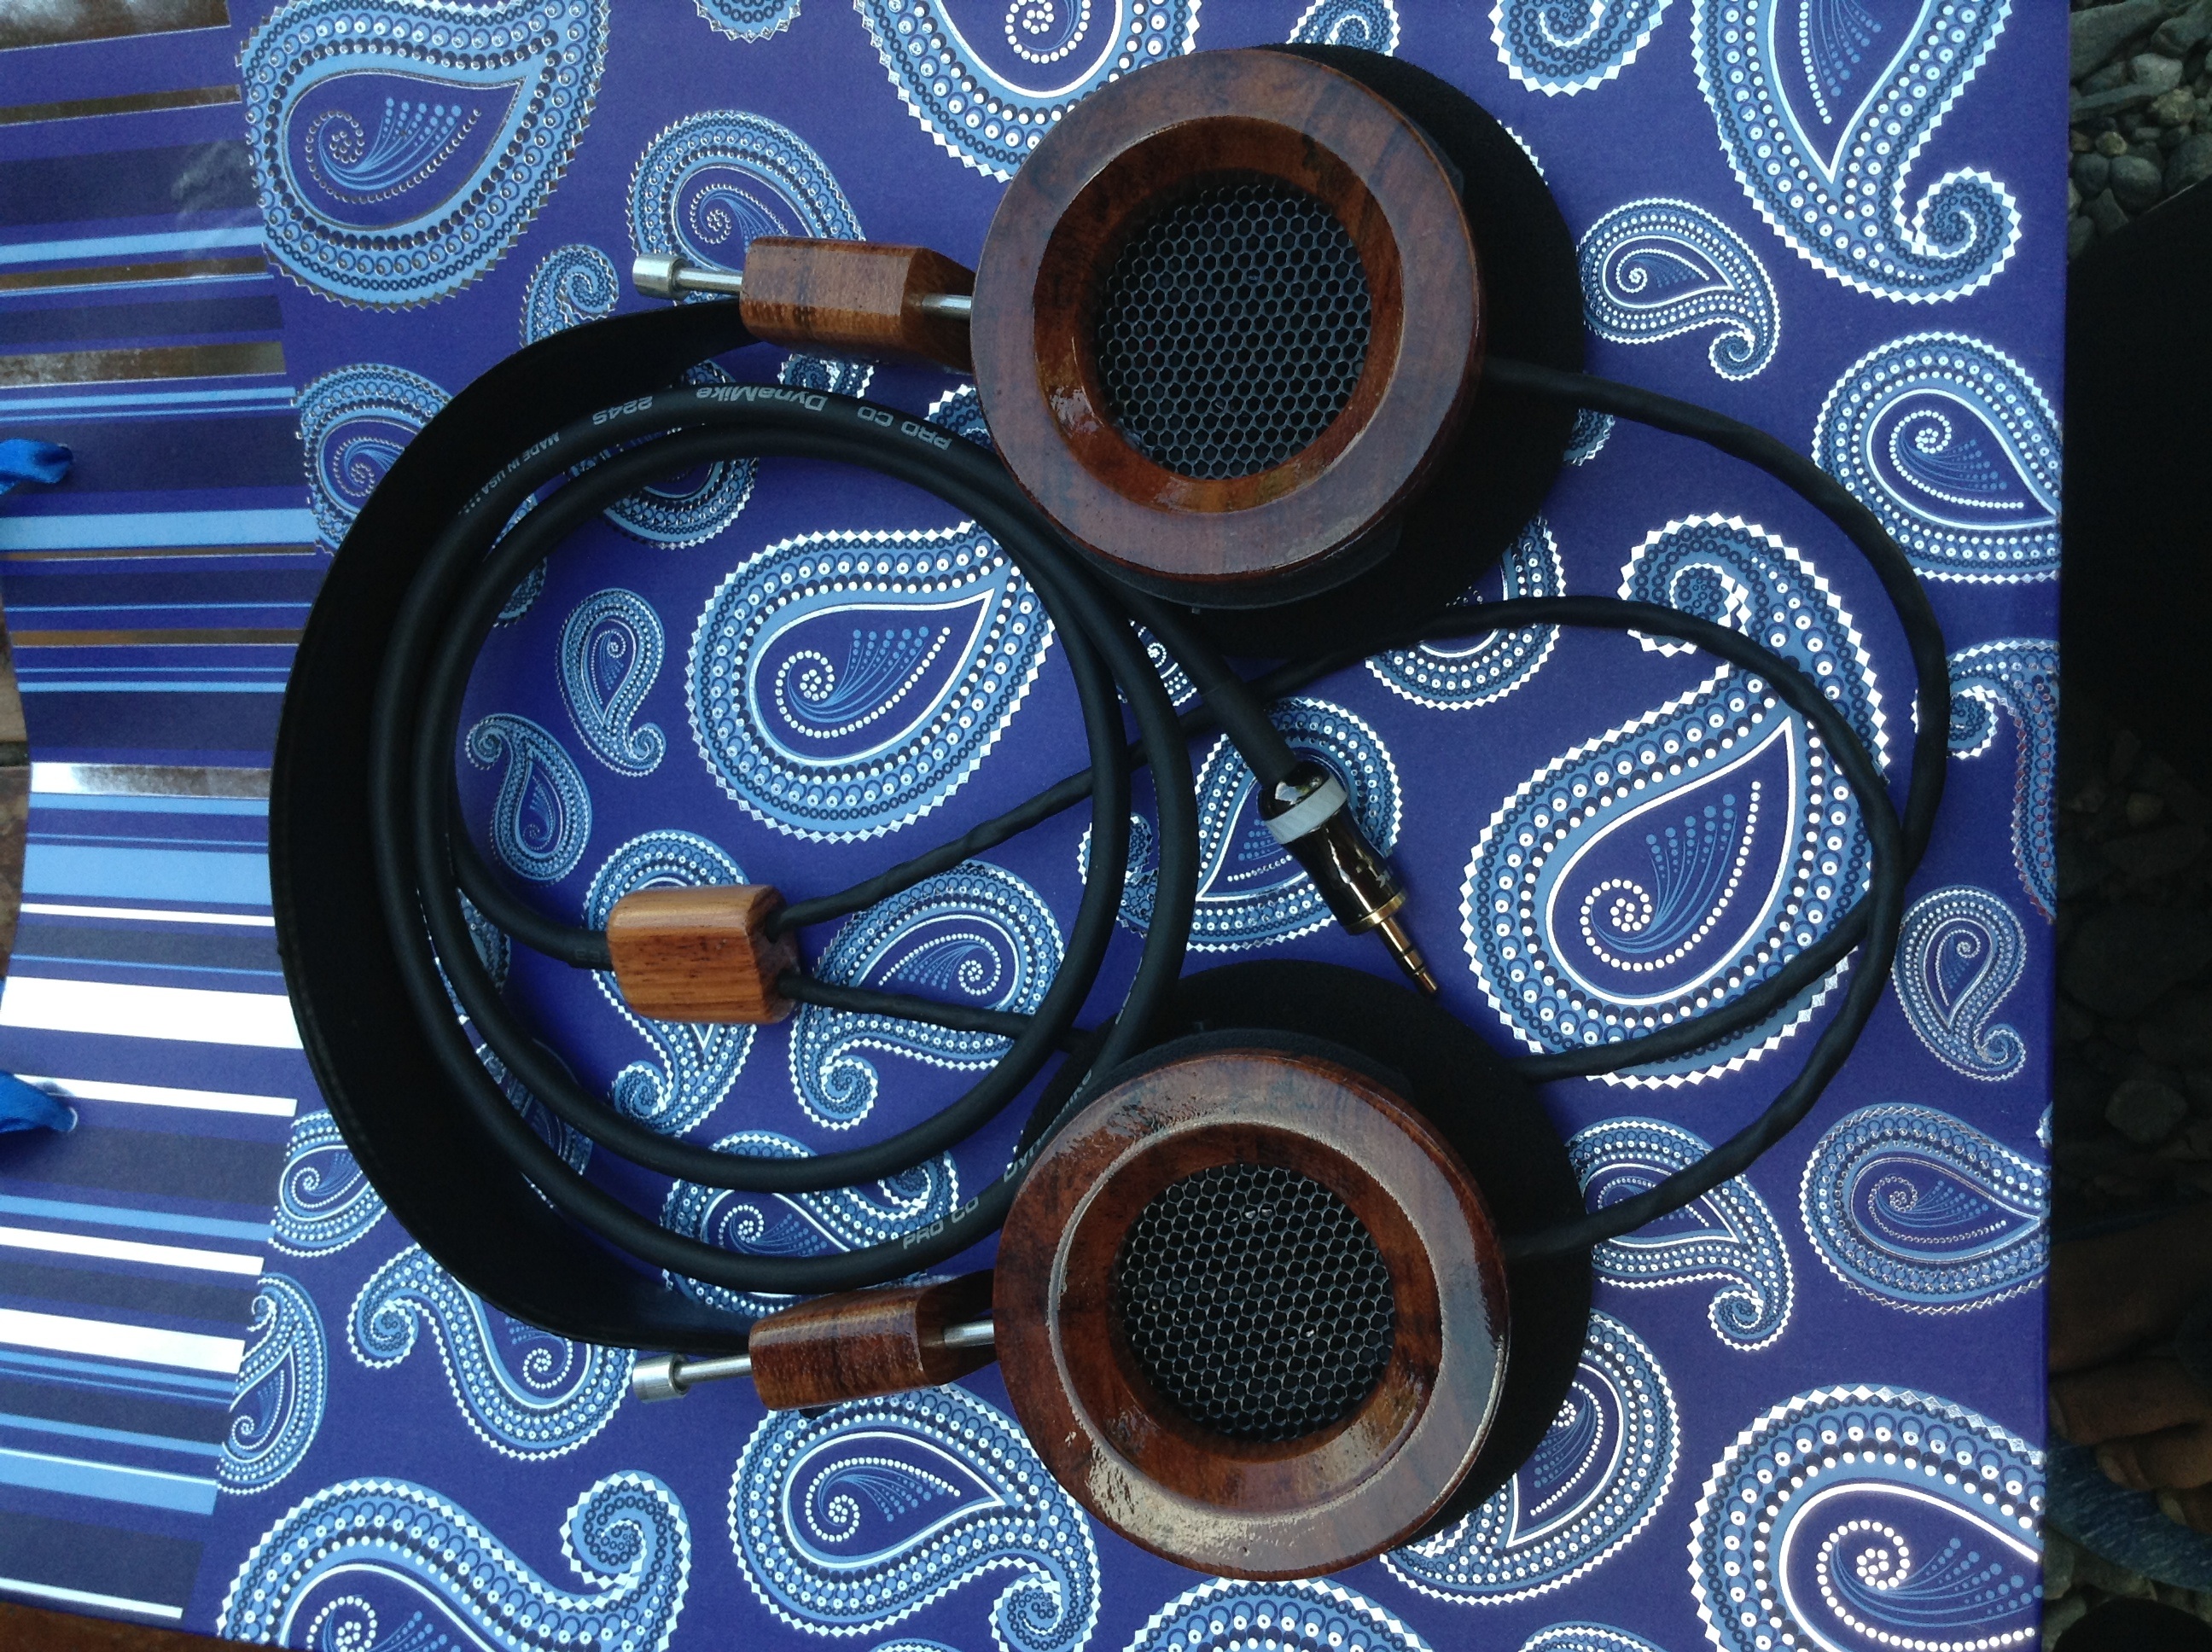
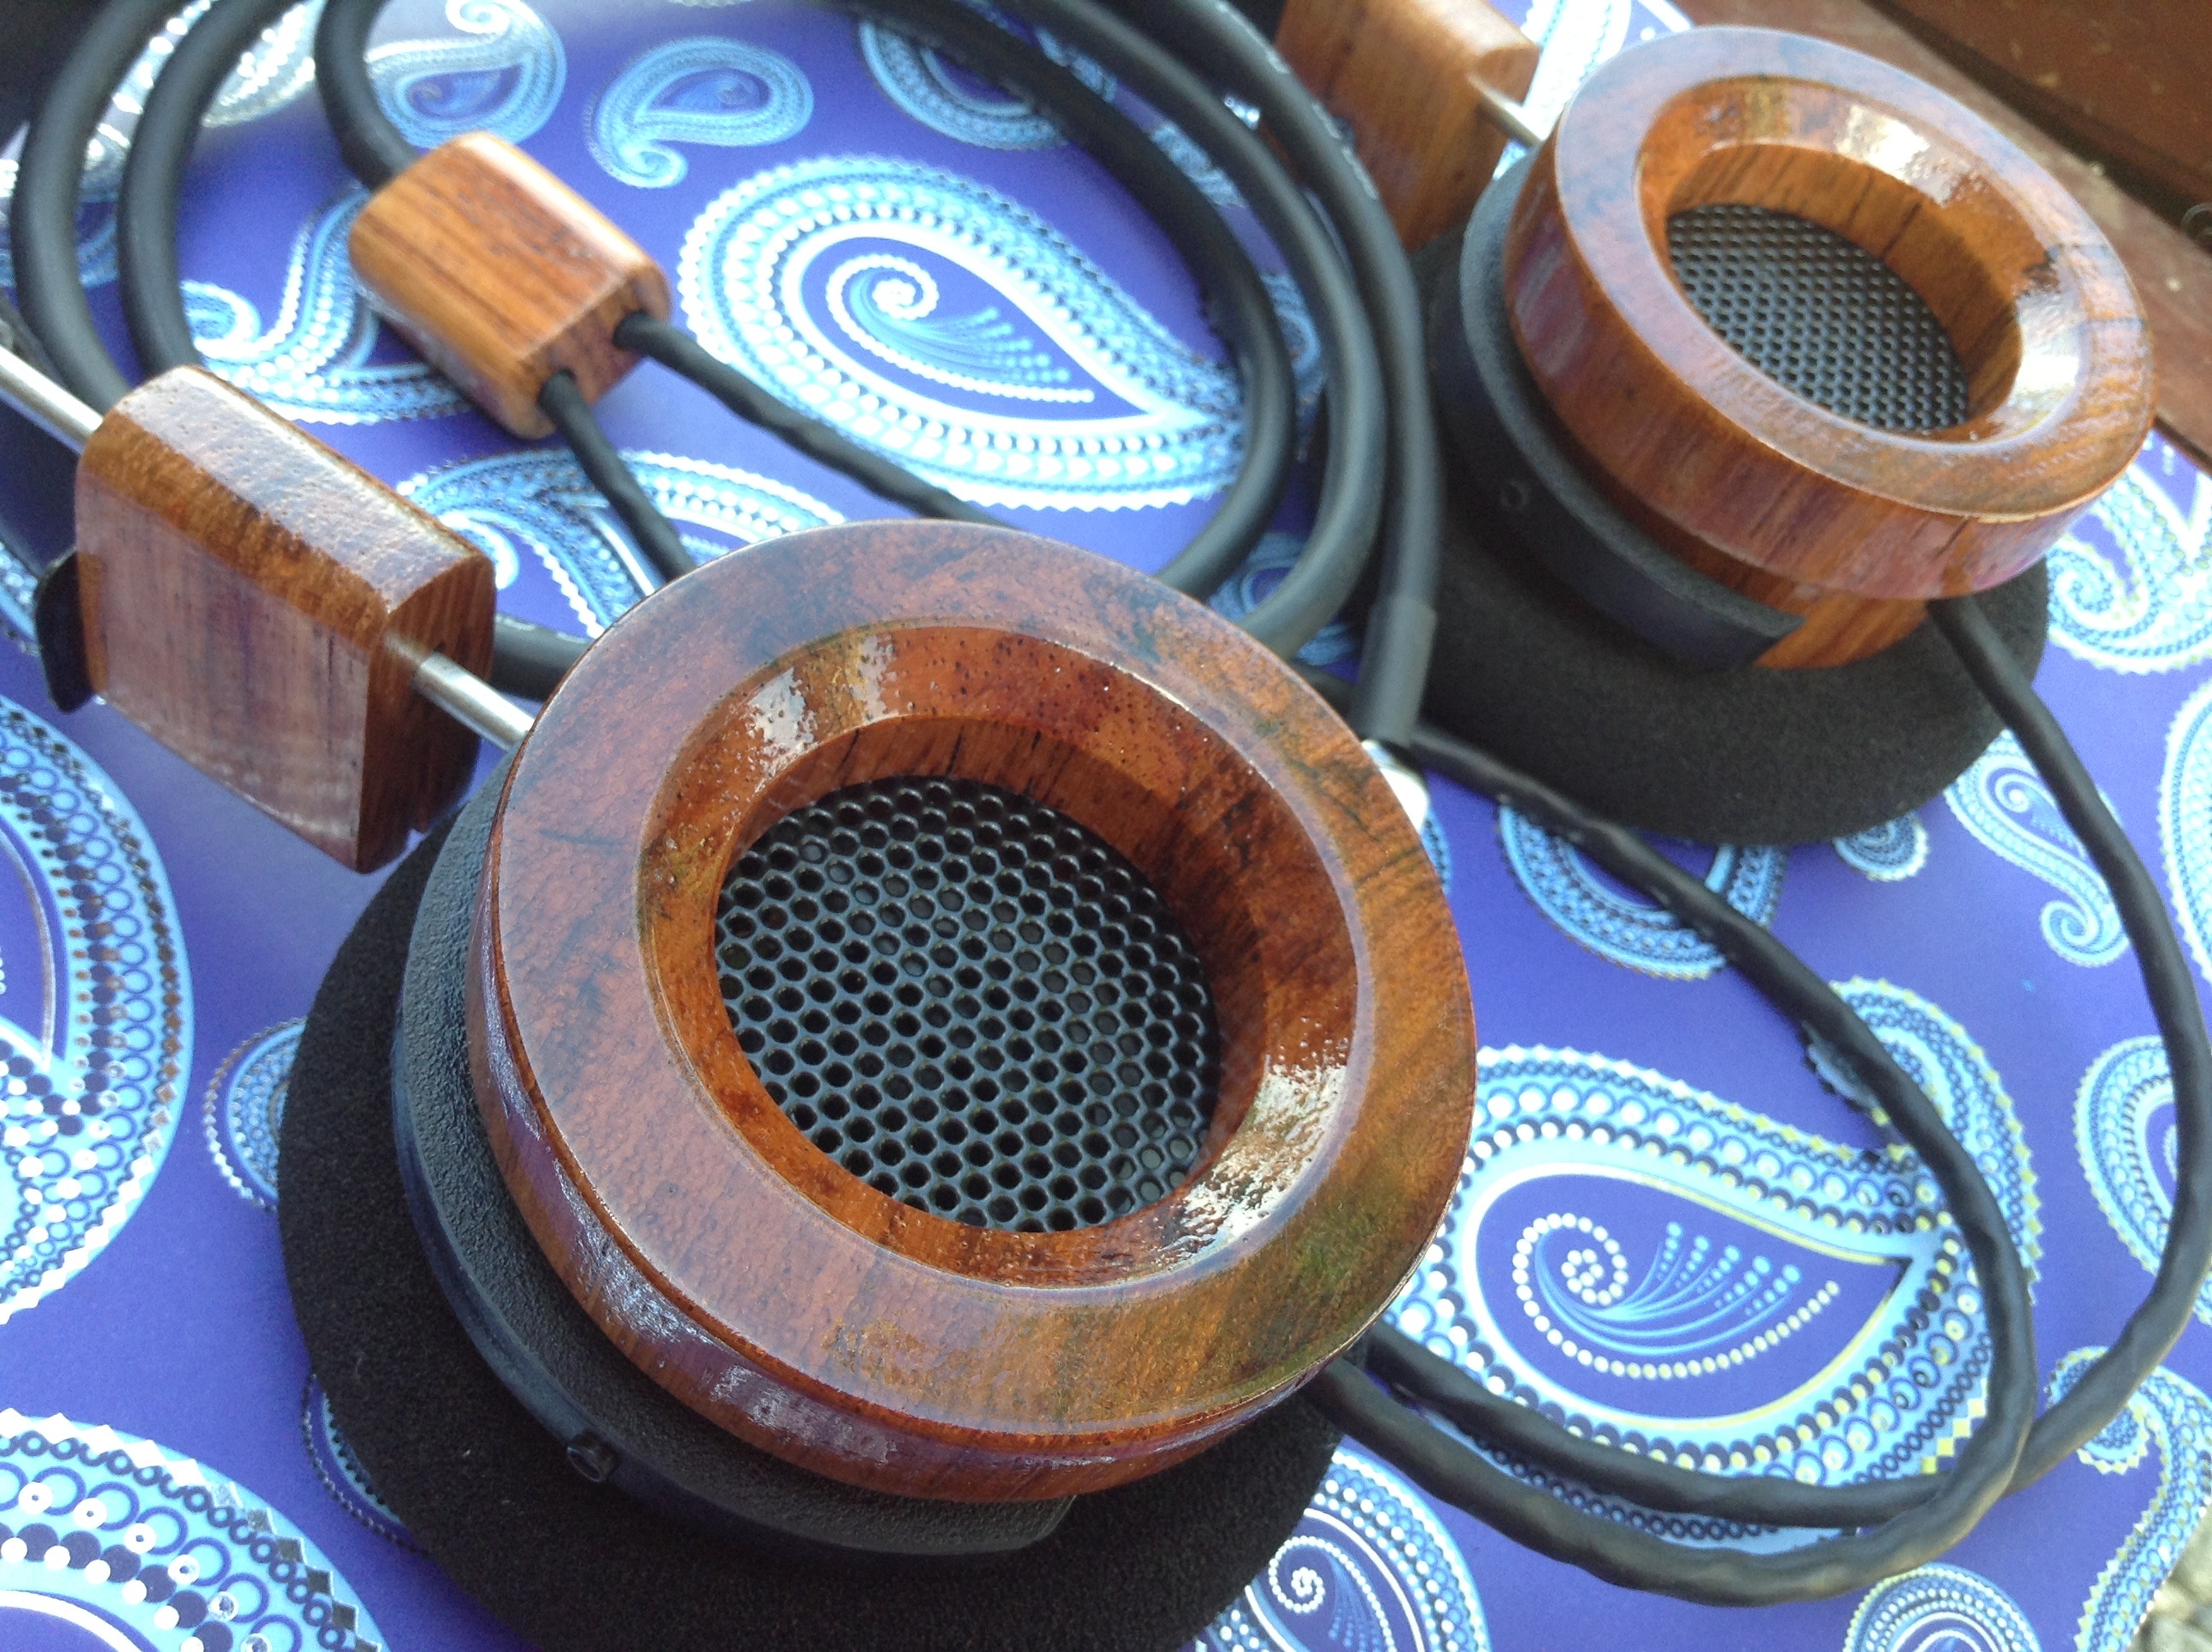
I've applied a piece of dynamat to each driver that eclein so graciously let me have, and applied a thin coat of the same copper paint so it would at least match :p
 
 
I'm still not proud of the mistakes I've made with painting, but for a first attempt I suppose it's not bad, and I always have my mushroom cups from my other 60's to perfect! The flat style cup is growing on me though, especially for out and about use (less poke-outey). I'm going to be using my woodies for a pure home setup, getting some silver cabling for them terminated with a Neutrik straight plug (when expenses allow). 
 
 
These penny 'phones, however, are going to be my to-go rig. My plans for them are as follows:
 
1) Replace leather headband with a nice looking/feeling leather
2) Carry the right channel over to the left cup, adding a 3.5mm jack in the left cup (any opinions on 3.5mm vs 2.5mm? I could use a second opinion on this.)
3) Replace standard rods with either copper rods, or some copper-plated steel rod. If anyone knows leads on these, let me know!
4) Since I'll have a jack in the left cup, recabling will be in order. If money permits I would like to get a silver (or SPC) recable, but if not, I'll be open to any suggestions on cable preference :) 

 
Firstly, I would highly suggest removing some of the dynamat, You only need about a pea sized amount on the back of the driver, Much more than that and it starts affecting the sound in a bad way.  Grado/Allesandro only put a small amount of mass on the back of their drivers and I think it is for this reason. too much dynamat can be a bad thing, keep it in mind. 
 
Also, as far as changing the stock cable goes. I didn't hear any real difference on my rig. 


Quote:
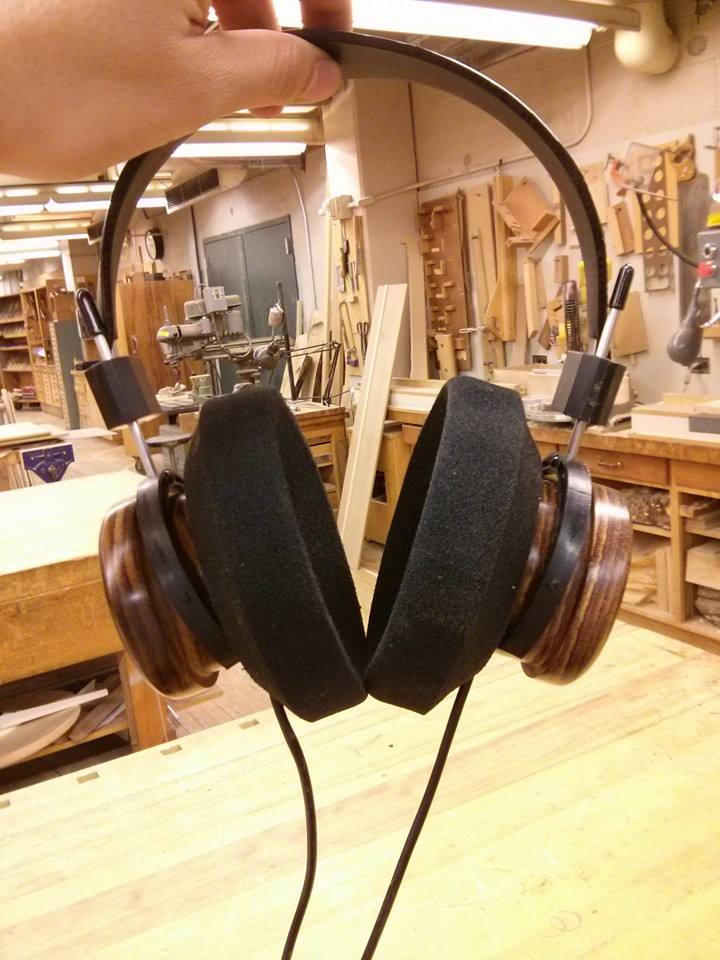
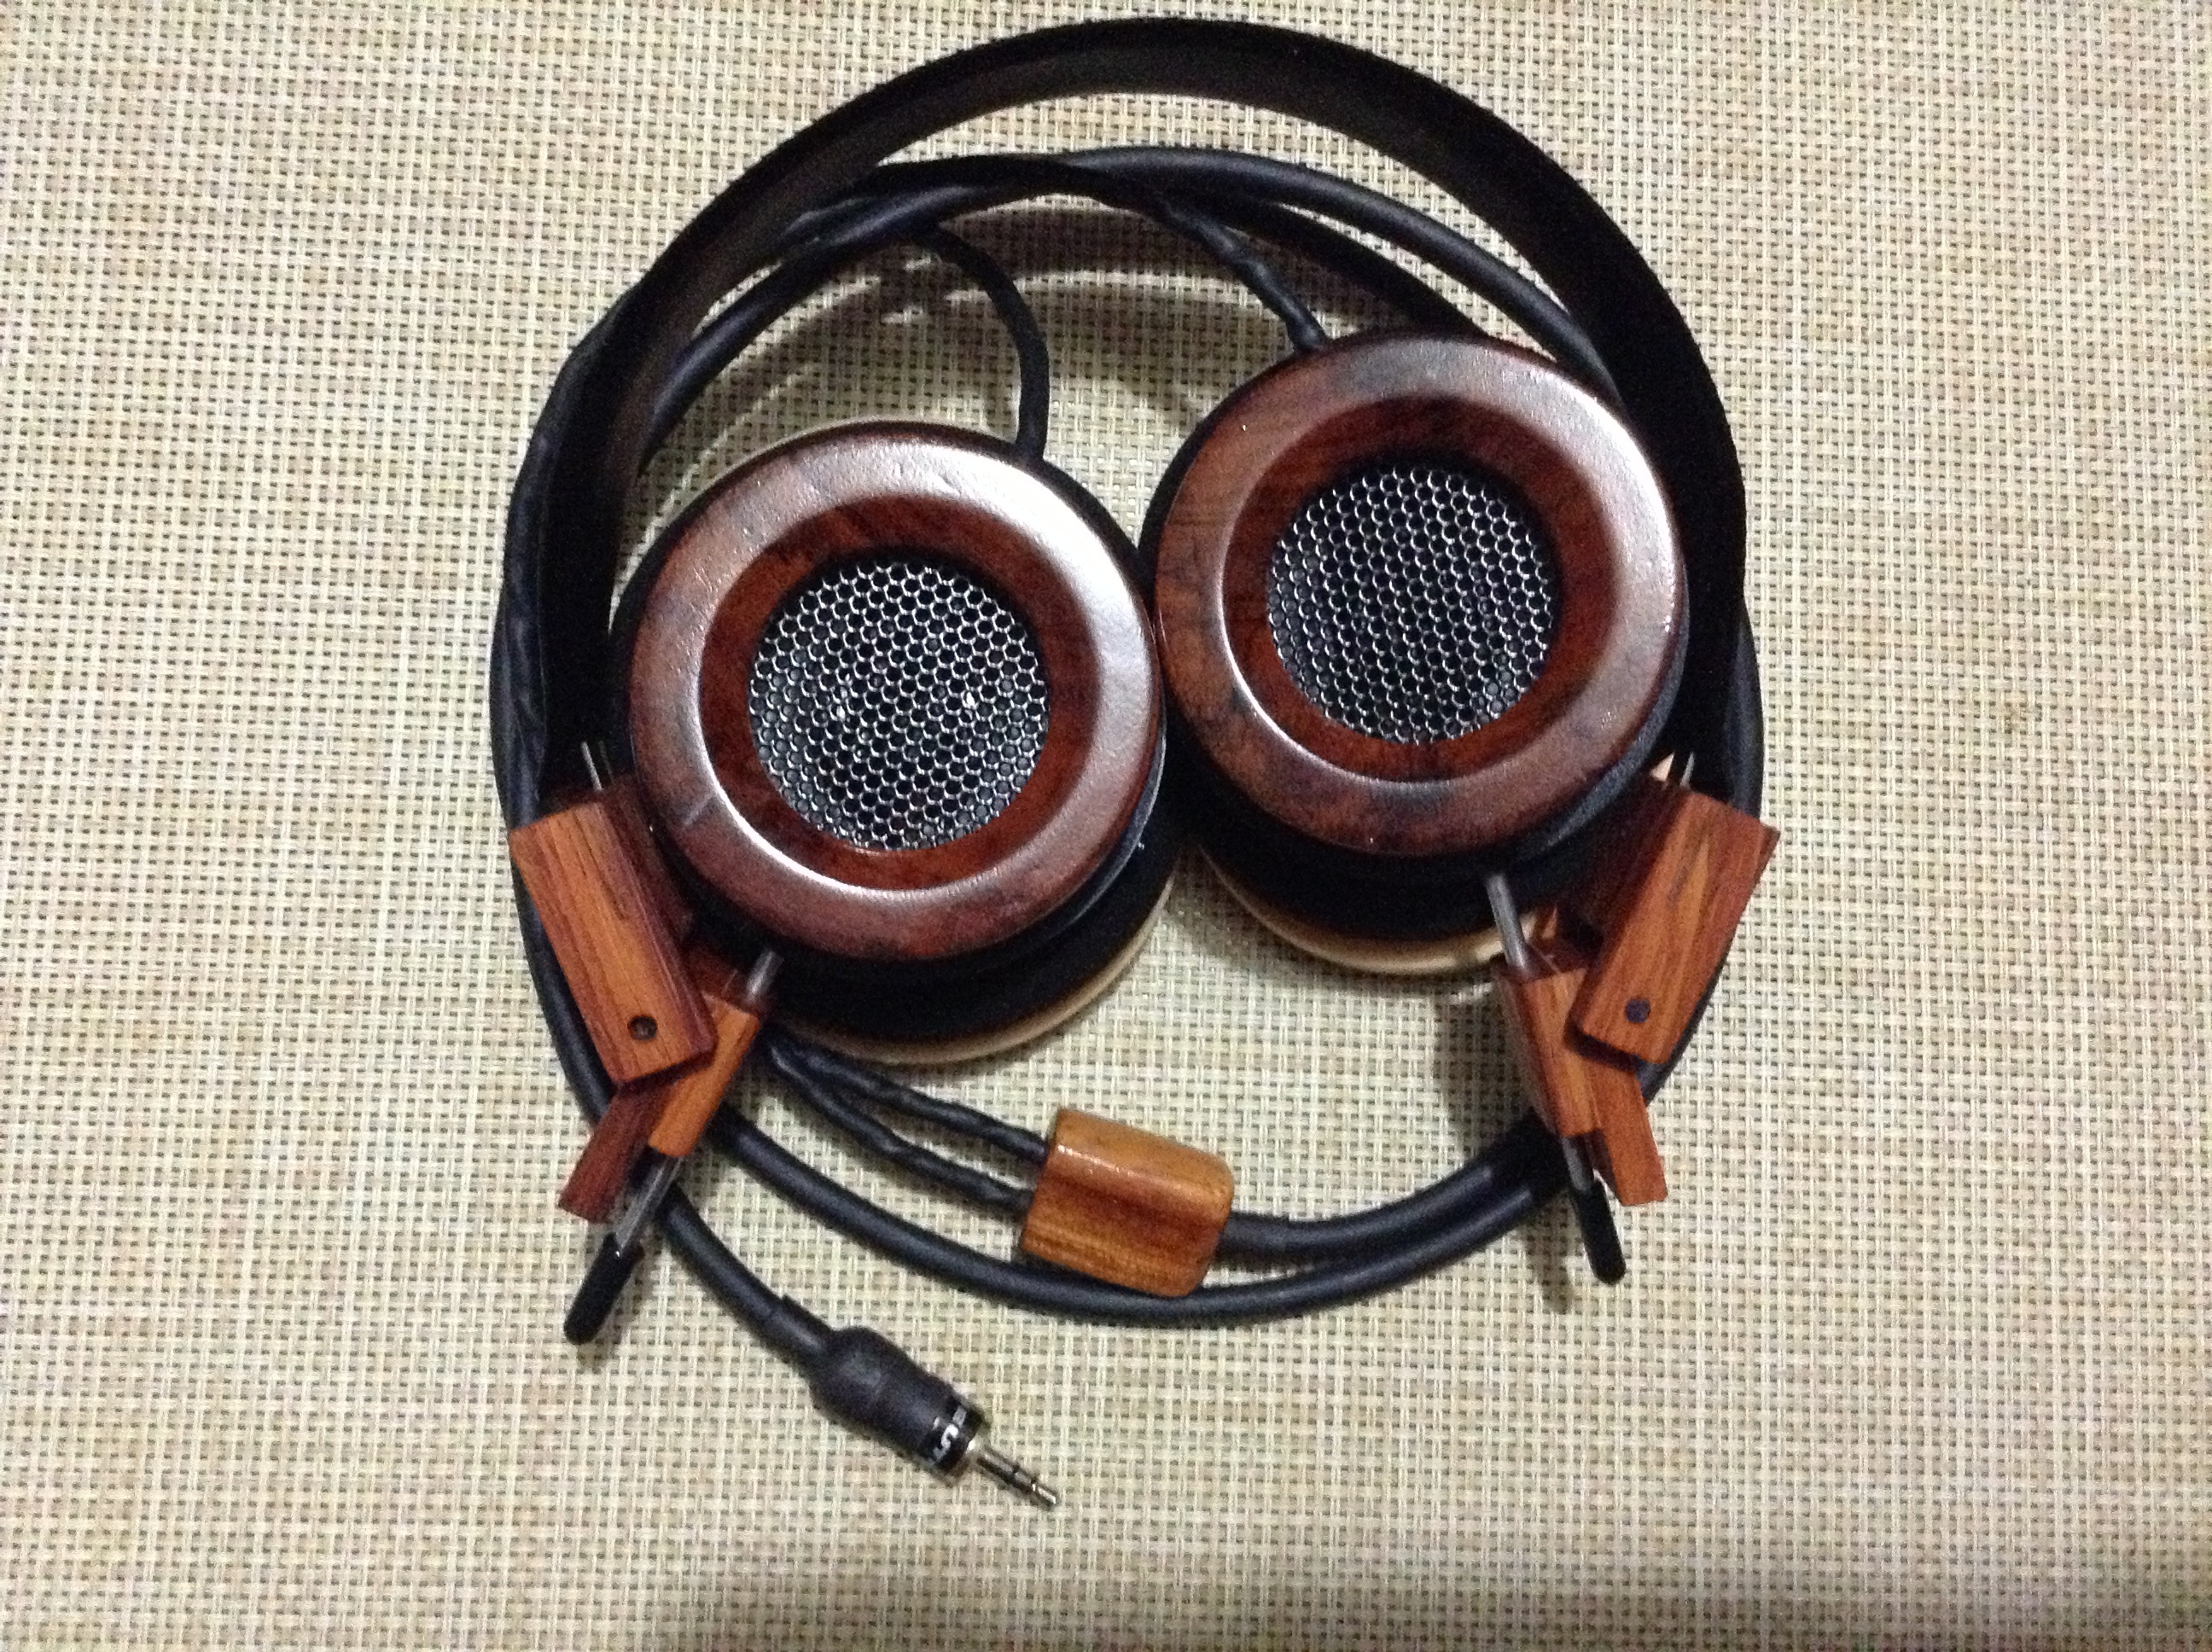
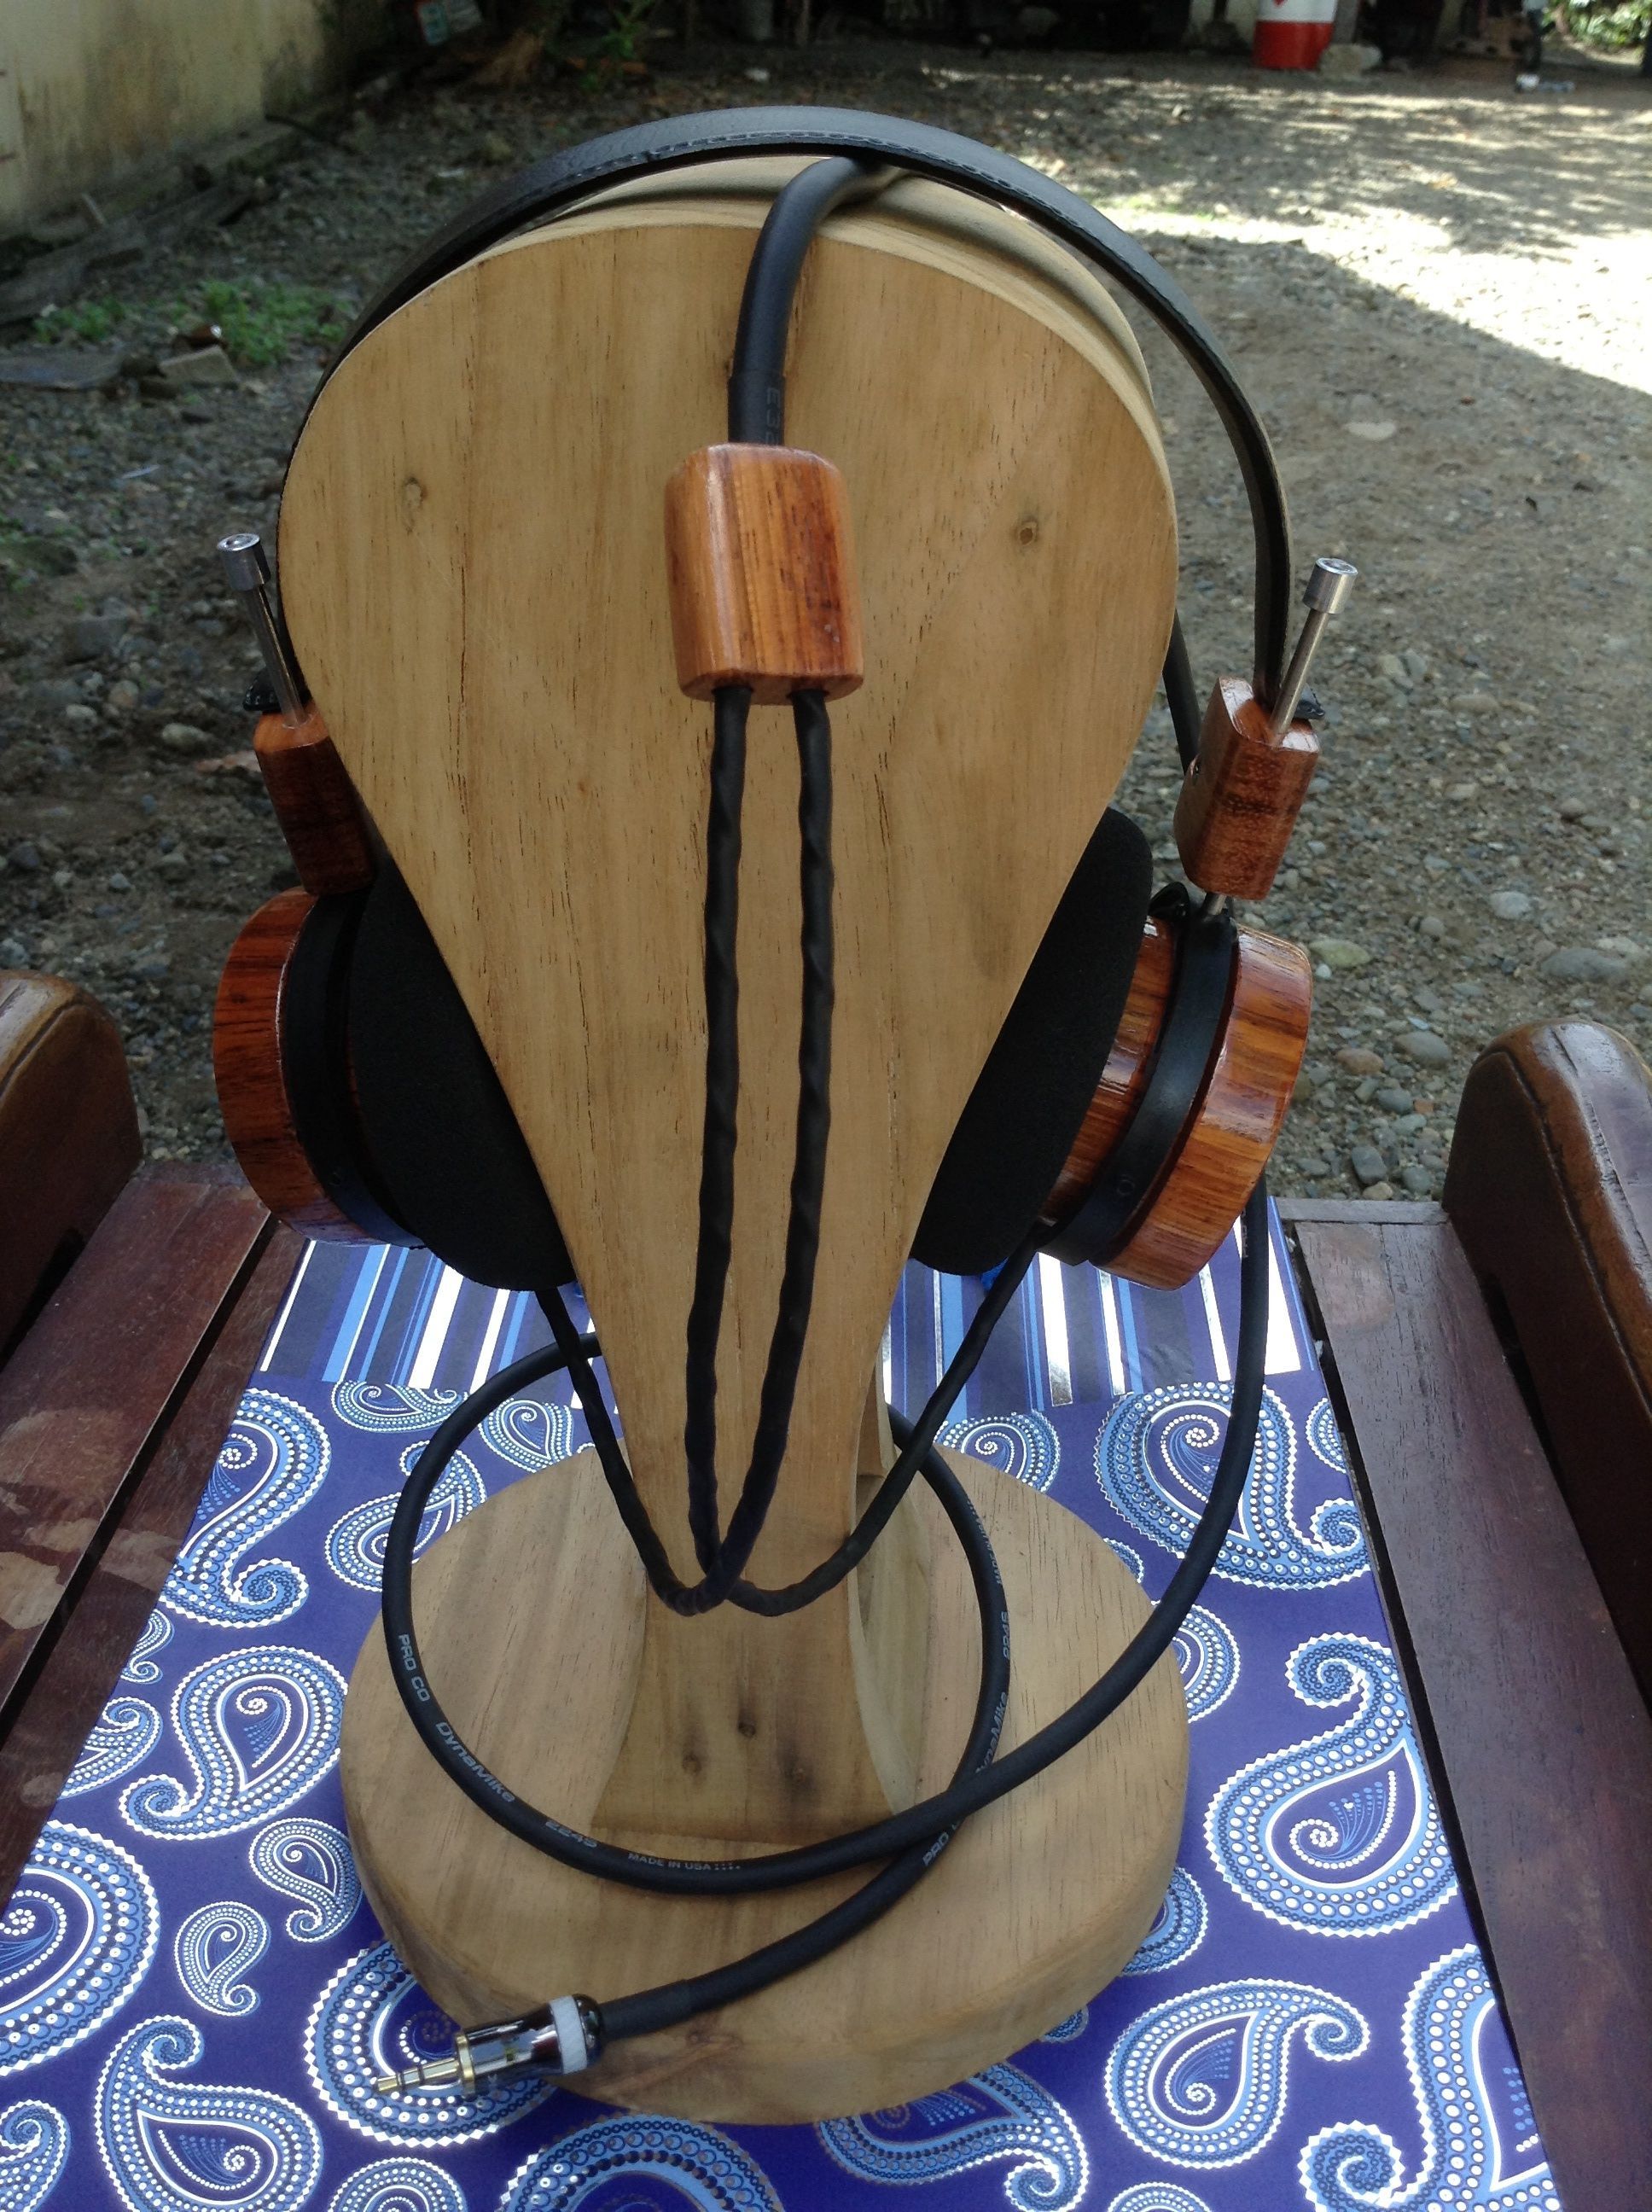
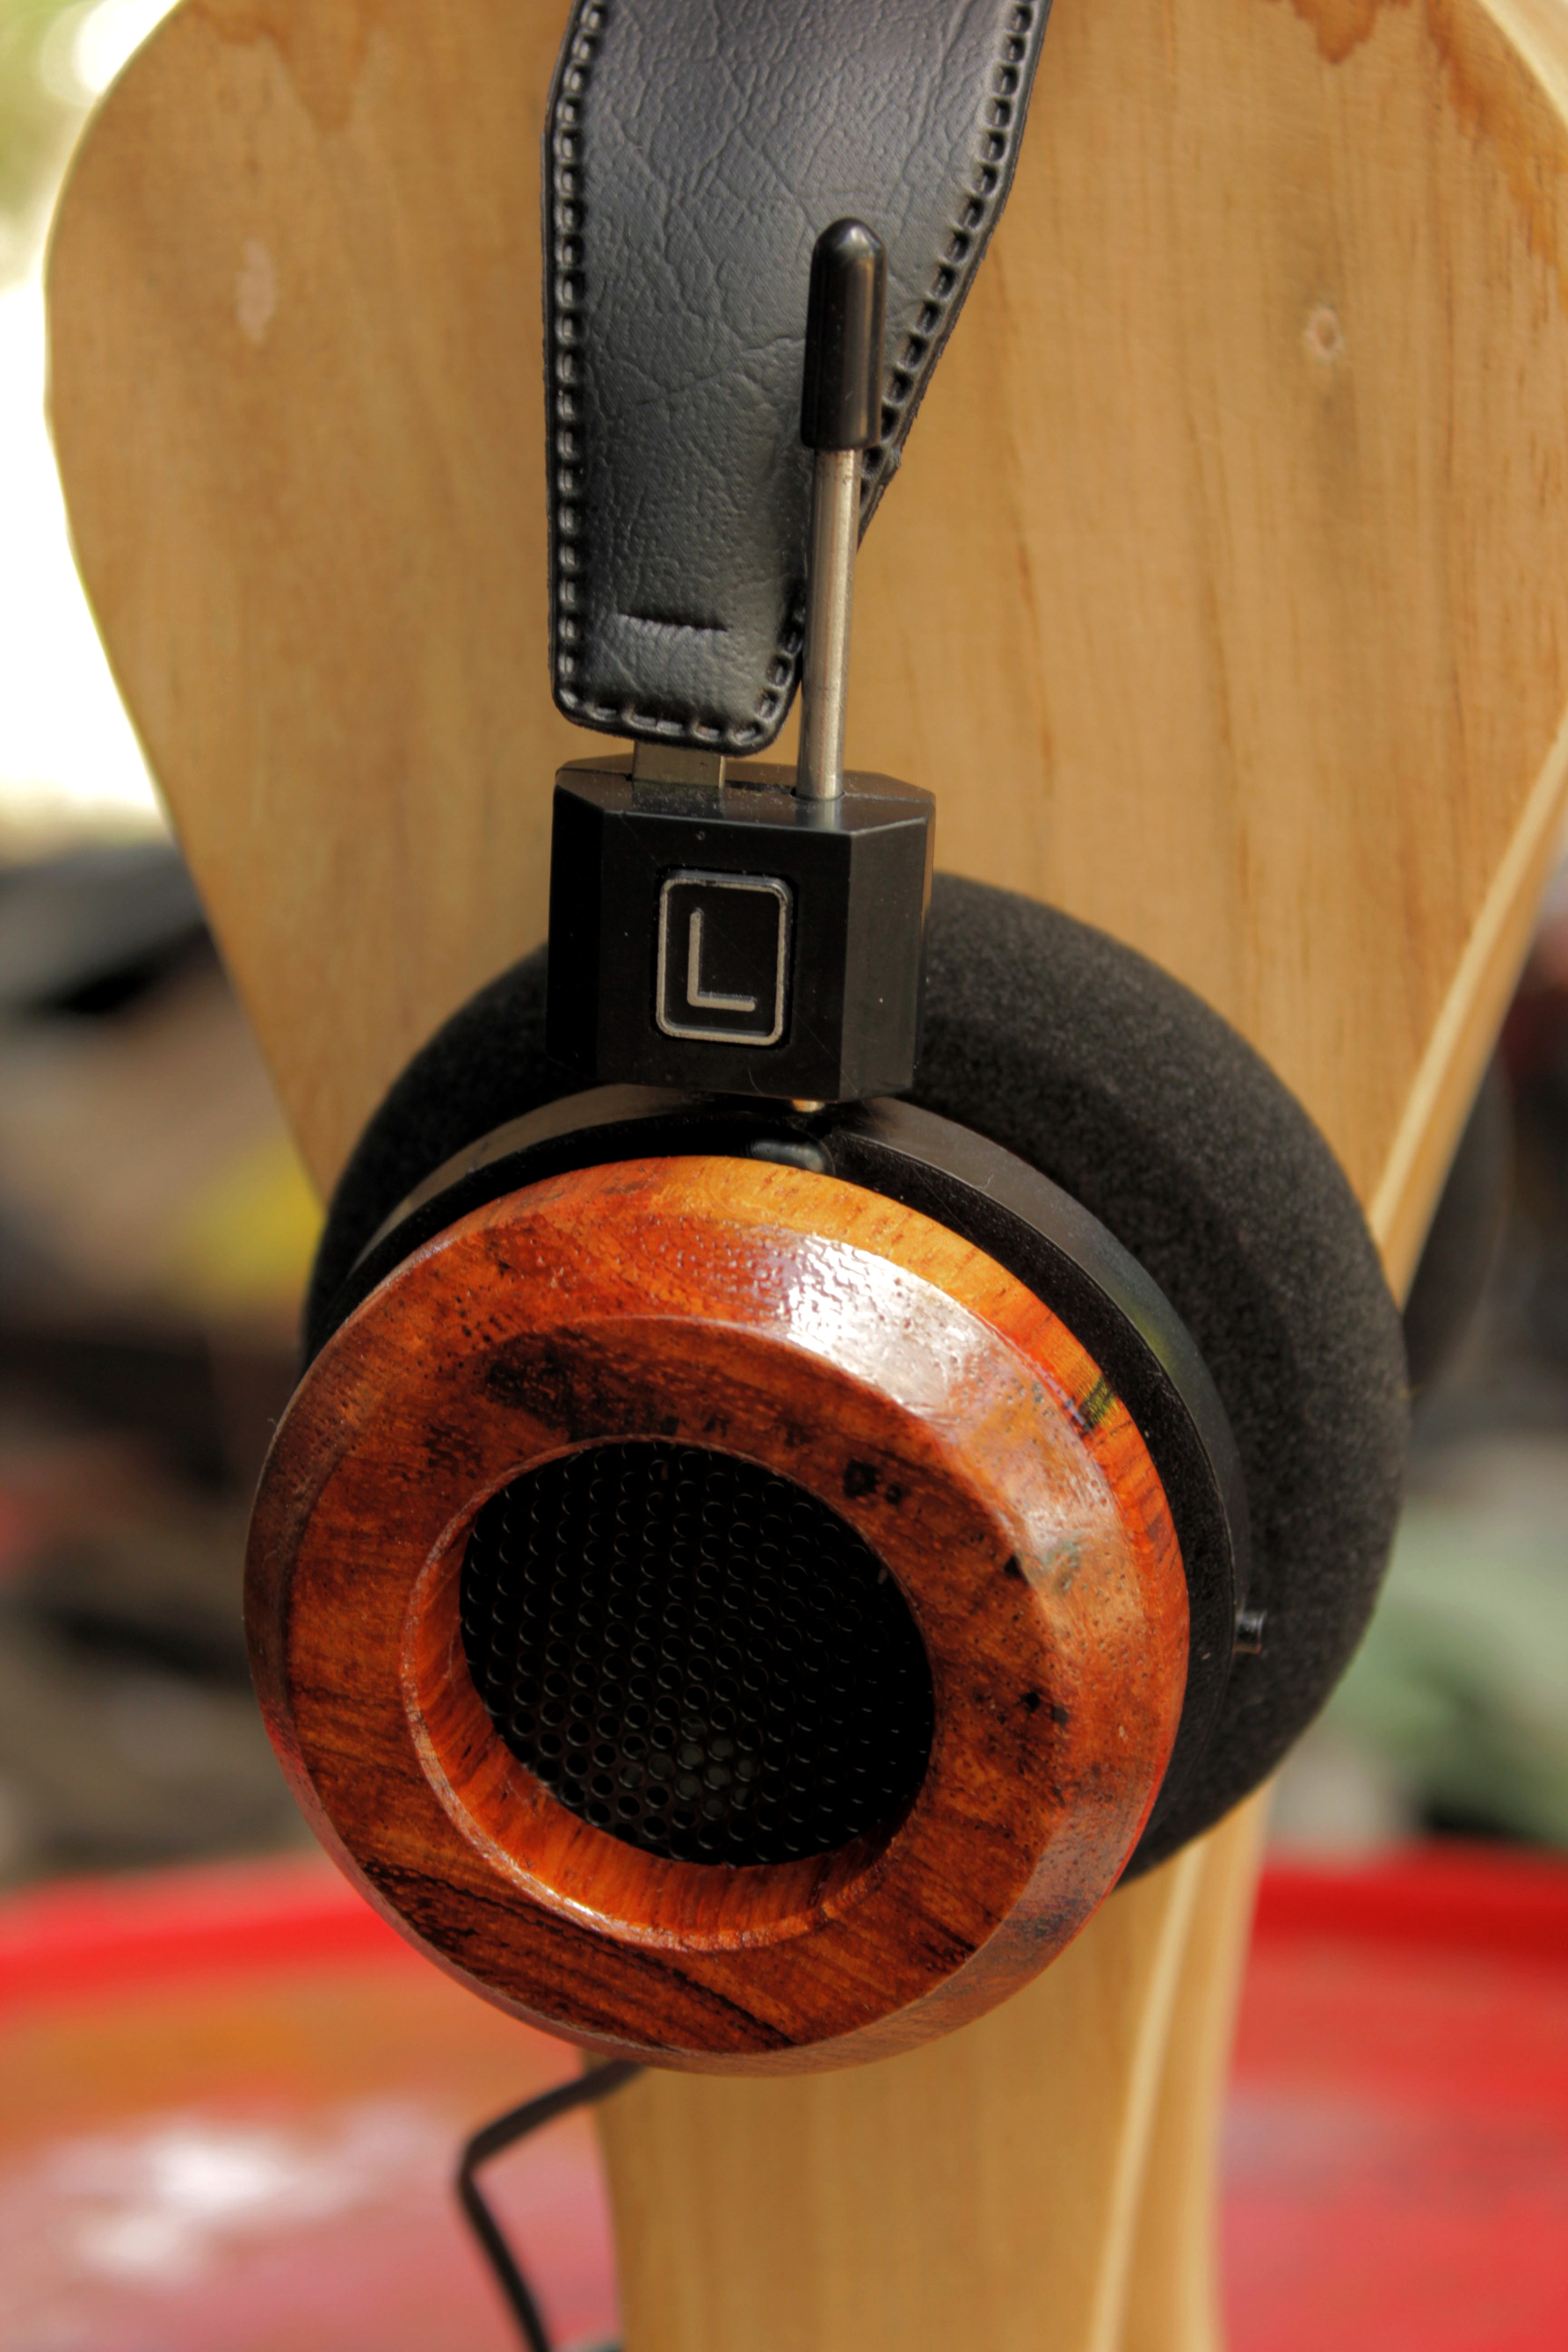
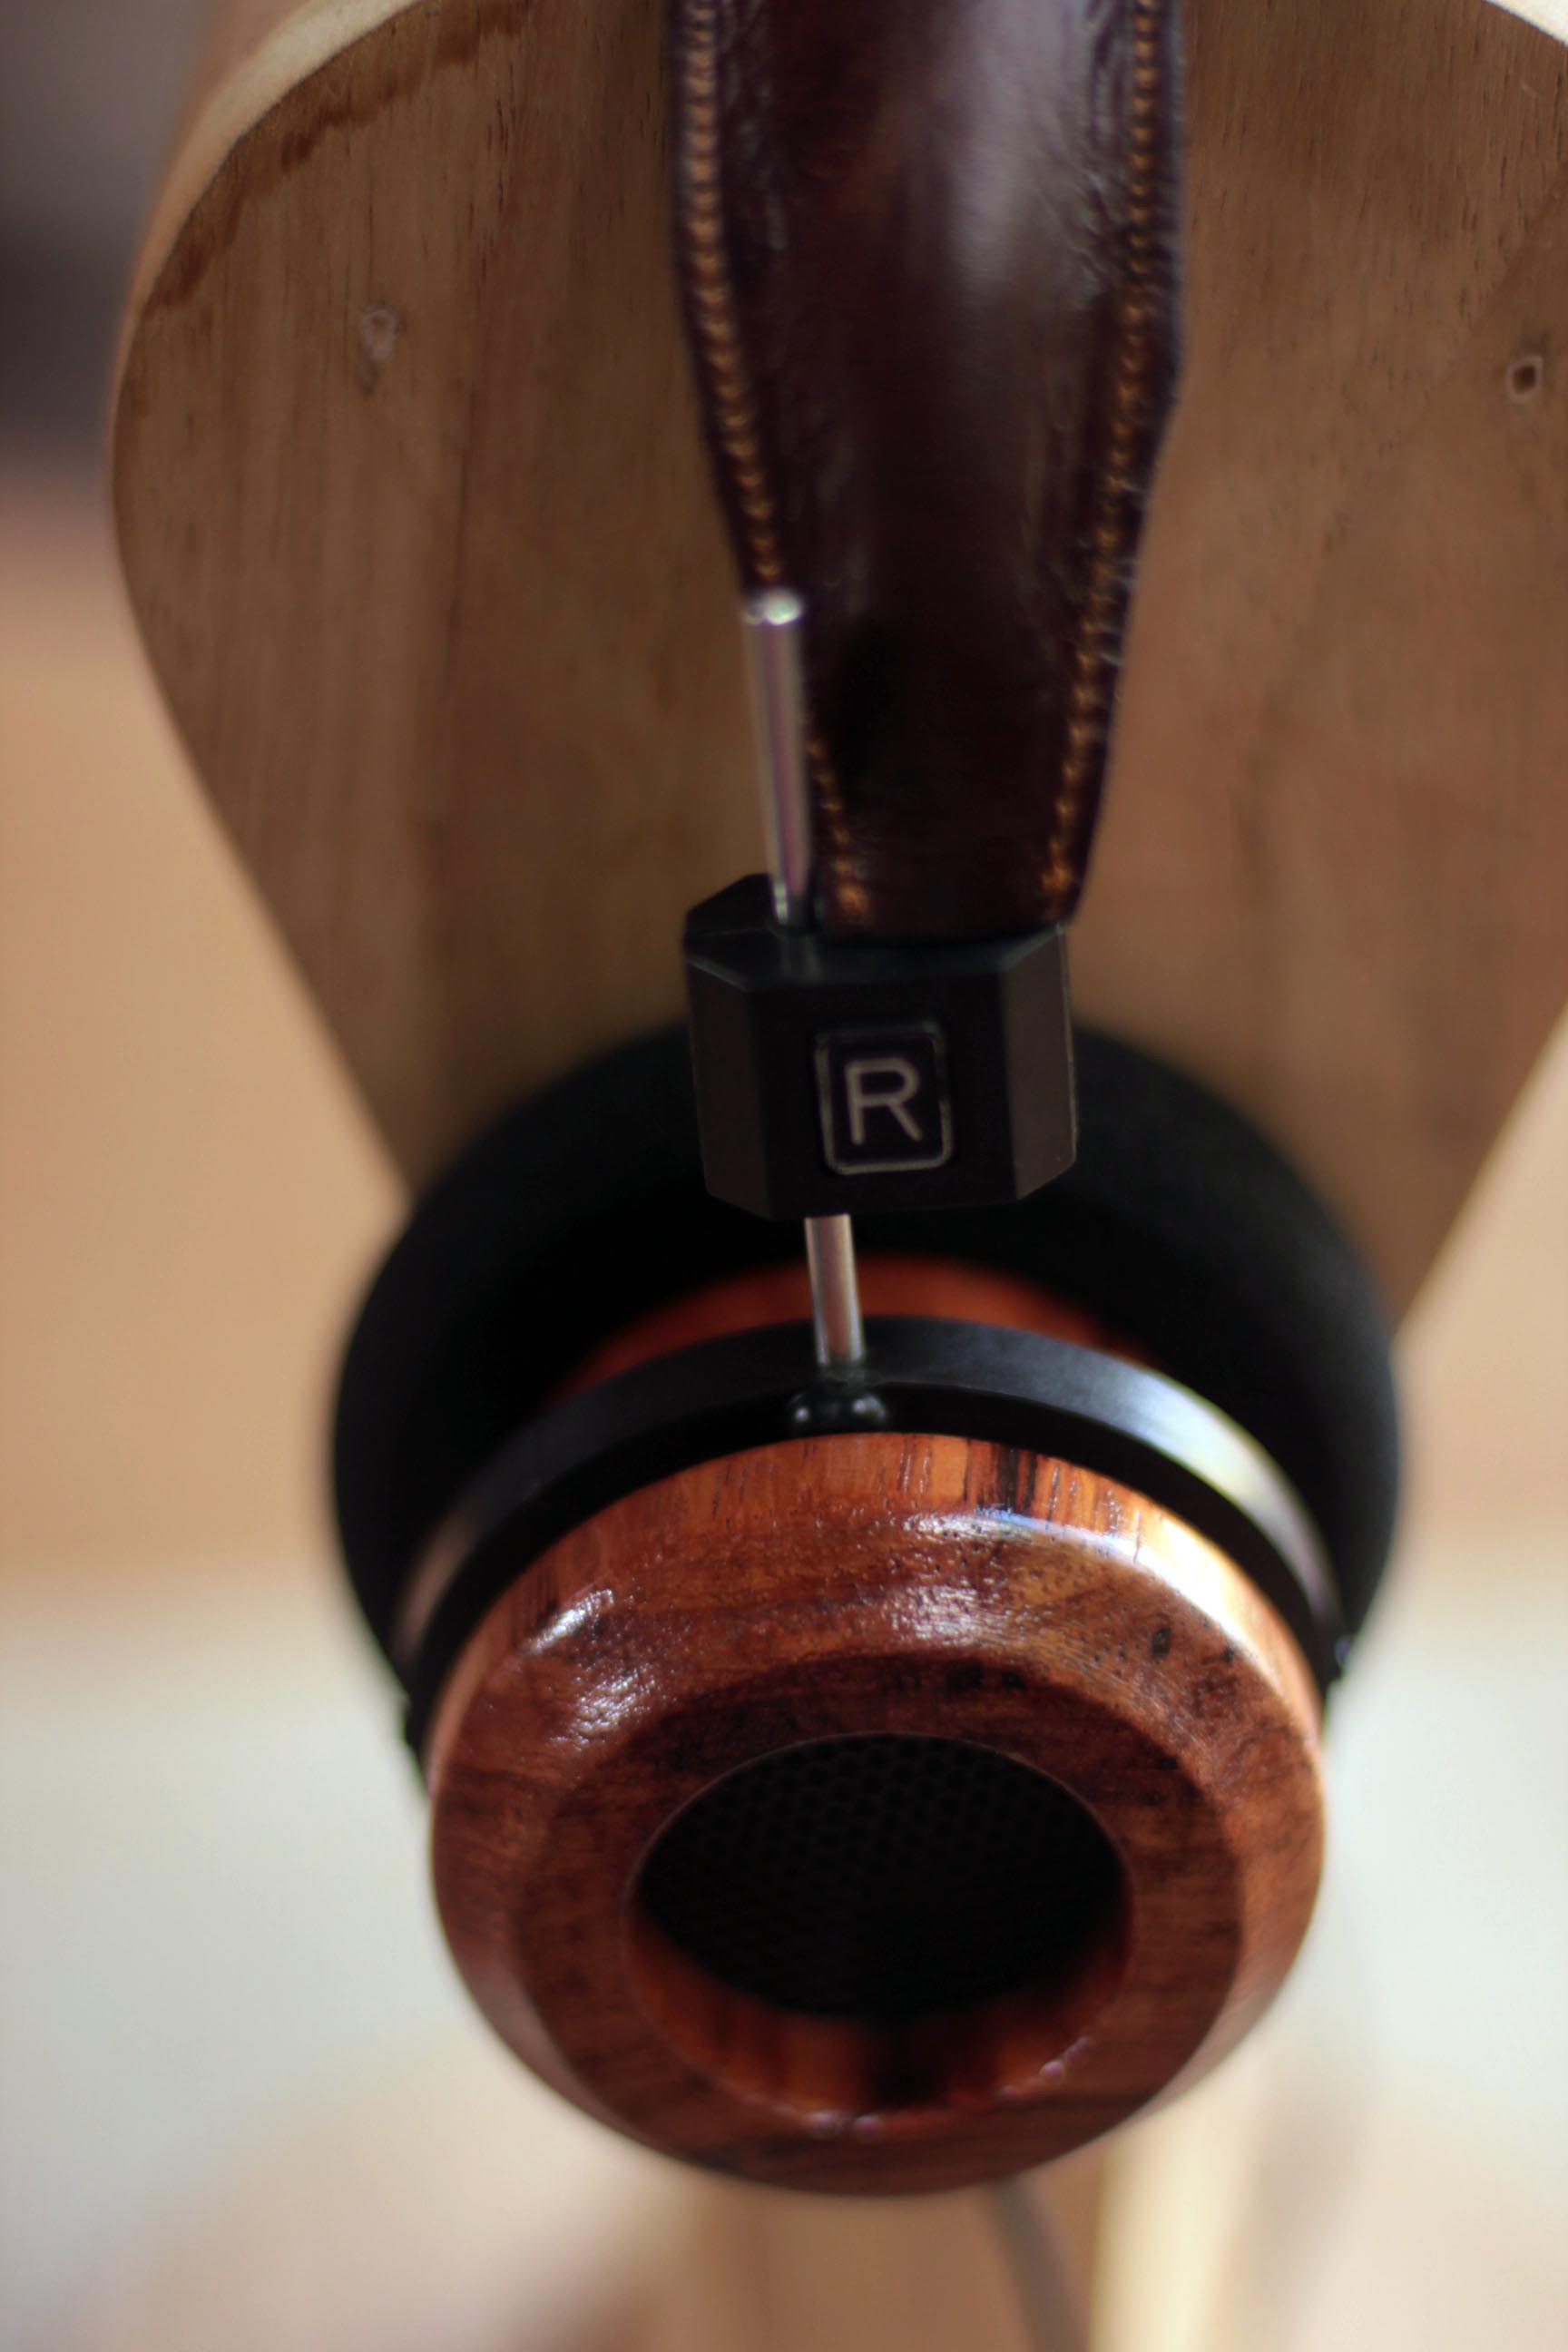
Announcing the ownership and finishing of the Cebil cups from Martin Custom Audio.  Marty cut these cups for me based on some back and forth conversation so that I could achieve what I had a vision of.  In my case, I asked for Marty to leave them unfinished as I'd take on the final steps.  I utilized Minwax' Polyshades "Gloss Pecan" that provided a stain and poly in one.  I applied 2 coats to these cups.  The pecan provided just enough tone in the finish to add the slight color enhancement that I was looking for.


They look gorgeous *jaw drop*


Also, I have a little something to add that you guys might get a kcik out of. First of all I have my 225i's I'm burning them in.. They sound fantastic, I'm really happy with the amount of detail and the sound signature of the drivers. I can tell they are definitely going to be my favorite once i have them in wooden housings. As it is now, I find myself picking them up over hte ms pros which i find too smooth on the top end and too boomy on the low end. 
 
 
Here comes the fun part, I wanted to open up my 225i's to apply a bit of dynamat and just take a good look inside of them, remove the grilles and whatnot. However, we were in the process of moving so I had no pans to heat water in. My nephew had a great idea to use the coffee maker, it worked like a charm. I highly recommend the coffee maker method.. Just run some water through, put the steaming water in a pan, fill it up to the part of the cup that sticks out on the new i series, wait a few moments and then pull them apart.
 
 
As it turns out there was a bit of excess glue on the inside covering one of the holes but I managed to get it out without removing much of the cloth over the holes.
 
Overall, i removed the driver cloth on the front, added a bit of dynamat to the back, removed the grilles, removed that chunk of glue and let them burn in quite a bit.. They are really sounding good guys. I'm thinking these drivers are going to be absolutely perfect for a wooden cup. 
 
 
Jul 25, 2011 at 2:52 AM Post #765 of 3,353
xaval,
 
What kind of connectors do you need at the other end of the cable?  I think I understand what you need and might be able to whip something up - be it the instructions on how to carry this out, or to build the actual cable.  Let me know about the connectors that need to go at the other end of the cable that the 1/4" TRS connector goes to.
 
Thanks,

The binding posts are a bit huge. Spades would work great... Or bare wire lol
 

Users who are viewing this thread

Back
Top