Setting Up An ABX Test + Simple Guide to Ripping, Tagging & Transcoding
Mar 17, 2013 at 8:10 AM Thread Starter Post #1 of 51
Joined
Jan 30, 2011
Posts
13,315
Likes
24,354
INTRODUCTION
One thing that has constantly annoyed me on my own journey of discovery is the number of times people blindly recommend using lossless for a portable DAP.
 
Most times, those same people have never taken the time to actually abx different lossy formats (against lossless), so the same endless myth is perpetuated (that to truly enjoy music, you have to be listening to a lossless source). IMO the reality is that for most of us – if we take placebo out of the equation (by performing a blind abx), we can't actually tell the difference between aac256 or mp3 320 and lossless – if we use the same original source file for the re-encoding, and playback on the same audio system.
 
In fact far more important than the container is the actual mastering of the audio track.
 
I decided to write this quick guide because I often suggest people abx different lossy vs lossless music formats so they can make informed choices. However – I couldn't find a lot of really good how-to's readily available which set-out clearly how you should set up an abx. This is my attempt at a step-by-step guide on how best to perform the test. It is by no means a definitive guide – instead just what I have gleaned along the way. If anyone finds flaws in my method, or has other suggestions of better ways to achieve the end result – then please make comment. If I think the amendment is worth adopting, I'll edit the original how-to.
 
Lastly – for those who don't believe in abx testing, and yet state they can obviously tell a night and day difference just by listening ….... it's your prerogative, and I won't debate it.  I'll will however continue to be skeptical (as in all cases I've found same people simply refuse to subject themselves to a proper abx – fear maybe?) – but I would ask you not to 'pollute this thread' with argument and debate. If you feel that strongly about it – go start your own thread. This thread is purely meant to be a how-to for those who are interested in setting up a simple abx.  For the record, I do believe some people will be able to differentiate - but for the vast majority - not really (purely my opinion).
 
I'll cover in order:
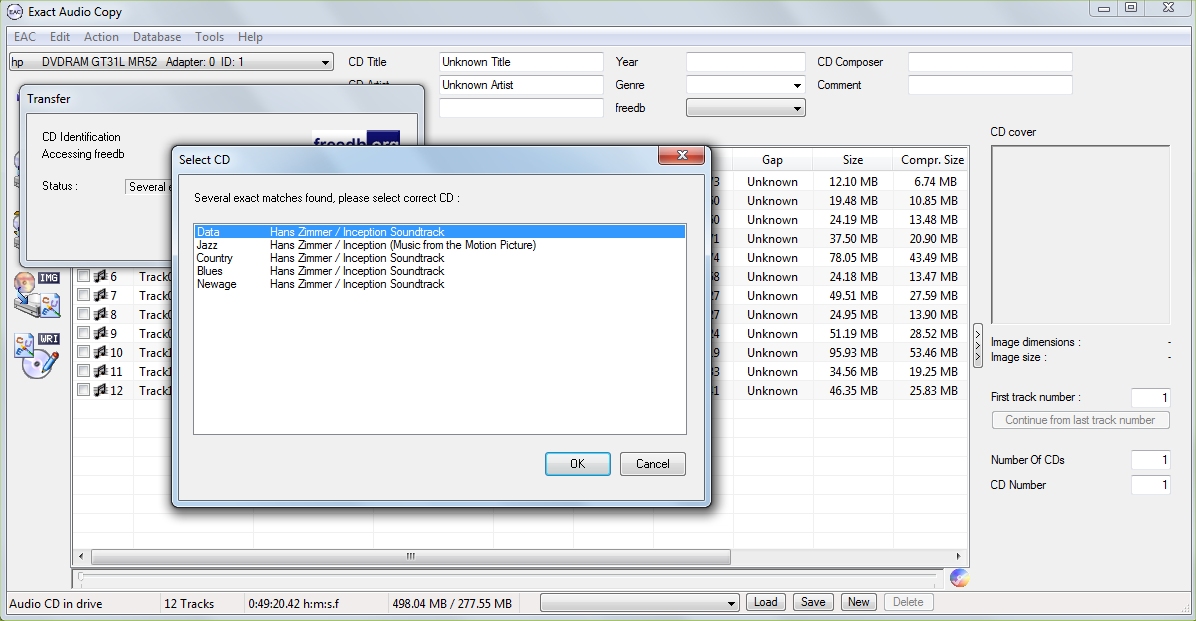
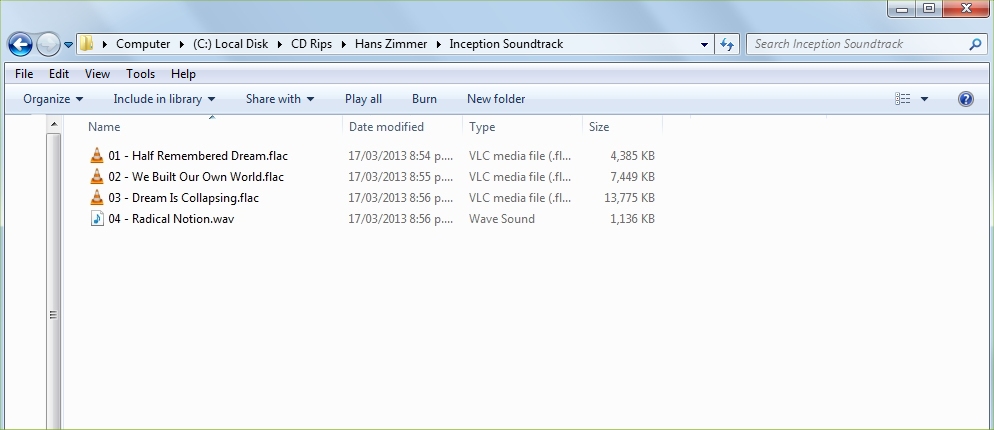
Setting up ripping with EAC (Exact Audio Copy)
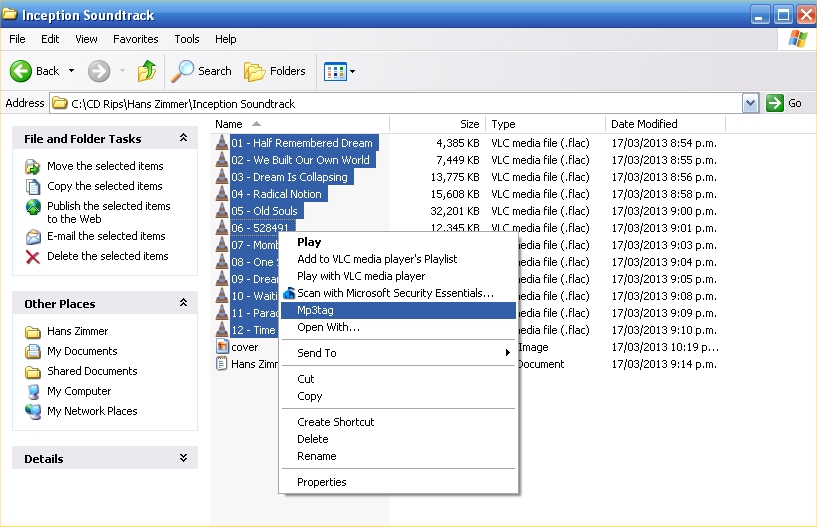
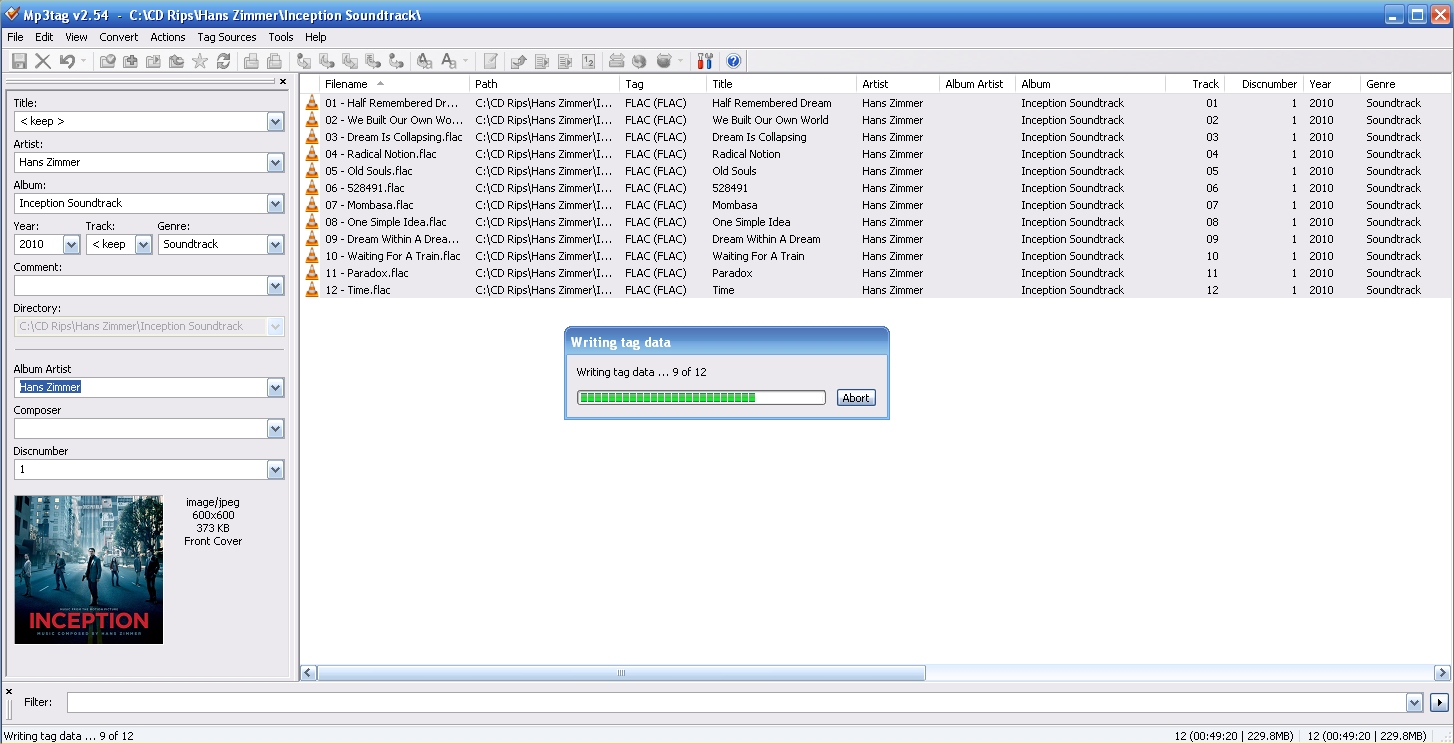
Tagging with mp3tag
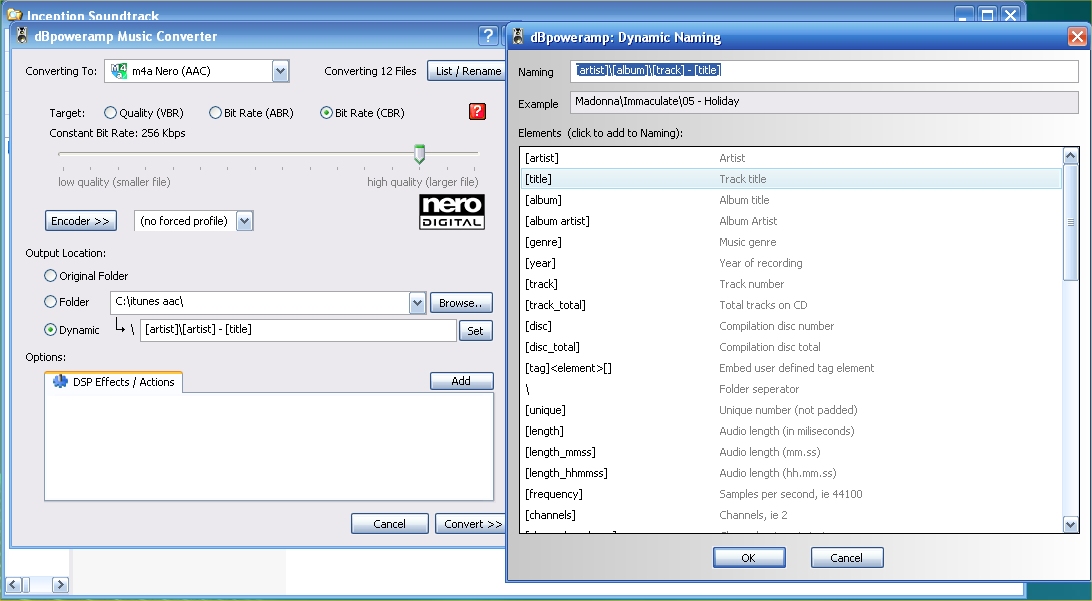
Trans-coding with dbpoweramp
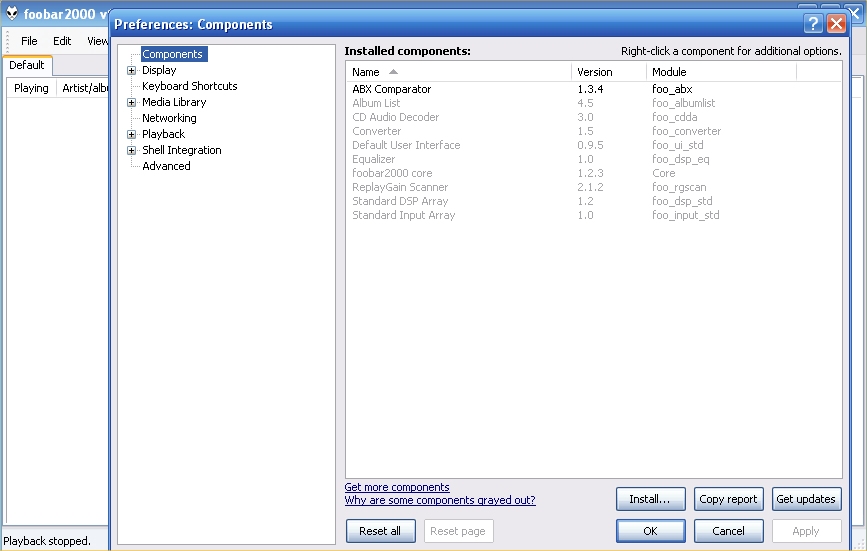
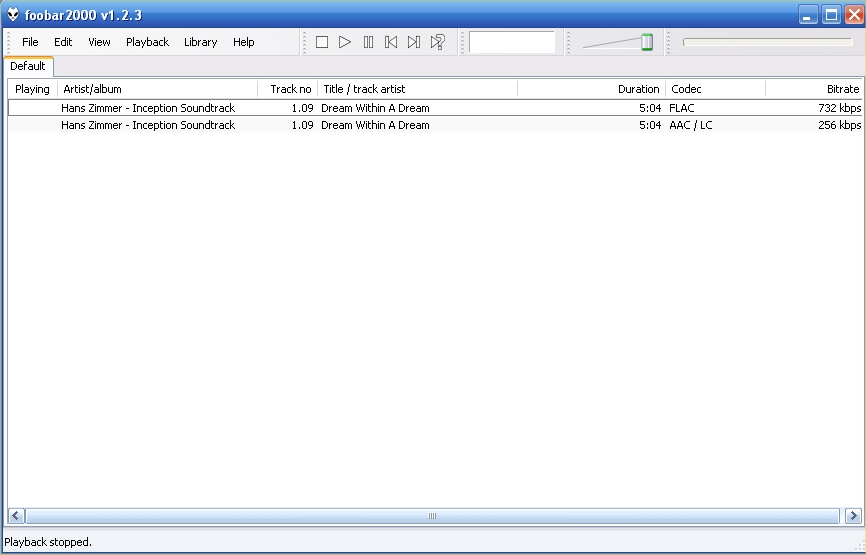
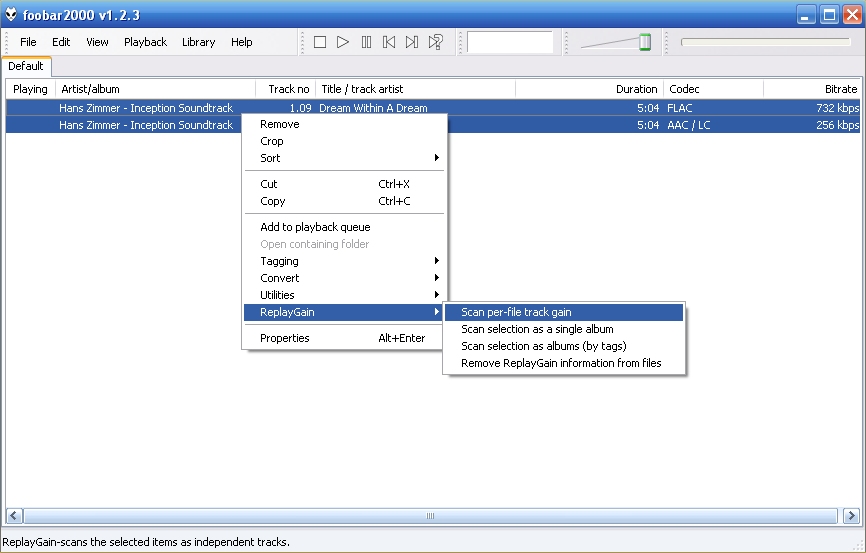
Running an abx with Foobar2000
 
In order to provide the screen-shots, I'm using a virtual XP machine (virtual box) and a laptop (my optical drive on my PC just died – so I'm awaiting a replacement). The reason I'm using this is so that I could then simulate a completely clean install. My main PC running Win8 already has these tools set-up the way I like them. For the purpose of this exercise, I preferred to start from scratch again so I could get the configurations right.
 
Next topic is EAC (ripping)
 
Mar 17, 2013 at 8:11 AM Post #2 of 51
RIPPING A CD WITH EAC
 
This is from Wikipedia:
 
Exact Audio Copy (EAC) is a proprietary CD ripping program for Microsoft Windows. It has also been tested to work under newer versions of Wine on Linux. This program was created by Andre Wiethoff in 1998, while he was a student at the University of Dortmund in Germany, stating he became "fed up with other audio grabbers", and decided to develop his own.
 
If there are any errors that can't be corrected, the software tells the user which time position the (possible) distortion occurred, so they could easily control it with, for example, the media player.
EAC is used to convert the tracks on standard audio CDs to WAV files, which can then be transcoded into other formats. These include lossy ones such as MP3, AAC, Ogg Vorbis, or lossless ones such as ALAC, FLAC, or WavPack using external encoders. It also has the option of using the Windows Audio Compression Manager (ACM Codecs) for direct compression.
 
It supports AccurateRip (automatically comparing the copy with those rips made by others) and can automatically create Cue Sheets, with all gaps, track attributes, ISRC, and CD-Text included. EAC also supports automatic ID3 tagging using Internet-based databases such as freedb, GD3, or a local database.
 
Exact Audio Copy is freeware, free for non-commercial use, and popular among audiophiles for its accuracy and ability to rip slightly damaged audio compact discs

 
The EAC homepage is here: http://www.exactaudiocopy.de/
 
You can get the latest version of EAC from here – its usually a very compact size - under 5 Mb: http://www.exactaudiocopy.de/en/index.php/resources/download/
 
Once you've downloaded the file, install it. This is pretty easy – and you can just run with the default options. I personally don't use the GD3 Metadata plugin (allows for automatic artwork and tag retrieval etc) – preferring to handle this myself.
 
The EAC Wizard
On first run – you'll be asked to run through the EAC set-up wizard, to configure your preferred settings and calibrate your drive. Important – the first question the wizard asks is how do we want to set-up our drive. Make sure we choose the “accurate results” choice and also that you have a relatively new audio CD available so that the CD rom drive can be calibrated and also accurate rip can be configured. This happens automatically during configuration – just follow the prompts.
 
When the encoder selection is asked for – I just use FLAC – but we'll go through options below to explore other formats. Next you'll be asked for a file naming scheme. Choose the closest one to your immediate preference (we can reconfigure this shortly).
 
Manual Configuration
With the wizard finished – we can now fine tune EAC (most of these tweaks are a set-up once operation). The first thing I do is to go into EAC > EAC options (or just choose F9). Go to the filename tag, and refine the default filename mask. I always use “track no.” “ - ” “track name” (preceded by artist/album folder tags). I use this simple format because a I use a folder hierarchy for Band and Album. So in the naming scheme box, I use 
 
%artist%\%albumtitle%\%tracknr% - %title%

 
This will give Directory Artist, Subdirectory Album, then each track. Play around with the options until you get what you really want. You can make it as complex or simple as you like.
 
The next tab to go to is Directories. I always set-up a default directory of C:\CD Rips. You can choose what suits your set-up.
 
Next – move to the CD-text operation. I make sure the Upper all characters box is unchecked (default is checked)
 
If you want to change compression options at any stage, you can under EAC > Compression Options …. (F11)
It is possible to encode diect to ALAC – using qaac. Read post #11 here for some tips (http://www.hydrogenaudio.org/forums/index.php?showtopic=86291). I haven't actually tried it as I simply use FLAC as my lossless container and aac as my lossy (transcoding – see next section).
 
The last option to set-up is EAC Metadata Options (F12). I personally use the builtin freedb engine.
 
Ripping
So we now have our CD in our drive, EAC has started, and this is the first dialogue box we get.


As yet nothing has tags. So the first thing to do is get some information. Choose Database > Get CD Information From > Remote MetaData provider (alt+G). If you get multiple options, choose one and click OK.


If it's not accurate – repeat and try again with a different selection. In this case, all of the information looks OK.


If I wanted to now – I could manually change either all of the tag info, or even individual ones. I have to make sure I select the songs to change first though.
 
I now select all of the tracks by clicking the Select/Deselect all checkbox, and then rip as compressed files – Action > Copy Selected Tracks > Compressed (Shift + F5). The rip commences – first ripping each track, and then encoding it to FLAC (or whatever default compressed container you've chosen).


If we look in explorer, we can see the flac files being saved into our default directory.


At the end of the rip – you should get a text file generated which will give us a rip log (including accuracy) and an option to save it. I find it a good idea to keep this with my ripped flac files (choose create log).


Our rip is successful.  Now onto tagging.
 
Mar 17, 2013 at 8:11 AM Post #3 of 51
TAGGING WITH MP3TAG
 
 
TAGGING WITH MP3TAG
Others will have their own preferences for tagging, and many will like to use the tagger incorporated within their own media player. I've used MP3TAG for as long as I can remember. I just find it has a very simple and clean interface, and it can be run easily within Explorer.
 
First up – go here to get it: http://www.mp3tag.de/en/
 
Install it (just use the defaults).
 
Now before we start – lets find a suitable album cover (the album I was ripping was Inception OST). I look for album covers manually because I'm fairly precise about my collection, and I like to make sure my covers are consistent (quality / resolution / colour and size). So first up is a trip to google images – searching for “Inception OST”. First thing is to amend the Search Tools and change from 'any size' to 'exactly' and use parameters 600 x 600. I do this for all of my album covers. This narrows my search, and I can then find and save the exact file I want. I fund a suitable jpg image file and save it as “cover.jpg” to my C:\CD Rips\Hans Zimmer\Inception Soundtrack folder.
 
Now to tag my flacs. Open Explorer and navigate to myy album folder (C:\CD Rips\Hans Zimmer\Inception Soundtrack). Highlight the flac files, and right click.


Choose the MP3Tag option – and the editor will open. Highlight all the files in the right pane, and we can see the existing tags. Most of the tags are already pretty good – but we're missing Album Artist and the Album Image.


To add Album Artist – simply type it in. To add the album image, right click the box, choose add cover, and choose the cover.jpg file (it should already be in the default directory). We can now click the save icon, and all of the tags will be updated.


Now I realise that most tags can be added within EAC – but I do find MP3Tag invaluable - especially for tagging electronically purchased music – where the tags are sometimes not exactly the way I want them.
 
Next we need to transcode our flacs to a lossy format.
 
Mar 17, 2013 at 8:11 AM Post #4 of 51
TRANSCODING WITH DBPOWERAMP
 
 
For this example – you can get a demo version of dbpoweramp from http://www.dbpoweramp.com/dmc.htm  You can download a fully functional trial (3 weeks use) – but I really would recommend getting the full version (which is only $38).
 
After installing, you'll get a configuration window. Switch to the Codecs tab, and you'll notice that already installed are options to convert from aiff, cd, flac, m4a / mp4, Monkeys Audio, mp3, wave and wavpack. You can convert to aiff, alac, flac, mp3 (lame), and wave. Further down, you have the option of adding support for more codecs. For now – we'll add the aac codecs (http://www.dbpoweramp.com/codec-central-m4a.htm). I use the m4a Nero aac encoder. Download it from here http://codecs.dbpoweramp.com/codecs-new/dBpoweramp-Codec-m4a-Nero-AAC.exe and install it. Then grab this file ftp://ftp6.nero.com/tools/NeroDigitalAudio.zip , open the zip file, and copy neroAacEnc to your C:\Program Files\Illustrate\dBpoweramp\encoder\m4a Nero (AAC) folder.
 
Now would also be a good time to install the dsp pack. Whilst I don't use most of these – the really handy one is the ability to resample on the fly and change bit depth (if required). So for example – if you have a 24/96 high-res file, and you want to convert it to a 24/48 alac file for your ipod (I personally wouldn't worry about it – but some may) – then it's just a matter of selecting the dsp, and transcoding as normal.
 
OK – we're almost ready to go. The next step is creating a folder where we'll store all of our aac files for transfer to our ipod. So we'll create a folder called "iTunes aac" in our C drive.
 
The final step (we only have to do it once) is set-up the transcoding options.
 
Navigate to our flac folder C:\CD Rips\Hans Zimmer\Inception Soundtrack, select all the flac files and right-click. Choose “convert to”
 
dBpoweramp opens. Change the 'converting to' drop down box to “m4a Nero AAC”. Set your bit-rate. For starters try CBR 256. Once you've done a few abx tests (and found your limits) you may want to go lower. I personally use vbr200 – which for my ears is transparent. Leave the encoder as “no forced profile”.
 
For output file use “Dynamic”. In the folder address box, browse to C:\itunes aac\ For the dynamic box, click the “Set” box and choose what suits best. I use the same setting as I used for my flac files – eg [artist]\[album]\[track] – [title]. You can use whatever you prefer.
 
So the settings look as follows.


Now just click Convert>>>
 
In below pic – it's only showing 2 cores. In reality on my real PC (remember I've just used a VM for these examples)  I'd normally be using 4 cores, and average time to convert a full album is usually only about 30 seconds.


If we now look in our folder – we now see the fully converted album.


And the real beauty is that now we have the settings correctly set-up, until we change them, they will always default to this set-up. This means that next time we rip an album, simply go to Explorer, select the tracks, right-click, convert ….. done!
 
It really is a an easy job, and takes at most a couple of minutes per album.
 
Mar 17, 2013 at 8:11 AM Post #5 of 51
SETTING UP AN ABX WITH FOOBAR2000
 
 
First thing we need to do is get a copy of foobar2000 – so go here to download it http://www.foobar2000.org/download
 
Install it – for now just use the default options.
 
For a start it's going to look pretty plain – but it is an extremely powerful player, and I'd recommend getting to know it after this walkthrough – as it can be customised to look really amazing – and it packs some awesome features through the use of add-ons.


The next thing we're going to do is add the abx comparator – from the components page http://www.foobar2000.org/components – or a direct link here
http://www.foobar2000.org/getcomponent/7f6df5c7cf9657dfe9a6dff9bb77d200/b68f2e11a8929103609789a26b68aa02/foo_abx.fb2k-component
 
Click the file to install it, and then click apply after installation – foobar2000 will restart. If we look under File > Preferences > Components, we'll see the abx comparator installed and ready to go.


Right – let's start the abx. Choose File > Add Files, and navigate to our FLAC folder. Choose the desired track. Now repeat for the aac file. In the example below I've also chosen to show the codec and bitrate so you can see the 2 different files.


The next thing we want to do is volume match them. Highlight both files, right click, and choose ReplayGain, Scan per-file track gain. After the update runs, choose to update the file tags (gain can be removed later if you're worried about it).


The important thing is that we now know both files are within .02 decibel match of each other.


Now highlight the files again, right click and select Utilities > ABX Two Tracks


Tick the “Use ReplayGain” box and the comparator window will come up.


We can now play A by pressing the appropriate button. We can also play B by pressing the appropriate button. Now we know A is flac and B is aac, but we don't know which X or Y is. What we have to do is match A with X or A with Y (or B with X or Y). The best way to do this is select a particular part of the music that you think you will recognise a difference. You can do this by setting a start and stop section.
 
Now – start your abx session - but first tick the hide results box.. You can click the play A, B, X or Y buttons as amy times as you want. When you're ready to take a guess, click on one of the choice buttons. Then click next trial. Repeat for at least 10 trials – and preferably 15.


When you've finished, simply click exit. A dialogue box will open asking where to save the log. Save it as abx.txt (or whatever you want to call it) – make sure you take note of where the file was saved.


Now for the moment of truth – lets open it and see how we did …..


Not so hot (nor did I expect it to be). You'll note from the time stamp that I just randomly guessed really rapidly – mainly because this was simply a how-to, and also because I already know my limitations. Between aac256 and flac, I really am guessing – and the report bears this out quite nicely.
 
It shows which I guessed correctly, which I got wrong, and the statistical likelihood that I was guessing.
 
It's very easy to copy and paste the report (eg in a forum) so that you can take part in some of the trials that sometimes appear (for fun) in the sound science forum. Go ahead and repeat the abx as many times as you want – with different tracks, different artists – but also with different containers and bitrates. I'd really suggest trying mp3 320, or mp3 vbr -2 or -3, as well as aac down as low as 192. It's a real eye opener – especially if you've ripped and encoded everything properly.
 
Before I leave this topic – a couple more pointers …...
 
  • When performing the abx – you have to do at least 10, and preferably 15 iterations, or you won't have enough data for a good statistical sample. Doing 5 and getting them all right means nothing. I could achieve that too if I tried it enough times – simply by guessing.
  • Perform the abx at your normal listening levels. I know a few people who have tried this really loudly to try and pick up artifacts. That actually negates the whole point of the exercise. If you're being honest with yourself – you want to see if you can discern lossy from lossless at the levels you'd normally listen at – not at a level that would over time deafen you.
  • Be honest. It's no crime or shortcoming to not be able to discern aac256 or mp3 320 from lossless. We're human – we're not actually supposed to be able to discern it (or at least most of us aren't). Just be satisfied that you're likely in the vast majority that has normal ears. Then celebrate it – after all, you've just found out that you can now fit more of your collection on your DAP – and you won't know the difference.
  • Recognise the results. Anything larger than 5% actually shows a reasonable probability that you're guessing quite a bit of the time. If repeated tests show that you're all over the place with results, then the likelihood that you're guessing increases. Please, please don't take your lowest test and then continue to perpetuate the myth that there is a massive difference between well encoded higher bitrate lossy and lossless. It helps no-one – especially the newbies to this hobby.
 
Above all – enjoy the music. That's what we're all here for – right?
 
Mar 17, 2013 at 8:12 AM Post #6 of 51
FINAL THOUGHTS
 
I hope that some of this was useful to those who hadn't tried an ABX. Once again feel free to comment and make suggestions on ways I can improve this.
 
For those trying Foobar for the first time – don't be put off by it's look, or think it's too hard to configure. There is a wealth of information both here at Head-fi and at Hydrogen Audio (http://www.hydrogenaudio.org/forums/index.php?act=SF&s=&f=28).
 
You can see some great configurations in this thread - http://www.head-fi.org/t/450700/foobar-2000-screenshot-thread and here is mine currently (in case you're interested).


Mar 17, 2013 at 2:56 PM Post #7 of 51
Really great job! 
beerchug.gif

 
Mar 25, 2013 at 4:19 AM Post #8 of 51
Mar 25, 2013 at 6:45 AM Post #9 of 51
Thanks lads.  If anyone has advice / tips for making it better - just let me know and I'll edit accordingly.
 
May 6, 2013 at 11:46 PM Post #10 of 51
Really nice! Will try sometime soonish!
 
May 8, 2013 at 8:59 PM Post #11 of 51
Also, can you upload a zip of your set-up? It looks real nice, would love to use!
 
May 9, 2013 at 1:04 AM Post #12 of 51
Jun 8, 2013 at 11:41 AM Post #14 of 51
took me longer than i intended to get around to it, but i have finally done some abxing. i do intend to do a few more, with some sinatra songs, and maybe some 70s rock (mike oldfield should do i think). but as i mostly listen to electronical music, i thought id start with that. many thanks to brooko for making this guide and helping me with the pms i sent him. i tried 3 songs, here are the results:
 
 
foo_abx 1.3.4 report
foobar2000 v1.2.4
2013/06/08 18:06:36

File A: C:\adams ****\music\electronic\Downtempo, Other\Hol Braumann\Hol Braumann - Human\flac\01 - Hours.flac
File B: C:\adams ****\music\electronic\Downtempo, Other\Hol Braumann\Hol Braumann - Human\mp3\01 - Hours.mp3

18:06:36 : Test started.
18:07:16 : 01/01 50.0%
18:08:00 : 01/02 75.0%
18:08:22 : 02/03 50.0%
18:08:55 : 03/04 31.3%
18:09:27 : 03/05 50.0%
18:09:59 : 03/06 65.6%
18:10:20 : 03/07 77.3%
18:10:45 : 03/08 85.5%
18:11:18 : 04/09 74.6%
18:11:52 : 05/10 62.3%
18:12:20 : 06/11 50.0%
18:12:49 : 07/12 38.7%
18:13:20 : 08/13 29.1%
18:13:41 : 08/14 39.5%
18:14:09 : 09/15 30.4%
18:14:20 : Test finished.

----------
Total: 9/15 (30.4%)


foo_abx 1.3.4 report
foobar2000 v1.2.4
2013/06/08 18:26:43

File A: C:\adams ****\music\electronic\Downtempo, Other\Kryptic Minds - Cant Sleep - 2011\Flac\06 Can't Sleep (Feat. Alys Be).flac
File B: C:\adams ****\music\electronic\Downtempo, Other\Kryptic Minds - Cant Sleep - 2011\mp3\06 Can't Sleep (Feat. Alys Be).mp3

18:26:43 : Test started.
18:27:49 : 00/01 100.0%
18:28:28 : 01/02 75.0%
18:29:06 : 02/03 50.0%
18:29:46 : 02/04 68.8%
18:30:08 : 03/05 50.0%
18:30:29 : 03/06 65.6%
18:31:09 : 03/07 77.3%
18:31:39 : 03/08 85.5%
18:32:08 : 03/09 91.0%
18:32:23 : 03/10 94.5%
18:33:10 : 04/11 88.7%
18:33:35 : 04/12 92.7%
18:33:59 : 05/13 86.7%
18:34:19 : 05/14 91.0%
18:34:41 : 05/15 94.1%
18:34:44 : Test finished.

----------
Total: 5/15 (94.1%)


foo_abx 1.3.4 report
foobar2000 v1.2.4
2013/06/08 18:18:01

File A: C:\adams ****\music\electronic\Downtempo, Other\Solar Fields\2012 - Random Friday\flac\05 - Daydreaming.flac
File B: C:\adams ****\music\electronic\Downtempo, Other\Solar Fields\2012 - Random Friday\mp3\05 - Daydreaming.mp3

18:18:01 : Test started.
18:18:50 : 00/01 100.0%
18:19:15 : 01/02 75.0%
18:19:54 : 01/03 87.5%
18:20:23 : 02/04 68.8%
18:21:08 : 02/05 81.3%
18:21:28 : 03/06 65.6%
18:21:55 : 03/07 77.3%
18:22:33 : 04/08 63.7%
18:22:46 : 05/09 50.0%
18:23:20 : 05/10 62.3%
18:23:39 : 05/11 72.6%
18:24:16 : 06/12 61.3%
18:24:38 : 07/13 50.0%
18:25:06 : 07/14 60.5%
18:25:27 : 07/15 69.6%
18:25:31 : Test finished.

----------
Total: 7/15 (69.6%)
 
 
surprise surprise, i cant tell the difference between flac and mp3 
deadhorse.gif


Users who are viewing this thread

Back
Top