HiGHFLYiN9
Member of the Trade: Zynsonix
A quick guide to rewiring the HD201s. Neither I nor Headfi will be responsible if you fry or damage your precious $20 headphones.
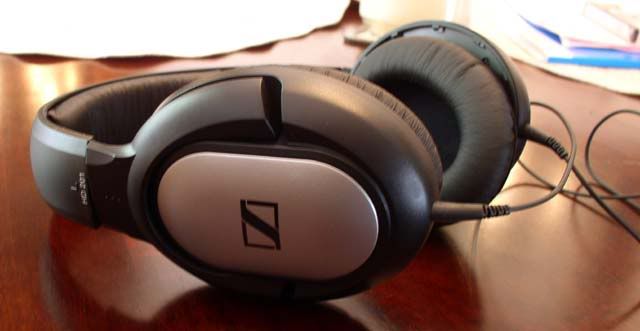
My HD201s just arrived today from Headroom. I quickly stripped open the package, pulled out the cans and plugged them in for a 5 second listen to make sure the drivers were working. I then unplugged them and pulled off the earpads, which are held in place by about 10 small plastic tabs.
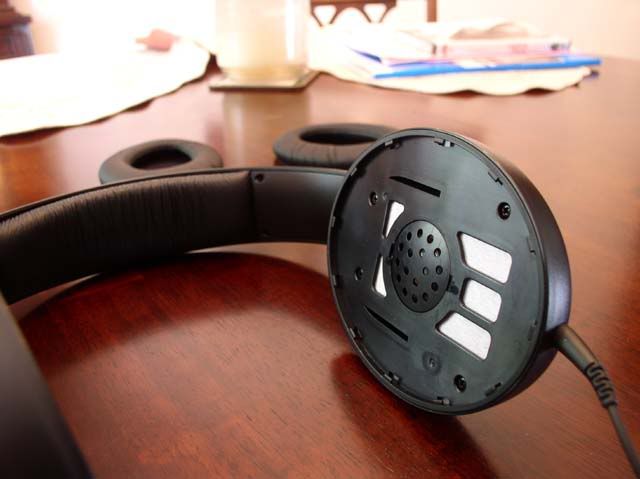
Underneath the pads I found the covered driver as well as 4 screw holes.
Assuming the screws were holding the plastic oval the driver was fastened on, I unscrewed them. Although they are quite small a standard size screwdriver worked fine.
Once the screws were well... unscrewed, and the plastic oval removed from the enclosures, I found that the driver was sealed in a plastic box with another four screws ::sigh::

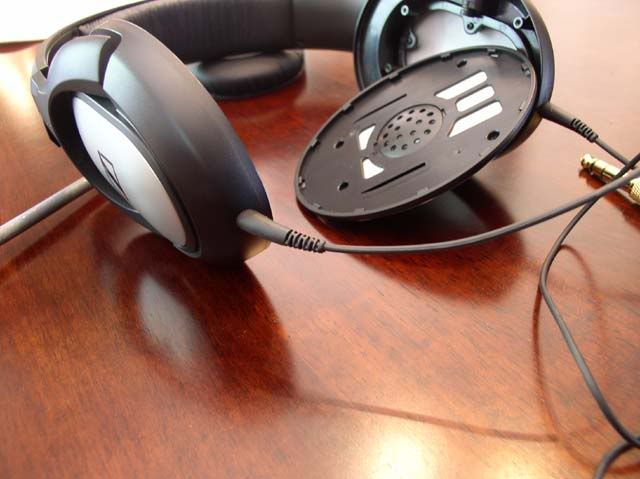
Even after unscrewing that second set of four screws the plastic box would not come off. Turned out it was sealed with glue.... a lot of it. After prying at it for 3-4 minutes with a pair of precision screwdrivers it came off. I was a little worried about destroying the headphones on this step as it requires so much pressure to get these things off.
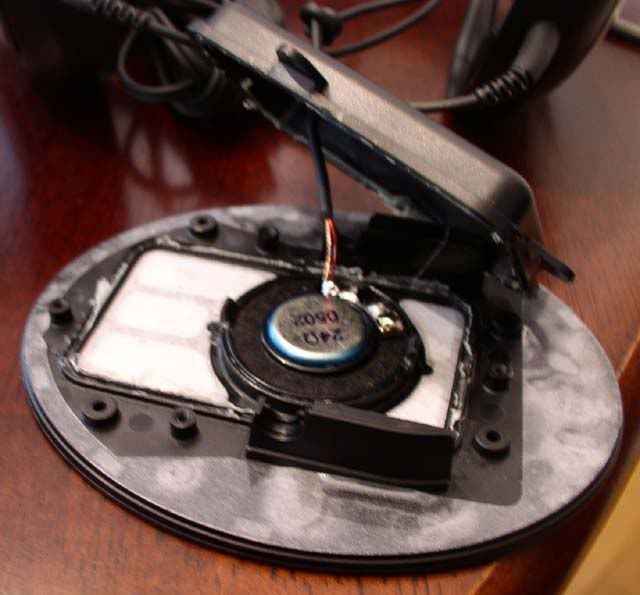
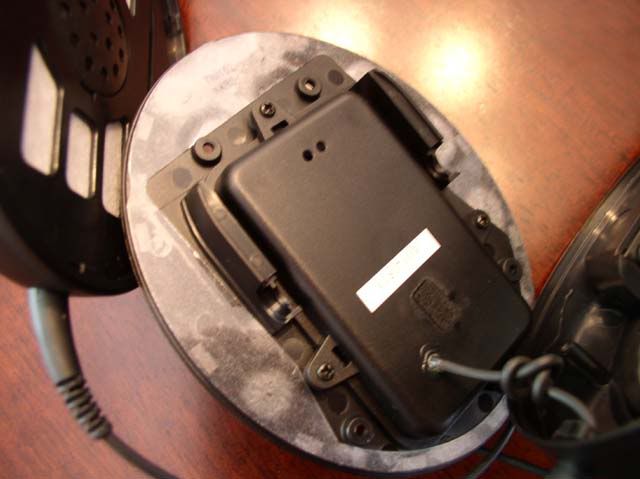
Finally the drivers are accessable. The soldering terminals are a lot like Grados, two squarish globs of solder for each driver connected to each other. The wiring is very similar to the HD600 cables I detroyed in the past, with ultra thin wires covered with coats of red, amber and green. The amber ones in my case were the ground, red was right and green was left. The drivers seemed to be similar looking to Koss Portapro diaphrams. I had a four foot cord I made using a switchcraft mini and litz braided silver plated copper handy. I snipped off the bottoms of the boots and ran the new wire through them. After the wire goes through the boots it has to go through the hole in the plastic box which will probably have to be enlarged and then the corresponding wires soldered to the terminals on the driver.
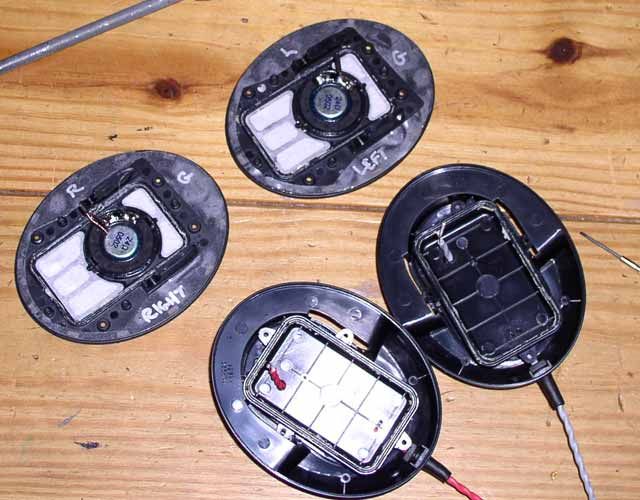
Screw back in the plastic boxes and push the wire back down in the boot so you have enough clearance to replace the plastic oval. Before you put the plastic oval back remember to snap the headband back in place if you took it out and zip tie the cable above the boot for strain relief. Finally screw the ovals back in, replace the earpads and your done. Congratulations! You've just spent the past two hours rewiring a $20 headphone

Hope everyone likes the guide, I look forward to seeing eveyone else's version of the rewired HD201!
My HD201s just arrived today from Headroom. I quickly stripped open the package, pulled out the cans and plugged them in for a 5 second listen to make sure the drivers were working. I then unplugged them and pulled off the earpads, which are held in place by about 10 small plastic tabs.
Underneath the pads I found the covered driver as well as 4 screw holes.
Assuming the screws were holding the plastic oval the driver was fastened on, I unscrewed them. Although they are quite small a standard size screwdriver worked fine.
Once the screws were well... unscrewed, and the plastic oval removed from the enclosures, I found that the driver was sealed in a plastic box with another four screws ::sigh::
Even after unscrewing that second set of four screws the plastic box would not come off. Turned out it was sealed with glue.... a lot of it. After prying at it for 3-4 minutes with a pair of precision screwdrivers it came off. I was a little worried about destroying the headphones on this step as it requires so much pressure to get these things off.
Finally the drivers are accessable. The soldering terminals are a lot like Grados, two squarish globs of solder for each driver connected to each other. The wiring is very similar to the HD600 cables I detroyed in the past, with ultra thin wires covered with coats of red, amber and green. The amber ones in my case were the ground, red was right and green was left. The drivers seemed to be similar looking to Koss Portapro diaphrams. I had a four foot cord I made using a switchcraft mini and litz braided silver plated copper handy. I snipped off the bottoms of the boots and ran the new wire through them. After the wire goes through the boots it has to go through the hole in the plastic box which will probably have to be enlarged and then the corresponding wires soldered to the terminals on the driver.
Screw back in the plastic boxes and push the wire back down in the boot so you have enough clearance to replace the plastic oval. Before you put the plastic oval back remember to snap the headband back in place if you took it out and zip tie the cable above the boot for strain relief. Finally screw the ovals back in, replace the earpads and your done. Congratulations! You've just spent the past two hours rewiring a $20 headphone
Hope everyone likes the guide, I look forward to seeing eveyone else's version of the rewired HD201!


