


drteming
100+ Head-Fier
- Joined
- Jun 26, 2015
- Posts
- 142
- Likes
- 96
I got my Little Dot Mk II several years ago. After playing around with it for a while, and totally screwing up the PCB with lifted pads and such ('cause I didn't know what I was doing), I put it away on the shelf. In the meantime, I got into building tube guitar amplifiers, then tube hi-fi amps, and recently, OTL headphone amps. Having learned quite a bit about hollow state electronics, I decided to see what I can do with the long neglected Little Dot. Cracking the little guy open, I forgot the horrors that I had inflicted on the PCB. I salvaged the power transformer and whatever components, and traced out the circuit:

It's actually a really neat little circuit. The gain switches are variable negative feedback switches, with resistances of 470k, 149.9k, 82.5k, and 59.9k. The EF95 is wired as a triode. In the manual, the output sections were described as having a SRPP topology. Actually, it's a self biasing White cathode follower, which is actually better at driving low impedance loads such as headphones.
I made some modifications to the circuit:

First, I moved the input coupling capacitor to before the volume potentiometer. A 100k stepped attenuator was swapped in for the cheesy 10k pot. I set the negative feedback resistor to a fixed 100k as I had the switches set to 82.5k, but had wanted just a bit more gain, but not as much as 149.4k. I added a 100 ohm resistor between the screen and the plate to prevent oscillations. I also increased the film bypass capacitor on the output coupling cap (220uF) to 2.2uF from 0.68uF, increased the bypass caps on the power supply to 0.1uF from 0.047uF, and added a virtual center tap to the heaters of the output tubes. The original heater elevation voltage was about 5V, and I upped it to about 28V. I also beefed up the bridge rectifier, using 4 UF5408 diodes.
The chassis drilled and painted. The orientation has been changed. It's a Hammond 10" x 6" x 2" aluminum chassis:

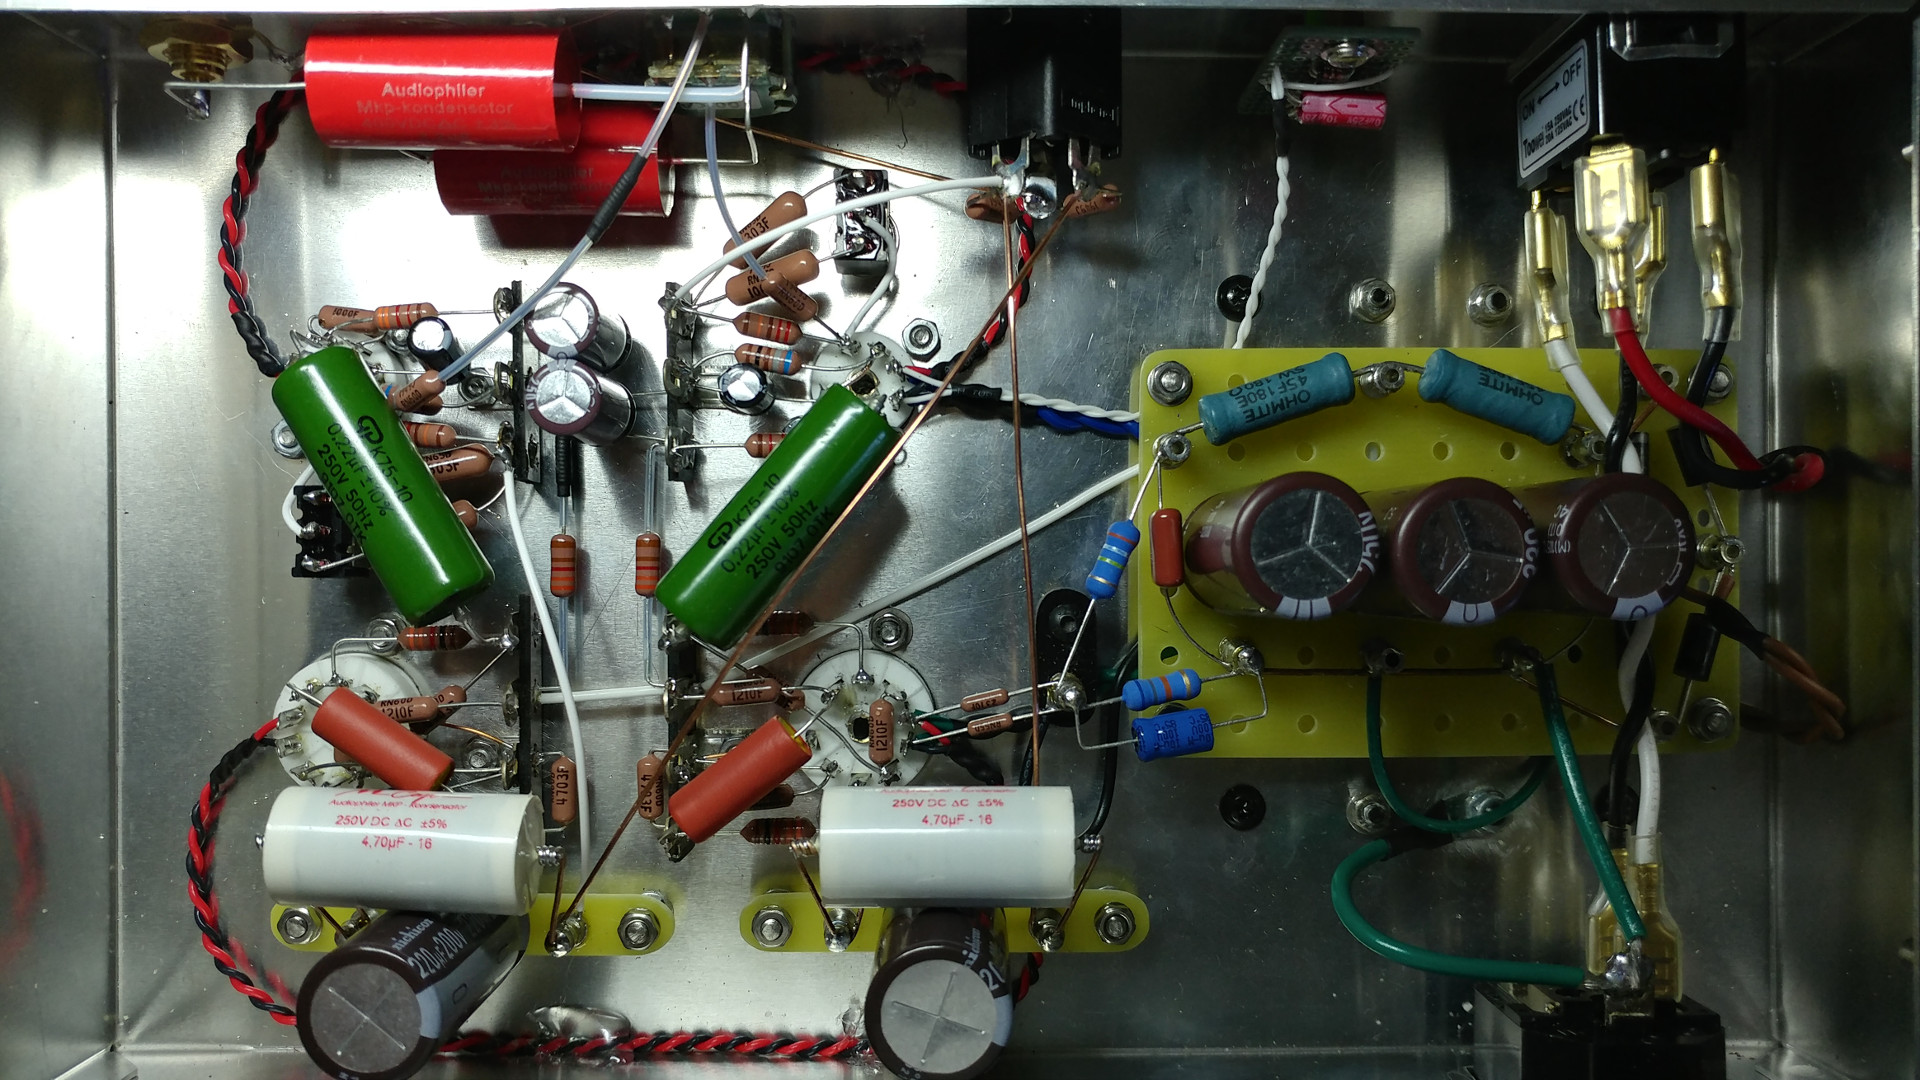
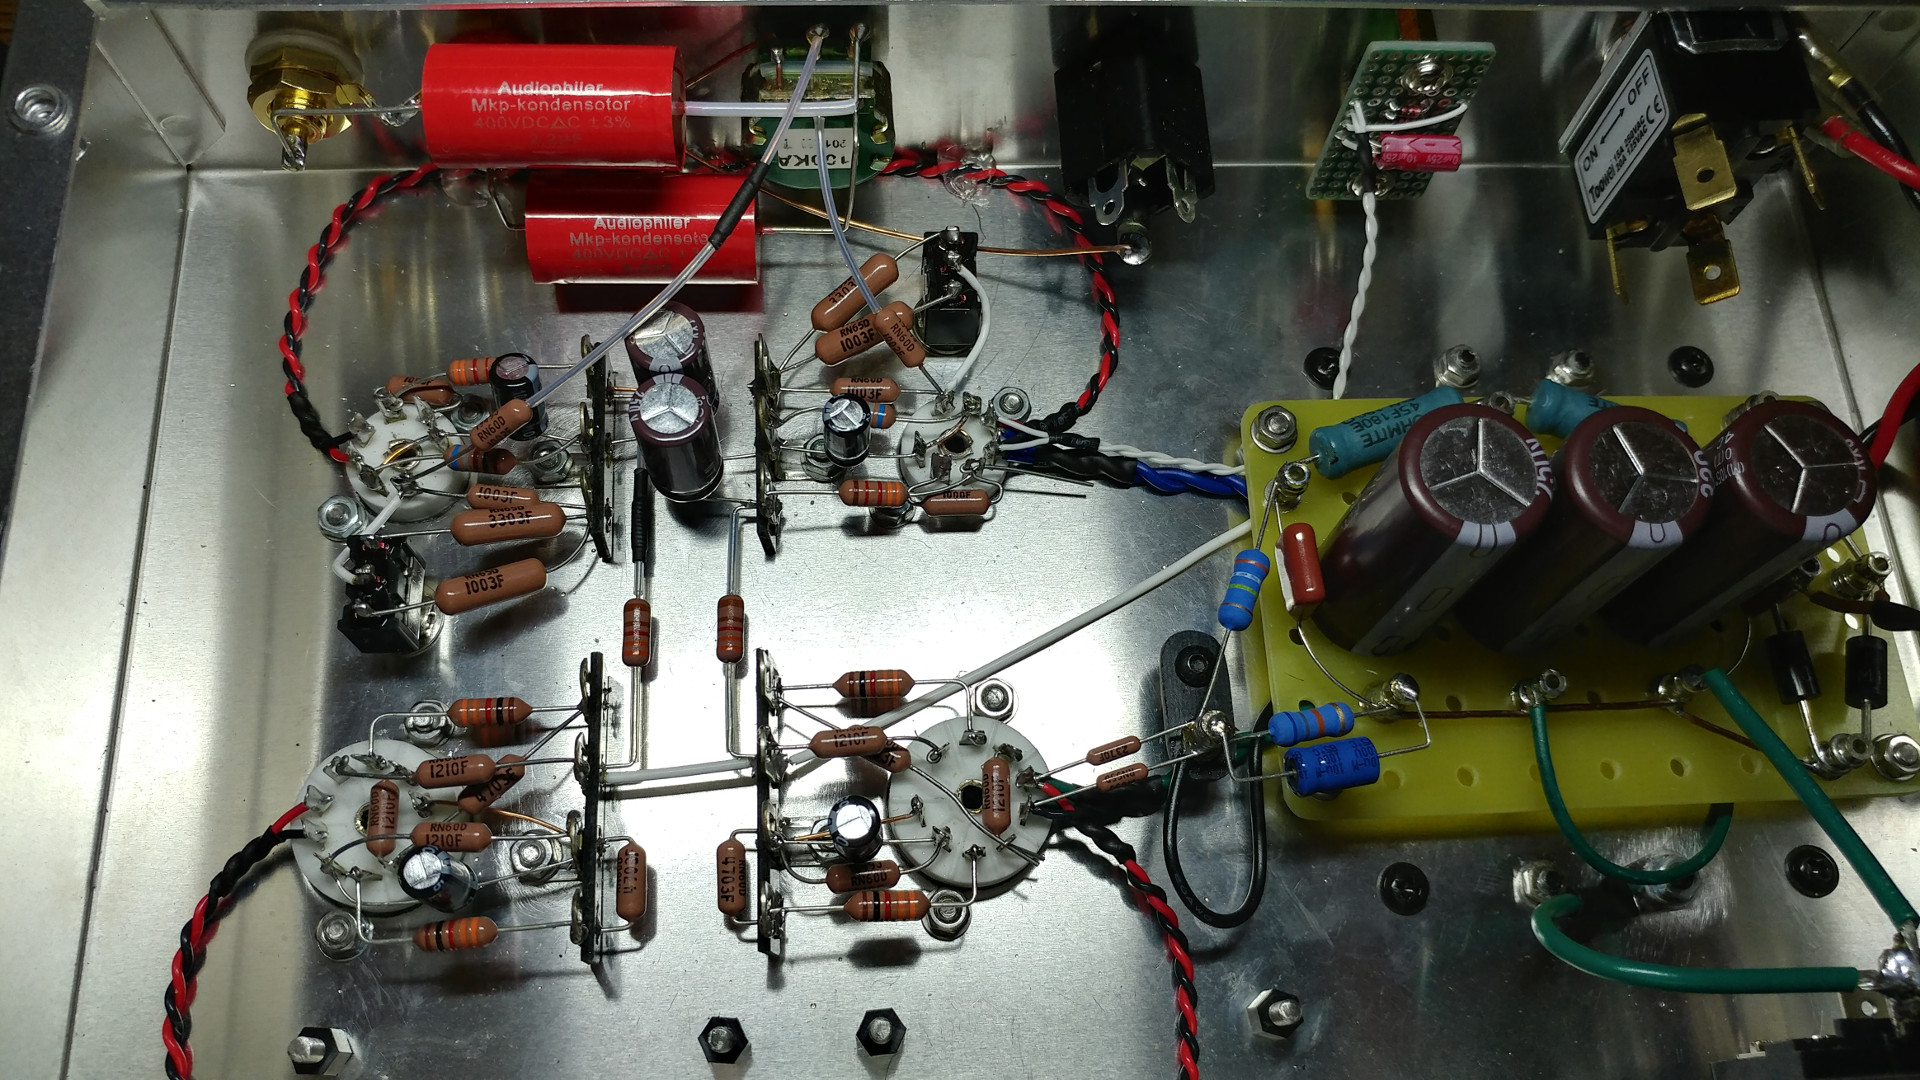
Power supply built on a turret board:

Power supply installed, along with the rest of the power circuit, and the filaments:

More pictures to come as I progress on the build.
It's actually a really neat little circuit. The gain switches are variable negative feedback switches, with resistances of 470k, 149.9k, 82.5k, and 59.9k. The EF95 is wired as a triode. In the manual, the output sections were described as having a SRPP topology. Actually, it's a self biasing White cathode follower, which is actually better at driving low impedance loads such as headphones.
I made some modifications to the circuit:
First, I moved the input coupling capacitor to before the volume potentiometer. A 100k stepped attenuator was swapped in for the cheesy 10k pot. I set the negative feedback resistor to a fixed 100k as I had the switches set to 82.5k, but had wanted just a bit more gain, but not as much as 149.4k. I added a 100 ohm resistor between the screen and the plate to prevent oscillations. I also increased the film bypass capacitor on the output coupling cap (220uF) to 2.2uF from 0.68uF, increased the bypass caps on the power supply to 0.1uF from 0.047uF, and added a virtual center tap to the heaters of the output tubes. The original heater elevation voltage was about 5V, and I upped it to about 28V. I also beefed up the bridge rectifier, using 4 UF5408 diodes.
The chassis drilled and painted. The orientation has been changed. It's a Hammond 10" x 6" x 2" aluminum chassis:
Power supply built on a turret board:
Power supply installed, along with the rest of the power circuit, and the filaments:
More pictures to come as I progress on the build.
Last edited:
")

 ... do you have a list, like an excel file for example, with all component required and info about them (for example... resistors tollerances, wattage of used resistors in power supply stage , etc. etc.) ?