iBasso DX50 MODS
Mar 30, 2015 at 3:59 AM Post #181 of 378
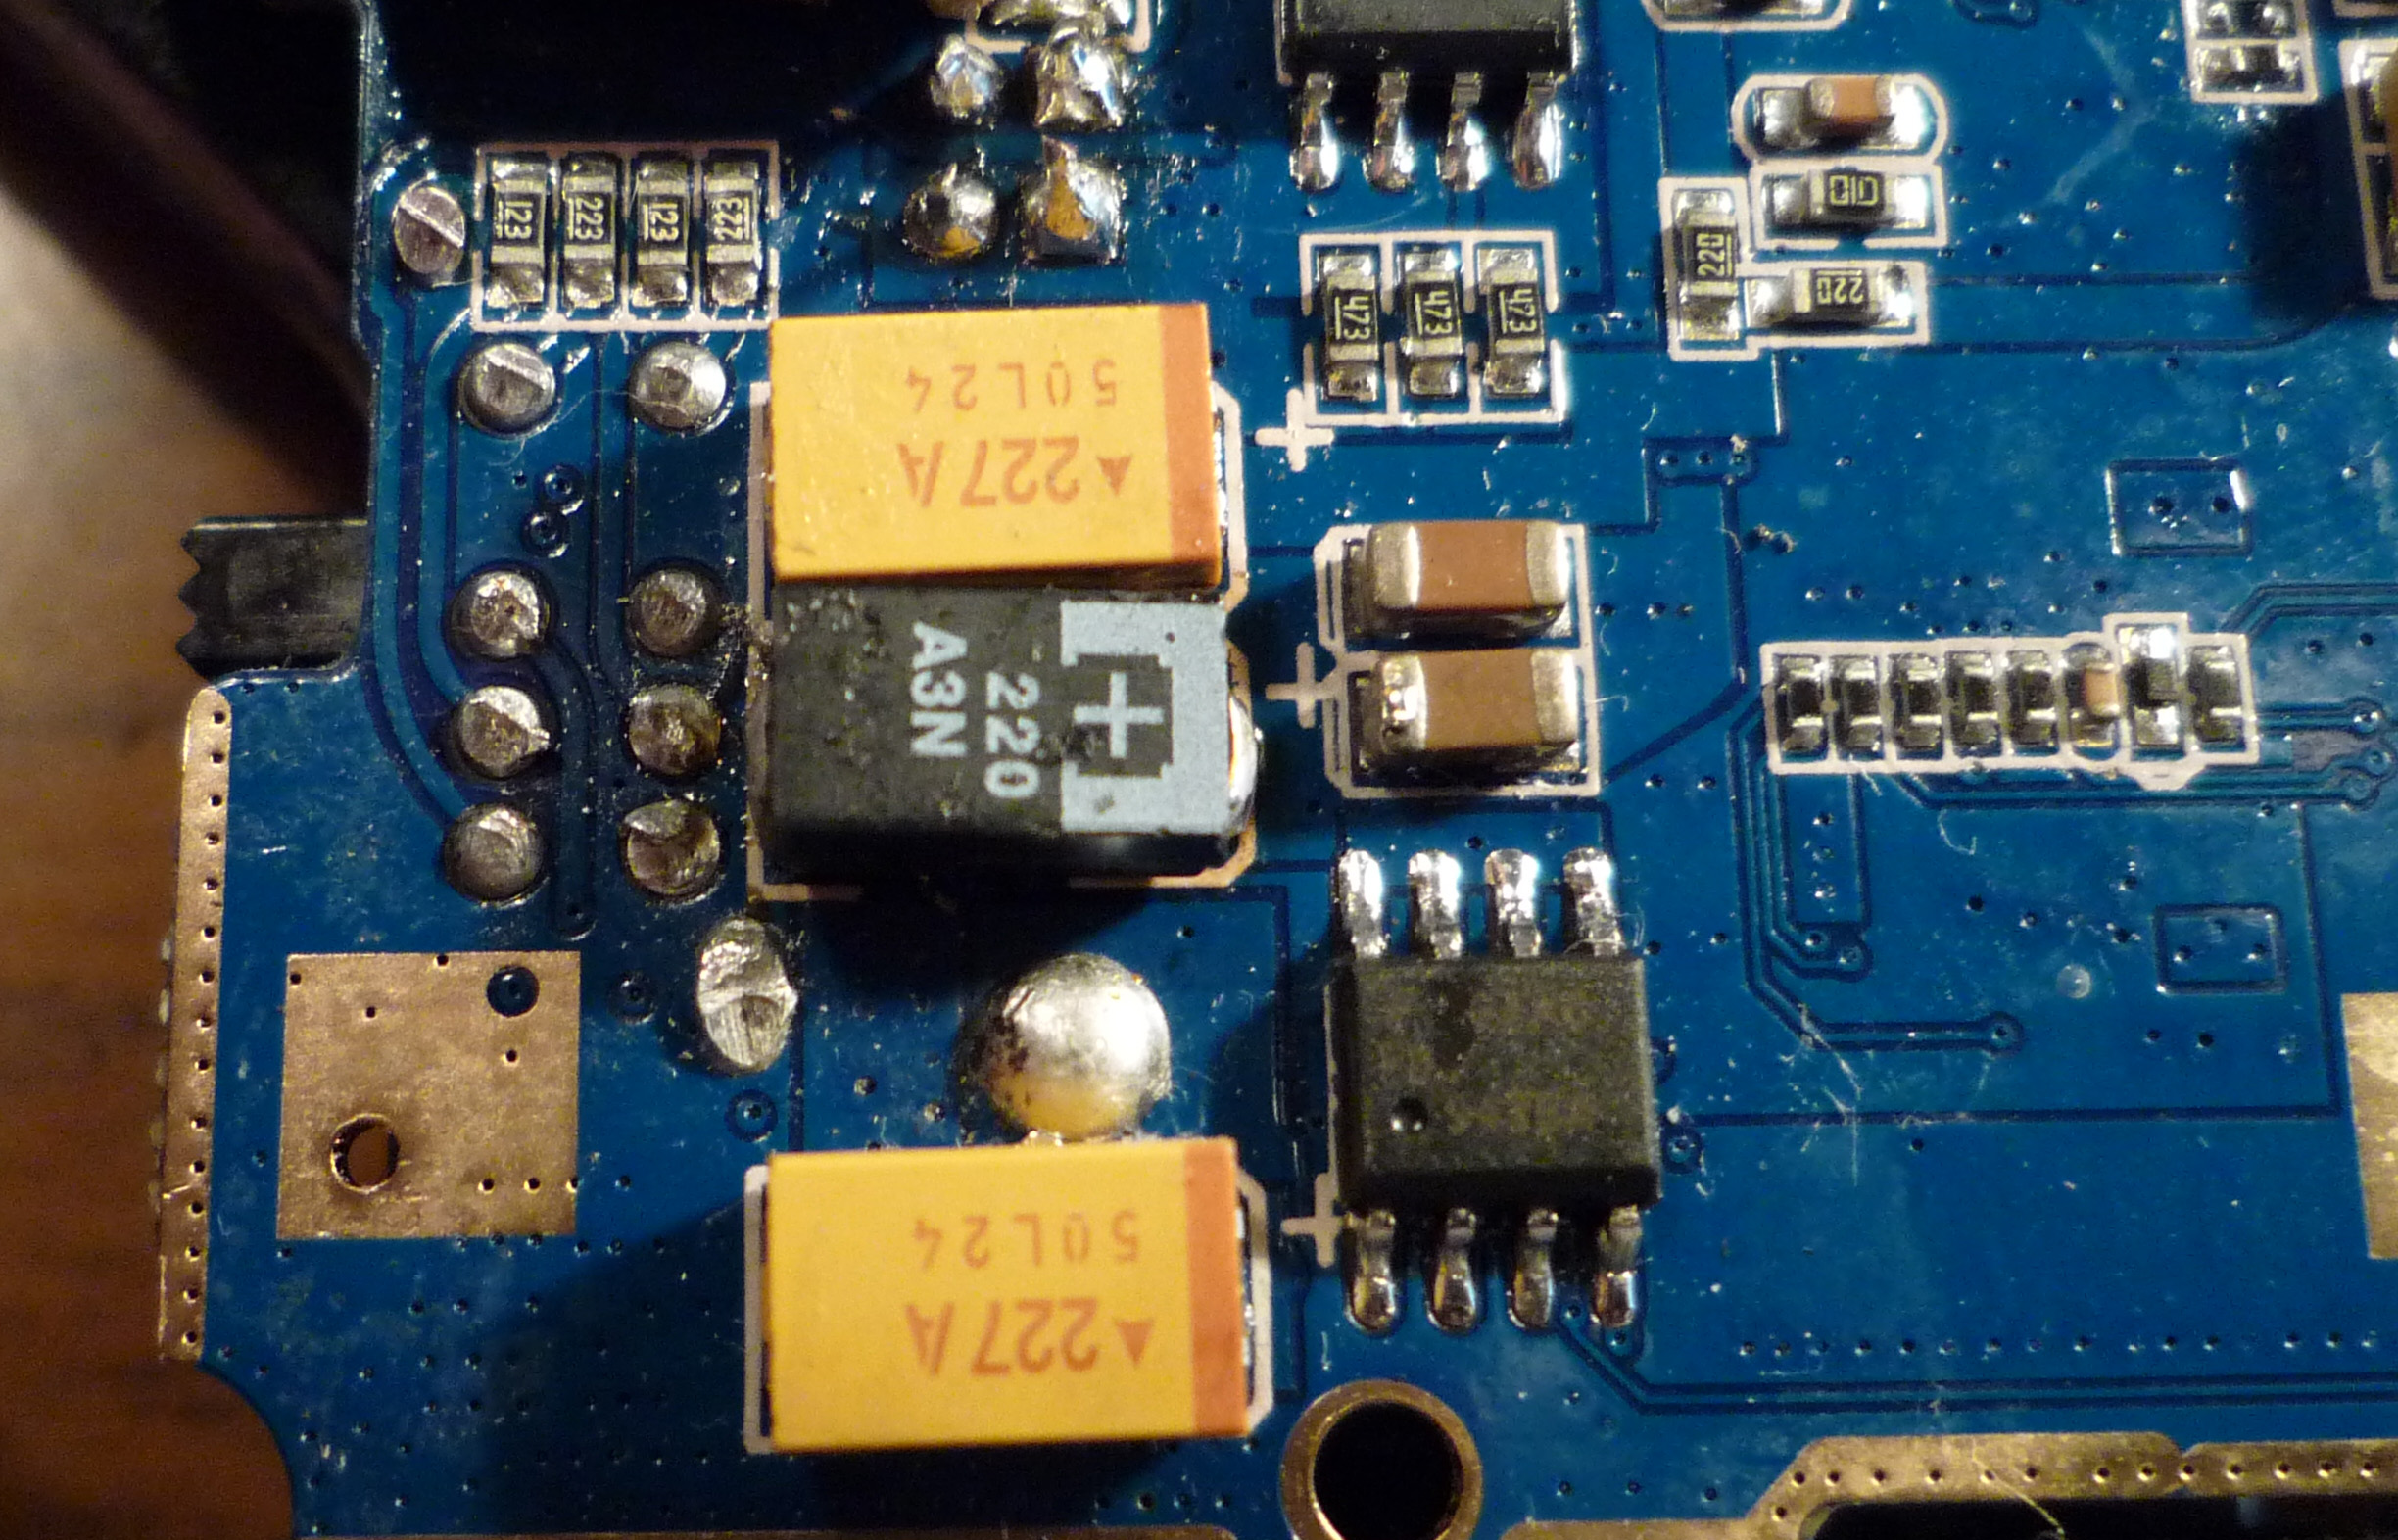
Well, make sure You let those capacitors "burn-in" before final conclusion. On HO section for me highs were spot on but with LO those FC caps required littlebit more time to smoothen out highs. Note - all caps I have tested and compared were burned-in before comparing and I still found SU 1.3.3 SQ best.
 
May 16, 2015 at 2:37 PM Post #184 of 378
Today I managed to change capacitors to Panasonic FC and although they're still burning-in I can hear great sound improvement
atsmile.gif

 
May 17, 2015 at 7:33 AM Post #185 of 378
Oh */*y*7/4e! I have forgotten to write short review about caps testing! Sorry everybody!
redface.gif

But nice to hear that my recommended Panasonic FC is liked by others too.
 
May 21, 2015 at 1:40 PM Post #186 of 378
Hi Coil

Could you please tell me if this is the correct Panasonic FC 220uF 10V? it seems to be right.

EEUFC1A221S

http://uk.rs-online.com/web/p/aluminium-capacitors/0571139/#

many thanks, going to give this a go because I am very intrigued and cannot resist:) (yes I can do electronics soldering)

Cheers
 
May 21, 2015 at 1:55 PM Post #187 of 378
Seem correct ones by code. Check this post few pages back: http://www.head-fi.org/t/720776/ibasso-dx50-mods/105#post_11230418
I can talk only about shorter ones, haven`t tried longer ones as shag used and can`t say if there is sound difference. I recommend to go with shorter ones, no extra wires and clean soldering can be done. Btw, I repeat myself - be careful opening DX50, it is kinda tricky first time and You have to be smart and gentle, otherwise You can break something easily. Soldering part is easy imo.
 
May 21, 2015 at 3:29 PM Post #188 of 378
Don`t know if Your longer FC`s sound same but they have slightly different specs which may affect sound.
1) Shorter ones, EEUFC1A221S - ripple current 290mA, impedance 0.350 Ohm.
2) Longer ones, EEUFC1A221 - ripple current 400mA, impedance 0.250Ohm.
 

 cheers Coil, from what you said on the earlier page it seems the Capacitor on the link I provided is correct. (see below) I will just cut down the wire to suit.
 
the specs are EEUFC1A221S:
Equivalent Series Resistance    350mΩ
    Height    11.2mm
    Lead Diameter    0.5mm
    Lead Pitch    2.5mm
    Leakage Current    3 μA
    Lifetime    1000h
    Maximum Operating Temperature    +105°C
    Minimum Operating Temperature    -55°C
    Mounting Type    Through Hole
    Ripple Current    290mA
 
be careful opening DX50, it is kinda tricky first time and You have to be smart and gentle, otherwise You can break something easily. Soldering part is easy imo.

Sure thing, Always tread carefully:)
 
May 21, 2015 at 3:43 PM Post #189 of 378
Yes it is correct and same ones I used. And I really recommend to remove whole PCB, makes soldering of tight fitted caps much easier + LO caps can be changed too. Stock Nichicon FW are good enough for LO but FC is littlebit better in soundstage/separation/imaging/dynamics (sounds littlebit too bright without burn in at first but will smoothen out). 
 
May 24, 2015 at 4:22 PM Post #190 of 378
Edit: all apart, no worries. Had a quick snoop around and then put it back together. Just got to wait for the caps to turn up in the post.

So all the screws drop out nicely (after undoing) except for the two top outer ones (micro sc card slot end). These two screws sompletely undo but they do not seem to want to drop out even with me tapping the unit. My micro screwdrivers lack enough magnetism to pull them free of the chassis. What I want to know is despite these two screws not being completely free of the player will this stop me from pulling down and removing the back? I want to avoid ripping any plastic part surrounding the screws!

I have had all sorts of small units apart and never ever force things.

Any tips?

Thanks
 
May 25, 2015 at 1:46 AM Post #191 of 378
All the screws must come loose and away! Weird problem. All screws dropped nicely out from my unit. And just to be sure - did You also remove screw under warranty/batch sticker?
 
May 25, 2015 at 5:28 AM Post #192 of 378
Coil, it was just the screws for removing the back (which I have now successfully removed) to gain access to the board. The two top screws were really clinging to the plastic after unscrewing making them unwilling to drop out.......they eventually did with some more encouragement. I will remove the PCB when the caps arrive in the post. I will also be upgrading the jack sockets to ones with better quality/grip.
 
May 25, 2015 at 5:56 AM Post #193 of 378
What`s wrong with Your DX50 jack sockets? Imho they are good quality. I`ve done some pretty bad jack "moves" with it and so far everything ok.
 
May 25, 2015 at 3:33 PM Post #194 of 378
What`s wrong with Your DX50 jack sockets? Imho they are good quality. I`ve done some pretty bad jack "moves" with it and so far everything ok.

 Just never liked that they do not give a s really secure enough grip on the HP jack. Ibasso have upgraded the sockets on the most recent batches. (it is the new Ibasso sockets I will be using)
 
May 25, 2015 at 4:27 PM Post #195 of 378
Which is the most recent batch? Mine should be 2013.
 

Users who are viewing this thread

Back
Top