Here are the things you will need for making your own OTG cable for A10 + HA-2:
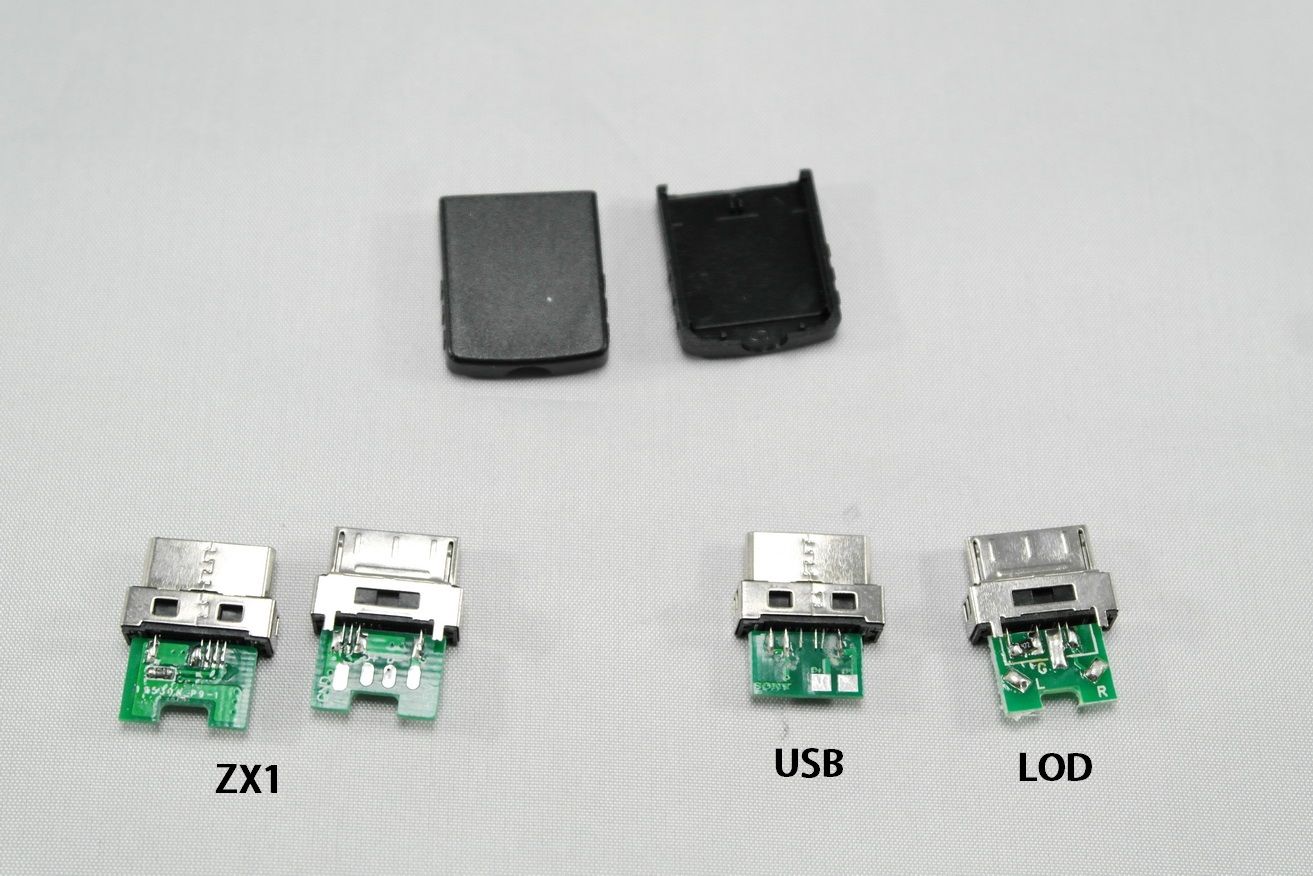
- Sony DIY dock connector for OTG. This is commonly known as the ‘dock connector for ZX1 to PHA-2’, but it will works for A10 series as well. Please note that there are three kind of DIY Walkman dock connector you can find online (*see first pic). The first one is just the dock connector for regular USB sync and charge, the second one is for getting the line-out signal (*for making LOD), and the rarest is the ZX1 connector for OTG cable. There are two places I know you can get the dock connector we need – if you can buy from TaoBao, I’ll recommend a seller called DD-cable first. If you can’t, then Lunashops also sells it. Note that there are an old and new version of this dock in existence, and the picture you see on DD-cable and Lunashops are both the old version though DD-cable will send you the new version (like the one I have in my 2nd pictures). Don’t worry on which version you'll get as both will work.
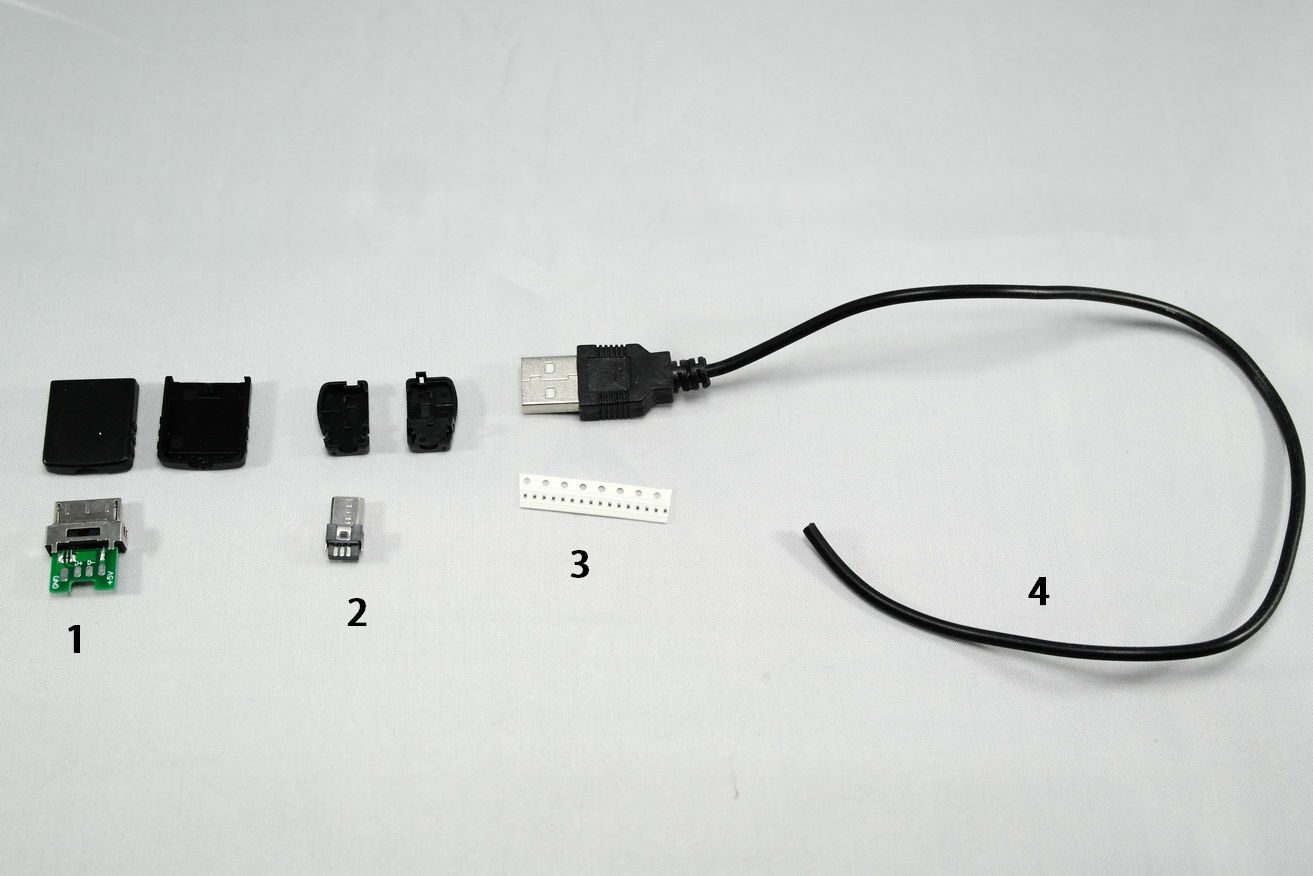
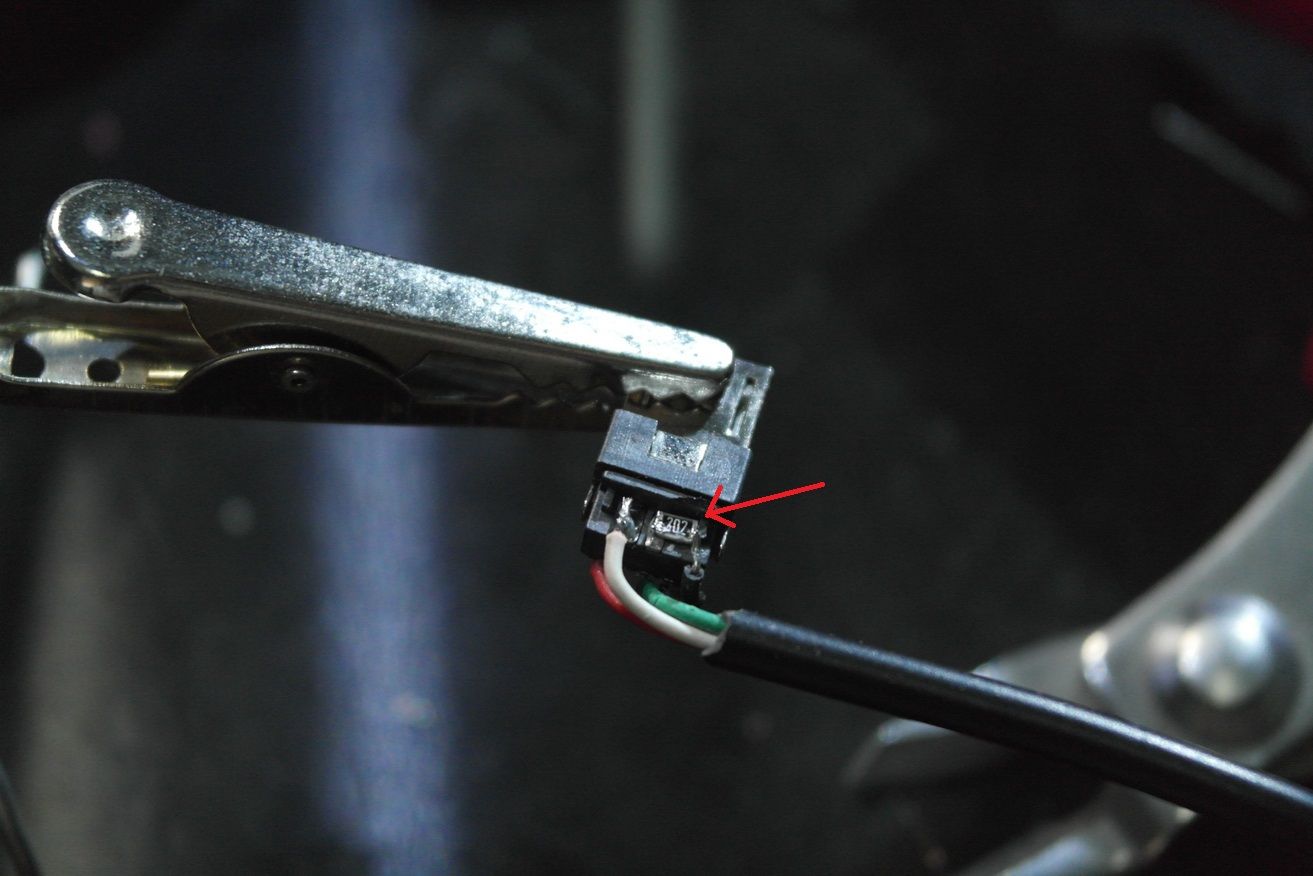
- Micro USB connector. These connector can be easily found on TaoBao and eBay for a fair price. Please take note that some of them are right angled and some are left angled in design. The one I have can be used in both way. Just be careful when you pick them up as we want left angled instead of right angled.
- 2000 ohm resistor. Preferable SMD type, 0603 in size. You can use any kind or size you want, but do remember it will probably be a very tight place inside the microUSB connector and I reckon 0603 SMD is probably the best choice, both for fit as well as soldering. Please note that those I have in the 2nd picture are actually 0402, which is extremely small and you will find it very hard to solder if you have never dealt with such a small parts. 0603 (which is what have been used in pic below) is much easier.
- A four conductors wire assembly - In other ways, a short piece of USB cable. No need for fancy cable here, just find a thin (*the thinnest you have) USB cable that you are not using and cut its cable to the length you want. USB cable is color coded inside so you will have lesser chance of soldering them wrongly.
- All the other things that you need for soldering and some superglue. Hot glue gun is optional but helpful.
Follow the guide below to solder your micro USB connector:
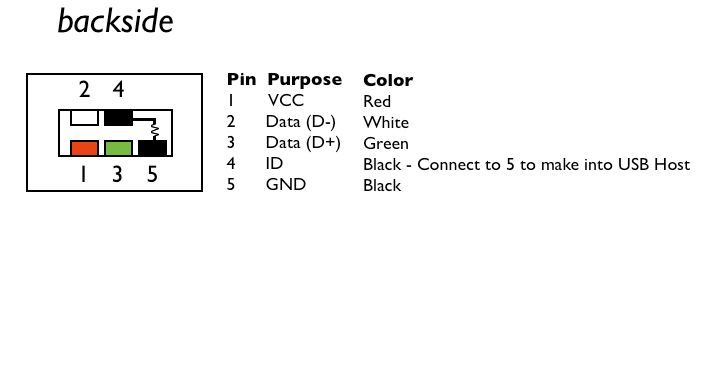
Red for 5V into Pin 1, Green for D+ into Pin3, Black for Ground into Pin 5, and White for D- into Pin 2. Then connect Pin 4 and 5 with the 2Kohm resistor in between.
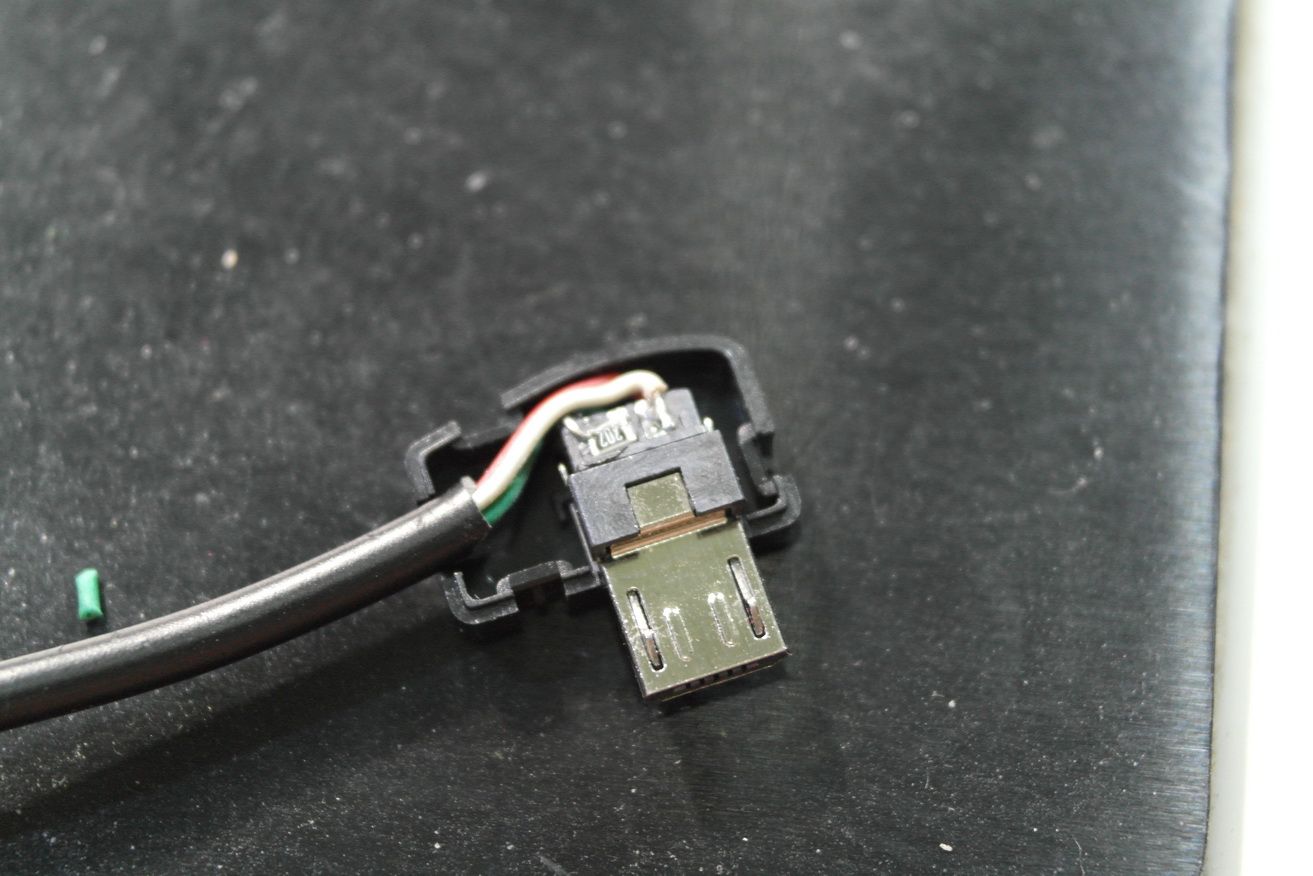
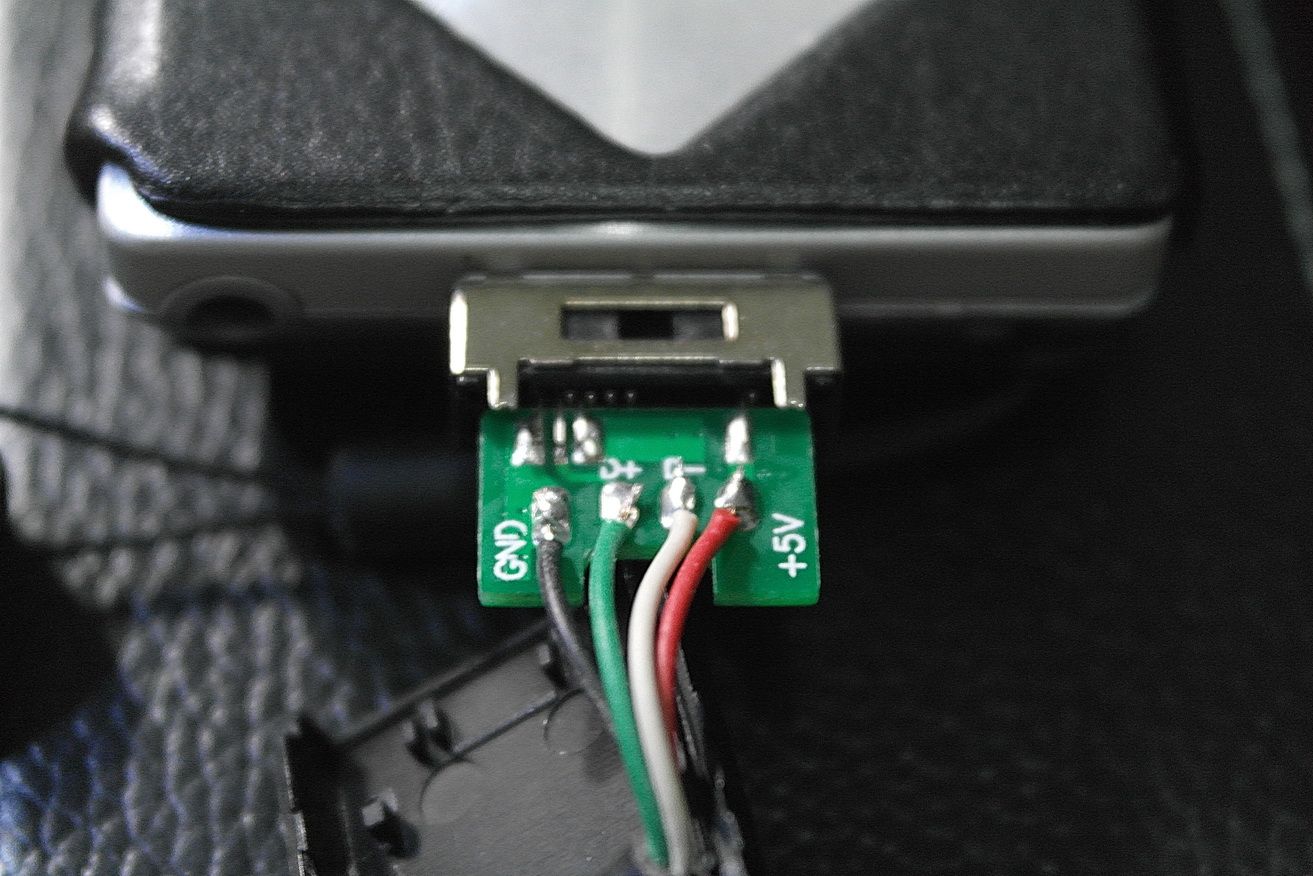
Soldering the other side of the USB cable to the Dock connector, and it should have clear marking of 5V (or just ‘+’), Gnd (or just ‘G’), D+ and D-.
Test all the soldering join with a multi-meter if you can, then connect you A10 player with HA-2 by the new OTG cable and test out the functionality. If everything is okay, superglue the micro USB and dock connector housing.
Tips:
- Be sure to glue or secure both end of the USB cables so you won’t accidentally pull them out of the housing. I use a combination of superglue and hot glue for the job.
- If you find it hard to solder the SMD resistor, a good tip is to use a *tiny* drop of superglue to glue it next to Pin 4 first, wait till it settle, then solder it to pin 4 and connect it to Pin 5.
- Whether you follow tip 2 or not, it will be wise to drop a tiny bit of superglue on the side of the SMD resistor in order to affix it to the microUSB connector permanently, just before you glue the microUSB housing shut.
- Don’t use too much superglue on microUSB and dock connector housing, just in case you might need to open them up at a later time.
Enjoy!
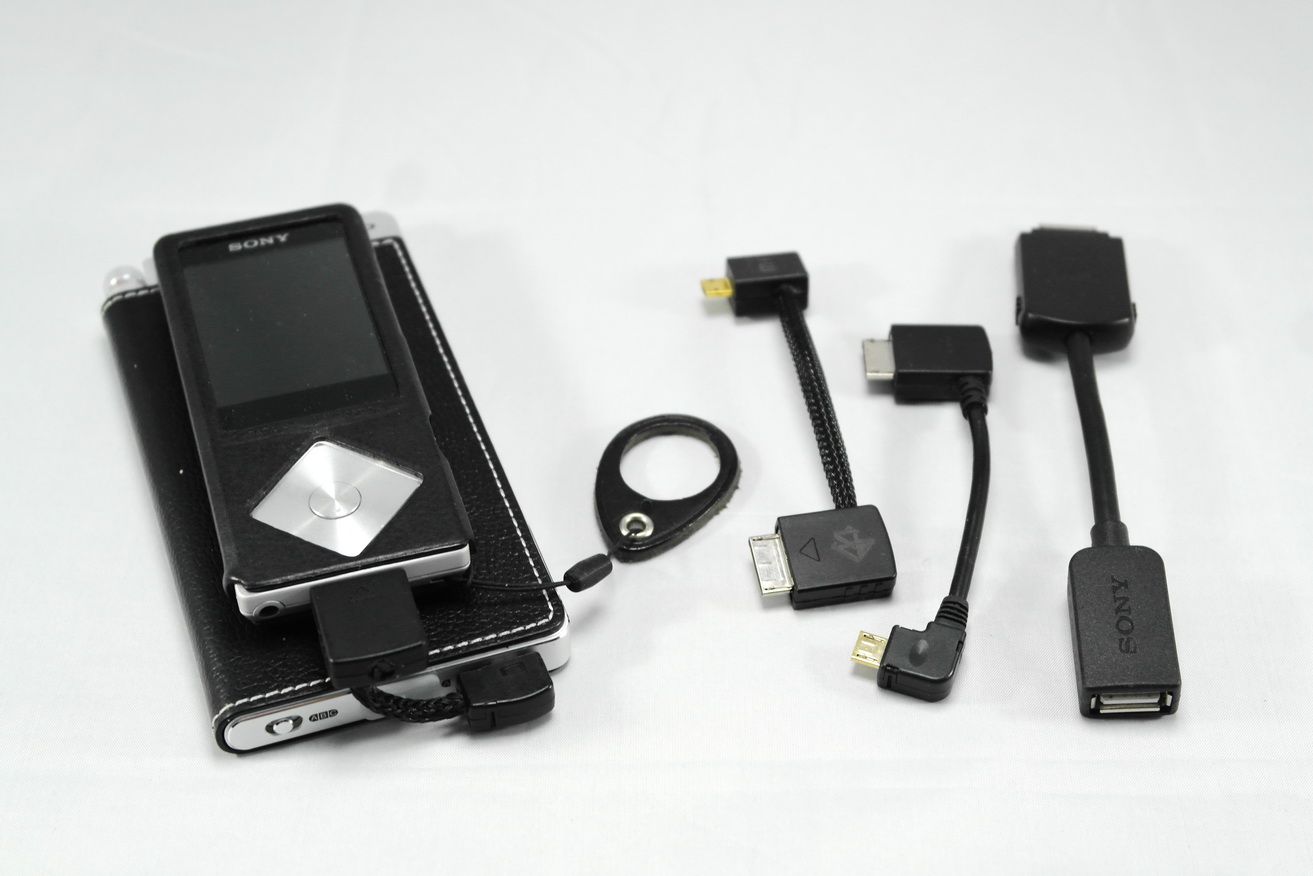
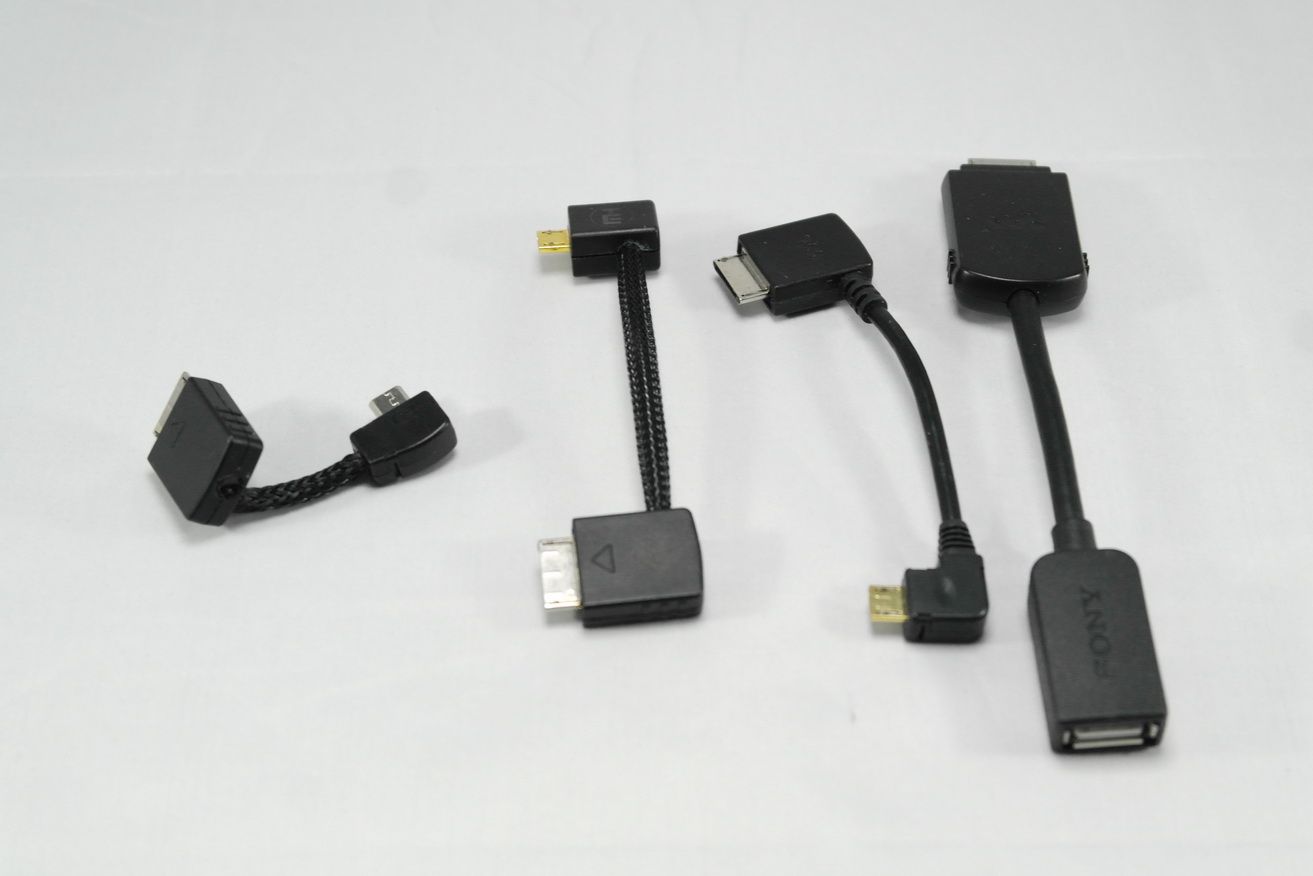
From left: the super-short OTG cable I made for this guide, MusicHeaven's OTG cable, Amazon / Taobao OTG cable, Sony official OTG cable.