DIY Earbuds
Jul 12, 2017 at 4:52 PM Post #466 of 4,707
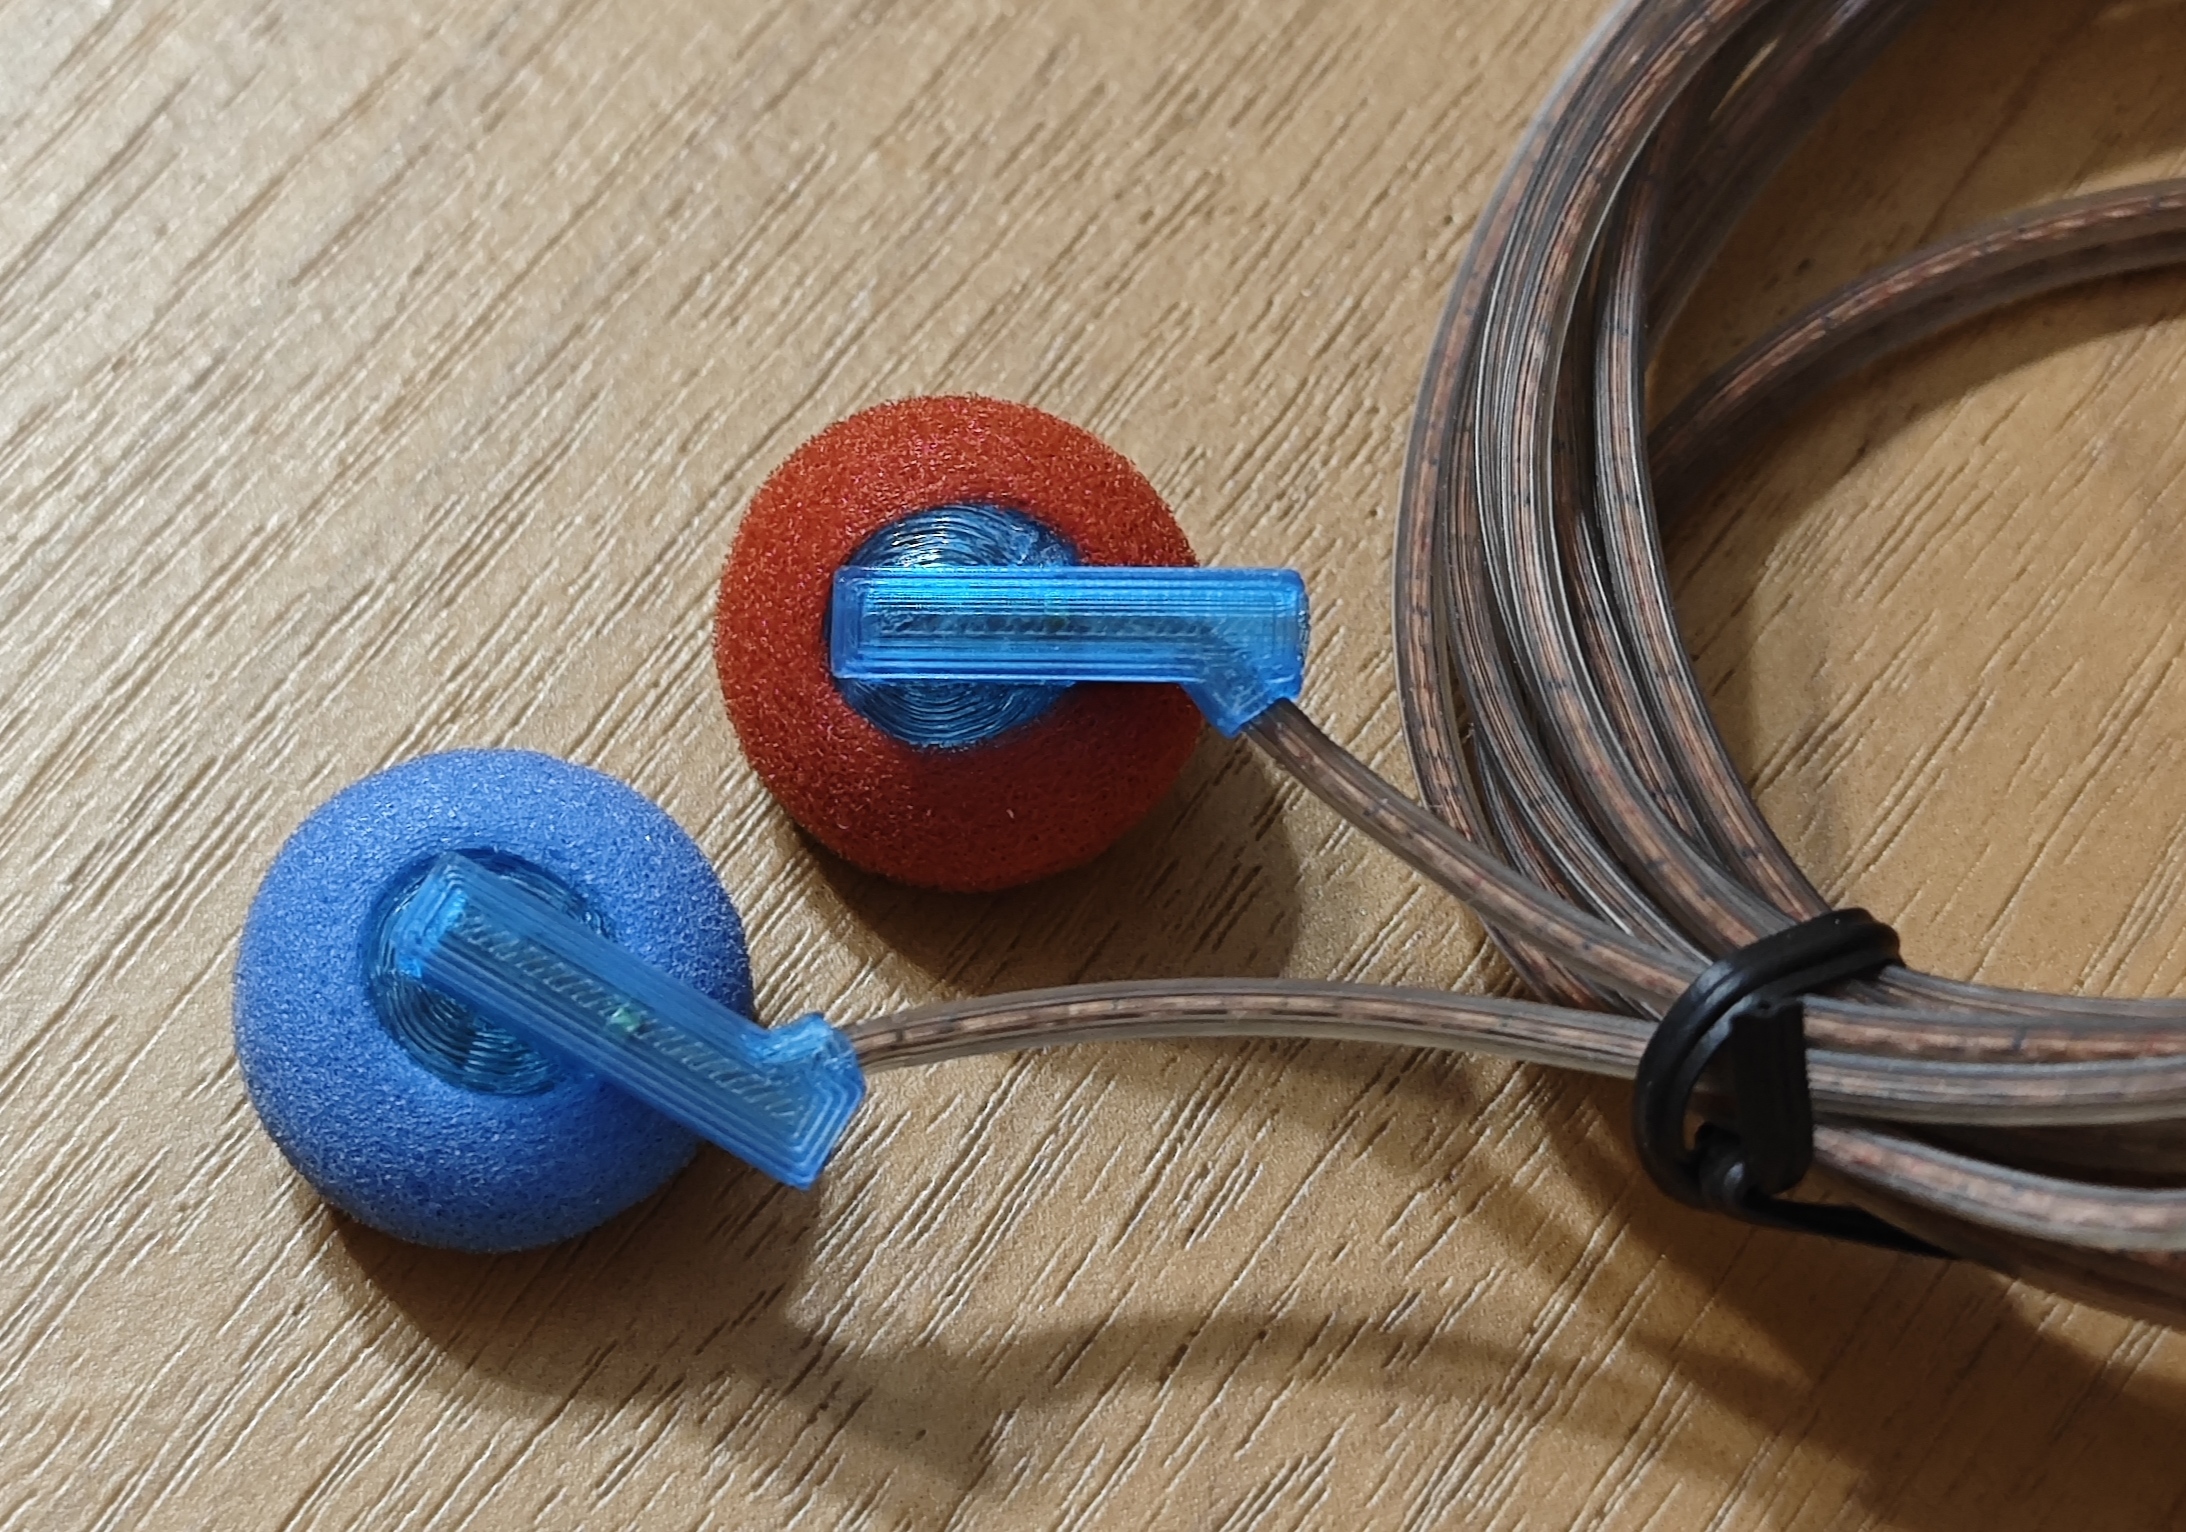
Every earbud driver I see has one connector marked with paint/ink.
The drivers have polarity, one contact is +/positive and the other is -/negative.
In all earbud drivers I've seen:
The (+) contact is marked with paint/ink and connect to the Red wire (R) or the Green wire (L).
The (-) contact is unpainted/unmarked and connect the ground wires.

Something interesting is my TY HI-Z 32, doesn't have the paint/marks on the same side of the driver.
Do you think they build the driver and only after that they somehow measure and mark the polarity?

Back when I was building speakers, and working with larger, bass & midrange drivers, I could touch the cone while checking the resistance, and feel which way it moves with the Ohmmeter's DC voltage being applied.
With small drivers, where you can't really feel them move, you may have to hook a microphone to an oscilloscope, and look to see whether you get a rising or falling pulse when the Ohmmeter's DC voltage is applied.
 
Last edited:
Jul 13, 2017 at 5:19 AM Post #467 of 4,707
IMG_20170713_170228.jpg
Today I try again to remove my filter foam of my ty 320 back shell. Before this I'm a bit afraid ripping off the foam but the foam really sturdier that it looks and came out fine. Using table glue (for screen printing platen) and put it directly on the driver as picture above.

The results? Definitely a more control lower end instead if just boom it now holds impact instead of decay and better textured. An improvement in bass depth (not lower just better depth in space)

I don't think I'm imagining things because I only compared with songs that I knew very very well.

Edit. Further listening and I miss the slight upper mids that I love from first mod. Back to original foam positions with come cotton.

Edit. For the fun of it i tried with no foam at all. Lol it sound too dull and missing highs.

Oh yeah I almost destroy the left driver. Glad it holds back in safely. Phew..!
 
Last edited:
Jul 13, 2017 at 1:24 PM Post #469 of 4,707
Part of the order I placed, to assemble some earbuds, has arrived.
I've received the wire and 3.5mm TRS plugs - so I began with the blue cable.

DSC-170713-120601.jpg

There will also be a red cable assembled - probably start on it tonight.

The four pieces of wire were cut as 48" (~1.2m), and then braided together, so the total length is a bit less.

I can recommend this wire, as being soft, flexible, and able to take the heat of soldering (without melting away from the joint).
https://www.aliexpress.com/item/28A...rature-Tinned-copper-UL-VW-1/32429281418.html
 
Jul 13, 2017 at 5:57 PM Post #471 of 4,707
Why tinned copper for audio and not bare copper?
Does it sound different from bare copper?
TIA

I bought this wire because it's cheap, and I wanted to try the silicone insulation - for its flexibility and ability to resist soldering temperatures.
So far, it does well with both of those features.
If you can point out a soft, flexible, high temperature wire that's bare copper (and not too expensive), I'd be willing to try some of it, as well.

I haven't yet received the earbuds that the wire will be connected to, so I can't comment on any differences in sound.
 
Jul 13, 2017 at 6:20 PM Post #472 of 4,707
Many years ago, I tried many wire brands to connect full size speakers to amps.
I also made and tried many interconnect cables.
I was interested how materials and design sounded.
Back then, I liked the sound of bare copper better than everything else.
I know a lot of people pay more for silver plated copper, I guess they like the sound better than pure copper, but I didn't like the sound of silver platted copper or others.
Since that time I prefer to use copper wires for audio, but taste and preference differs from person to person, so I was curious if your option was about sound.
 
Jul 13, 2017 at 7:07 PM Post #473 of 4,707
Some of my recent wire findings:

I recently purchased some 32 AWG USSR military copper wire from ebay for making some 8 strand braided cables. I haven't made a cable with it yet, but I think the 32 AWG will work really well for 8 wire cables, and it is very reasonably priced. This is very thin stuff, about 0.5mm outer diameter, close to the size used on the Shozy BK. It has Teflon insulation so it is very heat resistant and won't melt on you when soldering. The Teflon insulation will also make for a fairly durable braided cable imo. The 32 AWG I think will have a nice flexibility in an 8 wire cable, but I can't speak to any of the thicker gauges. The insulation type as well as core count/number of strands in the wire will determine the flexibility of the wire. I didn't count the number of strands in the 32 AWG but I would guess around 8-10. If the thicker gauges don't up the number of strands, they may be too stiff for some peoples preferences. It is hard to tell in the photos of the wire if it is clear/transparent insulation or if it's pink. In reality it is transparent, but the insulation has some opacity, and isn't perfectly clear so the wire does sort of look pink. When looking up close in the light you can see the copper wire through the insulation.

There is some wire on Aliexpress that I would really like to try as well. This stuff is much more expensive but has a very high core count, and is likely very flexible, while still using Teflon insulation. The seller has a lot of other options as well. Keep in mind when looking at some of the cheaper options that the core count is very low, so the wire will be stiffer.
 
Jul 14, 2017 at 12:57 AM Post #474 of 4,707
Thx for the fast response! Unfortunately it doesnt ship to the place i'm in. But i shall probably look for something with this form factor. The previous one was just a standalone pen and it probably got cooked after i used it for like an hour straight lol. Now it cant even liquidify the solder on the driver T.T

I got one of those, they are total crap and only work once. I filled a complain in AE for a full refund but lost the dispute. Will get a proper solder as well.
 
Jul 16, 2017 at 7:57 AM Post #476 of 4,707
I'm also interested in H180 mod, if you decide to do it, let us know how the sound changes with each step, at least if it sounds better/worst to you.
My H180 arrived today, out of the box it's not musically satisfying to me, they need to burn-in for a few days..

After 3 days of burn-in, the H180 sound is much better and I like it.

They are difficult to open, I opened them and made the center hole in the driver, the sound changed.
I can't A/B compare it with another H180, but with the hole in the driver it has more bass, voices are a bit more recessed and treble rolls off sooner.
I can't say it's better now, neither worst, it's different. It's a trade-off, more bass, less treble, more recessed voices.

Then I made a hole in the housing, this is very easy to do using a manual drill, but it made the sound very bad, it's worst now.
I know there are more steps in the original mod, I see something else done to the inside of the housing, but I don't know what to do further.
I'm now thinking I'll revert my mods.

My conclusion here is that tuning sound is difficult, if you have better results with H180 mod please let us know.

IMG_20170715_142918.jpg

IMG_20170715_143509.jpg

IMG_20170716_124110.jpg
 
Last edited:
Jul 16, 2017 at 8:32 AM Post #477 of 4,707
After 3 days of burn-in, the H180 sound is much better and I like it.
I think

Image 6: He trims the inner perimeter of the horseshoe. The first block (out of the 3) seems not connected to anything - the 2 others are connected to the holes at the back.
Image 7: He cuts away the horseshoe at the bottom, so the cable can enter here. I would think he cuts away the whole empty space.
Image 8: He fills the top half with the blue stuff (don't remember the name). They have it everywhere here, its called elephants snot :smile_phones: This is the thing I am mostly in doubt about, how much to use?

Edit: I don't think he cuts away that first block anyway, I think the new drilled hole goes into that.
IMG_0676.jpg

2669205_71e0f0cf-47d7-4374-8d4c-8c714fd4f2e2.jpg
 
Last edited:
Jul 16, 2017 at 9:20 AM Post #478 of 4,707
In picture 8 I see 2 things:
- The blue stuff inside the housing. I don't know if he makes another chamber with this (to connect to the outside hole) or he just makes the housing chamber smaller.
- The horseshoe turned from black to white, so I'm thinking he removed all the black horseshoe and replaced it with another material.
 
Last edited:
Jul 16, 2017 at 9:47 AM Post #479 of 4,707
In picture 8 I see 2 things:
- The blue stuff inside the housing. I don't know if he makes another chamber with this (to connect to the outside hole) or he just makes the housing chamber smaller.
- The horseshoe turned from black to white, so I'm thinking he removed all the black horseshoe and replaced it with another material.
There must be someone who has opened an original?:deadhorse:

You might be right about the color, but I think its just the light reflecting. It seems to me he cuts away a bit of the inner horseshoe in 6, its not perfectly round. He is also using another knife than in 7. But maybe its just excess glue he is removing. I think the angle he holds the drill in 5 might be significant, it looks to go into the top room of the 3
 
Last edited:
Jul 16, 2017 at 10:04 AM Post #480 of 4,707
I also thought he had cut the center of the horseshoe in 6 and I also tried it before I made the hole.
It further changes the sound and again to me it doesn't sound better or worst just different. Can't say exactly what changed, can't compare with before.

In pic 8, there is no mid horseshoe missing, so I now think maybe he replaced the horseshoe with white stuff, but It could also be light reflection as you said.

It was the housing hole that didn't work for me, it destroyed the sound.
Maybe these holes work with the blue material or he puts some padding inside like the PK housings have.
 
Last edited:

Users who are viewing this thread

Back
Top